
Overview
Now that you've connected your accounting software to Everflow Pay, there's one more concept to understand before we talk about syncs: Payee-to-Vendor mapping.
Mapping is how Everflow Pay knows which of your Payees correspond to which Vendors (or Contacts) in your accounting software. It's the link between the two systems, and without it, Everflow Pay can't sync financial data for that Payee. Their bills and payments simply won't appear in your books.
What Is Vendor Mapping?
In Everflow Pay, the Affiliates or Partners you're paying are called Payees. Depending on your accounting software, those same people and companies are called either Vendors or Contacts.
Mapping is the process of linking each Everflow Pay Payee to the correct record in your accounting software.
Why Mapping Matters
Without mapping, Everflow Pay doesn't know which Vendor (or Contact) in your accounting software corresponds to a given Payee.
In other words: no mapping = no sync. It's that simple. Every Payee you want to appear in your accounting software needs to be mapped. When a Payee is mapped to a Vendor, Everflow Pay knows exactly where to create financial records when payments are approved.
Accessing Vendor Mapping
Initial Setup
Once you've configured your Expense Account, as shown in the previous article, you'll be shown a view to map your Payees to Vendors.
This is the only manual step required after connecting your accounting software. Locate each Payee name on the left and select the corresponding Vendor from the dropdown menu on the right. You can only match one Payee to one Vendor — once matched, the Payee shows a Mapped tag.
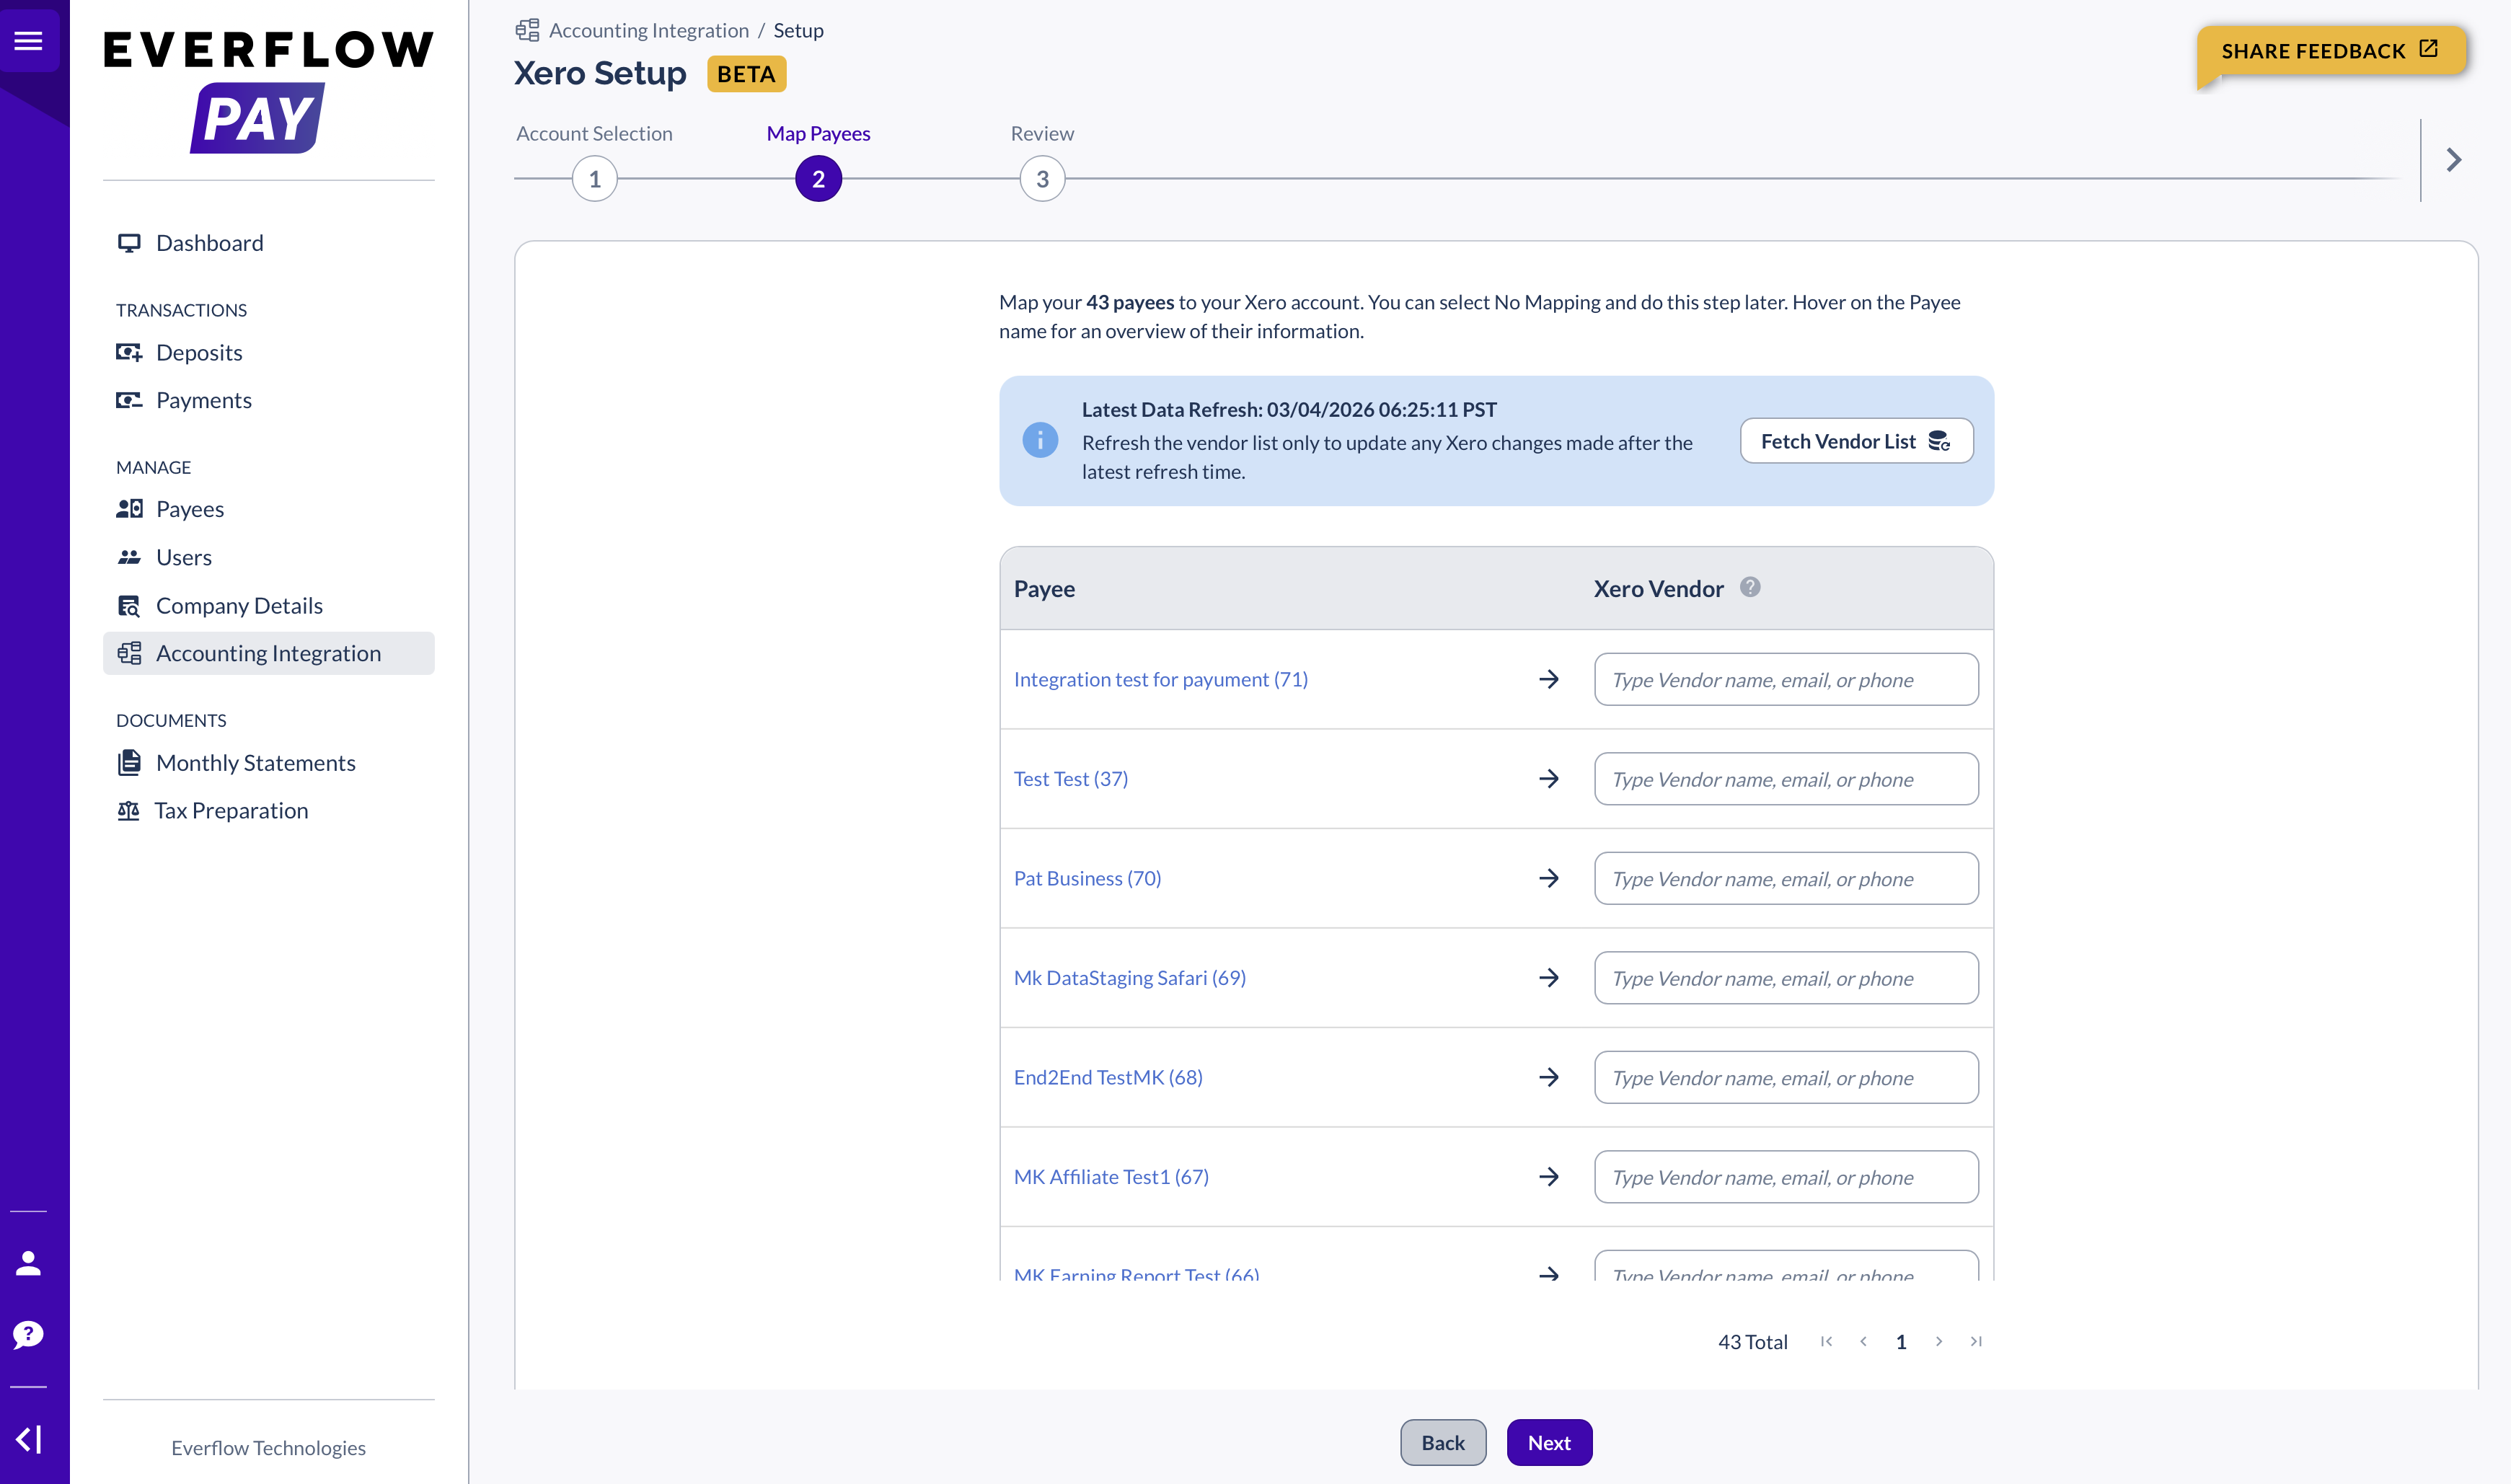
If you have recently added new vendors to your accounting software, click the Refresh Vendors button to refresh your data.
You are not required to map all (or any) Payees during the initial setup. You can always access and update Mappings later from the Mappings tab.
Once done, click Next. You'll then be invited to review your mappings. Click Save to confirm your selections.

Managing Payee-to-Vendor Mapping
Once your Payees have been mapped, you can manage them in the Mappings tab of the Accounting Integration page.
The Mappings Tab
The Mappings tab shows all of your Everflow Pay Payees and their corresponding Vendors in your accounting software.
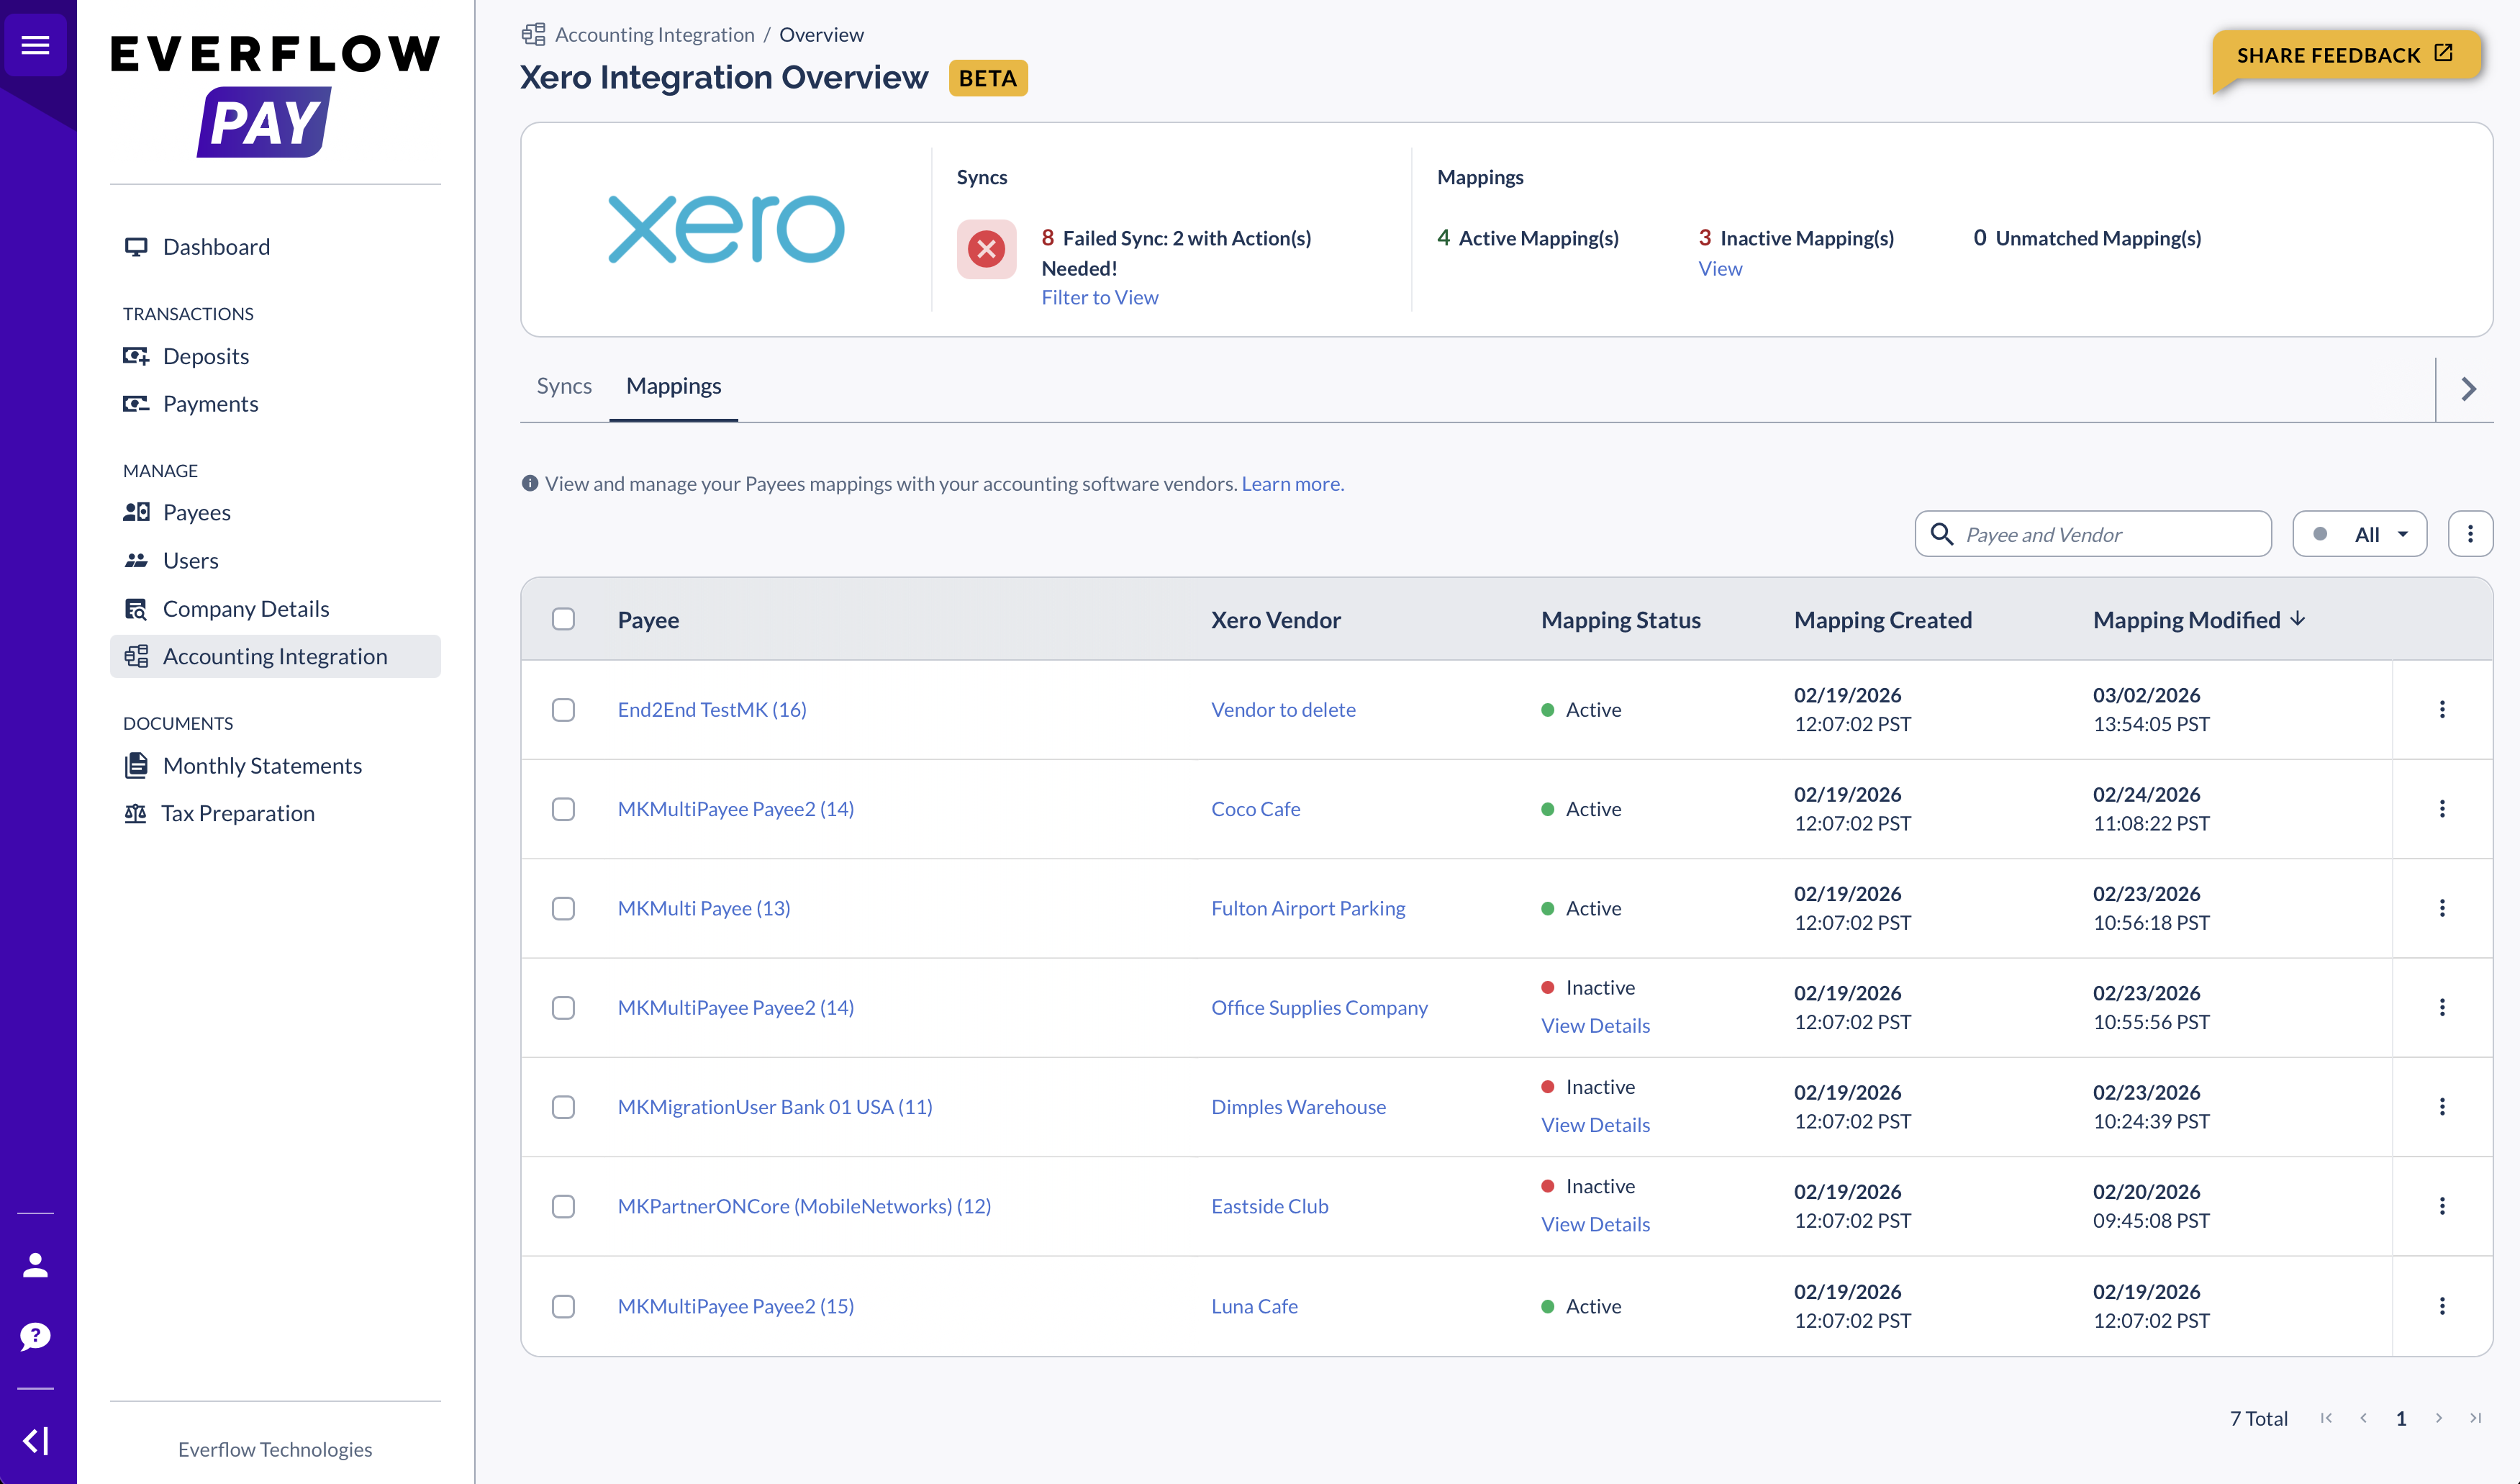
The Summary Bar
At the top of the Integration Overview page, the Mapping section of the Summary bar shows:
- [#] Active Mapping(s) — Payees with valid vendor mappings
- [#] Inactive Mapping(s) → Click "View" to filter the Mappings tab to Inactive only
- [#] Unmatched Mapping(s) → Click "Map Payee(s)" to open the mapping modal
This gives you a quick health check without scrolling through the table.
Understanding the Table
Columns
Mapping Status: Reference
Every mapping has one of three statuses:
Payee is linked to a valid Vendor/Contact. Syncs work normally.
The Vendor/Contact is no longer available (deleted, deactivated, or archived in your accounting software). Syncs are blocked until you assign a new one.
No Vendor/Contact mapped. Syncs don't happen for this Payee until you create a mapping.
Xero users: Archiving a Contact will cause the mapping to become Inactive.
Editing a Single Mapping
To change which Vendor a Payee is mapped to:
- Find the Payee in the Mappings table
- Click the row action menu (three-dot icon on the right)
- Select "Edit"
- The "Edit Mapping(s)" modal opens
The Edit Mapping(s) Modal
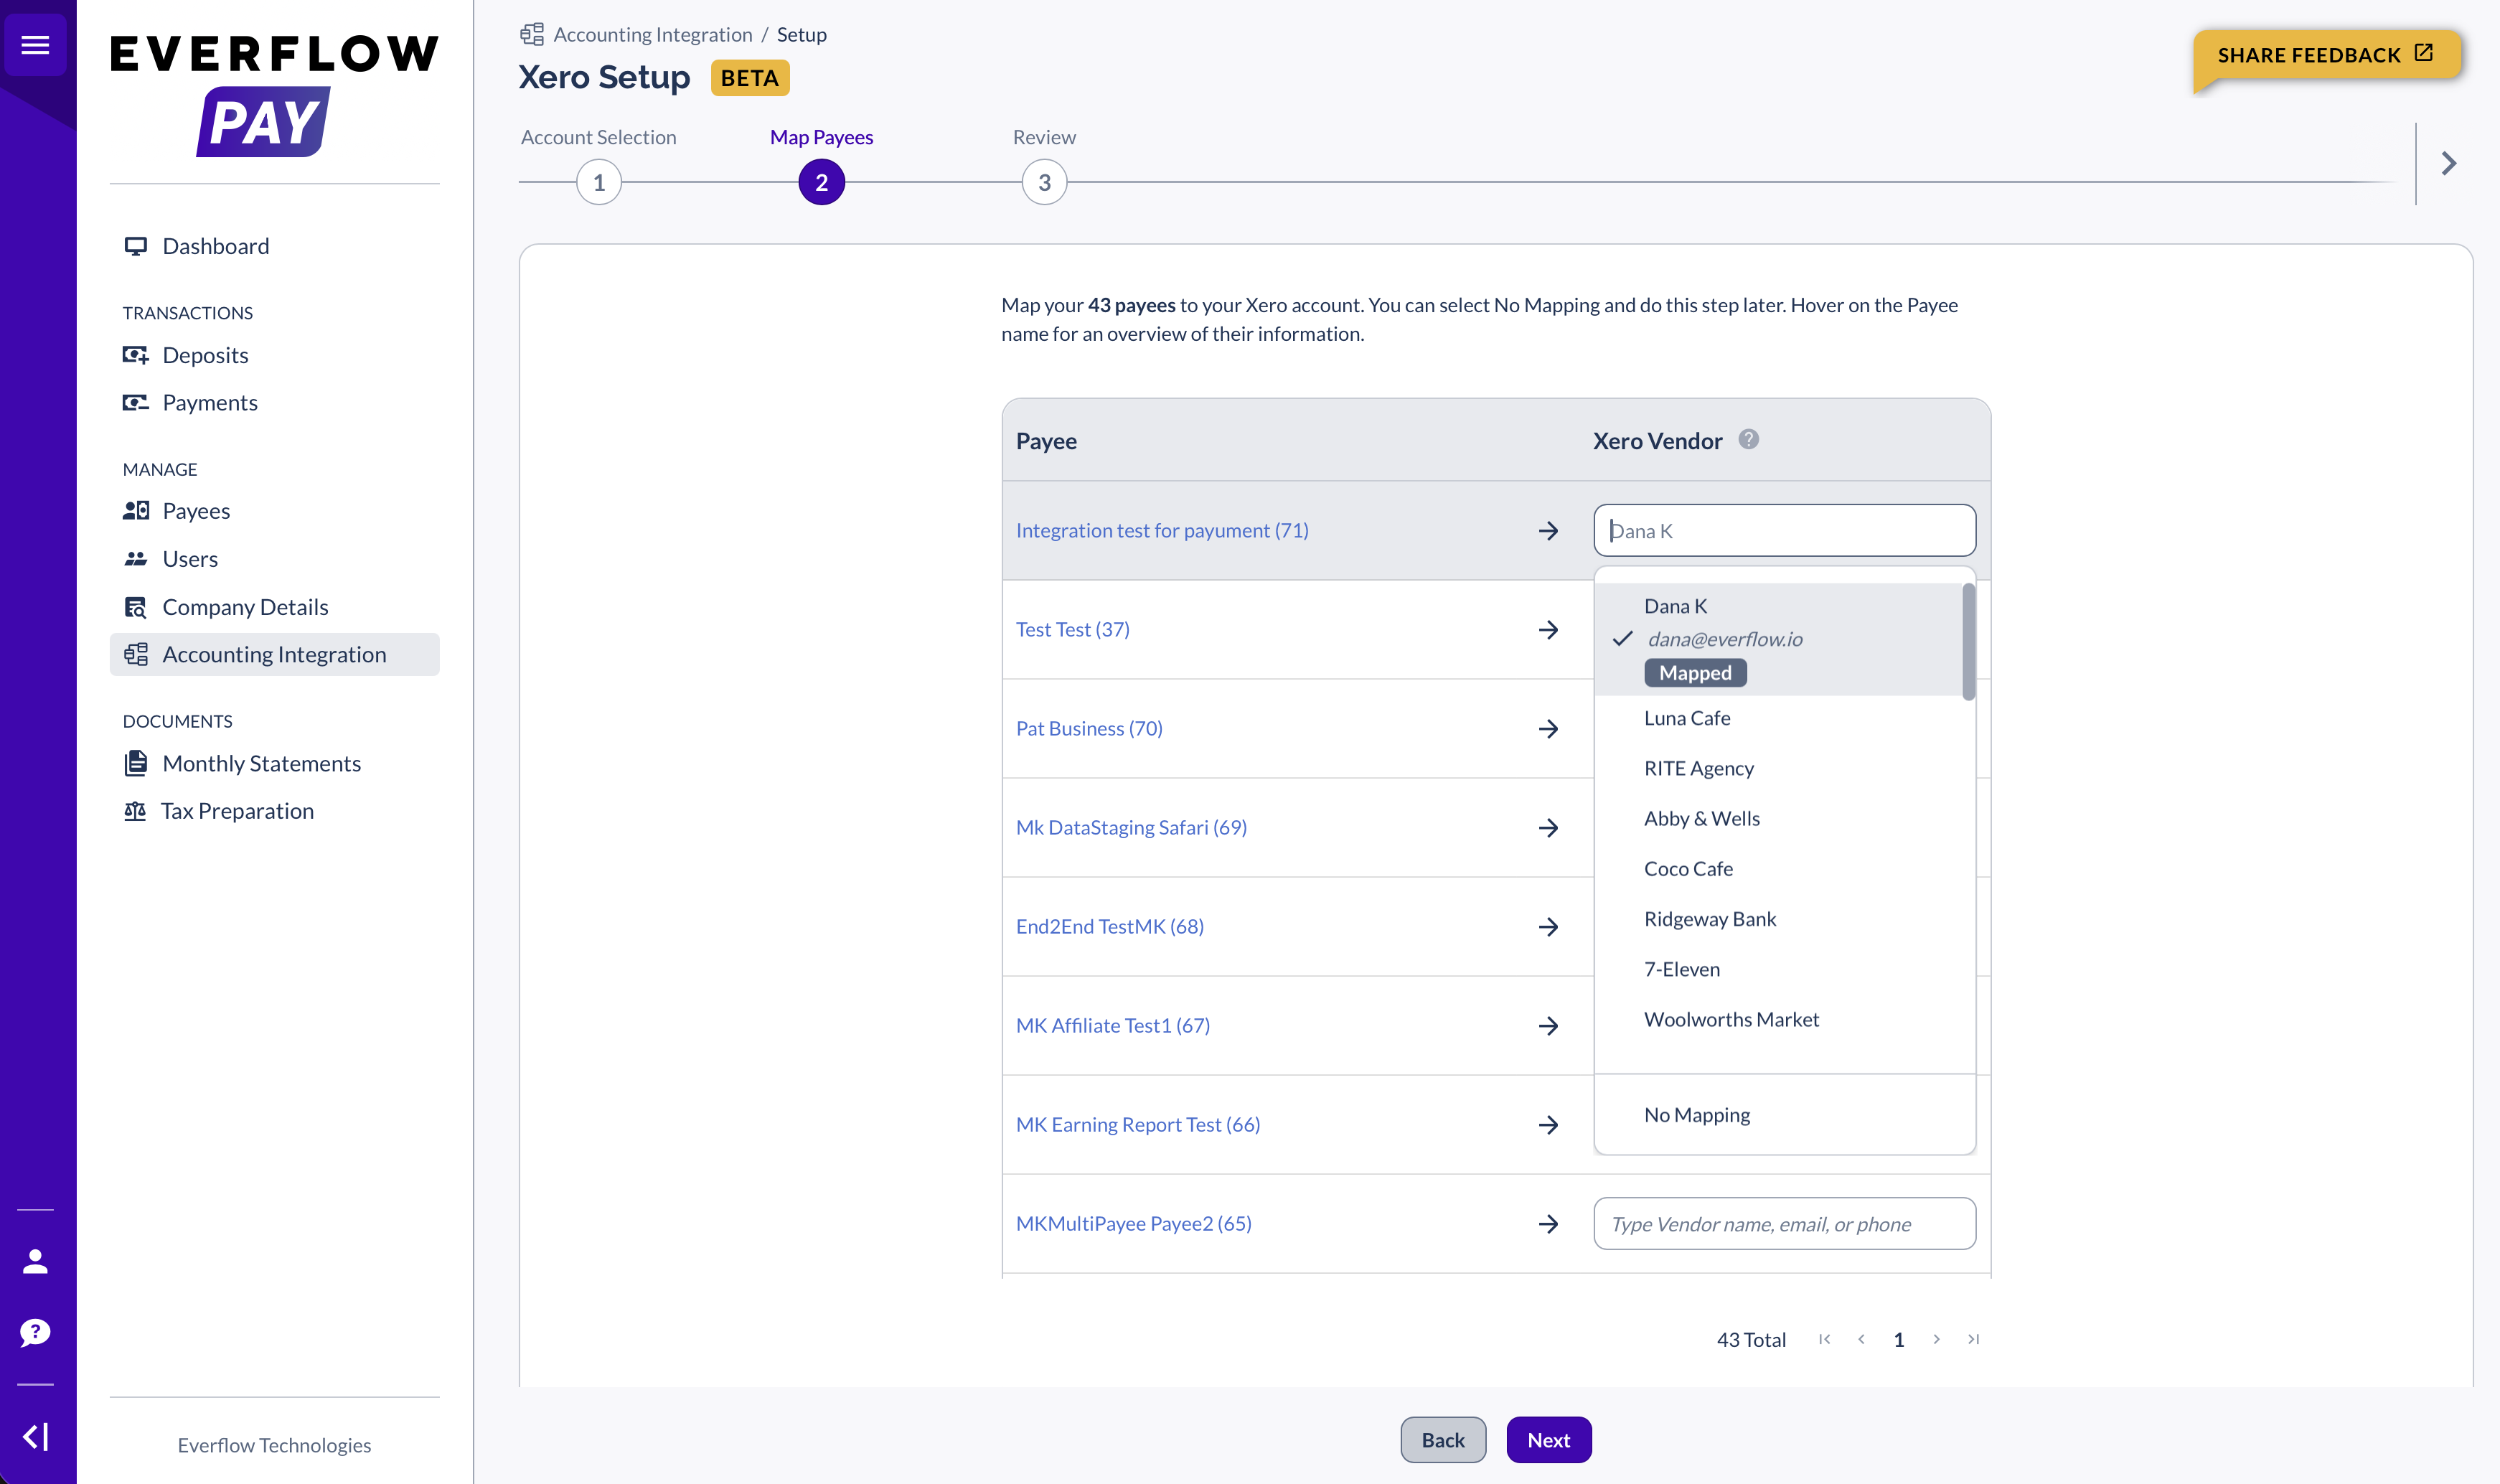
Vendor Selection
Use the search dropdown to find and select a Vendor by name, email, or phone. The dropdown shows all Vendors from your accounting software. The vendor preview shows an "External Vendor ID" field — this is the Vendor's ID in your accounting software, useful for cross-referencing records between systems.
Refreshing Vendor Data
Click Refresh Vendors to refresh the vendor list from your accounting software. The Latest Vendors Refresh timestamp shows when the vendor list was last updated.
Refreshing only updates the available vendor list — it does not automatically re-match any Payees.
Saving
Click "Save" to save the new mapping, or "Cancel" to discard changes.
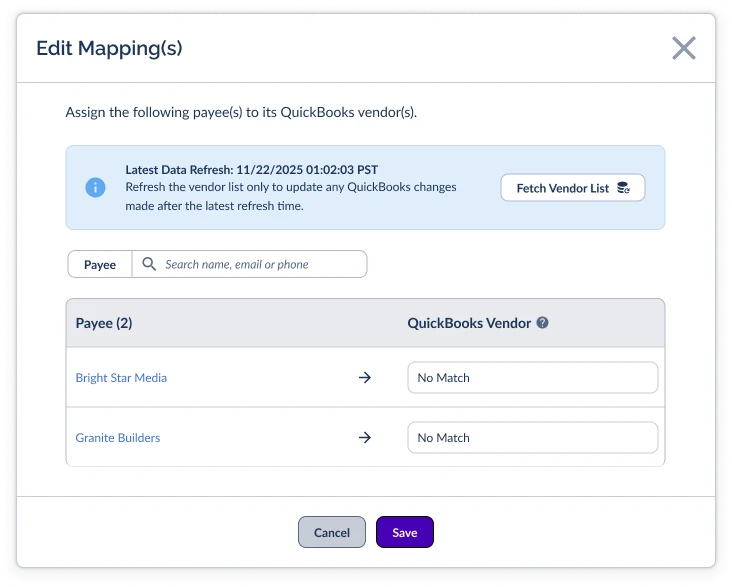
Bulk Editing Mappings
To edit multiple mappings at once:
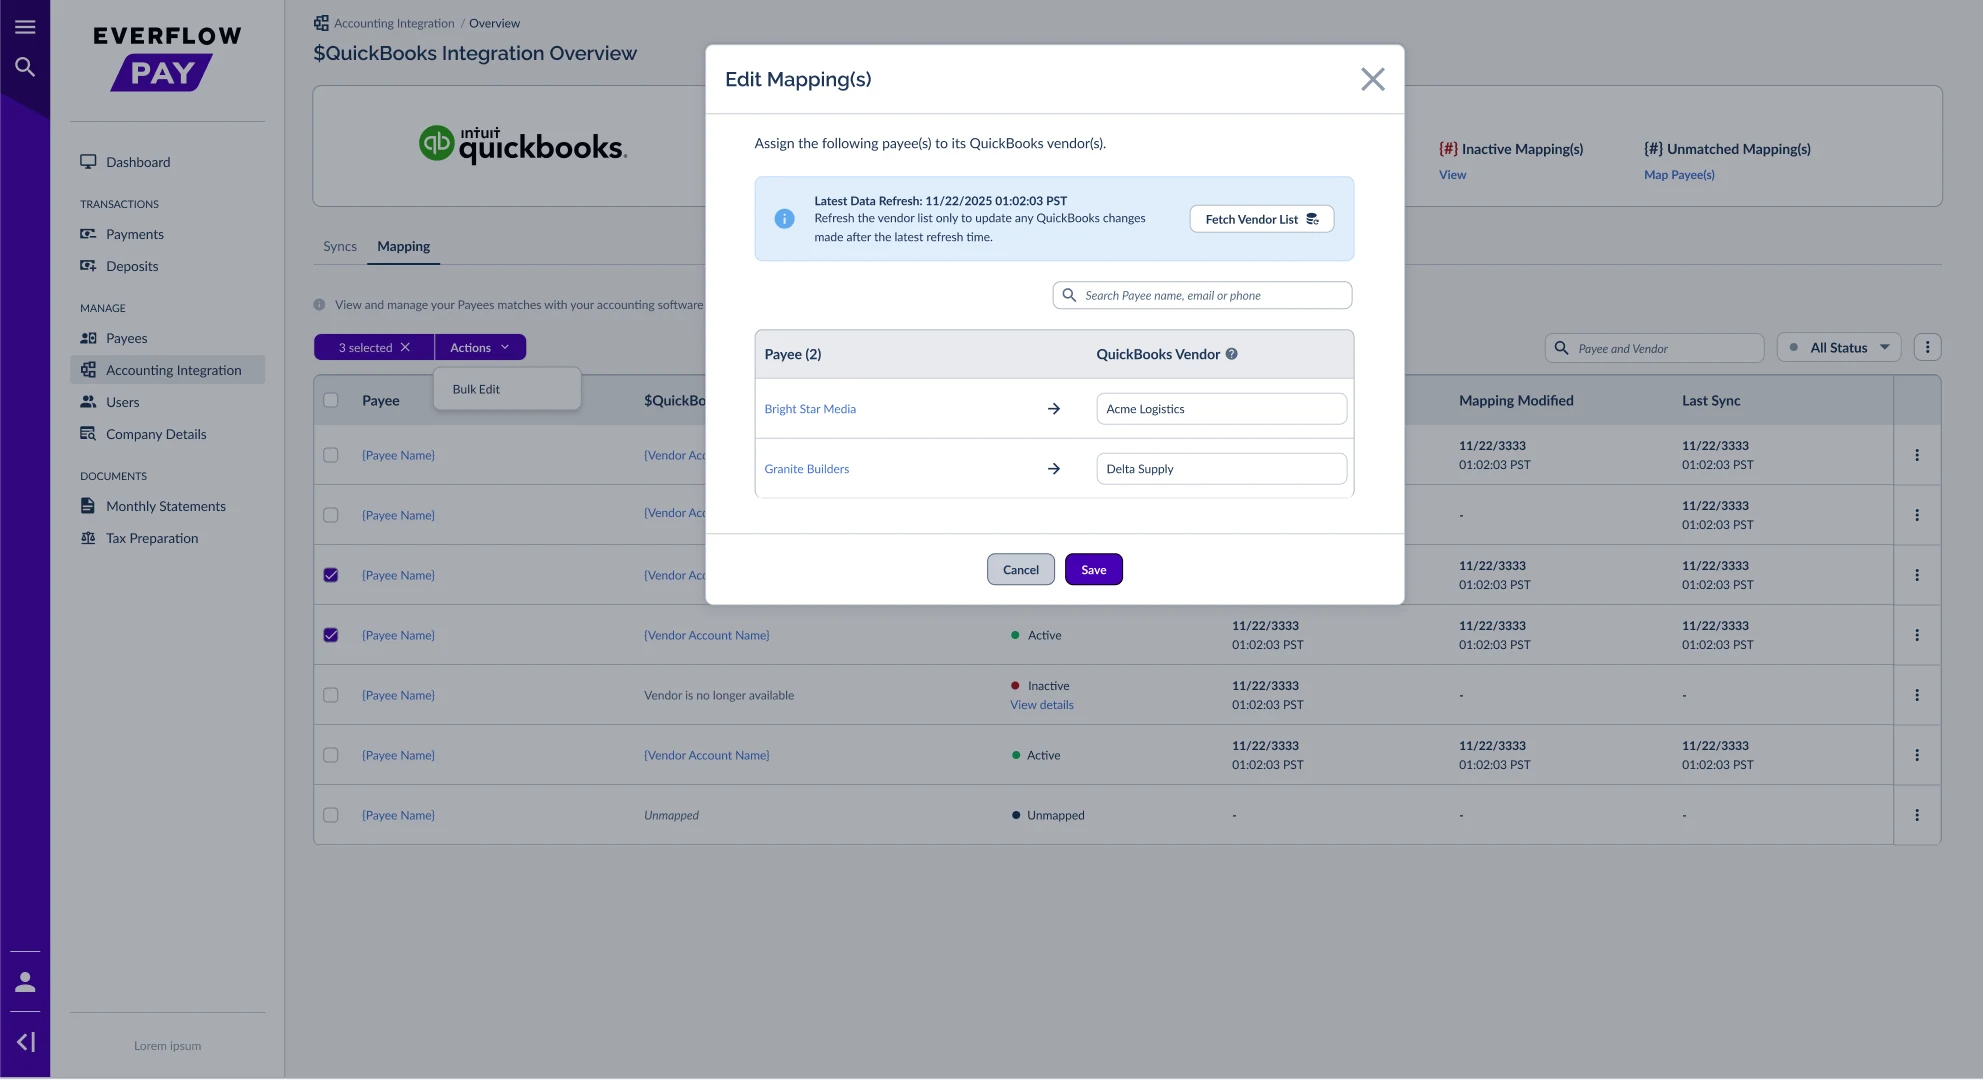
Matching Unmapped Payees
If you have unmapped Payees (Payees with no Vendor assigned), you can map them from three places:
All three open the Map Payee modal, which works the same as the Edit Mapping(s) modal described above.
When Mappings Break
Mappings can become Inactive when something changes in your accounting software — most commonly when a Vendor is deleted, deactivated, or archived.
Common cause: Vendor is deleted or made inactive in QuickBooks Online.
If a Vendor is deleted or deactivated, the mapping row shows Inactive status and the Vendor column displays "Vendor is no longer available."
Common cause: Vendor is deleted or deactivated in NetSuite.
If a Vendor is removed from NetSuite, the mapping row shows Inactive status and syncs pause for that Payee until you assign a new Vendor.
Common cause: Contact is archived in Xero.
Archiving a Contact in Xero removes it from the API. Everflow Pay treats this as a deletion — the mapping becomes Inactive and syncs stop for that Payee.
What You'll See
How to Fix It
Refreshing Your Vendor List
To pull the latest vendors from your accounting software, use the Refresh Vendors button. You’ll find it in:
- The Map Payee(s) modal
- The Mapping tab
- The initial setup wizard
Alongside it, Latest Vendors Refresh tells you when the list was last brought up to date.
For how this works across the whole integration, see How Accounting Syncs Work in Everflow Pay. If a refresh doesn’t finish, see Fixing Accounting Connection Errors In Everflow Pay.
Quick References
Linking Everflow Pay Payees to Vendors/Contacts in your accounting software so that financial records sync to the right place.
No — mapping and syncing are separate concepts on separate tabs. Mapping links Payees to Vendors. Syncing pushes Bills and Bill Payments to your accounting software.
No sync happens for that Payee. Their payments will show "Not Synced" until you create a mapping.
No — you can skip Payees during setup and map them later from the Mappings tab whenever you're ready.
QuickBooks and NetSuite call them Vendors. Xero calls them Contacts. Same concept, different terminology.
Yes — once mapped, Bill and Bill Payment creation is fully automatic when payments are approved.
Yes — if a Vendor/Contact is deleted, deactivated, or archived in your accounting software, the mapping becomes Inactive. See the When Mappings Break section above.
On the Mappings tab of the Accounting Integration page: Menu → MANAGE → Accounting Integration → Mappings.
Tips
- Check your mappings regularly — especially after making changes in your accounting software (deleting vendors, deactivating accounts)
- Use the Summary bar for a quick health check — the Inactive and Unmapped counts tell you if anything needs attention
- Refresh the vendor list before making changes if you've recently added or modified Vendors in your accounting software
- Unmapped Payees won't sync — if you want all payments to appear in your books, make sure every active Payee has a mapped Vendor
→ Connecting Your Accounting Software To Everflow Pay — Initial setup
→ How Accounting Syncs Work In Everflow Pay — What gets created and when
→ Checking Sync Status In Everflow Pay — Where to monitor sync health
→ Fixing Accounting Sync Errors In Everflow Pay — What to do when a sync fails


