


.svg)

Overview
This article walks you through connecting your accounting software to Everflow Pay for the first time. Most of it takes just a few minutes. One step, pulling your vendors and accounts across from your accounting software, runs in the background and can take longer if you have a lot of them, but you don’t have to sit and wait for it. Here’s what’s involved:
- Selecting your Accounting Software
- Authorizing the connection
- Waiting for your data to load
- Choosing configuration options
Before You Begin
Make sure you have:
- An active Everflow Pay account
- An active Accounting Software subscription with Admin permissions
Here's a list of supported Accounting Software.
Getting to Accounting Integration
There are two ways to start the setup:
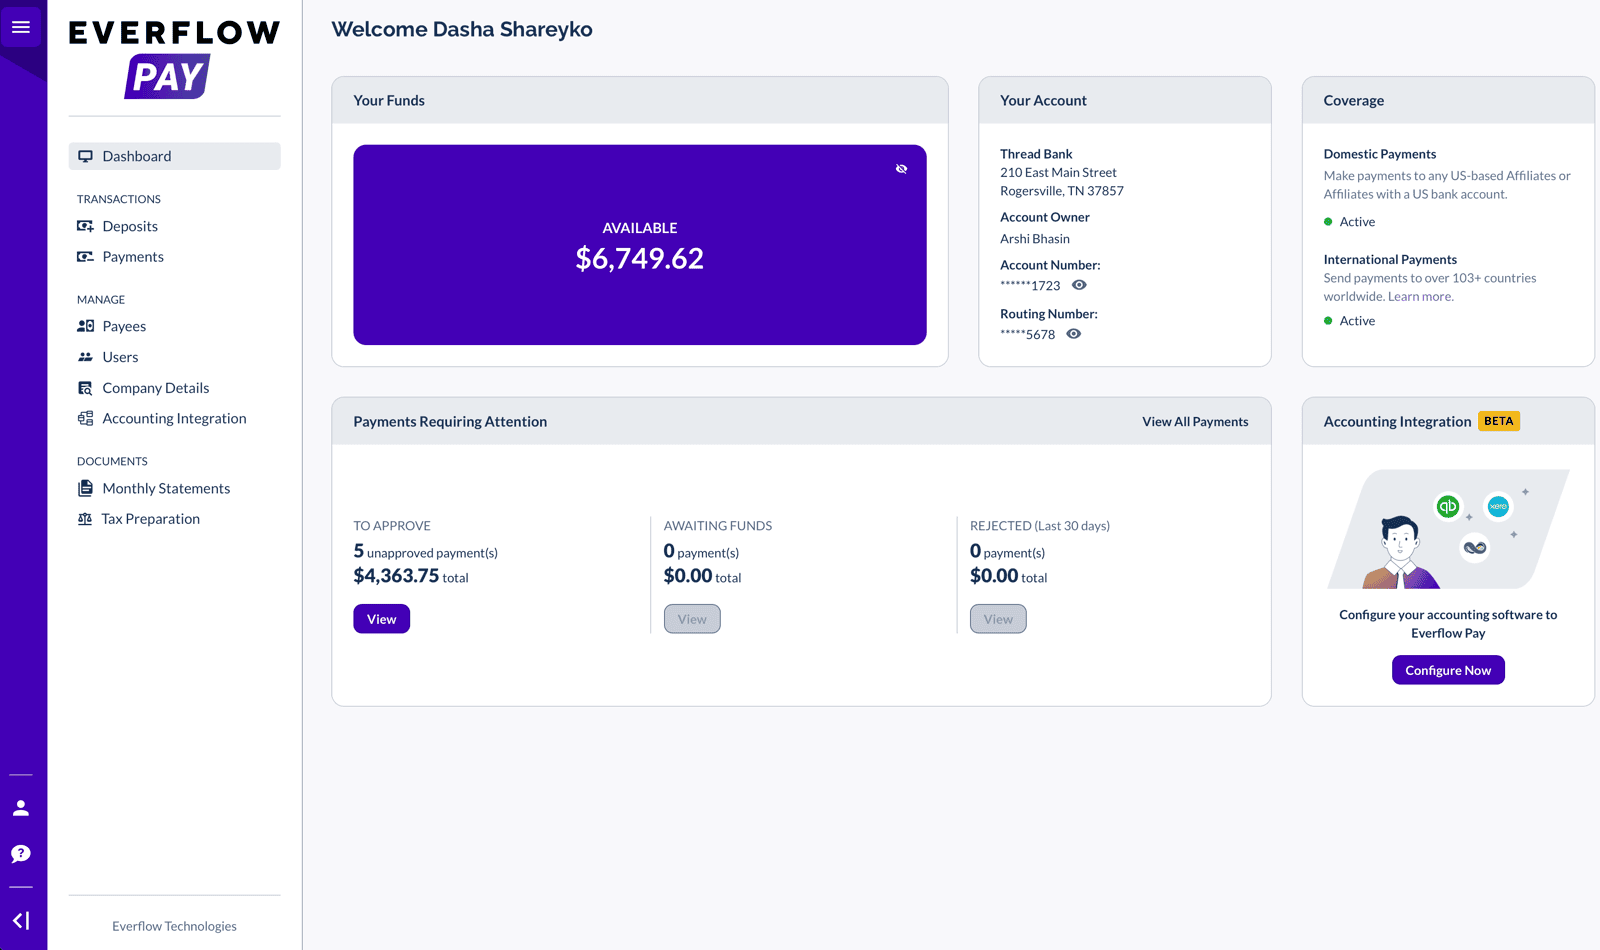
Step 1: Select Your Accounting Software
On the Accounting Integration page:
- Choose your accounting software from the available options
- Select your platform and click "Start Connection"
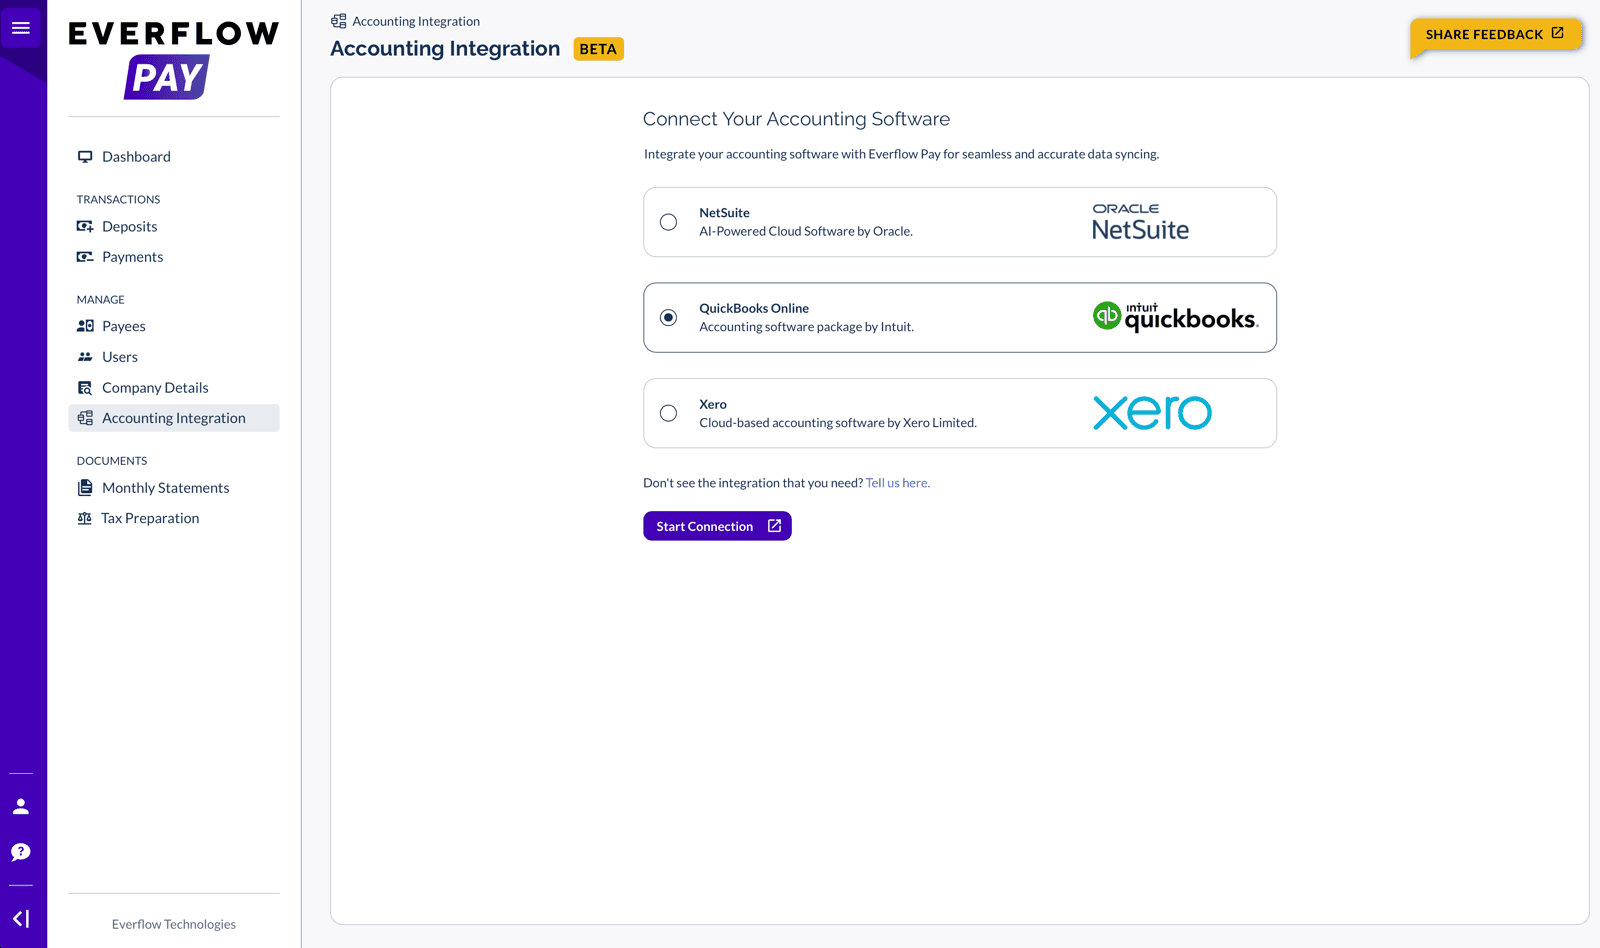
Don't see your accounting software? Please reach out to our support team or your AM with your request!
Step 2: Authorize the Connection
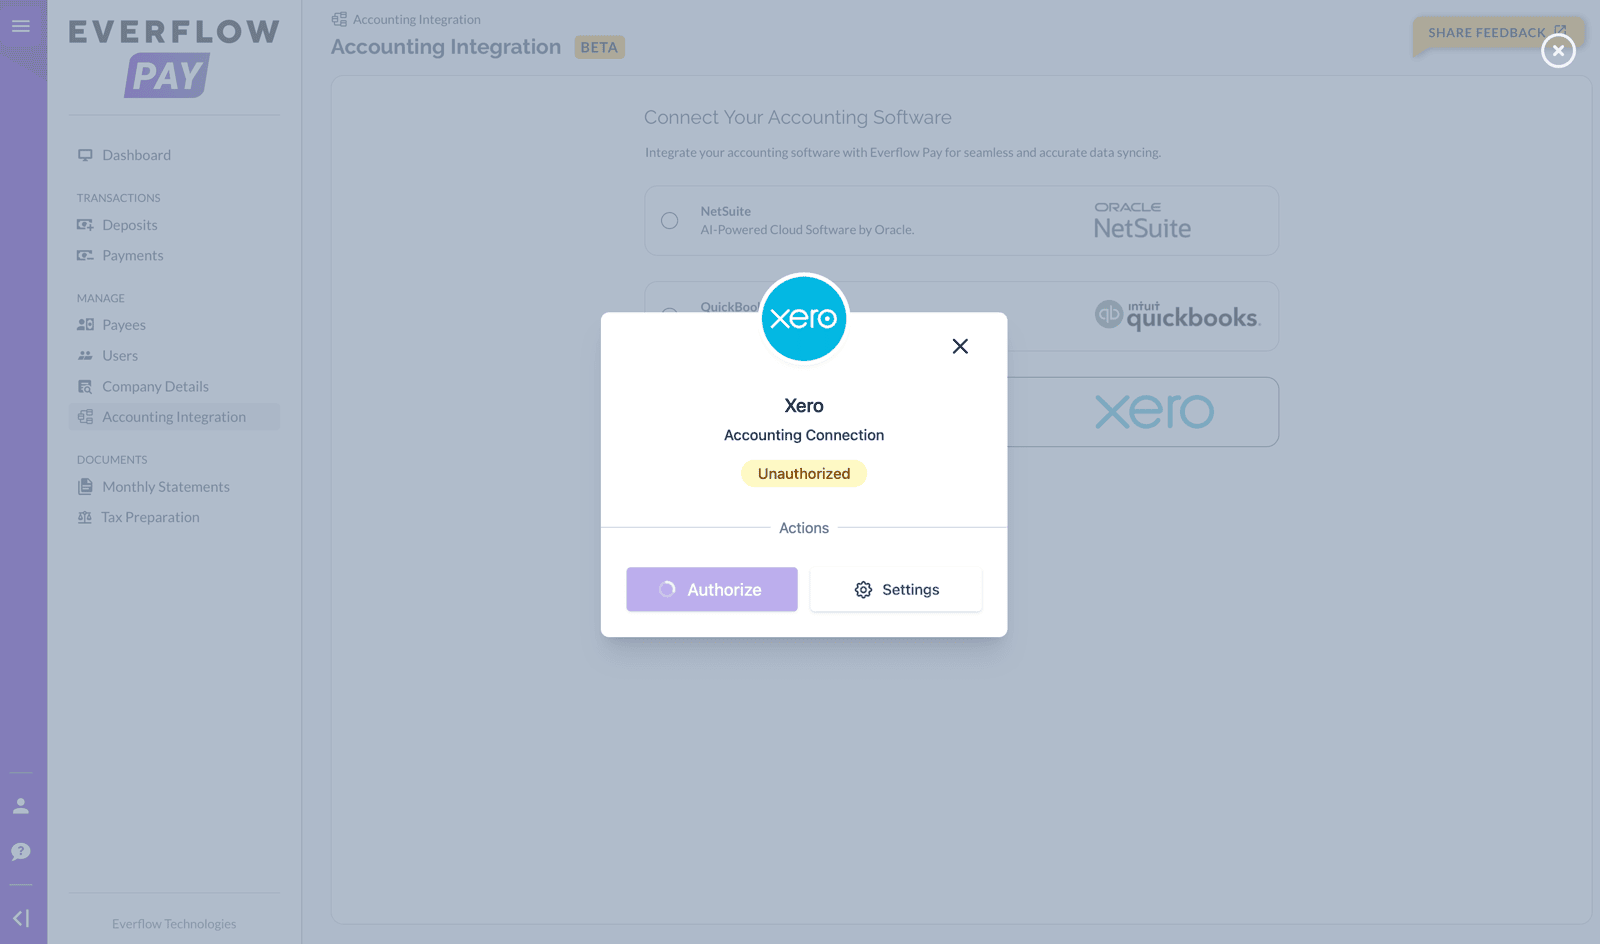
You'll now authorize read & write access via OAuth or a combination of OAuth and manual field entry, depending on your Accounting Software. Select your platform below:
- You'll see a connection card with the QuickBooks logo, "Accounting Connection" label, and an "Unauthorized" status
- Click the "Authorize" button
- You'll be redirected to the Intuit login page
- Log in with your QuickBooks credentials and authorize Everflow Pay to access your account
- If you have multiple companies associated with your Intuit account, select the correct company from the dropdown
- Once redirected back, click Save to complete the connection
- You'll see a connection card with the NetSuite logo, "Accounting Connection" label, and an "Unauthorized" status
- Enter your NetSuite credentials directly into the following fields:
- Account ID: Found in Setup > Company > Company Information (sandbox IDs end with '_SB1', '_SB2', or '_SB3')
- Consumer key: From the integration registration in your NetSuite application
- Consumer secret: From the integration registration in your NetSuite application
- Access token ID: From the integration registration in your NetSuite application
- Access token secret: From the integration registration in your NetSuite application
- SuiteTax enabled: Select if using SuiteTax for advanced tax calculations
- Need help? Click the "View our Connection Guide" link in the connection card
- Click Save to authorize Everflow Pay to access NetSuite
Required NetSuite Role Permissions
Make sure the NetSuite role used to generate your access tokens has the following permissions:
- Access Token Management – Full
- Accounting Lists – Full
- Integration Application – Full
- Log in using Access Tokens – Full
- Log in using OAuth 2.0 Access Tokens – Full
- REST Web Services – Full
- SOAP Web Services – Full
- Accounts – View
- Vendors – View
- Contacts – View
- Currency – View
- Bills – Full
- Bill Purchase Orders – Full
- Pay Bills – Full
- Payments – Full
- Vendor Bill Approval – Full
- You'll see a connection card with the Xero logo, "Accounting Connection" label, and an "Unauthorized" status
- Click the "Authorize" button
- You'll be redirected to the Xero login page
- Log in with your Xero credentials and authorize Everflow Pay to access your account
- Once redirected back, select your Default Tenant (your Xero organization) from the dropdown
- Click Save to complete the connection
Step 3: Wait for Your Data
As soon as your connection is authorized and saved, Everflow Pay starts pulling your vendor and ledger account lists across from your accounting software. It needs those before you can map anything.
Usually this is quick. If you have a long vendor list it can take longer, and the window will tell you so. At that point you can close it and get on with something else.
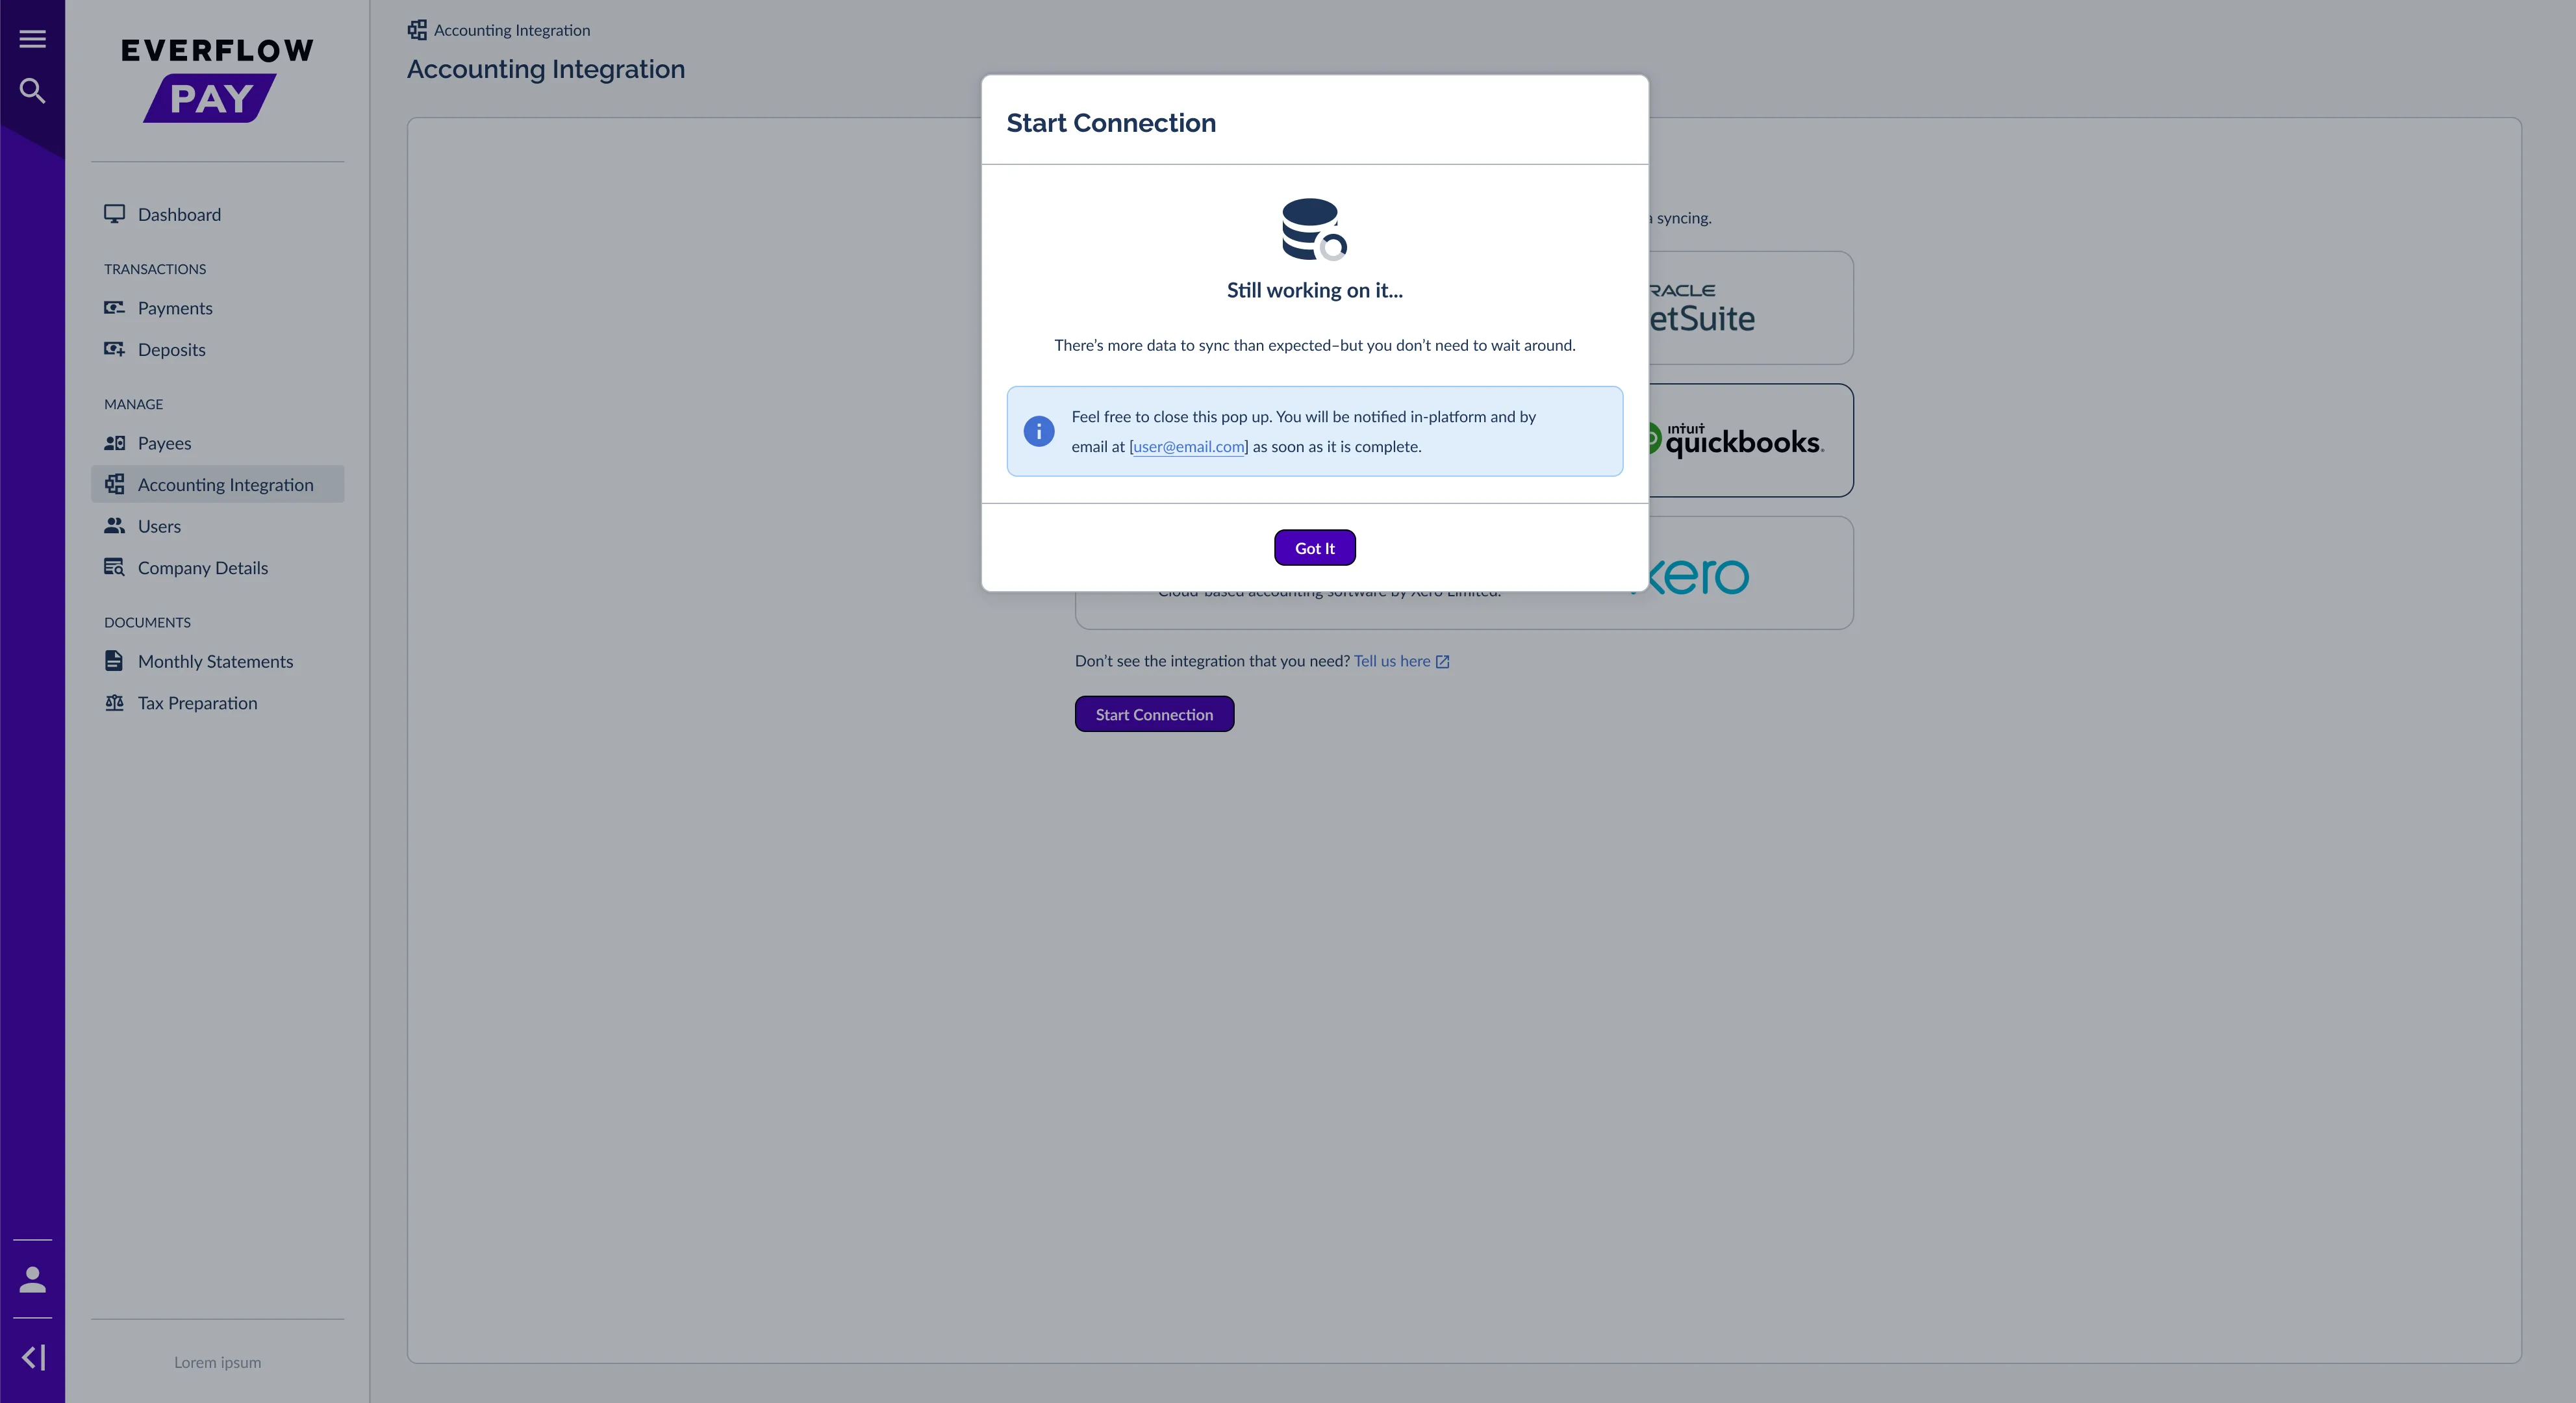

When you’re ready, click Continue Connection to carry on. If the data can’t be retrieved, see Fixing Accounting Connection Errors In Everflow Pay.
Step 4: Map Your Accounts
After authorization, you'll enter the Setup wizard. In this step, you'll configure your Accounts Payable information, telling Everflow Pay which accounts to use when creating financial records.
- ✓ Expense Account
- ✓ Bank Account
- ✓ Expense Account
- –N/A
- ✓ Expense Account
- ✓ Bank Account
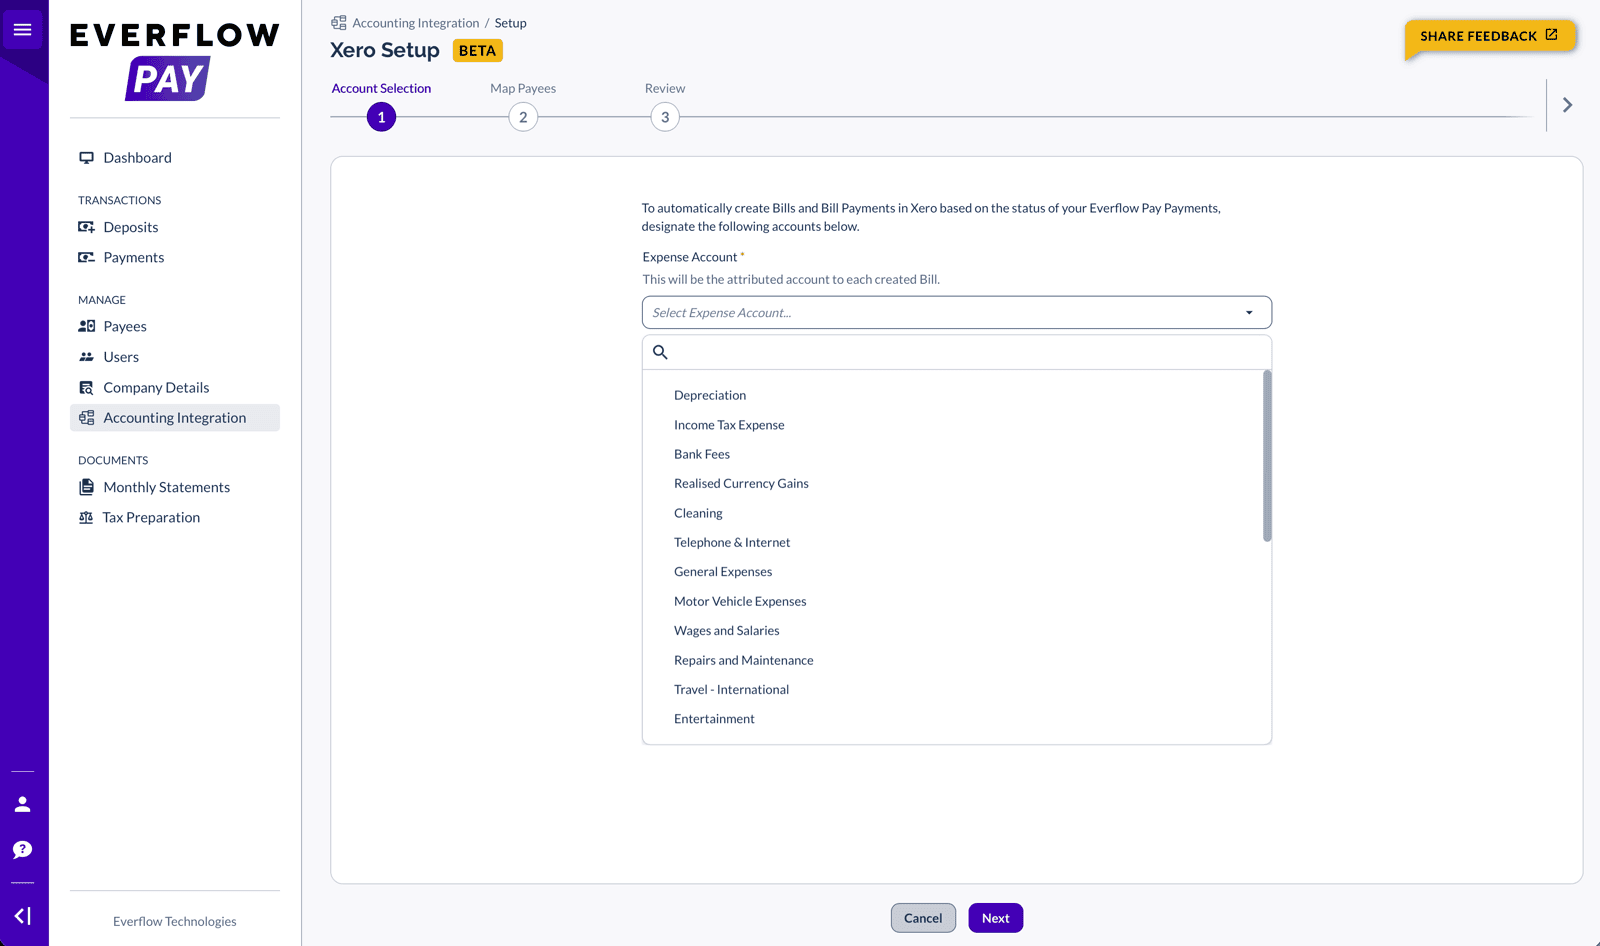
Refreshing Your Account List
If you add or rename accounts in your accounting software while you’re setting up, use Refresh Accounts to pull the latest list. Like the first fetch, it runs in the background and tells you when it’s done. Latest Accounts Refresh shows when the list was last brought up to date.
Bank Account
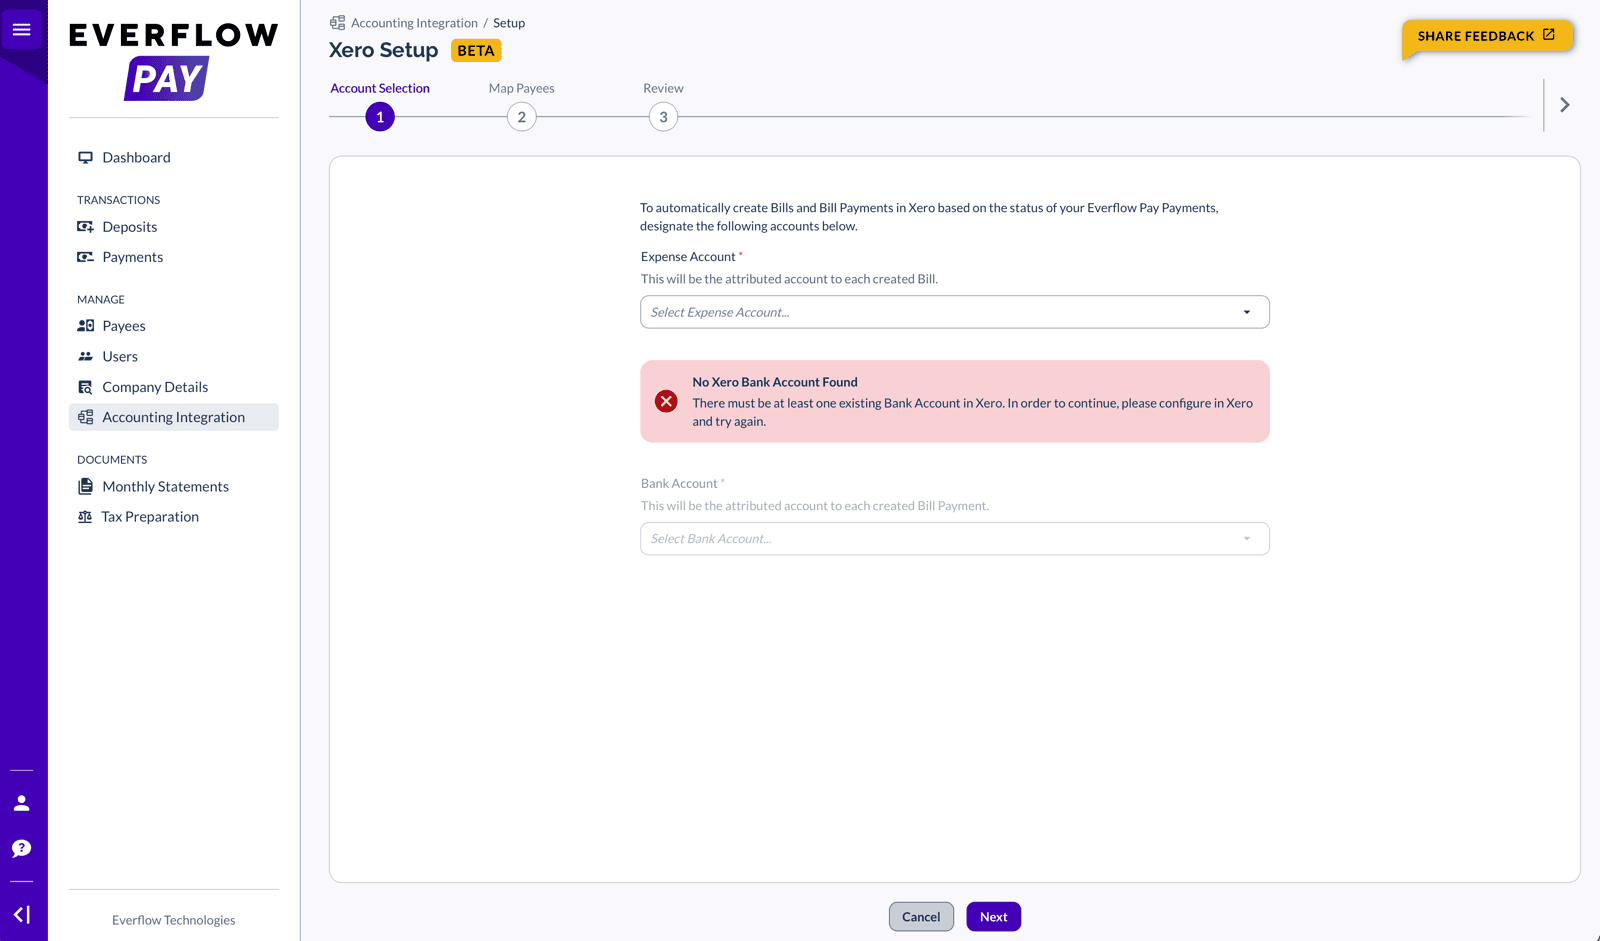
For QuickBooks Online and Xero, you'll also need to select the Bank Account that represents your Everflow Pay balance. This will be attributed to each created Bill Payment. Use the "Select Bank Account..." dropdown.
Troubleshooting: Account Not Found
If you see an error like "No [Provider] Expense Account Found" or "No [Provider] Bank Account Found", log in to your accounting software and create the required account, then return to Everflow Pay and retry.
→ Understanding & Managing Payee-To-Vendor Mapping In Everflow Pay: map your Payees to Vendors
→ How Accounting Syncs Work in Everflow Pay: what gets created and when
→ Checking Accounting Sync Status in Everflow Pay: where to keep an eye on things
→ Fixing Accounting Connection Errors In Everflow Pay: if the connection has a problem


