


.svg)

Overview
TrackDrive is a call routing and Pay Per Call platform. This integration connects TrackDrive's call routing with Everflow so you can track Pay Per Call performance, Partner payouts and buyer event revenue in one place. Whether the inbound call arrives on a dedicated Direct Inward Dialing (DID) number or through a landing page carrying TrackDrive's dynamic number script, TrackDrive routes the call and fires a postback to Everflow when the call completes or the buyer converts.
How the integration works
One value makes the whole round trip: the Everflow transaction ID. Everflow records the click and returns a transaction ID, TrackDrive stores it against the call, and TrackDrive sends it back on the conversion postback. Everything else in this guide is configurable. If that ID is lost at any point, the call still completes and the buyer still pays you, but Everflow never learns the conversion happened.
What you need before you start
Both platforms need to be configured before any call will attribute correctly.
| In Everflow | In TrackDrive |
|---|---|
| A Base Offer configured for Pay Per Call with $0 revenue and a payout set for the Traffic Partner | Dedicated DID phone numbers assigned to specific Traffic Sources and Partners |
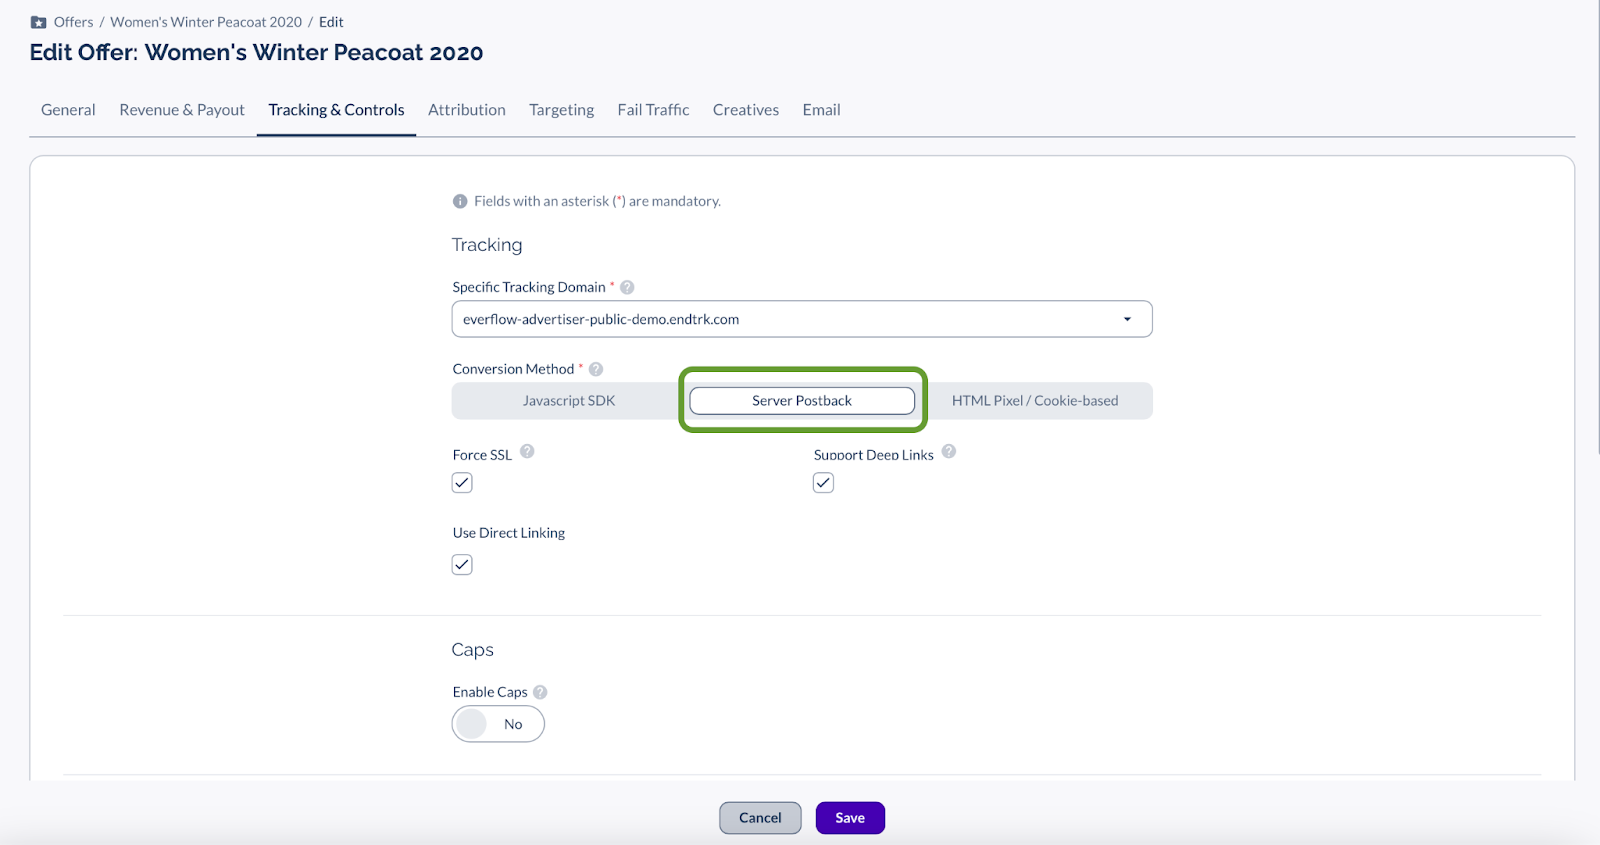
| Server Postback selected as the Conversion Method in the offer settings | Contact fields configured to capture and map the Everflow parameters oid, affid and _ef_transaction_id |
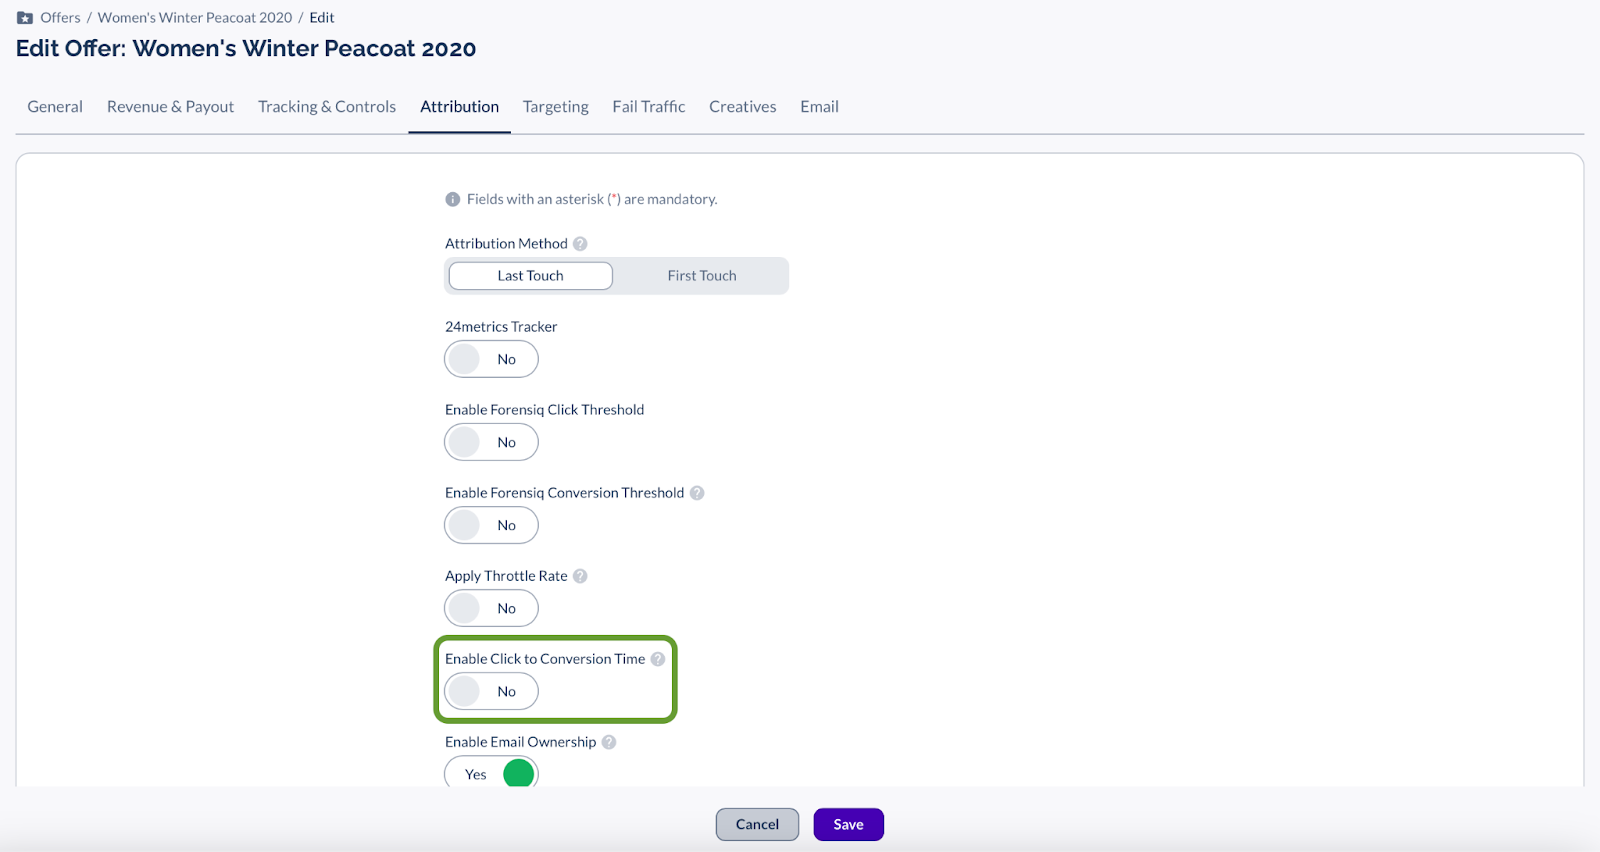
| Click to Conversion Time disabled under the offer's Attribution settings | Global or offer-specific Event Triggers configured to fire webhook postbacks on call completion or conversion |
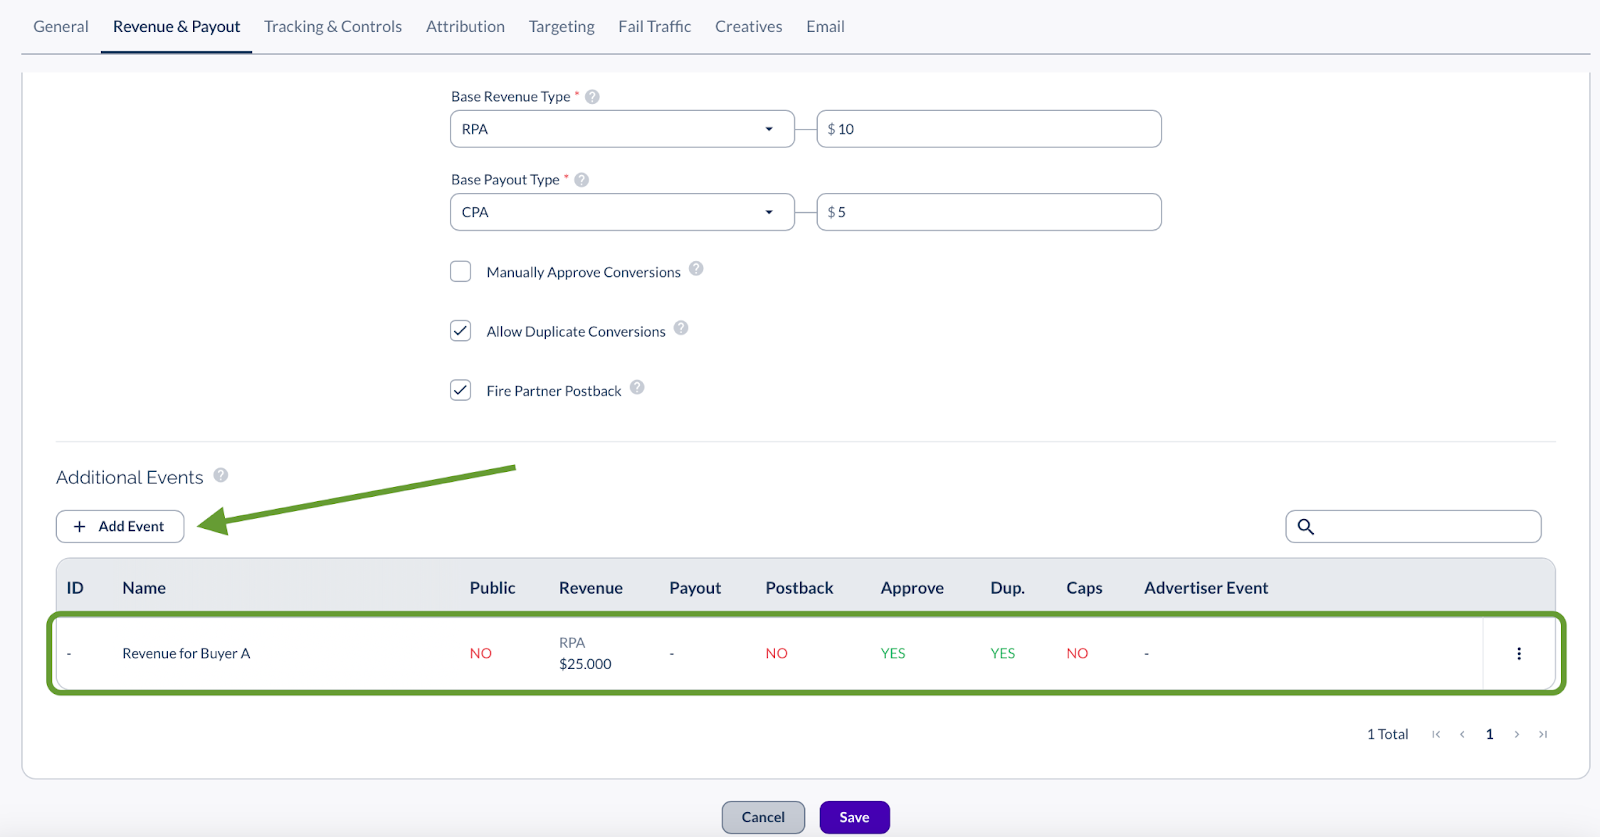
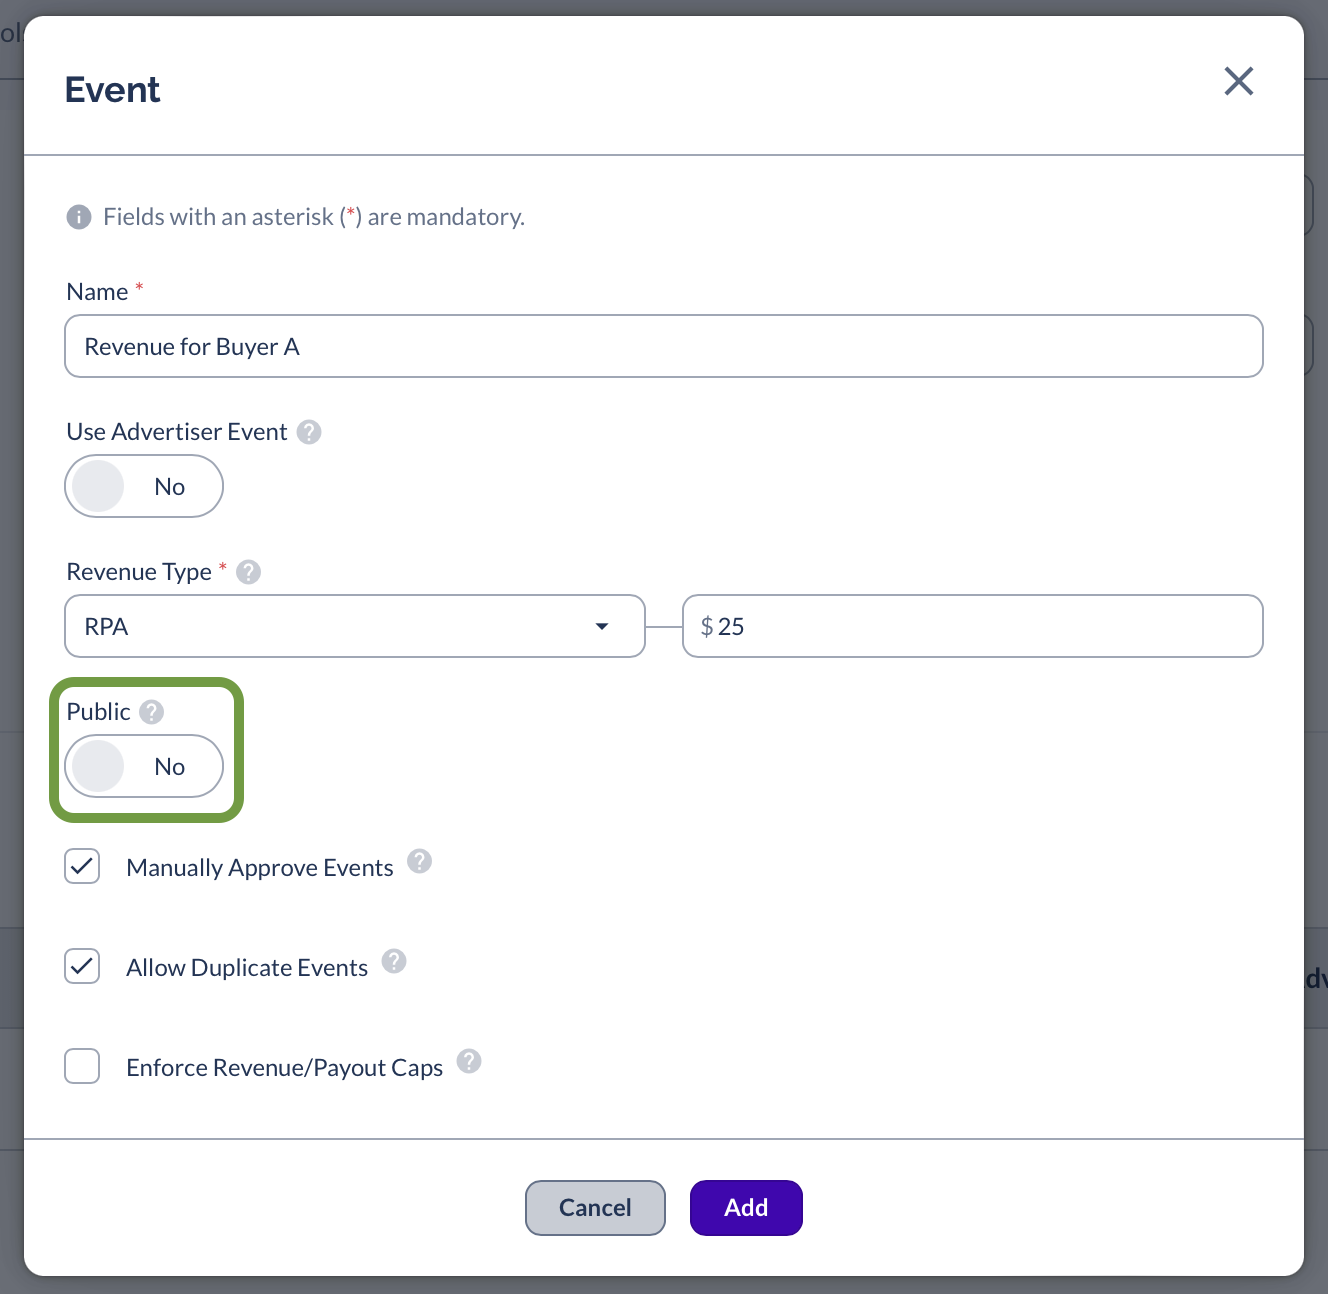
| Private Offer Events created to represent each TrackDrive Advertiser (Buyer) |
Step 1: Configure the Everflow Base Offer and Events
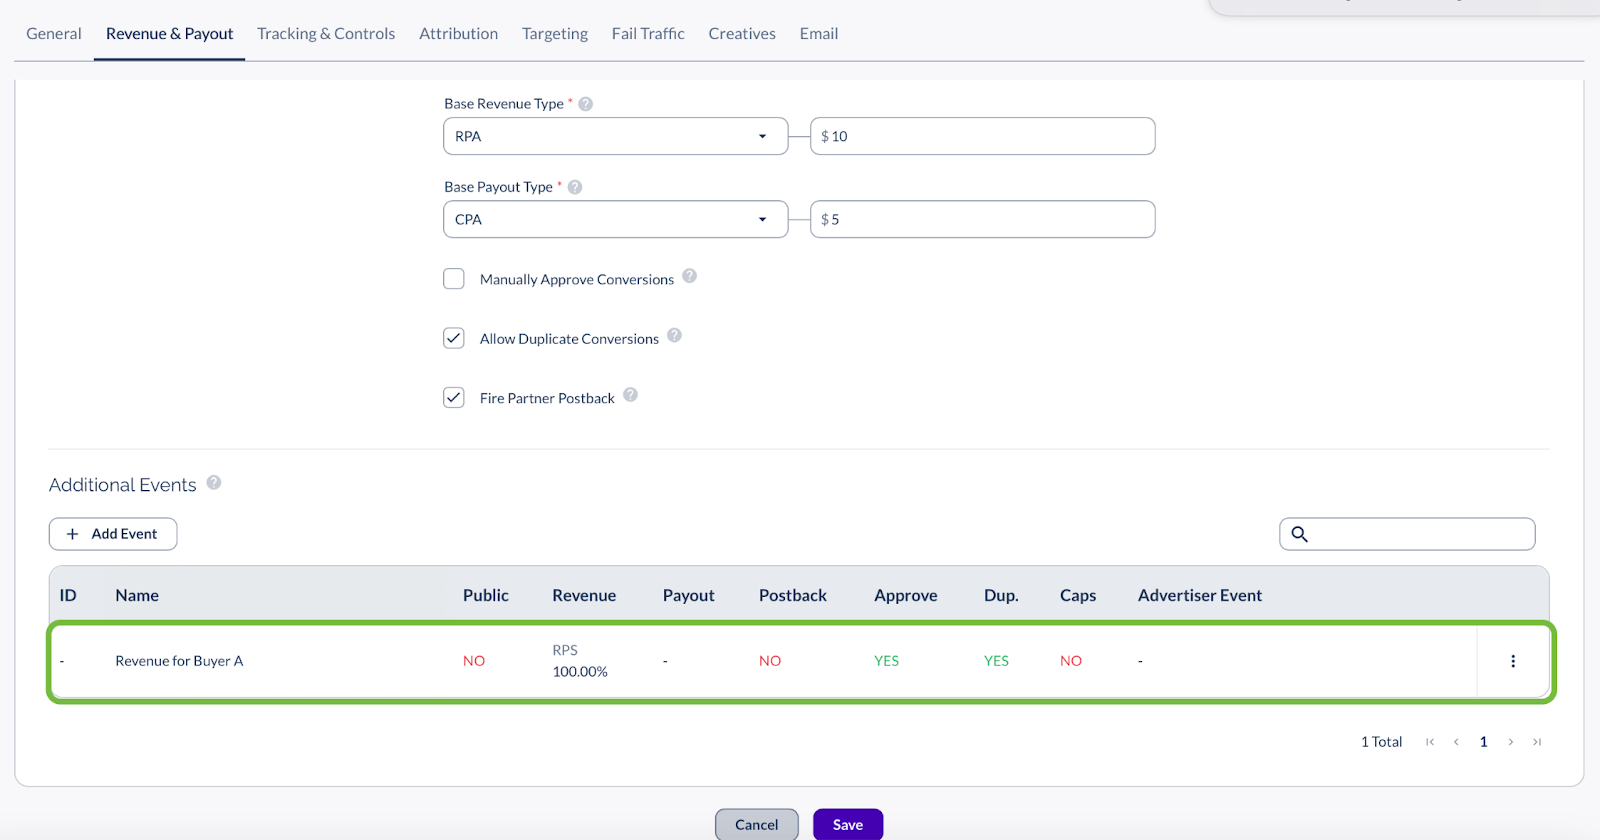
In Everflow, payout to your Partner sits on the base conversion and revenue sits on the Events, with one Event per TrackDrive Buyer.
Server Postback is what lets TrackDrive report the conversion from its own servers after the call ends, and disabling Click to Conversion Time stops Everflow discarding a conversion because the call ran longer than the default attribution window.
Creating an Event for each Buyer
Add one Offer Event per TrackDrive Buyer. Saving the offer generates a unique event_id for each, and those event IDs become the Buyer IDs you map on the TrackDrive side.
Payout on the Events themselves is irrelevant, because the Events are Private and the Partner is already paid on the base conversion.
RPA/CPA: revenue and payout set in Everflow
TrackDrive posts the conversion only, and Everflow applies the fixed amounts you configured. Use this when your buyer rates are stable.
CPS: revenue and payout set in TrackDrive
TrackDrive posts the conversion together with an amount, and Everflow applies a percentage of that value. Use this when buyer payouts vary per call.
A current limitation, and the workaround
Everflow Events do not currently support assigning a different Advertiser to each Event, so every Event on the offer belongs to the offer's Advertiser. Until that changes there are two ways around it: create a separate Everflow offer per buyer to track their Pay Per Call Events, or give buyers login access to the call stats in TrackDrive.
Step 2: Retrieve Your Everflow Credentials
You need four values from Everflow before configuring anything in TrackDrive.
| Value | Where to find it |
|---|---|
| Network ID (nid) | Your numeric Network ID, shown in your Advertiser Postback URL settings or your account settings. |
| Advertiser ID | The main Advertiser Details page, or the offer setup page. |
| Tracking Domain | Under Offers > Manage, or inside your Postback settings. Use the hostname only, for example tracking.yourdomain.com, with no https:// prefix. |
| Advertiser Event ID | Generated per Buyer Event when you save the offer in Step 1. |
Step 3: Format the Default Landing Page
Skip this step if you are using DID numbers routed directly to Partners with no landing page. If you do have a landing page carrying the phone number for dynamic number insertion, it must receive these parameters so TrackDrive can associate the call with the Everflow click.
https://www.yourdomain.com/?_ef_transaction_id={transaction_id}&affid={affiliate_id}&oid={offer_id}Step 4: Map Fields and Traffic Sources in TrackDrive
TrackDrive needs somewhere to hold the Everflow values, and its Traffic Source IDs need to line up with your Everflow Partner IDs.
If you would rather not key the webhooks on the TrackDrive Buyer ID, you can set a token such as the Everflow event_id in the Buyer Extra Tokens or the Buyer Conversion Setting Extra Tokens and use that in the webhooks instead.
Step 5: Configure Event Triggers and Webhooks
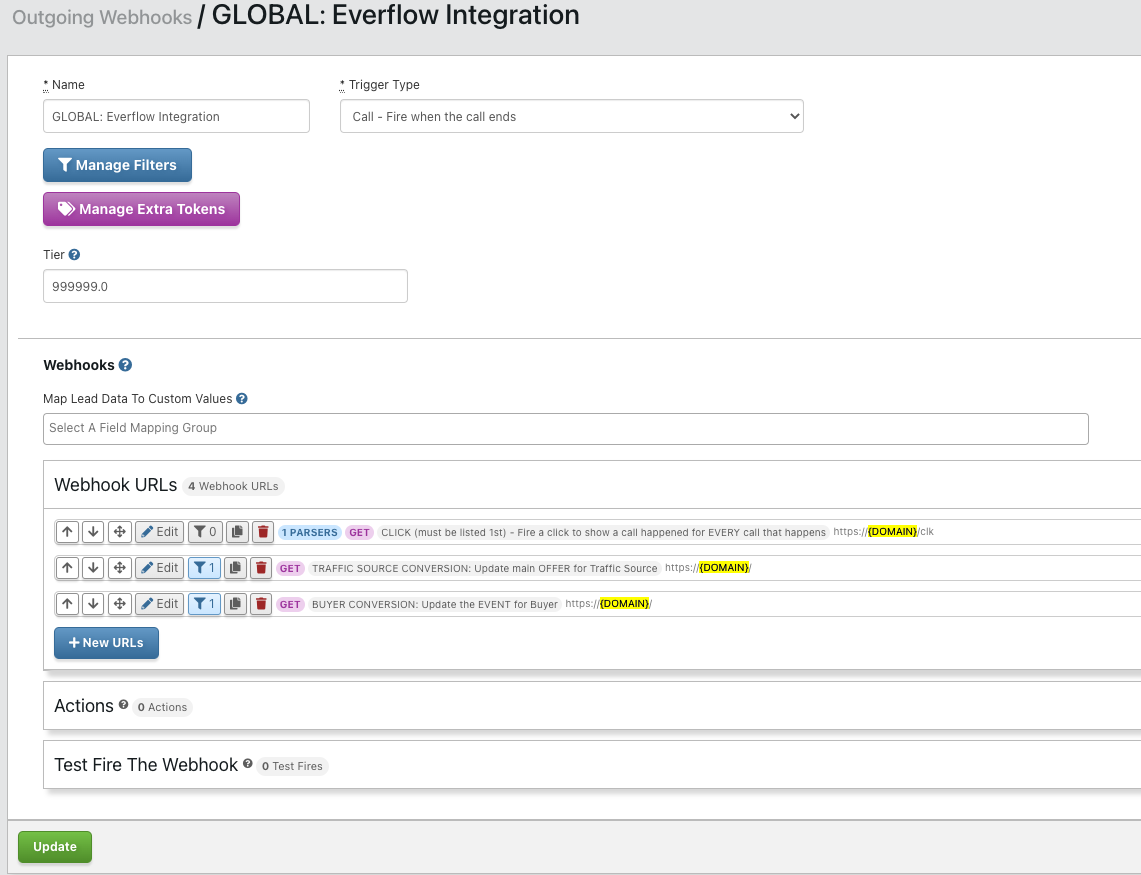
TrackDrive ships a template that builds the whole webhook set for you.
The imported trigger is a template and will not work until you point it at your own account.
Required changes to the imported trigger
Three edits are mandatory:
- Edit each Webhook URL and replace {Domain} with your real Everflow tracking domain.
- Update the nid parameter on both the Traffic Source and Buyer Conversion webhooks with your Everflow Network ID.
- Set the trigger condition, for example Call Ended and/or Buyer Converted, and apply any filters you need such as a minimum call duration.
Webhook parameters
Keep these parameters. Removing one will break attribution rather than simply omitting a value.
| Parameter | What to map it to |
|---|---|
| nid | Your numeric Everflow Network ID. |
| transaction_id | The _ef_transaction_id parsed from the click response. Used in both the Traffic Source and the Buyer Conversion updates. |
| event | Buyer Conversion URL only. The TrackDrive Buyer ID, matched to the Everflow event_id. |
| oid | The Everflow Offer ID this postback fires to. |
| affid | The TrackDrive Traffic Source ID, matched to the Everflow Partner ID. |
| amount | Keep only if you are tracking dynamic revenue or payout (CPS) from TrackDrive. |
Why the 15 second delay is there
The imported template puts a 15 second delay after the Click webhook. That is deliberate. It gives Everflow time to commit the transaction ID parsed from the click response, which both the Traffic Source conversion and the Buyer conversion depend on. Removing the delay is the most common way this integration is broken: the conversions fire before the transaction ID exists and Everflow has nothing to attribute them to.
Optional parameters
Two extras are available if you want to carry more data through:
- On the click tracking webhook, append sub1 to sub10 to pass Partner values.
- On the conversion tracking webhook, append adv1 to adv10 to pass values from TrackDrive.
Step 6: Test and Verify
Run one real call end to end before going live. A configuration error here is invisible until revenue is missing.
In the Everflow Conversion Logs you are checking for two separate records, not one:
- The main conversion, recorded under the correct Traffic Partner with $0 revenue and the correct payout.
- The associated Event, recorded under the correct Event ID for that Buyer, carrying the revenue.
If the main conversion appears but the Event does not, the event parameter mapping in Step 5 is the place to look. If neither appears, the transaction ID is not making the round trip, and the 15 second delay is the first thing to check.
Related Reading
→ Accessing & Editing S2S Postback URLs. Where to find your postback link and what each part does.
→ Your Guide To Parameters & Macros. The full list of values you can pass.
→ How To Set Up Conversion Events. Creating and configuring the Offer Events used here.


