
Overview
Rimo is a telehealth platform with a built-in Everflow integration that tracks the full visitor journey — from the moment someone lands on the Rimo intake funnel through treatment creation, approval, and recurring orders. This guide walks through setup so you can attribute partner traffic to every stage of the funnel using a mix of client-side and server-side events.
How tracking works in Rimo
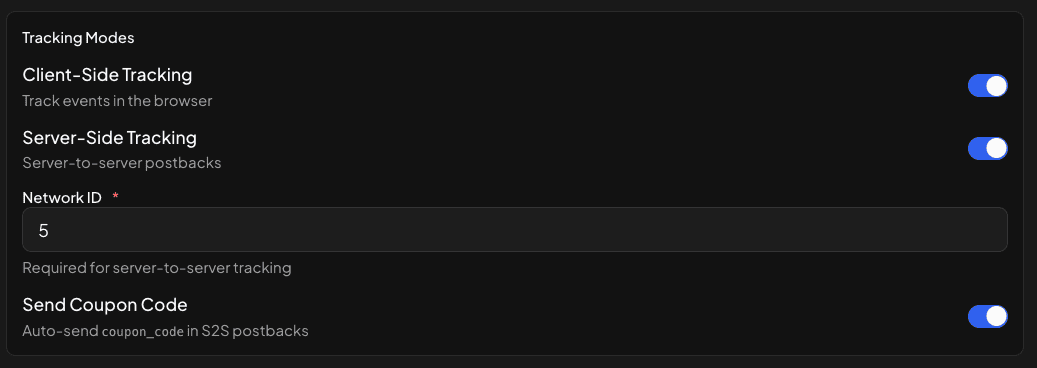
Rimo supports two attribution modes that work together: a JavaScript SDK for in-browser events and server postbacks for server-confirmed milestones. Most networks enable both and split the funnel between them.
EF.click() and stores the click cookie.Use client-side for tracking in-browser events (Teleform Started, Checkout Started). Use server-side for tracking events that occur after the user has left the browser (Treatment Approved, First Order, Recurring Order).
Before you start
main.js from). Find it under aid parameter on every event.adv_event_id parameter empty for the base conversion.Setup walkthrough
tld option ensures the click cookie is shared across subdomains, so attribution survives the hop from your landing page to the Rimo-hosted form.<script type="text/javascript"
src="https://www.TRACKING_DOMAIN.com/scripts/main.js"></script>
<script type="text/javascript">
EF.configure({
tld: 'ROOT_DOMAIN.com'
});
EF.click({
offer_id: EF.urlParameter('oid'),
affiliate_id: EF.urlParameter('affid'),
source_id: EF.urlParameter('source_id'),
sub1: EF.urlParameter('sub1'),
sub2: EF.urlParameter('sub2'),
sub3: EF.urlParameter('sub3'),
sub4: EF.urlParameter('sub4'),
sub5: EF.urlParameter('sub5'),
uid: EF.urlParameter('uid'),
transaction_id: EF.urlParameter('_ef_transaction_id')
});
</script>TRACKING_DOMAIN with your Everflow tracking domain and ROOT_DOMAIN.com with the root domain shared by your landing page and Rimo subdomain.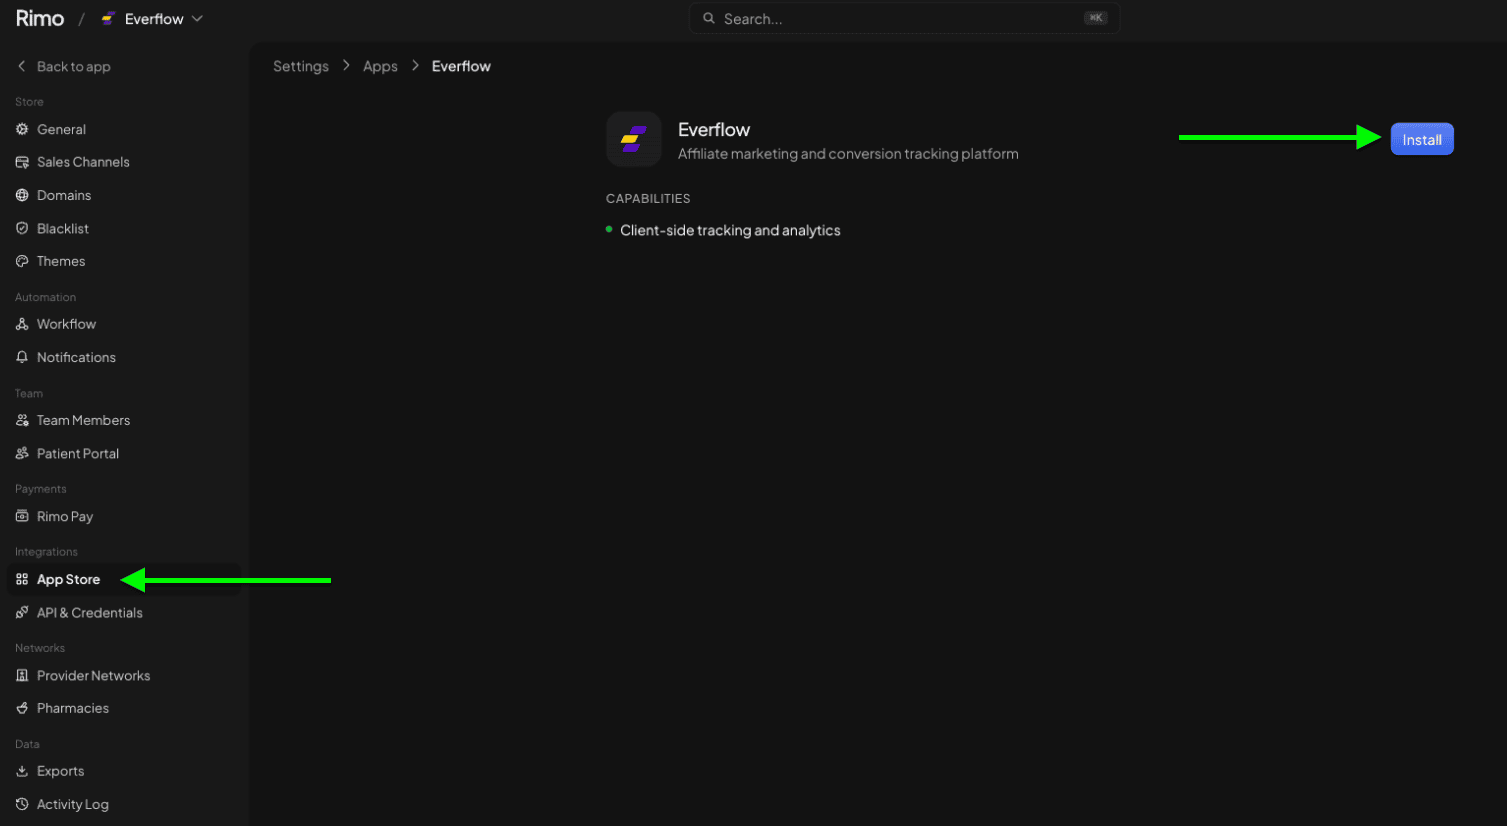
https:// prefix. Example: www.serve-eflow-test.com.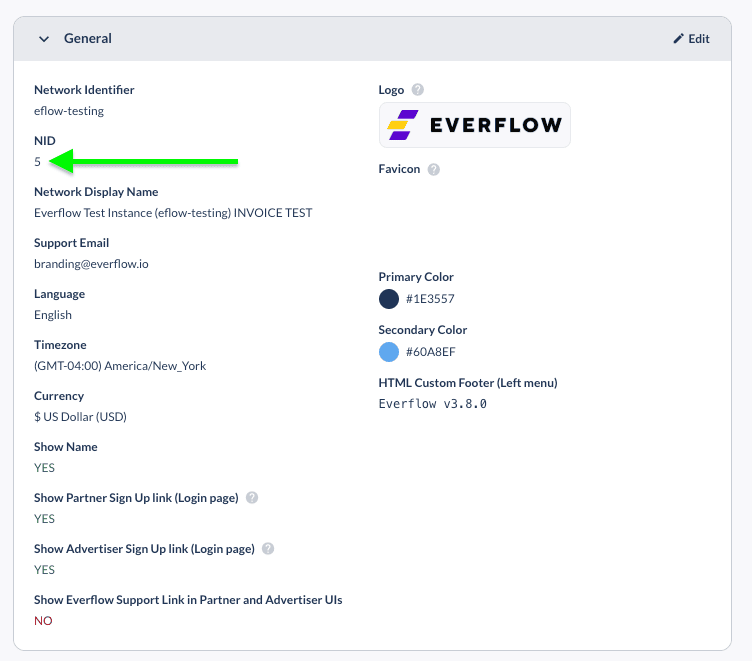
coupon_code parameter to every server postback.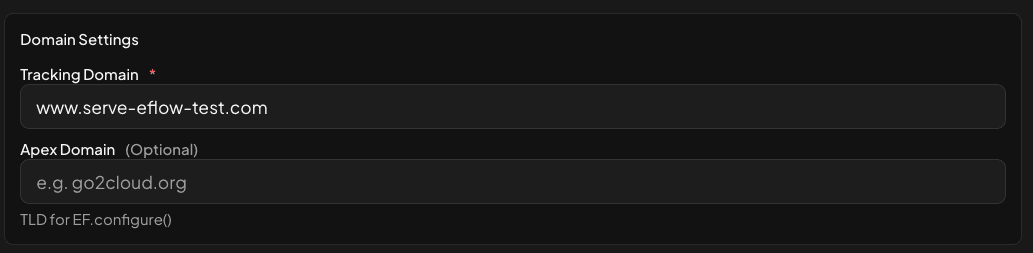
aid — the Advertiser/Brand ID for Rimo in your Everflow instance.adv_event_id — the Advertiser Event ID. Leave empty for the base conversion.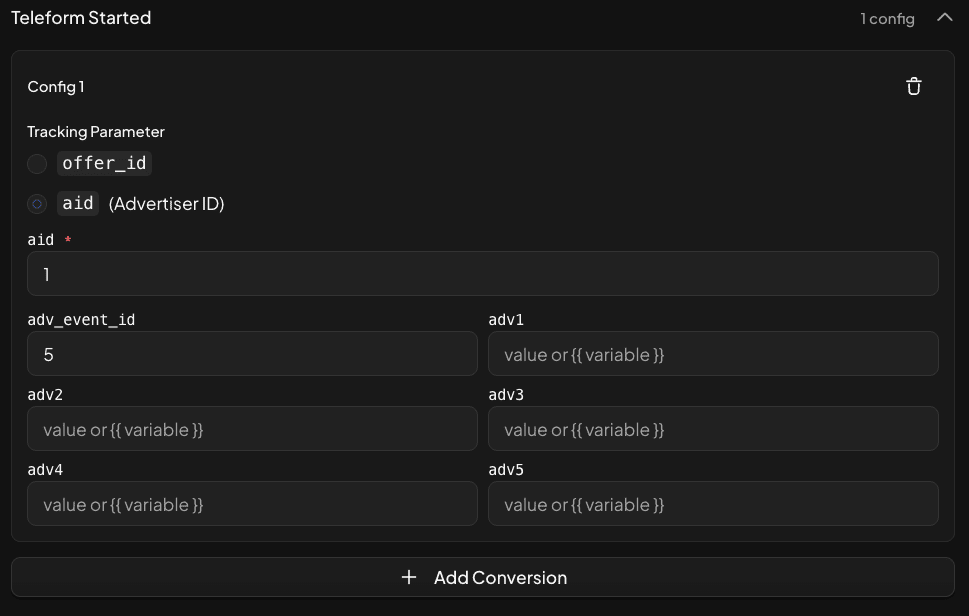
aid — the Advertiser/Brand ID (same as client-side).order_id — choose between Treatment ID (same value across every order in a treatment) or Order Number (unique per order). Order Number is recommended for clean dedupe.adv_event_id — same rule as client-side.amount — auto-populated for Treatment Created, First Order, and Recurring Order.
Supported events
Client-side (JavaScript SDK)
Server-side (Server Postbacks)
Recommended event mapping
Most networks don't need every event. Start with this minimum mapping and add the rest only when a specific use case calls for it.
Client-side (recommended minimum)
Server-side (recommended minimum)
Template variables for event payloads
Already mapped
{{ orderAmount }} — auto-populated as amount on server events.{{ couponCode }} — auto-populated as coupon_code when the Send Coupon Code toggle is on (step 4c).{{ orderNumber }} — auto-populated as order_id if Order Number is selected as the source.Optional — available for adv1-adv10
Pass any of the variables below as adv1–adv5 to enrich your reporting:
{{ treatmentId }}{{ email }}{{ phoneNumber }}{{ offeringCode }}{{ offeringId }}{{ billingPlanId }}{{ customerId }}{{ storeId }}Per the Parameters & Macros guide, adv1–adv5 are mapped to standard reporting columns by default.
Troubleshooting
Double-check the tld value in the click script. It must be the root domain shared by your landing page and the Rimo intake form (e.g. if your landing is get.example.com and Rimo is at app.example.com, set tld: 'example.com'). If they're on completely different root domains, cross-subdomain cookies won't apply and you'll need to pass the transaction ID through URL parameters instead.
Verify three things: (1) the tracking domain in step 3 is correct and reachable, (2) the NID in step 4 matches your Network ID, (3) the Advertiser/Brand ID (aid) in steps 5-6 maps to a real advertiser in your Everflow instance. Use Everflow's Postback Validator if you want to confirm the request is shaped correctly.
That's expected if you map both as the same event in Everflow. Use distinct Advertiser Event IDs (adv_event_id) so they show up as separate events. Treatment Created represents intent (checkout completed); First Order represents revenue (provider-approved). Most networks pay only on First Order.
The Recurring Order event fires only on subsequent shipments after a First Order has been approved and created. It will not fire on the initial purchase — that's First Order's job. If you're testing with a fresh customer, you'll need to wait for a real renewal cycle to verify.
The variables Rimo exposes are listed above. To pass anything custom, contact your Rimo account team — they can extend the template variable set on their side. Pass any new variable through adv1–adv5 for reporting.
Related help desk articles
→ Your Guide To Parameters & Macros — full reference for adv1-adv5, sub1-sub5, and other postback parameters.
→ Introduction To Conversion Tracking Methods — conceptual overview of S2S vs JS SDK vs HTML pixel.
→ Understanding Tracking With Server To Server Postbacks — how the postback URL anatomy works.
→ How To Test Partner Postbacks — verify your event payloads before going live.
→ Everflow Server IPs — whitelist these to prevent silent postback failures.


