
Overview
Normally, paying a Partner through Everflow Pay takes two approvals: you approve the invoice in the Core Platform, then you approve the payment again in the Everflow Pay platform to release the funds. Payment Auto-Approval removes that second manual step.
When you turn it on, approved payments are released automatically, so payouts keep moving without you opening Everflow Pay to approve each one. You stay in control of which Partners it applies to, and you can add a delay as a safety window before anything is released.
Payment Auto-Approval is available to all Everflow Pay accounts at no additional cost. It's a standard feature, not a paid add-on, so there's nothing to purchase or unlock to start using it.
Before You Turn It On
A couple of things worth knowing first:
How Payment Auto-Approval Works
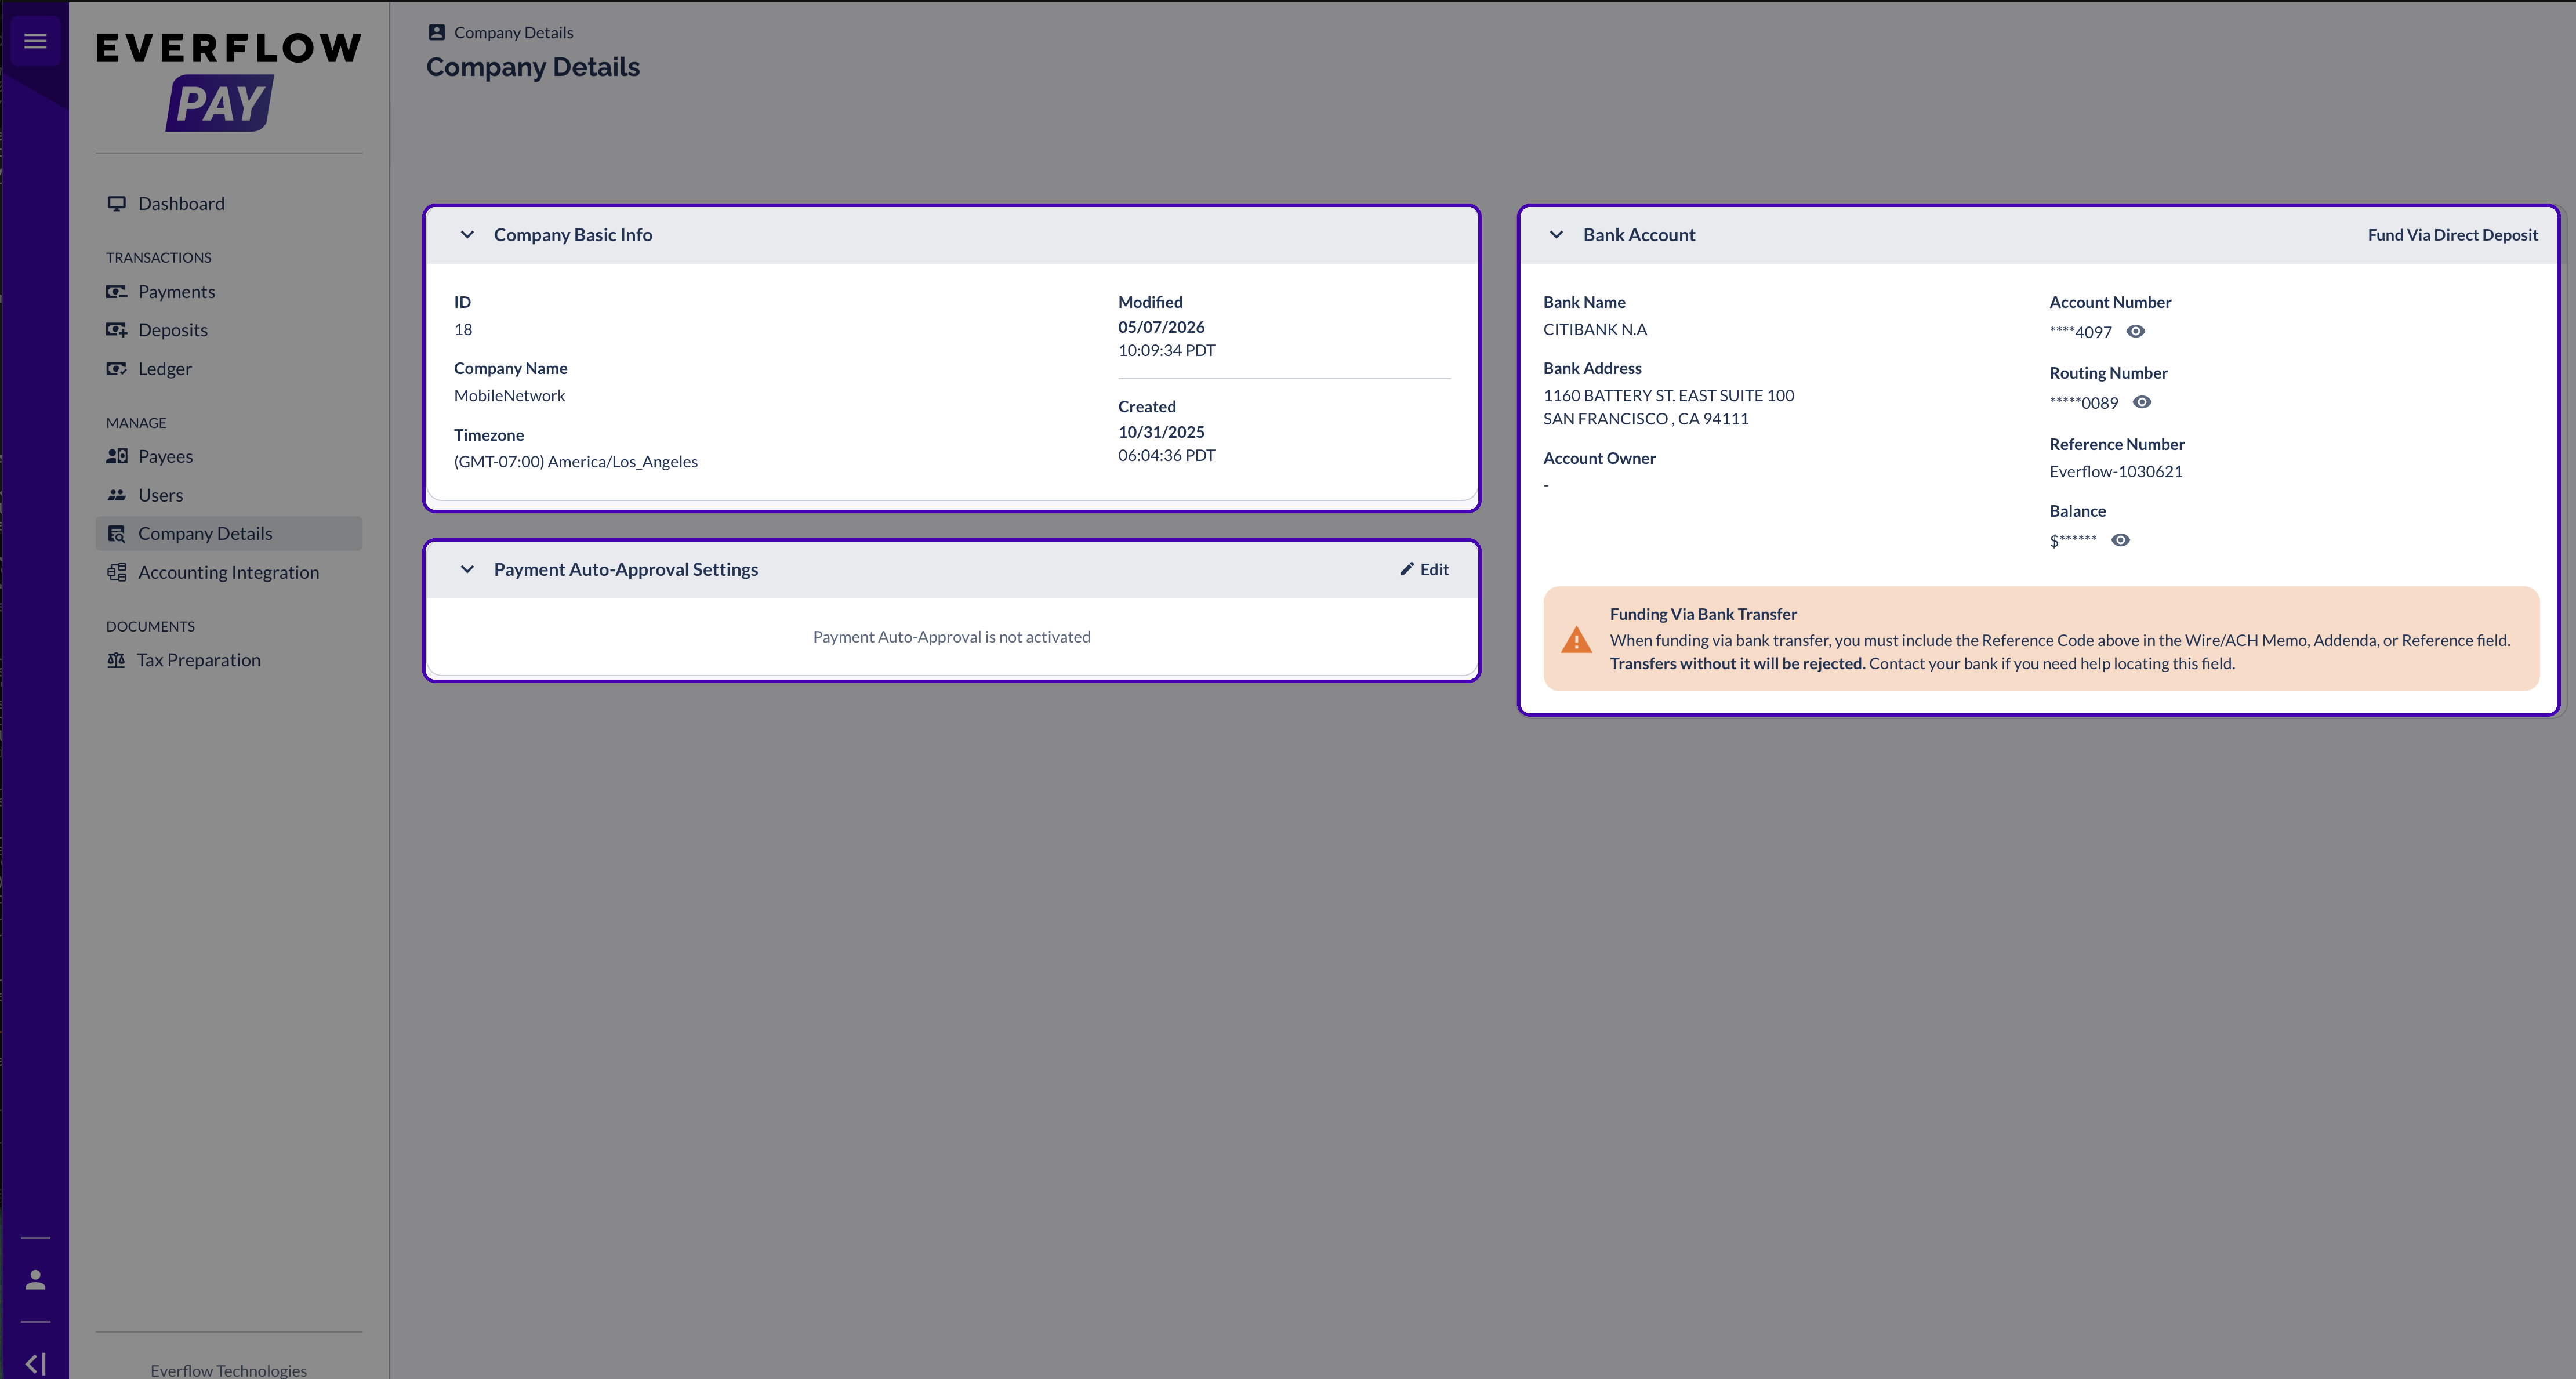
Auto-Approval is set up in the Everflow Pay platform, under your company settings. You decide three things: whether it is on, which payees it applies to, and whether payments wait through a delay before they are released. Once it is active, eligible payments are approved and paid out for you, and you are notified by email each time.
Setting Up Auto-Approval
You set up Auto-Approval from your company settings in Everflow Pay. The whole flow lives on one settings page.
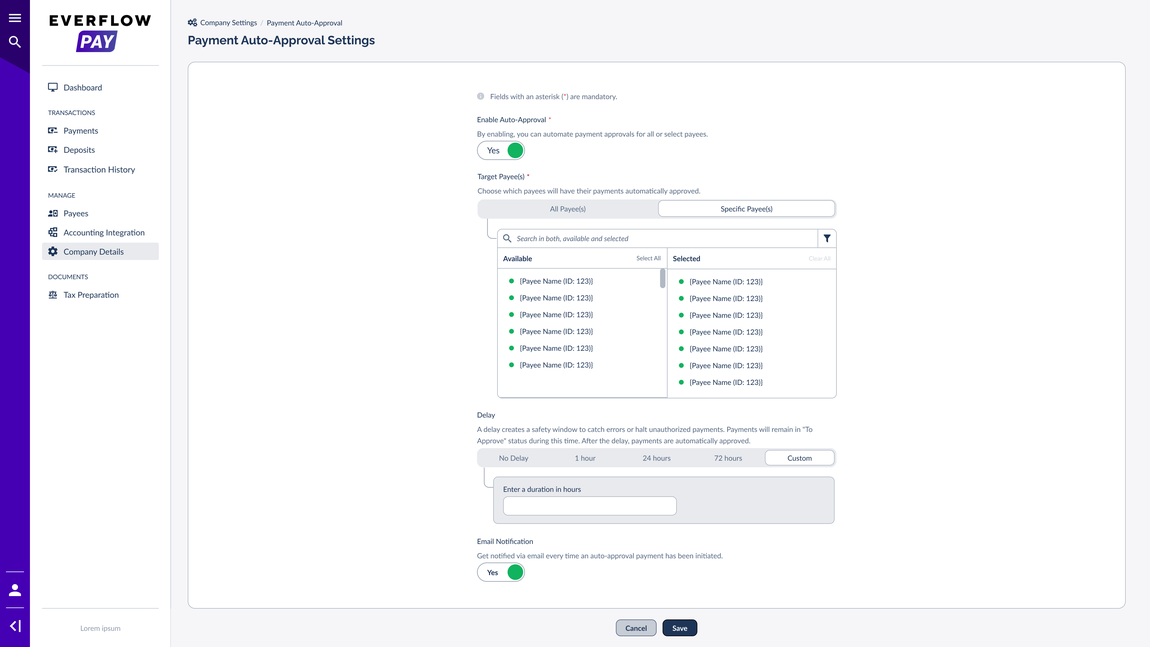
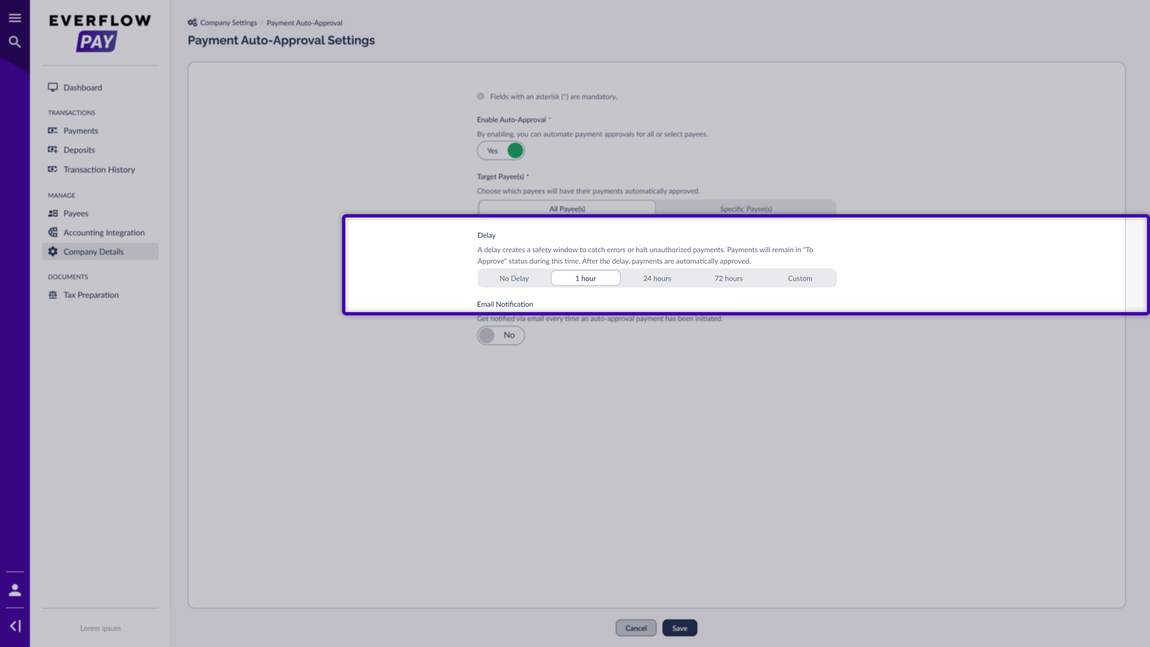
Set No Delay and payments approve and release right away. Set a delay, for example 24 hours, and every auto-approved payment sits in To Approve for a full day first. That gives you a window to catch a mistake or stop an unexpected payment before any money moves. If nothing is touched, the payment releases automatically when the delay ends.
How Auto-Approval Behaves Day to Day
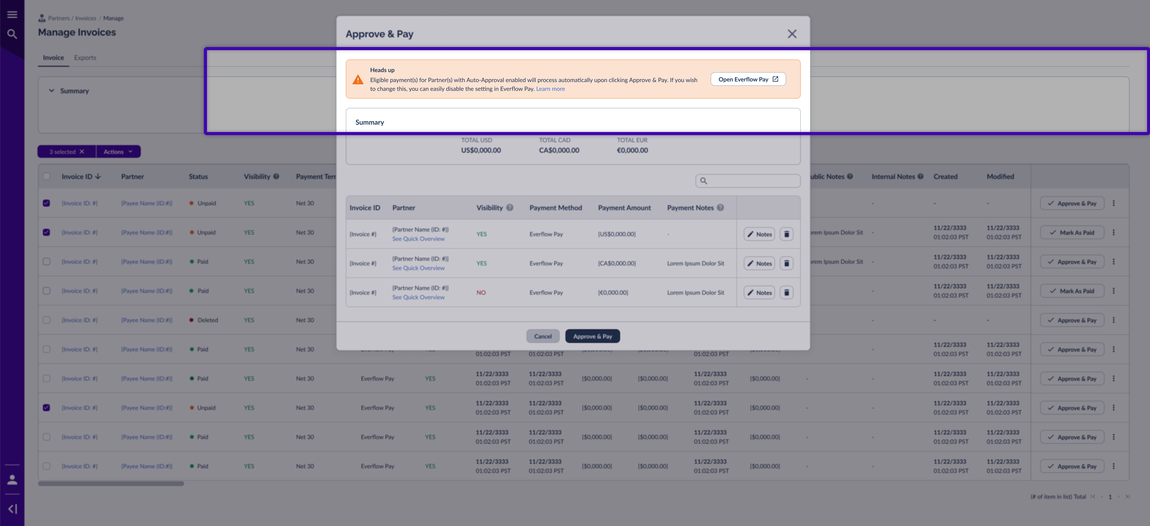
Auto-Approval also works alongside the payout tools in the Core Platform. On the
When you bulk approve, any Partner who has Auto-Approval enabled in Everflow Pay will have their eligible payments process automatically. Everflow Pay shows a heads-up so you know this before you confirm.
Verify and Track Auto-Approved Payments
After you save, a few things update in the Everflow Pay platform so you can keep an eye on what is being approved for you.
Your dashboard
Your dashboard’s Payments Requiring Attention area shows what still needs a look — To Approve, Awaiting Funds, and Rejected. Payments that auto-approve release on their own, so anything left in To Approve is still waiting on you.

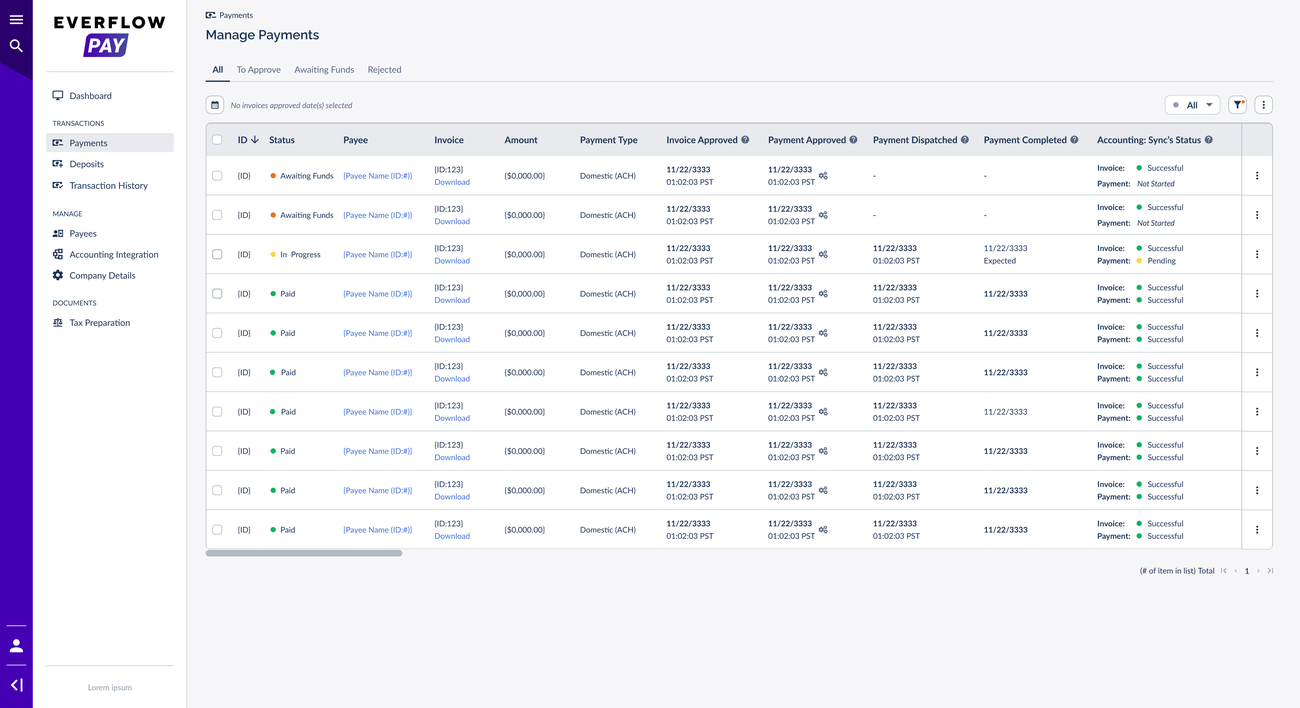
The Payments page
On the Payments page, you can follow each auto-approved payment through its statuses, the same way you track any other payment.
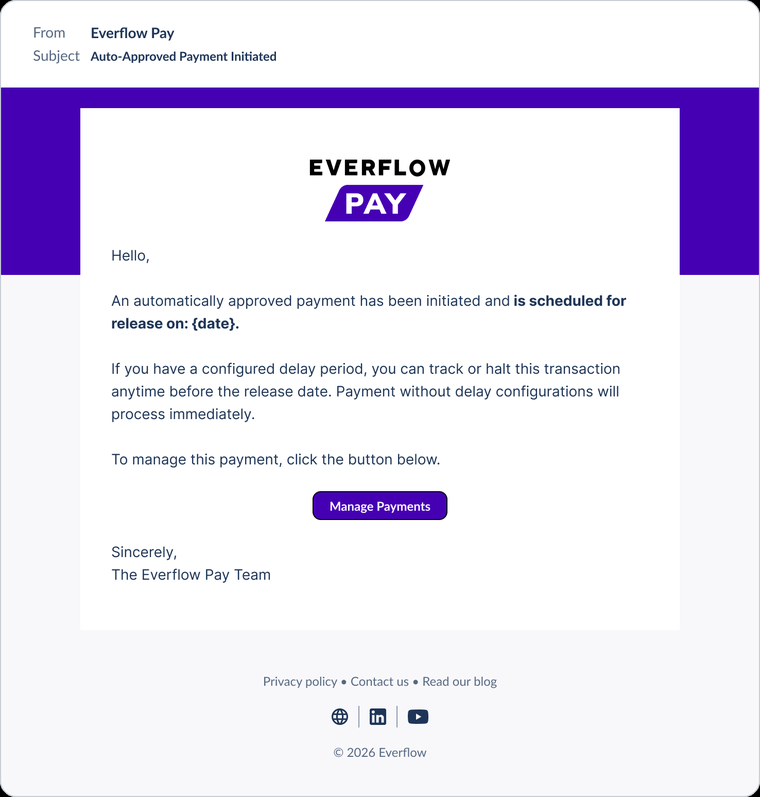
Email alerts
If you turned on email alerts, you will get an Auto-Approved Payment Initiated email each time. It includes the scheduled release date, and if you set a delay, a link to review or stop the payment before it goes out.
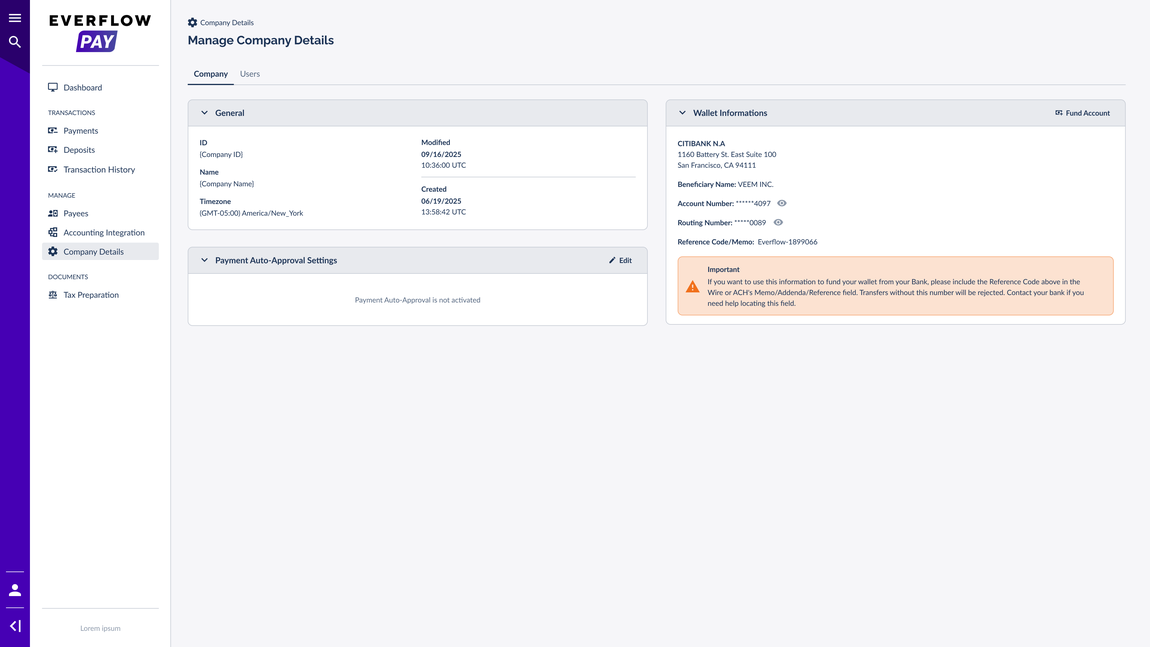
Managing or Turning Off Auto-Approval
You can change your settings any time. In the Everflow Pay platform, go back to
If you set a delay, you can also stop a single scheduled payment before its release date from the Payments page while it is still in To Approve.
Frequently Asked Questions
The delay is a safety window. During it, auto-approved payments stay in To Approve so you can review them or stop them before any money moves. After the delay ends, they release automatically. Choose No Delay if you want payments to release right away.
Yes. Under Target Payees, choose Specific Payees and select exactly which ones should have their payments approved automatically. Everyone else keeps the manual approval flow.
A payment only auto-approves when every condition is met. If one wasn’t, it stays in the manual flow. The usual reasons:
If you set a delay, the payment stays in To Approve until the delay ends. While it is in that status, you can review or stop it from the Payments page, or use the link in the Auto-Approved Payment Initiated email, before its release date.
If you turn on Email Notification in the settings, you will get an email every time an auto-approved payment is initiated, including its scheduled release date.
Yes. Go to Company Details in the Everflow Pay platform, click Edit on the Payment Auto-Approval Settings card, and turn it off or adjust which payees it applies to.
→ Sending Payments From Everflow To Everflow Pay the manual two-step approval flow that Auto-Approval automates.
→ Processing Partner Payments how Partner payouts work end to end.
→ Funding Your Everflow Pay Account via Bank Debit keep your balance topped up so payments can go out.


