
➔ Conversion Tracking: Records when a visitor makes a purchase.
➔ Customer Event Pixels (CEP): Shopify's modern technology that captures customer actions in real-time.
➔ Reconciliation: Matches sales to the correct affiliate / partner, even without cookies.
Overview
The Everflow Shopify integration automatically connects your Shopify store to track affiliate marketing performance. It monitors when customers click on affiliate links and make purchases, giving you complete visibility into which partners are driving sales.

Quick Reminder:
- You can connect multiple Shopify stores to one Everflow account
- Each Shopify store can only connect to one Everflow account at a time
- You must select an Advertiser for each integration
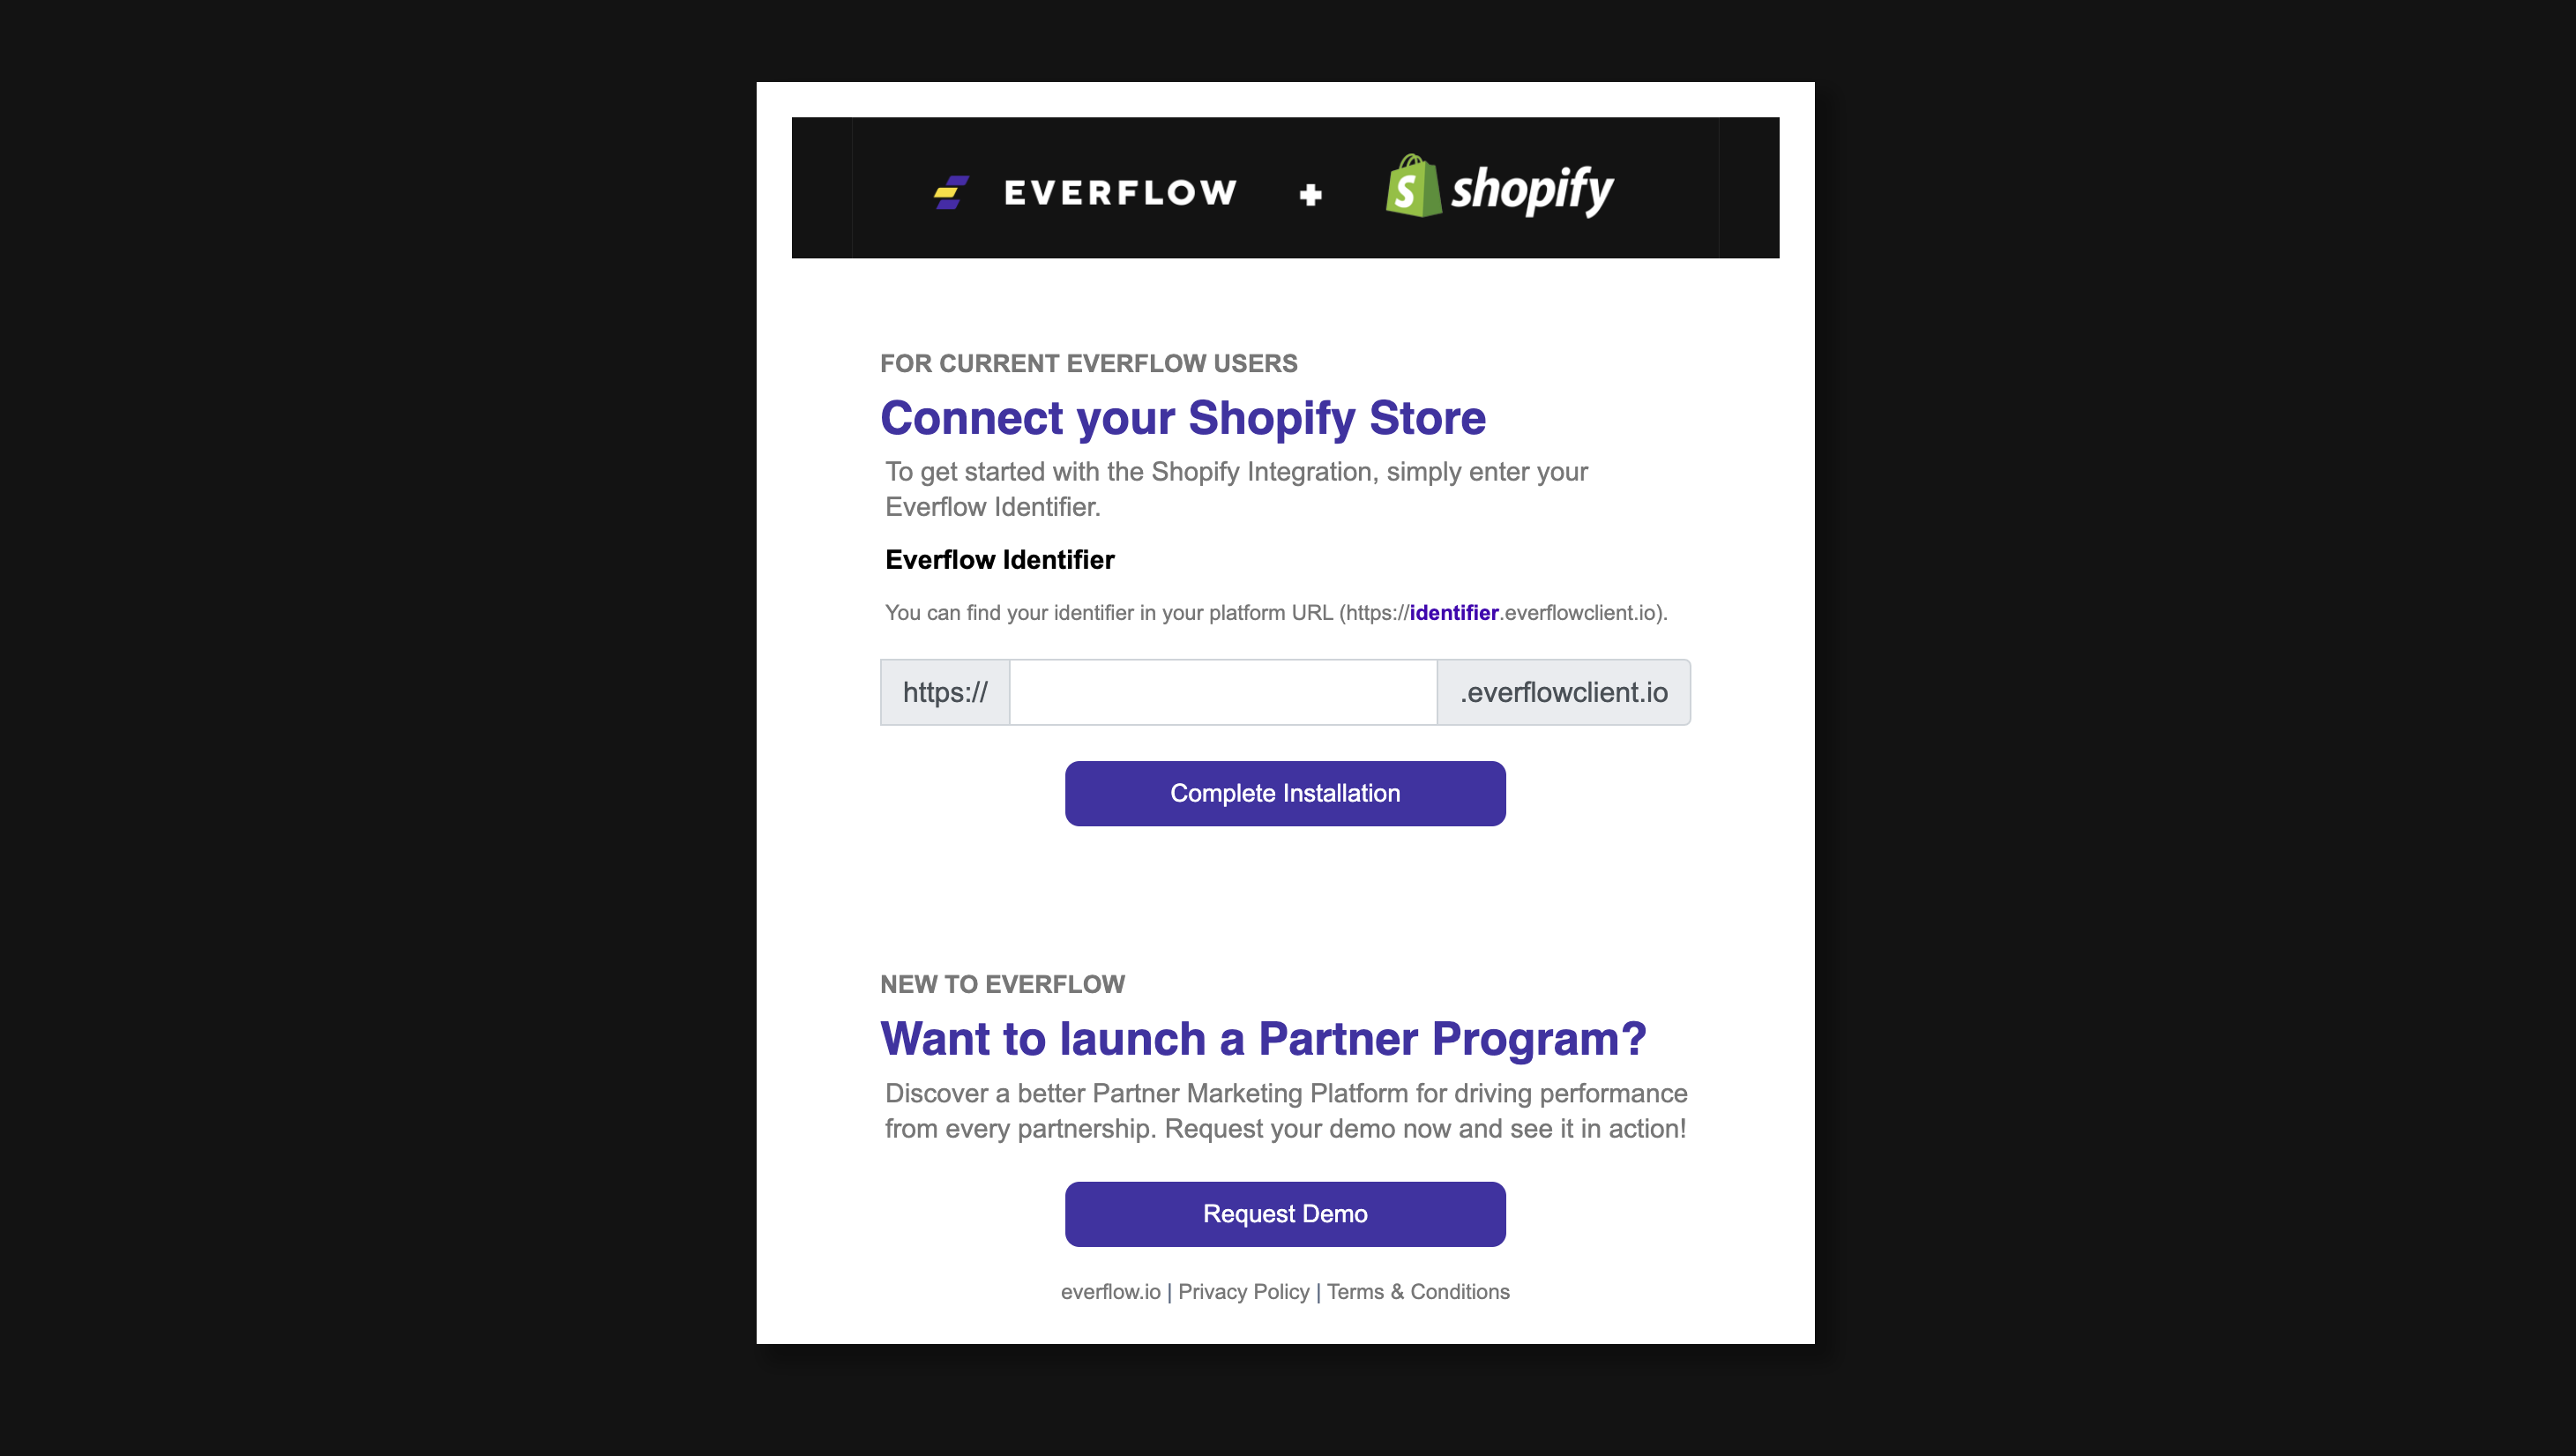
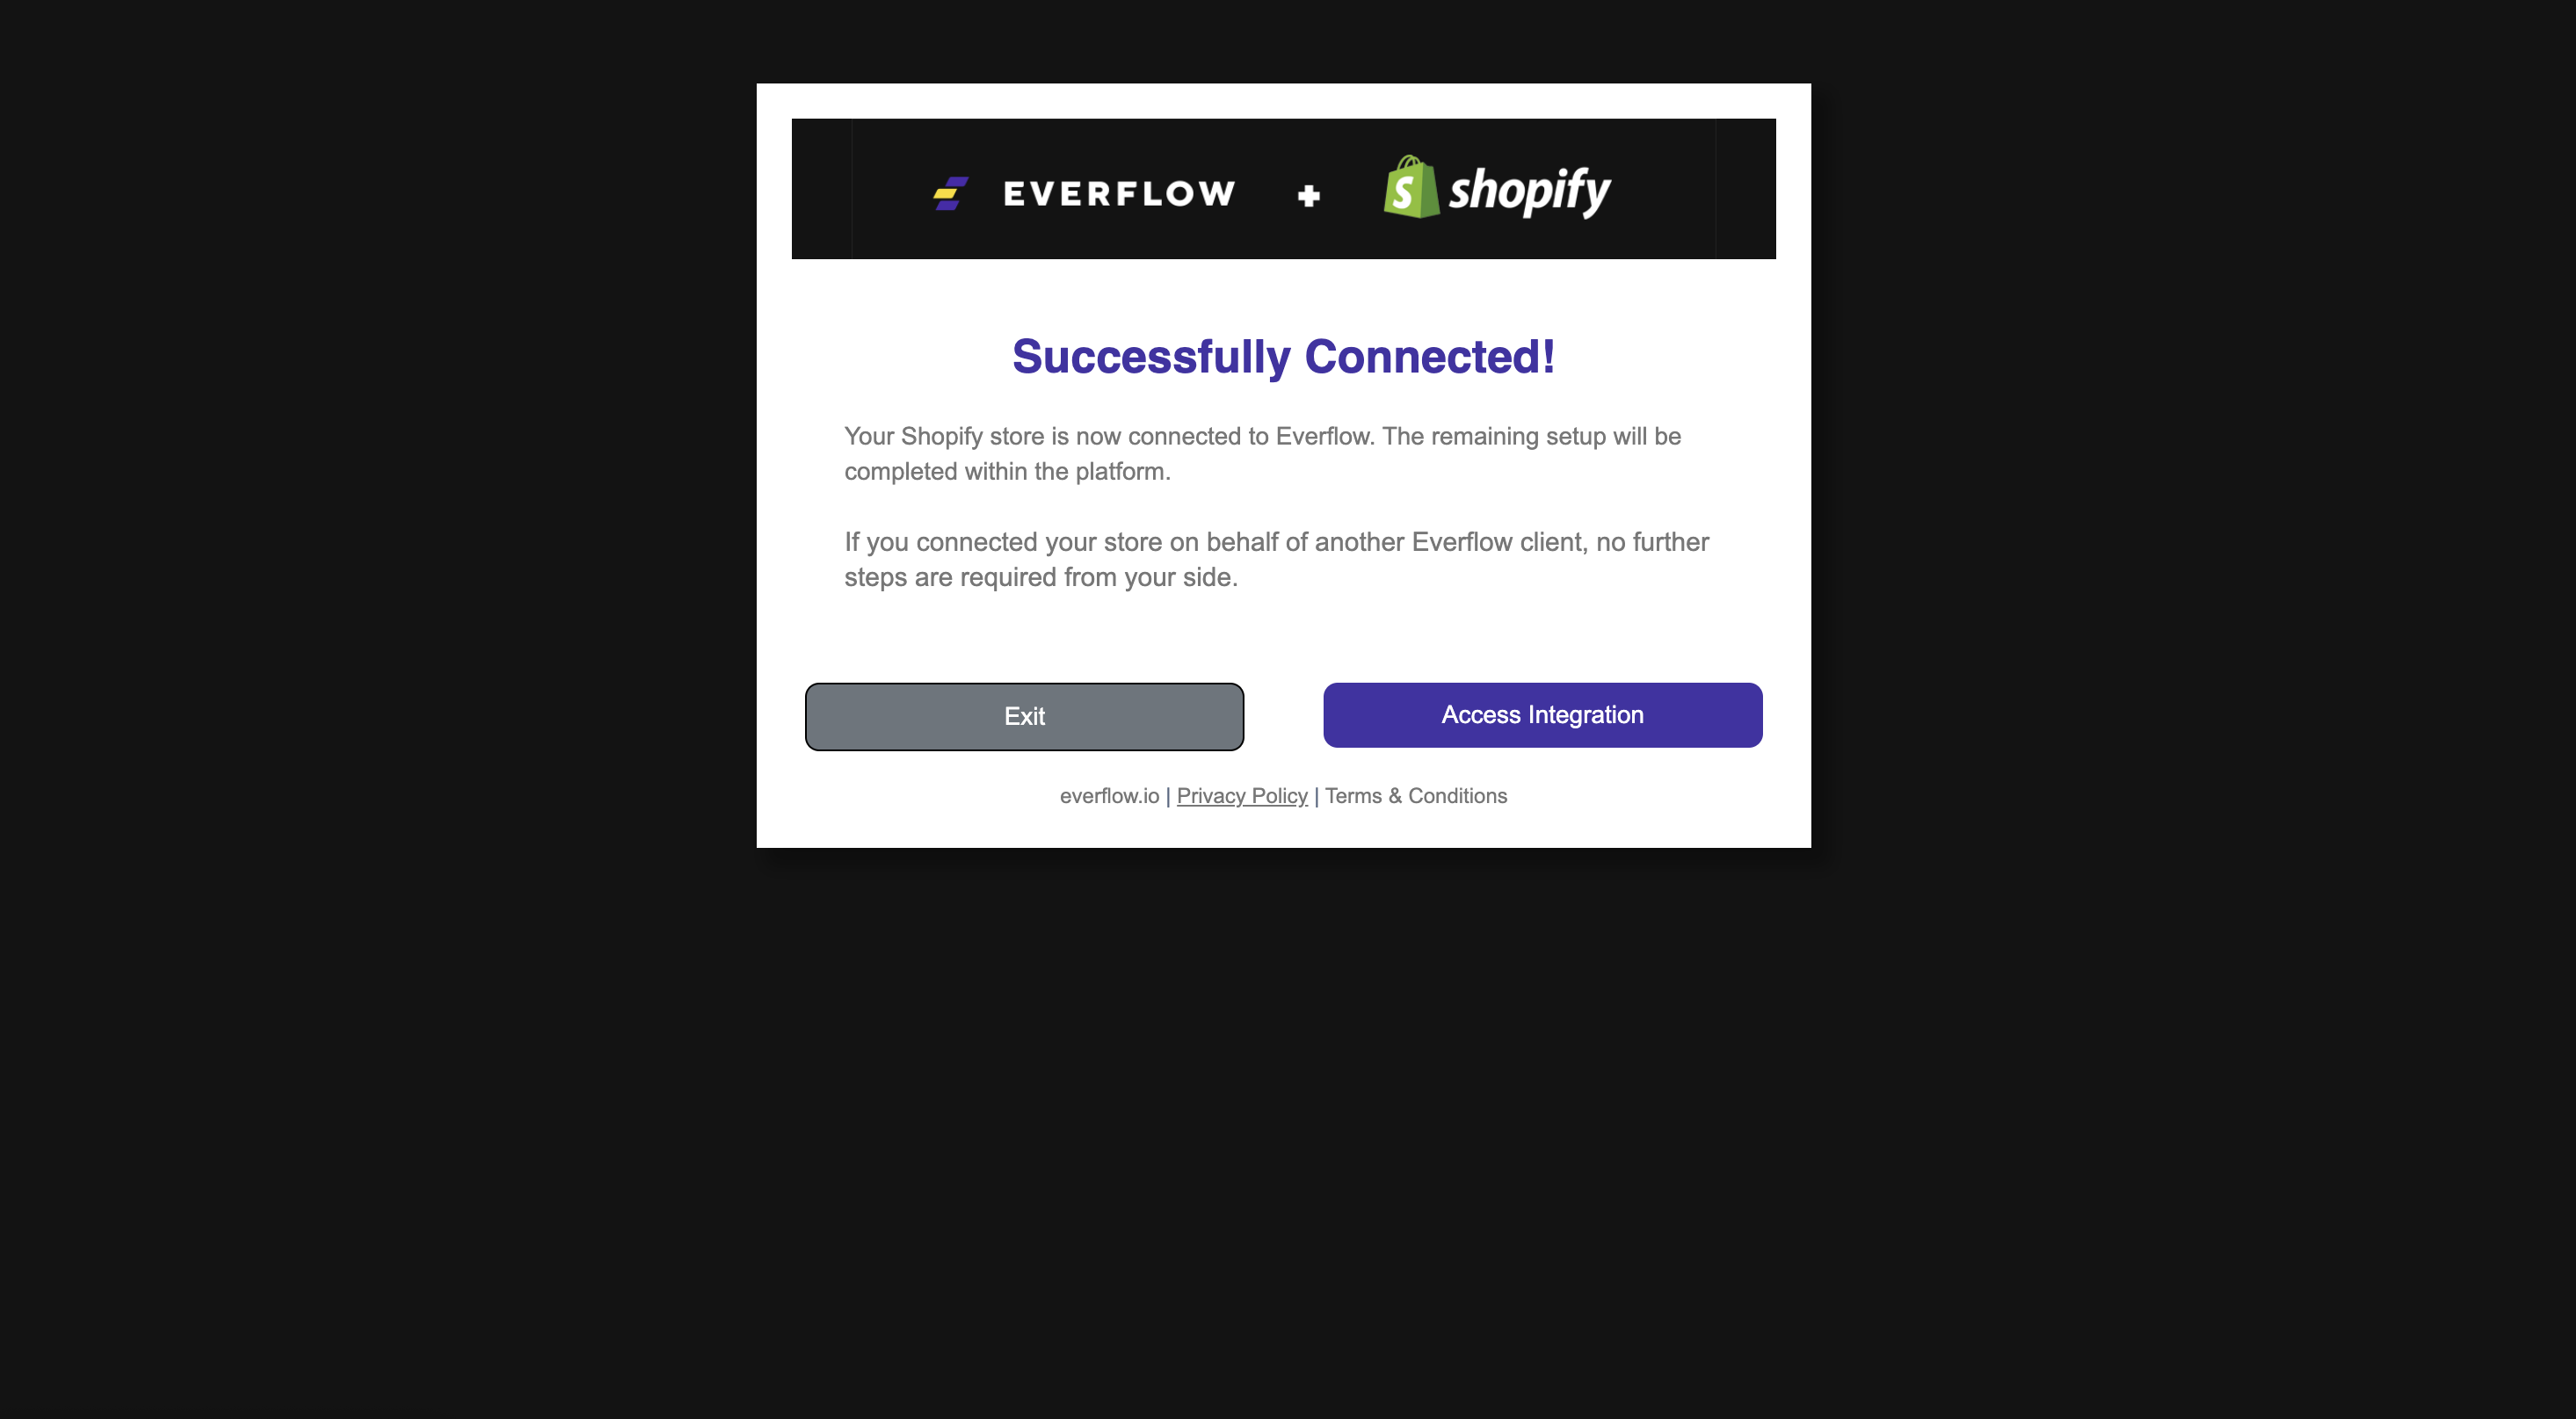
Installation Steps
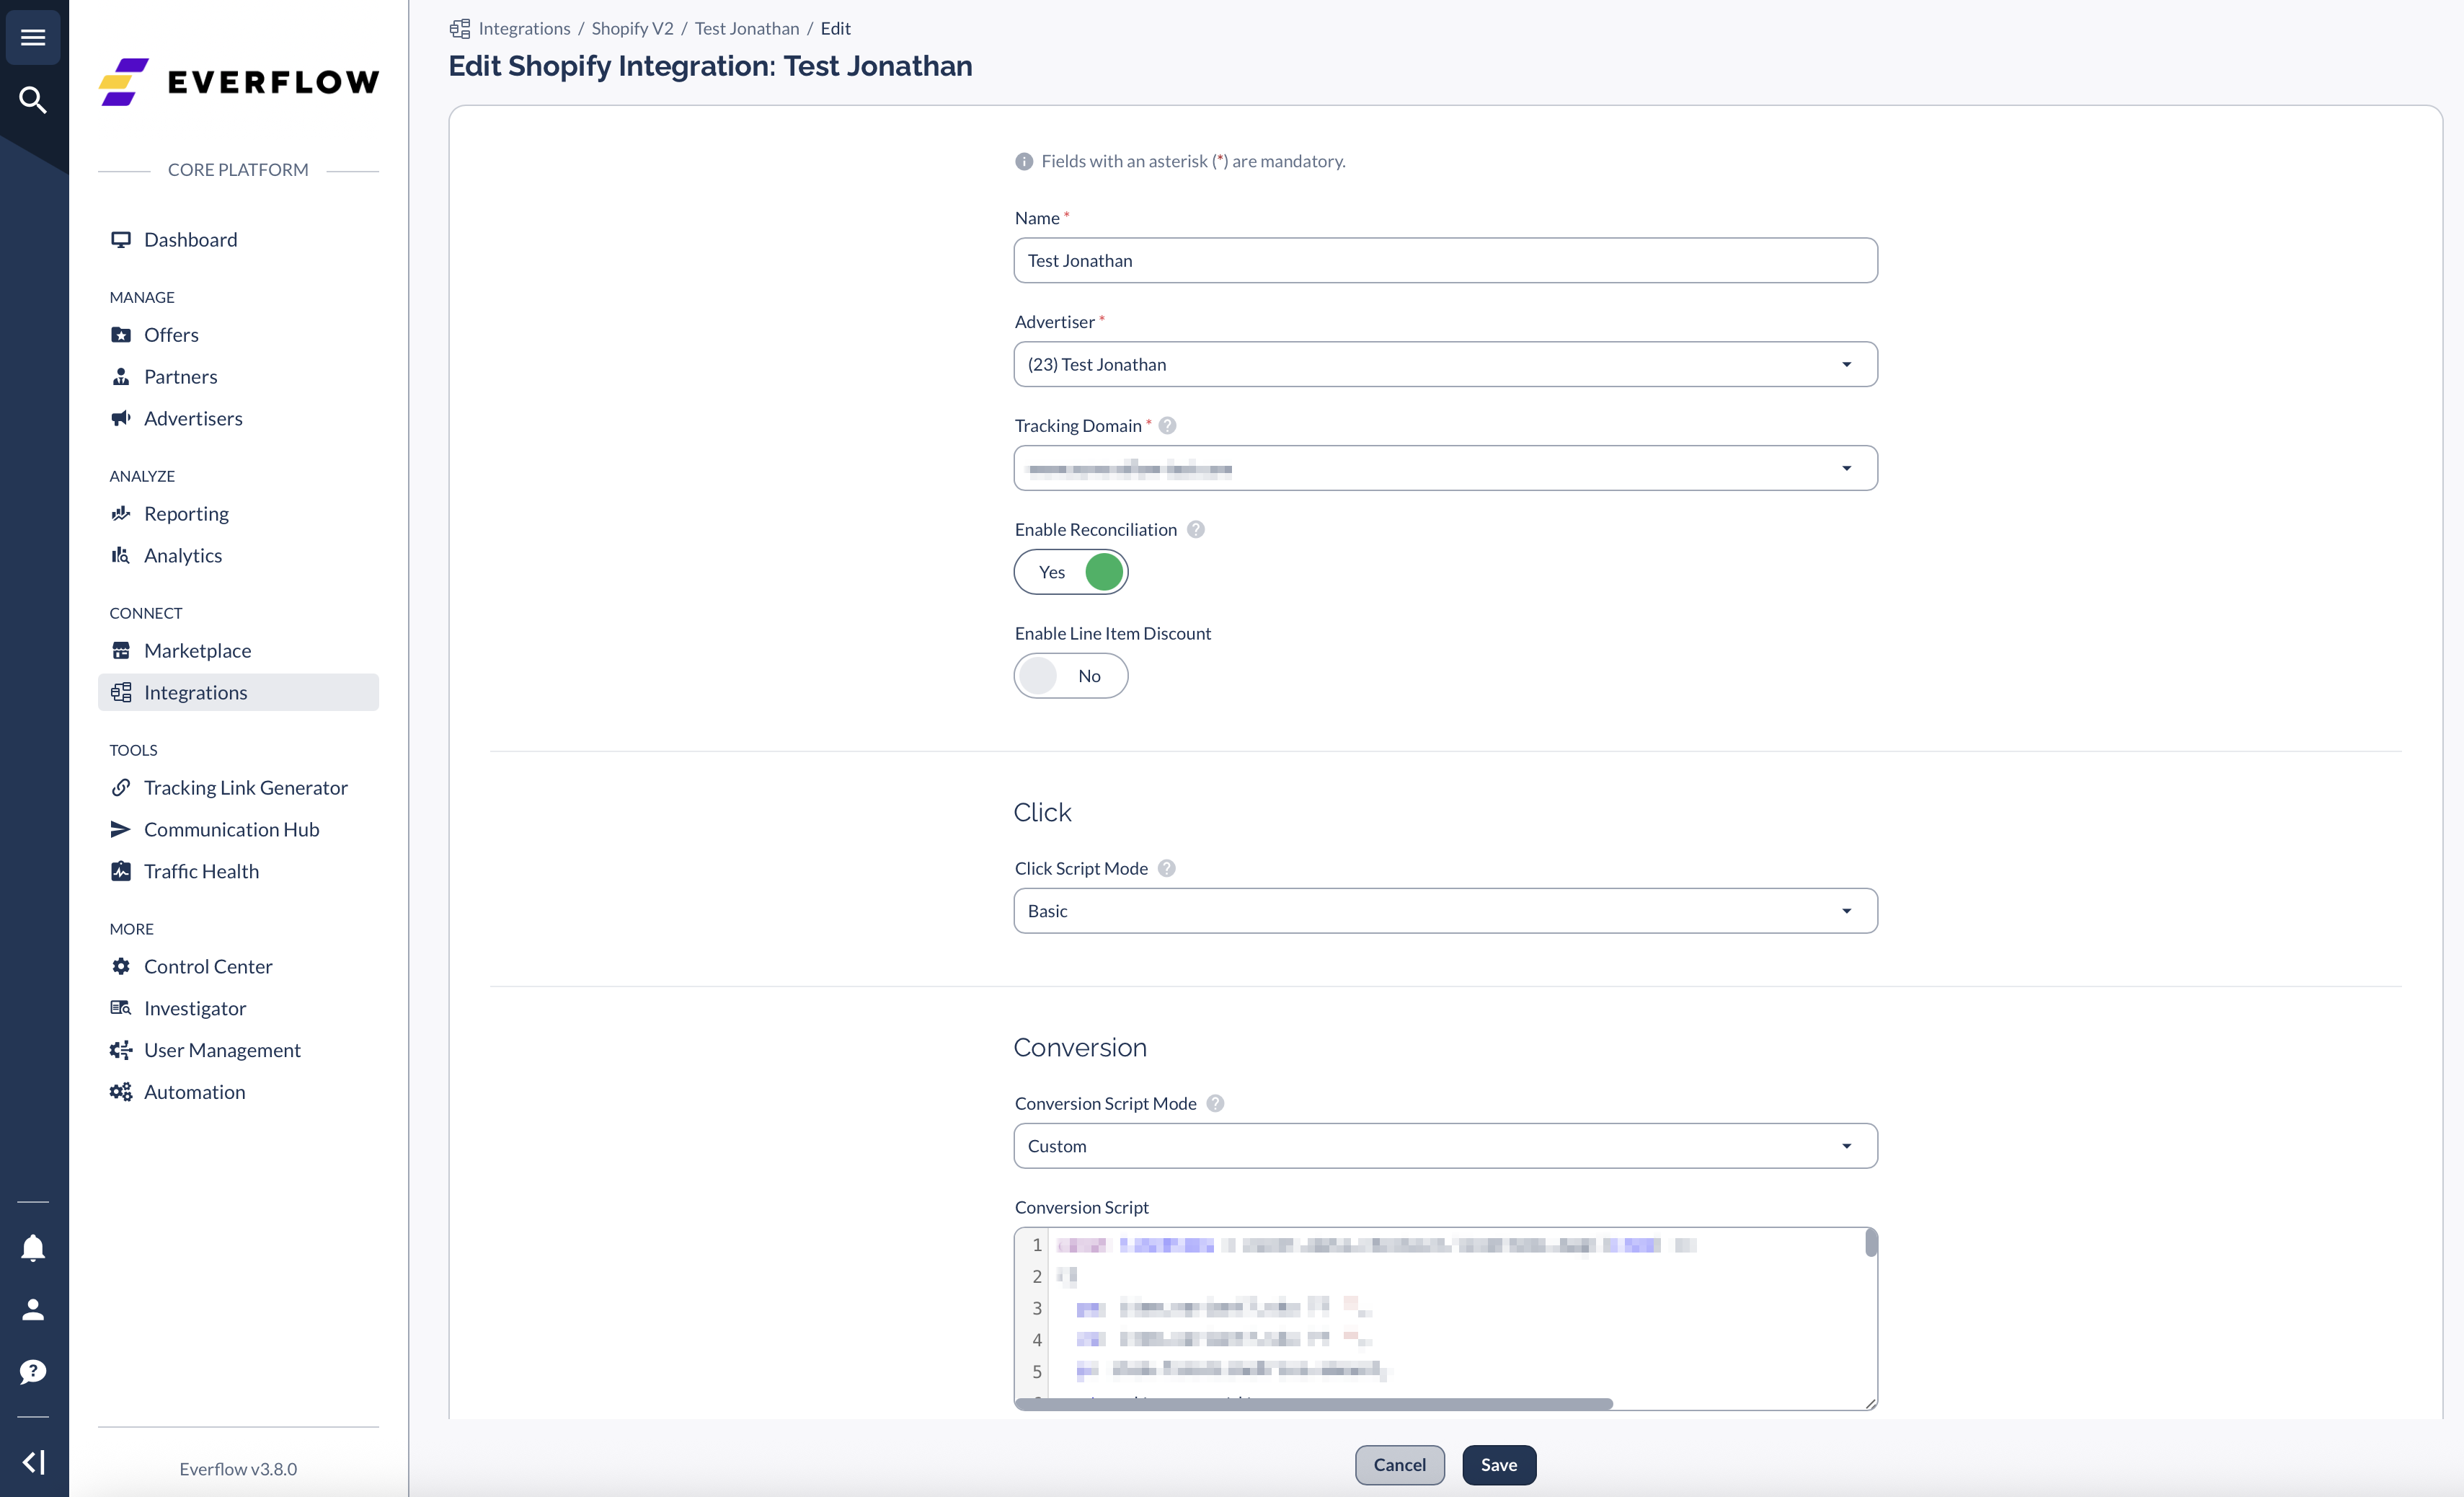
Configuration Settings
Basic Settings
- Name: Identify your integration (required)
- Advertiser: Select which advertiser this store represents (required)
- Tracking Domain: Choose your Everflow tracking domain (we recommend using the default)
Tracking Options
Basic Scripts (Recommended)
The app automatically installs these default tracking scripts:
Click Script:
EF.click({
    offer_id: EF.urlParameter("oid"),
    affiliate_id: EF.urlParameter("affid"),
    transaction_id: EF.urlParameter("_ef_transaction_id"),
    sub1: EF.urlParameter("sub1"),
    sub2: EF.urlParameter("sub2"),
    sub3: EF.urlParameter("sub3"),
    sub4: EF.urlParameter("sub4"),
    sub5: EF.urlParameter("sub5"),
    uid: EF.urlParameter("uid"),
    source_id: EF.urlParameter("source_id"),
    creative_id: EF.urlParameter("creative_id"),
    coupon_code: EF.urlParameter("__cc"),
  }).then((x) => {
  });
Conversion Script:
var order = {
  oid: checkout.order.id,
  amt: checkout.subtotalPrice.amount,
  bs: checkout.shippingAddress?.province ?? "",
  bc: checkout.shippingAddress?.country ?? "",
  cc: checkout.discountApplications.find((discount) => discount.type === "DISCOUNT_CODE")?.title ?? "",
  items: [],
};
event.data.checkout.lineItems.forEach(function (items) {
    var item = {
    };
    item["ps"] = items.variant.sku;
    item["p"] = items.finalLinePrice.amount;
    item["qty"] = items.quantity;
    item["ds"] = items.discount_allocations && items.discount_allocations.length > 0 ? items.discount_allocations[0].amount : 0;
    order.items.push(item);
  });
var eftid = "";
if (checkout.attributes) {
  for (var i = 0;
    i < checkout.attributes.length;
    i++) {
    if (checkout.attributes[i].key === "eftid") {
      eftid = checkout.attributes[i].value;
      break;
    }
  }
}EF.conversion({
    transaction_id: eftid,
    advertiser_id: integrationSettings.advertiserId.toString(),
    amount: event.data.checkout.subtotalPrice.amount,
    email: event.data.checkout.email,
    adv1: EF.urlParameter("adv1"),
    adv2: EF.urlParameter("adv2"),
    adv3: EF.urlParameter("adv3"),
    adv4: EF.urlParameter("adv4"),
    adv5: EF.urlParameter("adv5"),
    order_id: checkout.order.id,
    order,
  }).then((x) => {
  });
Organic Click Tracking
The standard Everflow organic tracking format does not work with the Shopify integration. To track organic (non-affiliate) traffic, use this modified click script instead. It detects visitors who arrive without an affiliate link and attributes them to your designated organic Offer and Partner.
browser.cookie.get("ef_witness").then(witness => {
  let offer, affiliate;
  offer = EF.urlParameter("oid");
  affiliate = EF.urlParameter("affid");
  if (!witness && !(offer && affiliate)) {
    offer = ORGANIC_OFFER_ID;
    affiliate = ORGANIC_PARTNER_ID;
  }
  EF.click({
    offer_id: offer,
    affiliate_id: affiliate,
    transaction_id: EF.urlParameter("_ef_transaction_id"),
    sub1: EF.urlParameter("sub1"),
    sub2: EF.urlParameter("sub2"),
    sub3: EF.urlParameter("sub3"),
    sub4: EF.urlParameter("sub4"),
    sub5: EF.urlParameter("sub5"),
    uid: EF.urlParameter("uid"),
    source_id: EF.urlParameter("source_id"),
    creative_id: EF.urlParameter("creative_id"),
    coupon_code: EF.urlParameter("__cc")
  }).then(x => {});
});
Reconciliation Feature
What it does: Matches the Shopify Cart ID to the Everflow Transaction ID to ensure accurate affiliate tracking, even when cookies are lost during checkout, when customers switch devices, or when browser data is cleared.
Settings:
- Toggle to enable/disable
- Built-in email attribution (works automatically)
- Uses checkout_token for better tracking
- Optional line item discount settings
Testing Your Integration
Steps:
- Enable Direct Linking in your Offer's Tracking & Controls section
- If you can't enable Direct Linking, add ?_ef_transaction_id={transaction_id} to your Default Landing Page URL
- Generate a tracking link for your Shopify offer
- Place a test order
- Check your reports to verify the data appears
This issue can be resolved by properly configuring the cookie banner. When a cookie banner is active in specific regions, data is collected from visitors from those regions only after obtaining consent. Without this, tracking capabilities may be limited in regions requiring explicit consent.
Learn more about Shopify privacy settings here.
Finding Your Data
Conversion Reports
Quick search: Use the search bar in the top-right of the Platform to find orders by Order ID.
Detailed reports:
To see reconciliation data:
Look for "Integration" in the Attribution Method column to identify reconciled conversions.
Refunds Report
Click here for more information.
Advanced Features
How the Integration Works (Technical Details)
For technical users: The integration uses Shopify's Customer Event Pixels (CEP) technology:
- Web Pixel Extension: Captures customer events in real-time
- Server-Side API: Automatically transfers data to Everflow when customers interact with your store
- Shopify CLI Technology: Built on modern, reliable tracking technology

Additional Event Tracking
Want to track more than just purchases? You can track additional Shopify events two ways — by appending an event subscription to your custom click script, or by setting up a Customer Event Pixel. Use whichever fits your setup:
Easier method (no Customer Event Pixel needed): If your click script is set to Custom, you can track additional Shopify events by appending an event subscription directly to your click script section in Everflow — there's no need to create a separate Customer Event Pixel.
Add the snippet below underneath your click script code. Replace SHOPIFY_EVENT with the Shopify event you want to track, AID with your Advertiser ID, and ADV_EVENT_ID with your Advertiser Event ID (must be Advertiser-level, not Offer-level):
analytics.subscribe('SHOPIFY_EVENT', (event) => {
  EF.conversion({
    aid: AID,
    adv_event_id: ADV_EVENT_ID,
  });
});
Example — tracking when a product is added to the cart:
analytics.subscribe('product_added_to_cart', (event) => {
  EF.conversion({
    aid: 1,
    adv_event_id: 2,
    adv1: 'Product Added to Cart',
  });
});
Replace SHOPIFY_EVENT with any of Shopify's standard web pixel events:
alert_displayedcart_viewedcheckout_address_info_submittedcheckout_contact_info_submittedcheckout_shipping_info_submittedcheckout_startedcollection_viewedpage_viewedpayment_info_submittedproduct_added_to_cartproduct_removed_from_cartproduct_viewedsearch_submittedui_extension_erroredFor the full list and event details, see Shopify's Standard Events documentation.
Prefer to use a Customer Event Pixel instead? You can still use the Customer Event method below.
For technical users who want to access additional data points from the checkout_completed event, you can view the complete list of available macros and data fields in Shopify's documentation.
➔ INSERT_ADVERTISER_EVENT_ID: Replace with your Advertiser Event ID (must be Advertiser-level, not Offer-level).
➔ INSERT_TRACKING_DOMAIN: Replace with your tracking domain.
Add to Cart Tracking:
analytics.subscribe("product_added_to_cart", (event) => {
    console.log("Everflow event tracking started");
    var script = document.createElement("script");
    script.onload = function () {
      var aid = INSERT_ADVERTISER_ID;
      var adv_event_id = INSERT_ADVERTISER_EVENT_ID;
      var eftid = EF.getAdvertiserTransactionId(aid);
      var data = {
        aid: aid,
        adv_event_id: adv_event_id,
        transaction_id: eftid,
      };
      EF.conversion(data).then((result) => {
          console.log(result);
        });
    };
    script.src = "https://www.INSERT_TRACKING_DOMAIN.com/scripts/sdk/everflow.js";
    script.async = true;
    document.head.appendChild(script);
});Checkout Started Tracking:
analytics.subscribe("checkout_started", (event) => {
    console.log("Everflow event tracking started");
    var script = document.createElement("script");
    script.onload = function () {
      var aid = INSERT_ADVERTISER_ID;
      var adv_event_id = INSERT_ADVERTISER_EVENT_ID;
      var eftid = EF.getAdvertiserTransactionId(aid);
      var data = {
        aid: aid,
        adv_event_id: adv_event_id,
        transaction_id: eftid,
      };
      EF.conversion(data).then((result) => {
          console.log(result);
        });
    };
    script.src = "https://www.INSERT_TRACKING_DOMAIN.com/scripts/sdk/everflow.js";
    script.async = true;
    document.head.appendChild(script);
  });
The checkout_started event behaves differently depending on your store setup. With Checkout Extensibility, it triggers every time someone enters checkout. Without it, it only triggers the first time.
Frequently Asked Questions
Need Help?
For custom event setup or complex migrations, our Customer Success team is here to help. Contact them with your specific requirements and any existing scripts you need to migrate.
Tracking New vs. Returning Customers
Shopify exposes an isFirstOrder value that lets you distinguish first-time buyers from returning customers. There are two common ways to use it.
Option 1: Pass First-Order Status in an Adv Parameter
To record whether each order is a customer's first purchase, set one of your isFirstOrder value in your conversion script. For example, to pass the true/false value in
adv1: event.data.checkout.order.customer.isFirstOrder,Option 2: Track Returning Customers as a Separate Event
If you want first-time purchases recorded as your base conversion and returning purchases recorded as a separate event, check isFirstOrder in your conversion script and attach a returning-customer Advertiser Event ID only when the order is not the customer's first:
var firstOrder = event.data.checkout.order.customer.isFirstOrder;
// ...build your conversion data object as usual... if (!firstOrder) {
  data.adv_event_id = RETURN_CUSTOMER_ADV_EVENT_ID;
}

