Overview
This guide covers how to set up Everflow tracking with Shopify's new Checkout Extensibility framework.
By implementing this integration, you'll be able to capture Shopify events as Offer Events, including:
- Product added to cart
- Checkout started / Checkout completed
- [Other key events]
This is a perfect fit if you want to have a complete picture of your customer journey across all channels and Partner types by tracking your Shopify Customer Events in Everflow.
A How-To Guide
Step 1a: Integrate with Shopify (RECOMMENDED)
- Before following the guide below, configure your Shopify app and enable the click script - [Click Here]
Step 1b: Place Click Script in a theme.liquid with Shopify (NOT RECOMMENDED but possible)
- From your Shopify admin, go to Online Store > Themes.
- Click ... > Edit code.
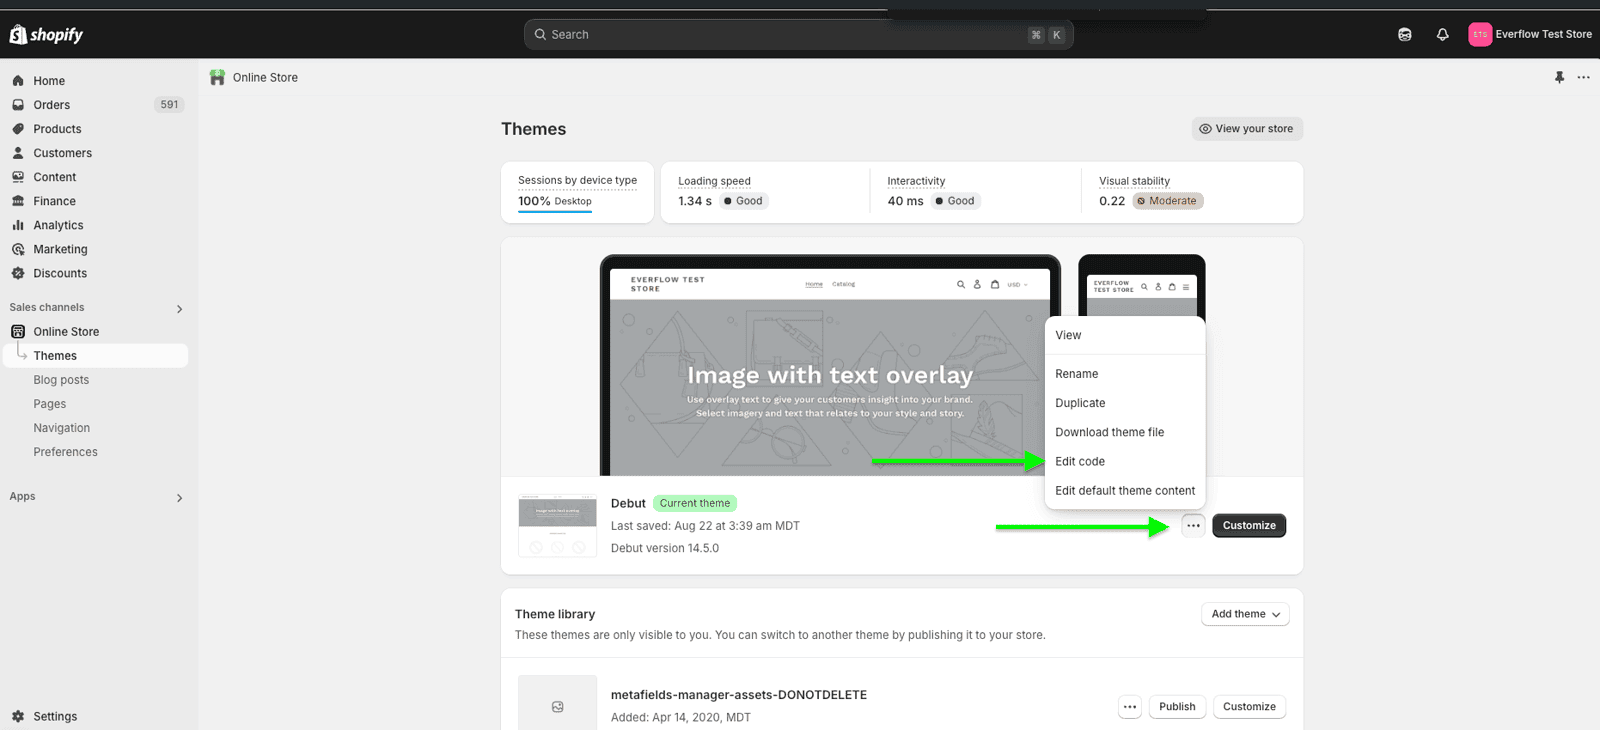
- When you click a file in the directory on the left, it opens in the code editor.
- Open theme.liquid and place the click script below.
- Replace TRACKING_DOMAIN with your tracking domain.
- Save to ensure the file is successfully saved on the store.
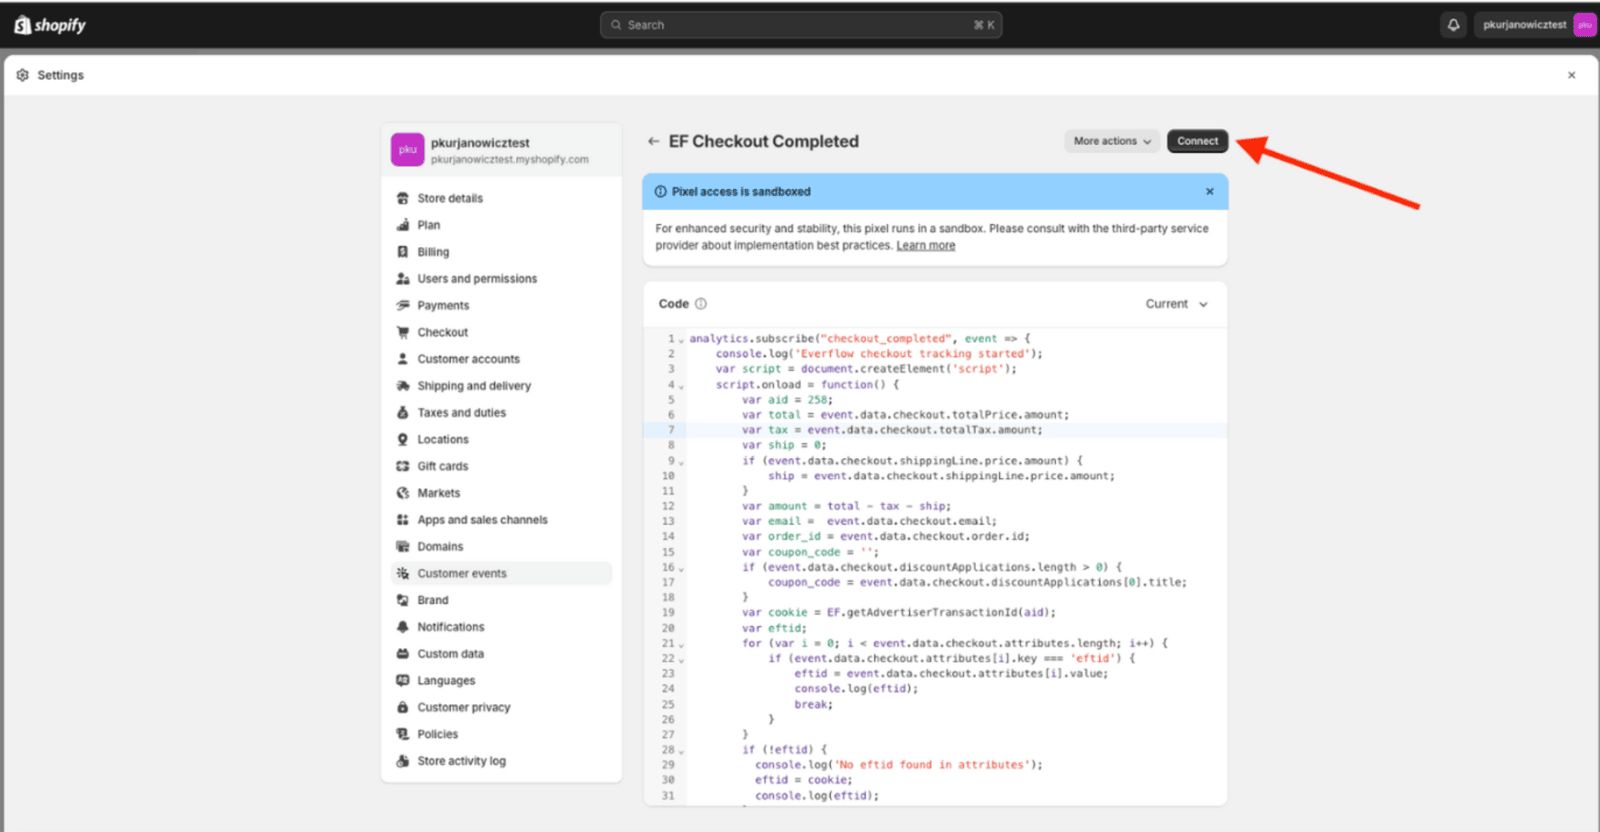
Step 2: Add a Customer Event Pixel
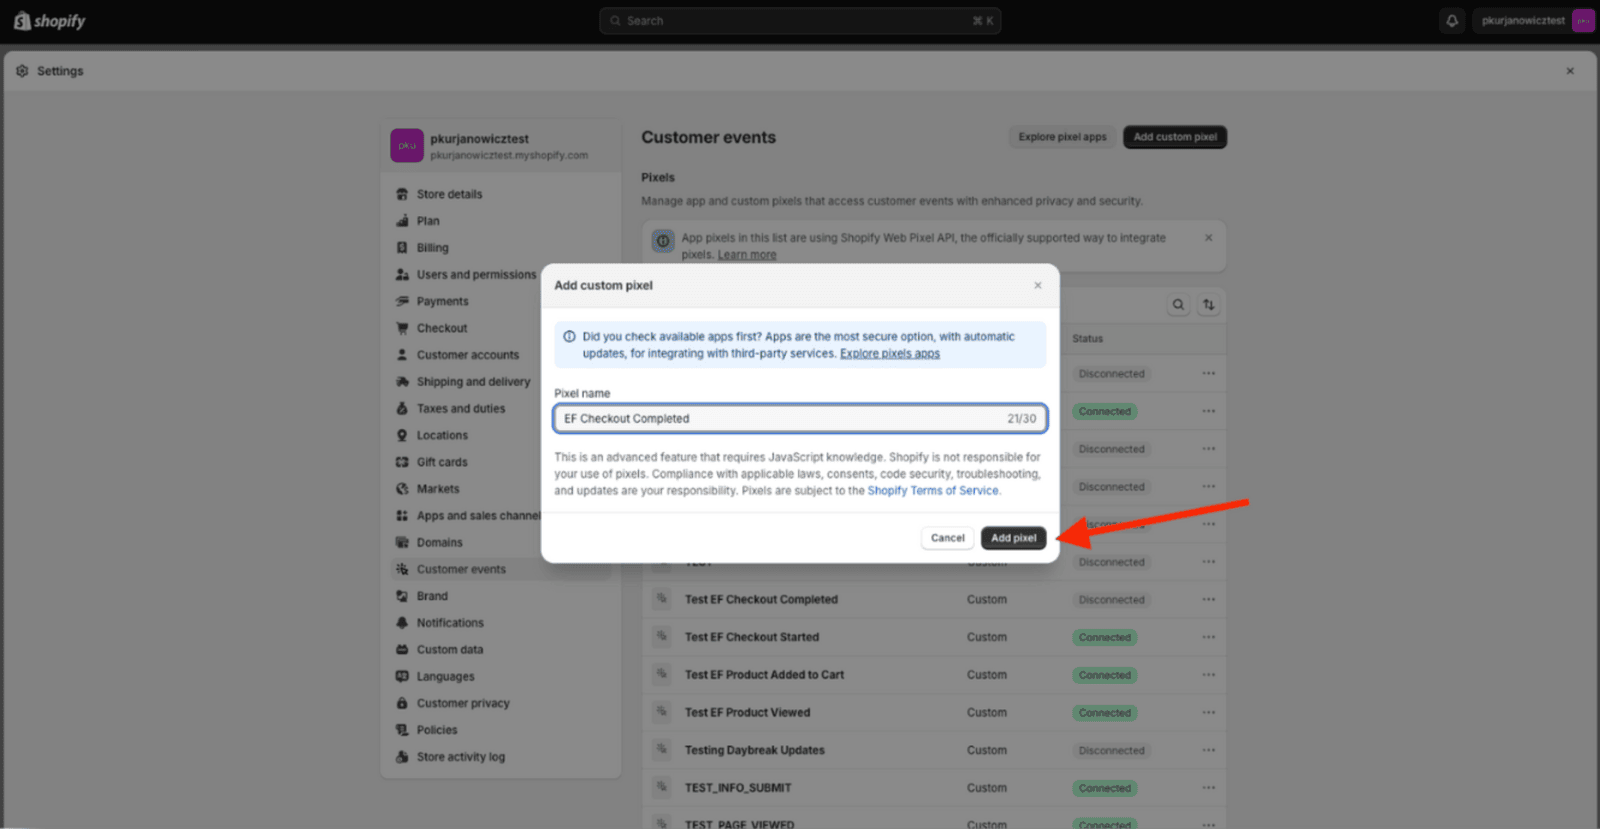
- Navigate to Settings > Customer Events > Add Custom Pixel.
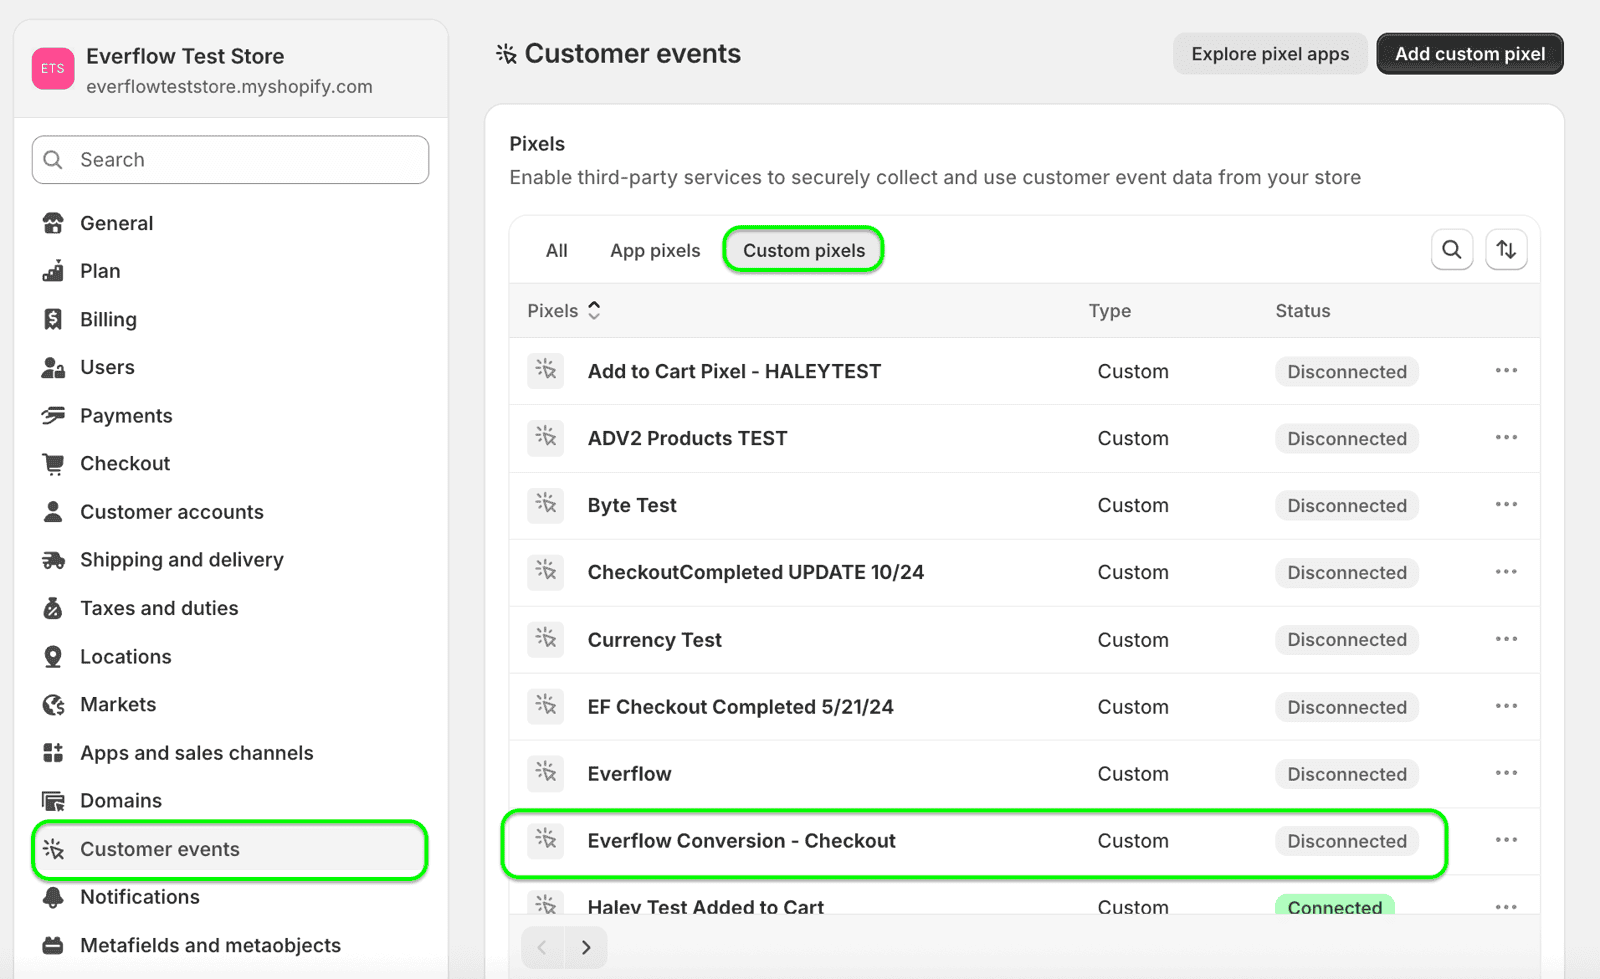
- Name the pixel and click Add Pixel.
Paste the following script, replacing INSERT_ADVERTISER_ID with the advertiser ID associated with the advertiser for this Shopify integration, and INSERT_TRACKING_DOMAIN with the tracking domain from your Everflow account:
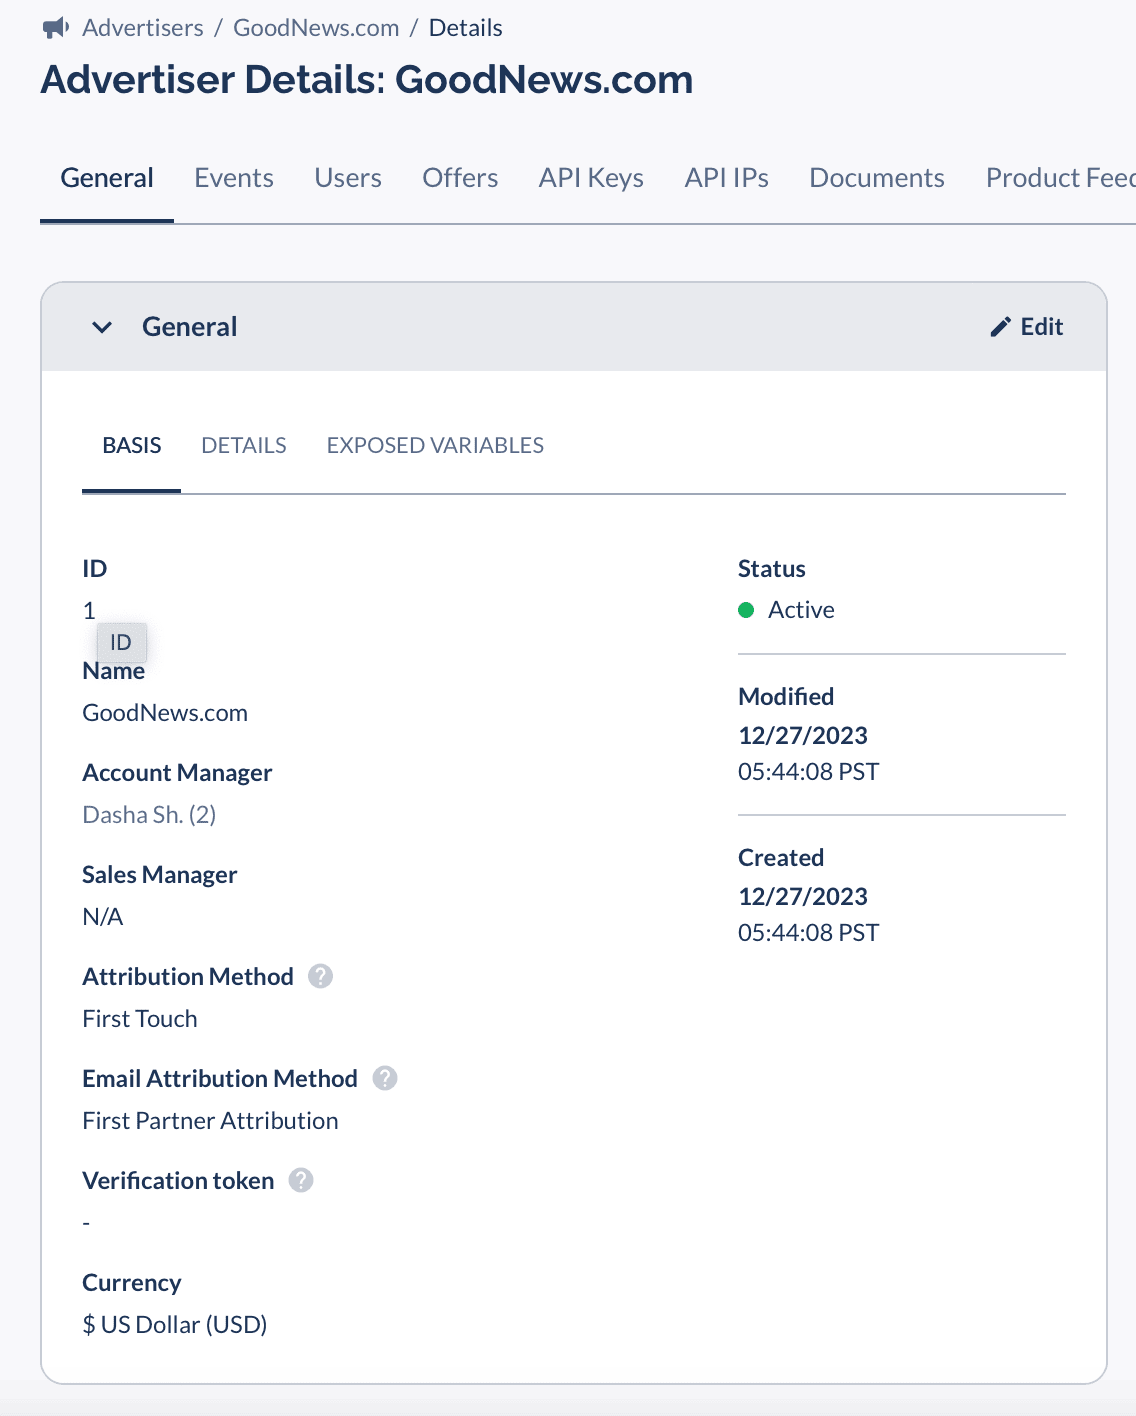
Finding Advertiser ID
- To find an Advertiser ID, navigate to Advertisers - Manage and select an Advertiser associated with your Shopify account
- To find your Tracking Domain, navigate to Control Center - Platform Configurations - Domains tab.
- Click Save to apply the changes, then click Connect.
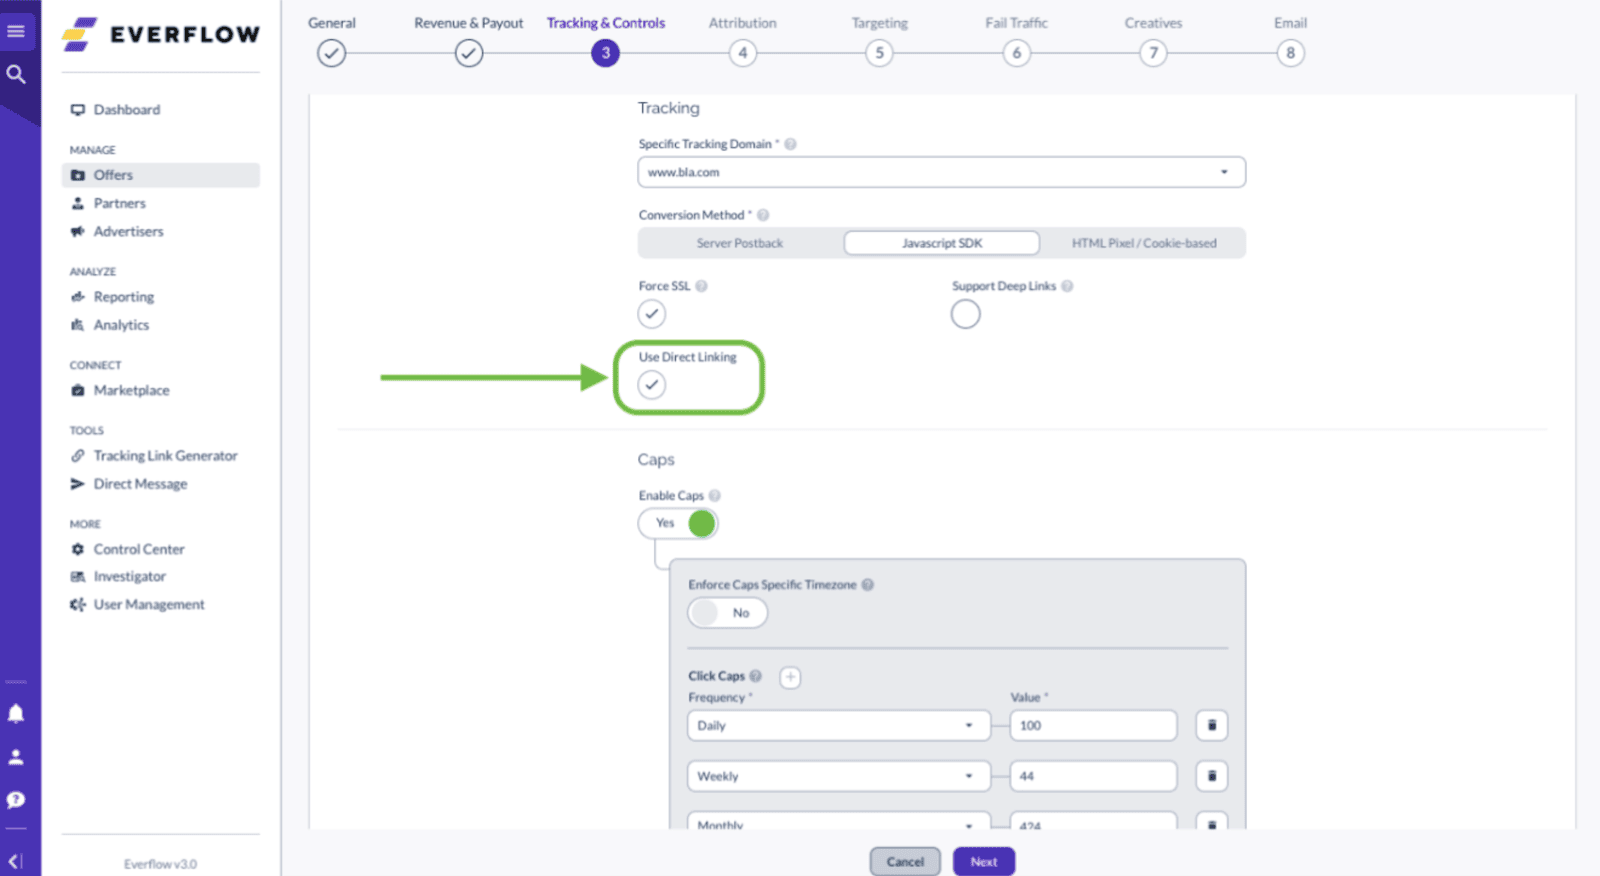
Testing the Integration
Ensure that Direct Linking is turned on inside the offer's Tracking & Controls section before generating a tracking link.
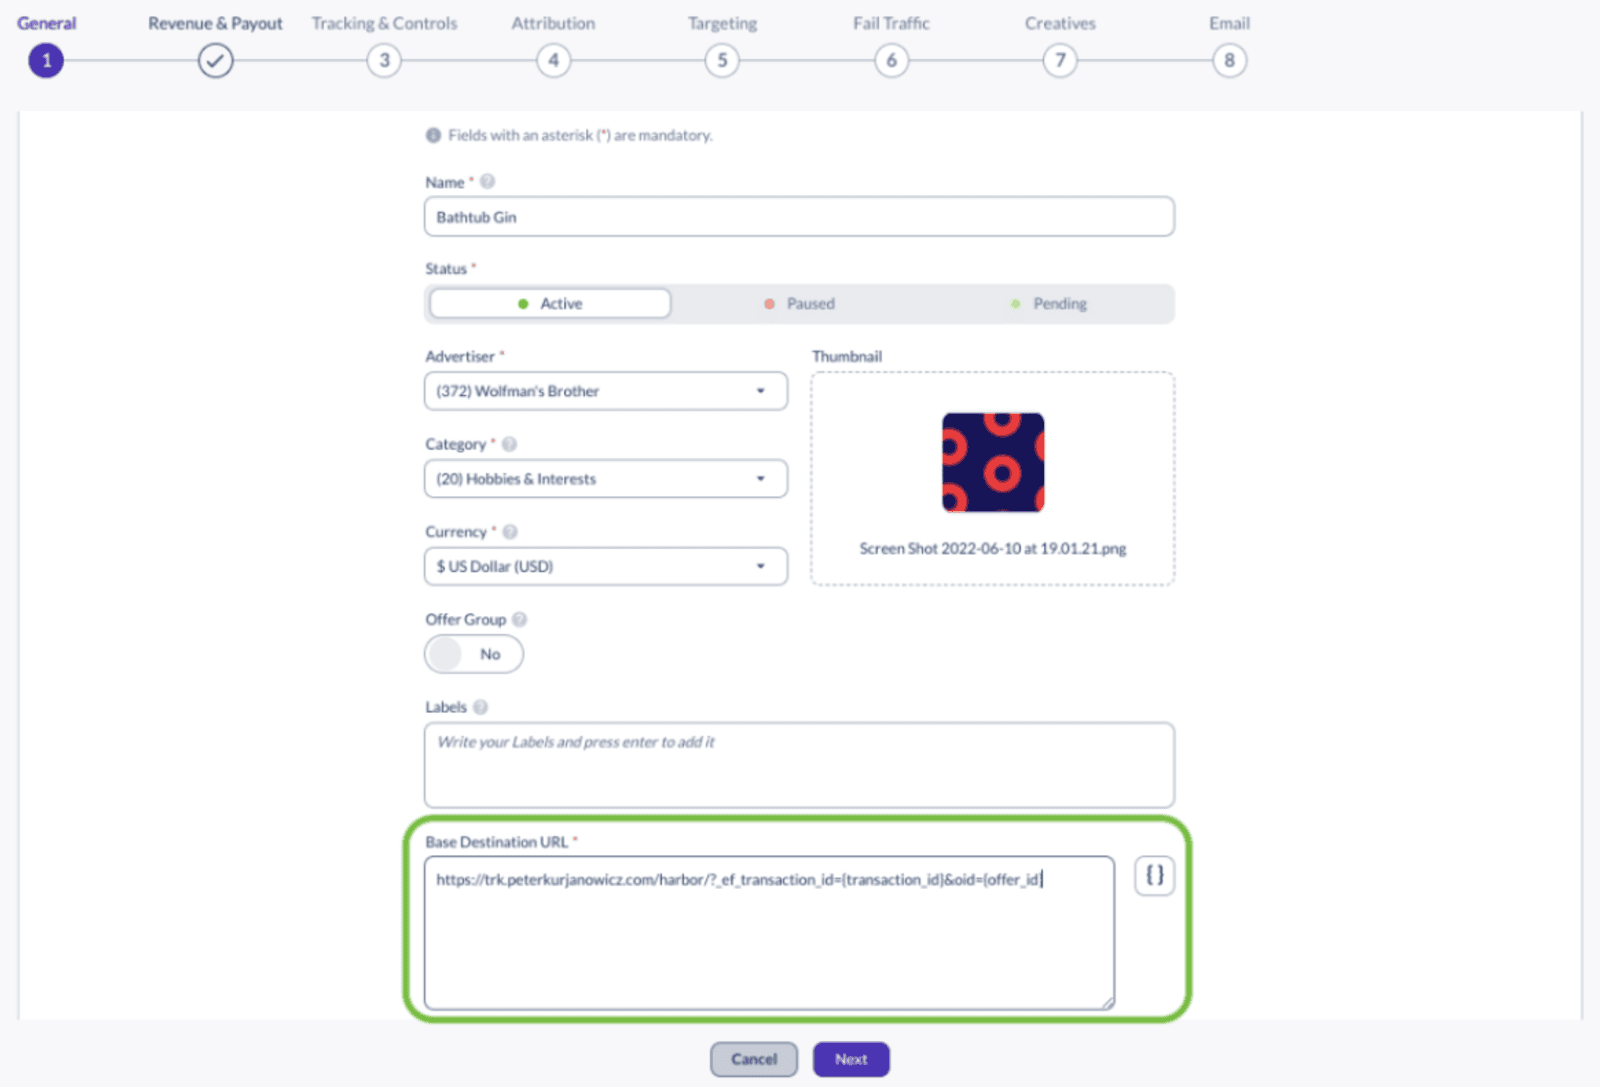
- If using Redirect Links for this Offer, please make sure to add the following string to the end of the Base Destination URL:
?_ef_transaction_id={transaction_id}
Here is an example:
- Use a tracking link for one of your Shopify offers and make a test purchase. You should see the order show up as a Conversion inside your Everflow account.
Examples of Customer Events
- INSERT_ADVERTISER_ID - replace with Advertiser ID
- INSERT_ADVERTISER_EVENT_ID - replace with Advertiser Event ID, offer level events cannot be used, must be Advertiser Event ID (maybe link to that article?)
- INSERT_TRACKING_DOMAIN - replace with Tracking Domain
product_added_to_cart: When someone adds a product to their cart, the product_added_to_cart event gets triggered. This can happen on any store page where customers can add items to their cart.
checkout_started: The checkout_started event happens when someone starts checking out. If your store Checkout Extensibility, this event triggers every time they enter checkout. For non-checkout extensible shops, it only triggers the first time they start checking out.
checkout_completed: The checkout_completed event shows when someone finishes their purchase. Usually, this happens once on the Thank you page after checkout. But for upsells and post purchases, the checkout_completed event is triggered on the first upsell offer page instead. Just keep in mind - if the page doesn't load properly, this event won't trigger at all. Scroll up to see the actual example.
Reporting
To view specific details from Shopify for a conversion:
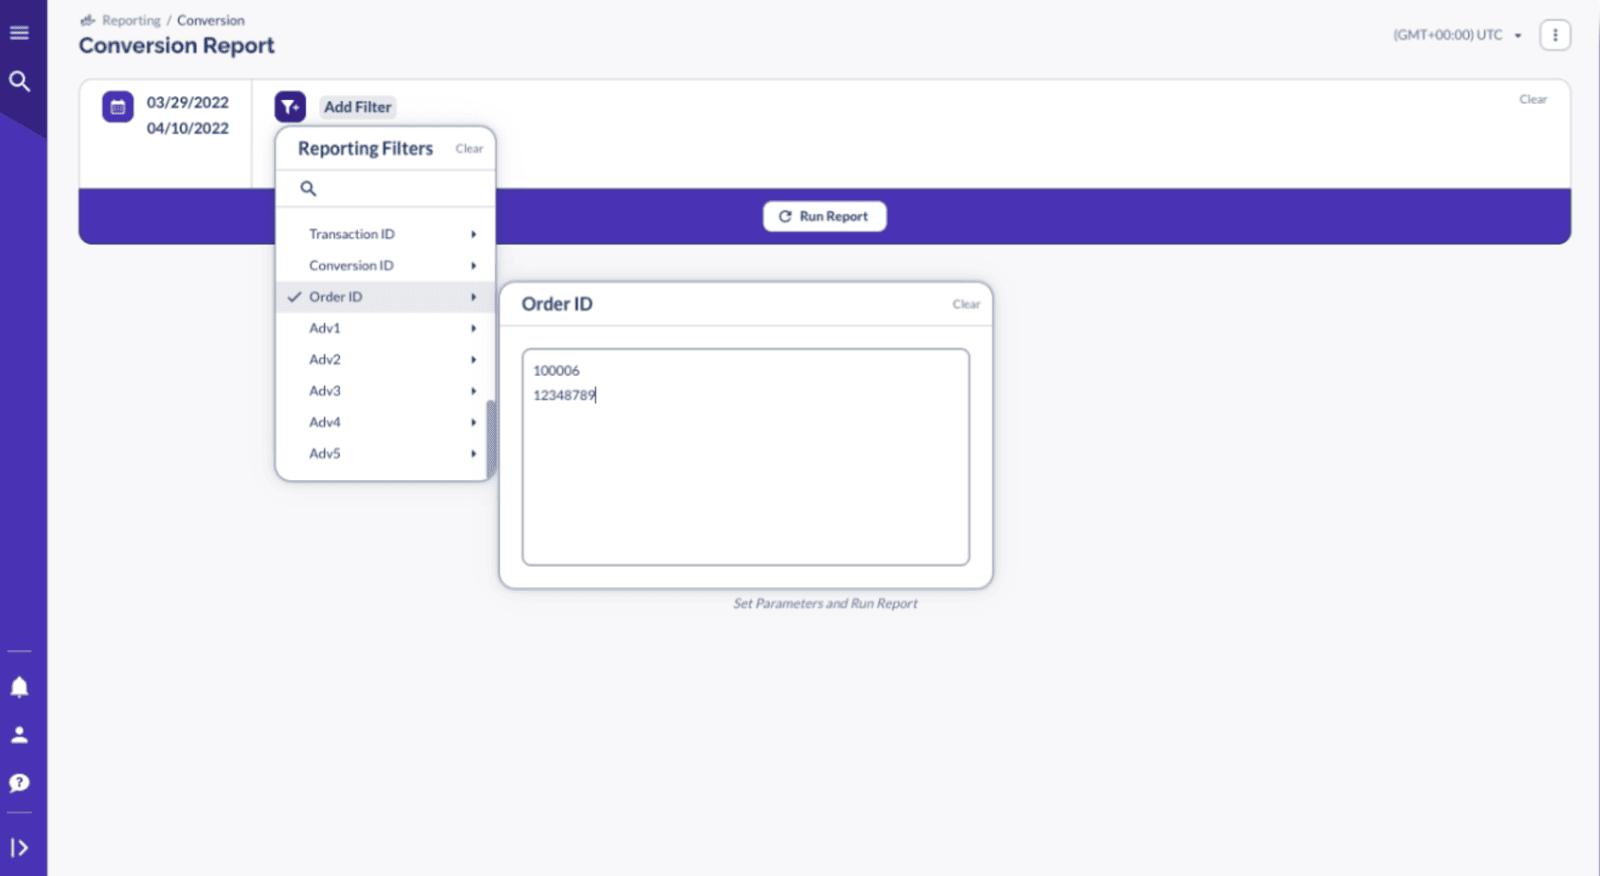
- Enter an order ID in the search bar at the top-right corner of the portal, or navigate to Reporting > Conversion to find the conversion.
- Add the following columns to the report:
- Order ID
- Order Number
- Order Items
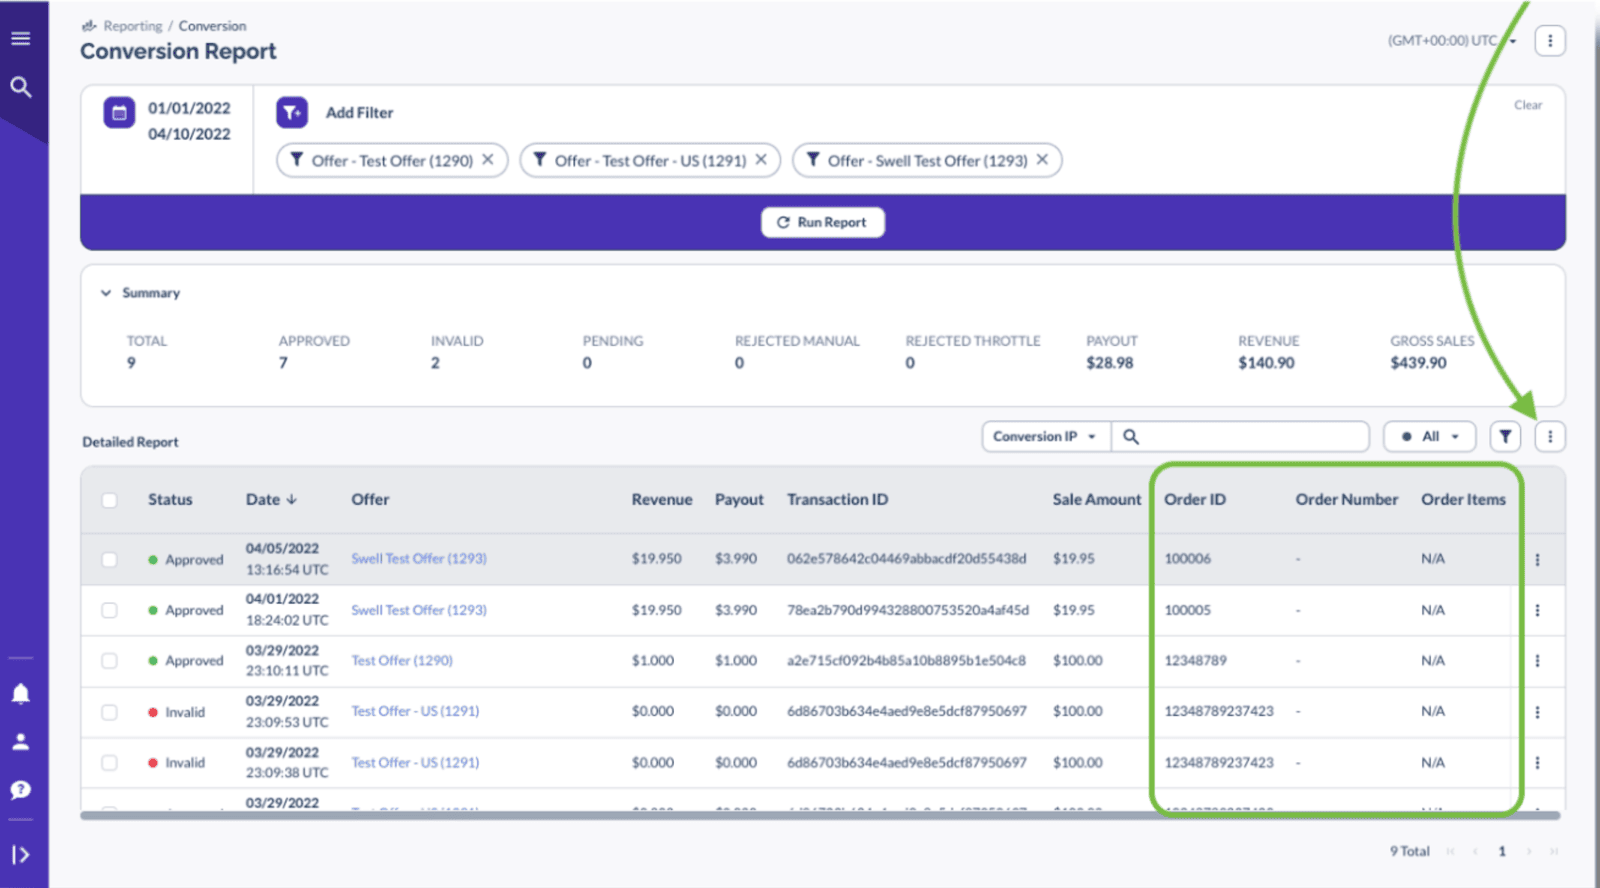
- You can also filter conversions by Order ID on the Conversion Report by selecting it as a filter.