
Overview
This article outlines how to track data from the Konnektive CRM in Everflow. It includes guides for setting up your campaign and postback URLs in the Konnektive platform, as well as setting up the Offer accordingly and testing it in Everflow.
These instructions are for use with Redirect Partner Tracking Links only.
For Direct Linking, you will need to be using Checkout Champ, a web-building tool used on top of Konnektive. For more info - [Click Here]
Campaign Setup: Konnektive
- Log in to your Konnektive account.
- Then, set up a new campaign and a new affiliate.
- For instructions on this, please refer to Konnektive - [Click Here]
- Be sure the affiliate is added to the campaign.
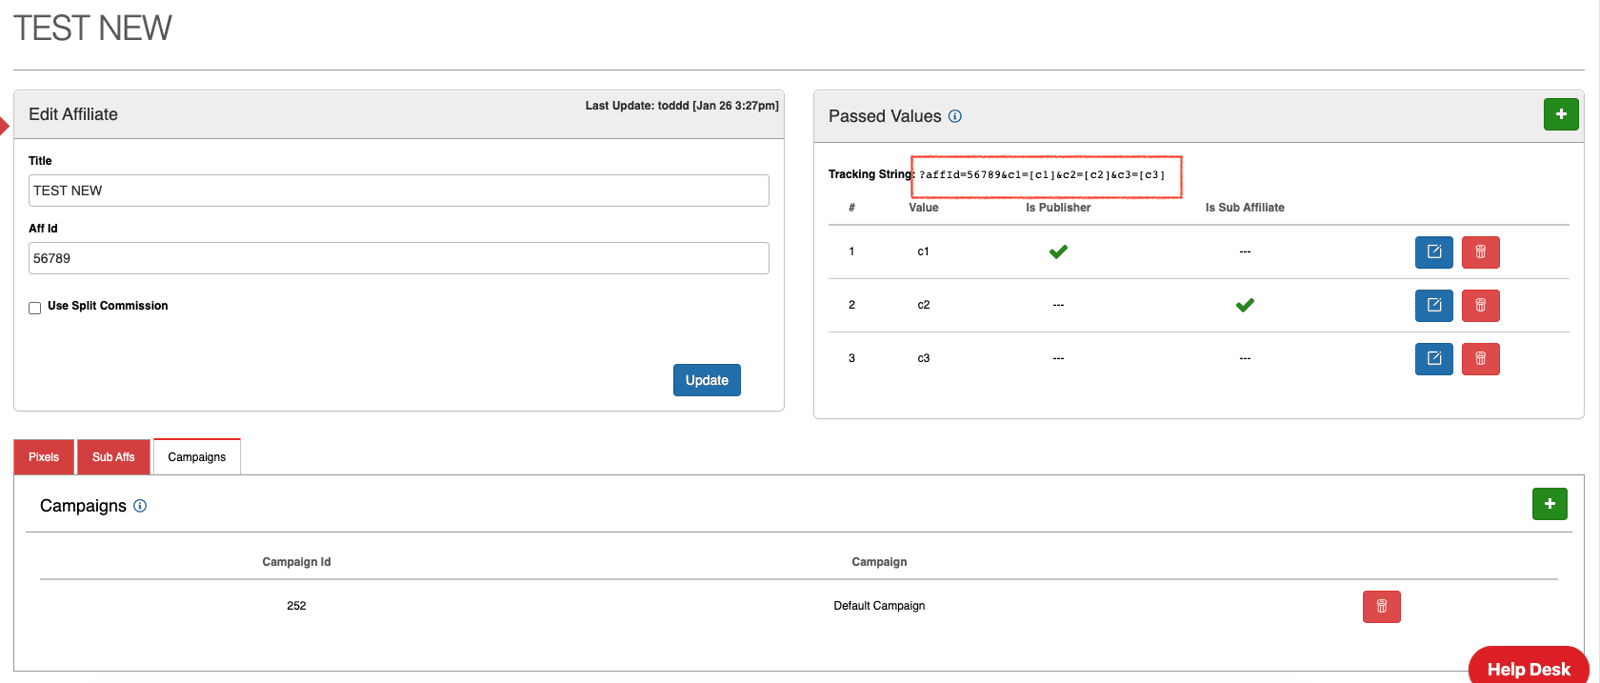
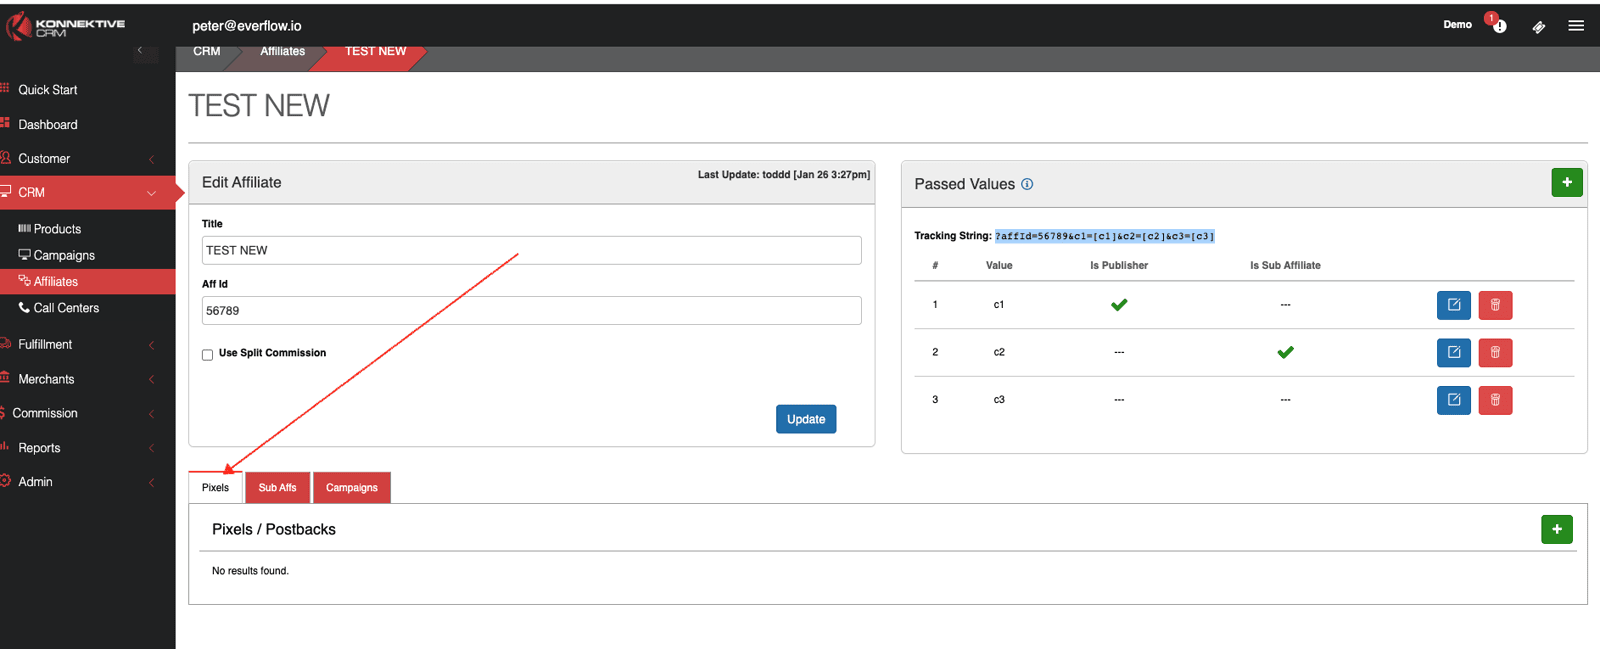
- Then, navigate to CRM > Affiliates, and click the Edit button for the desired affiliate.
- Copy the Tracking String from their page.
Offer Setup: Everflow
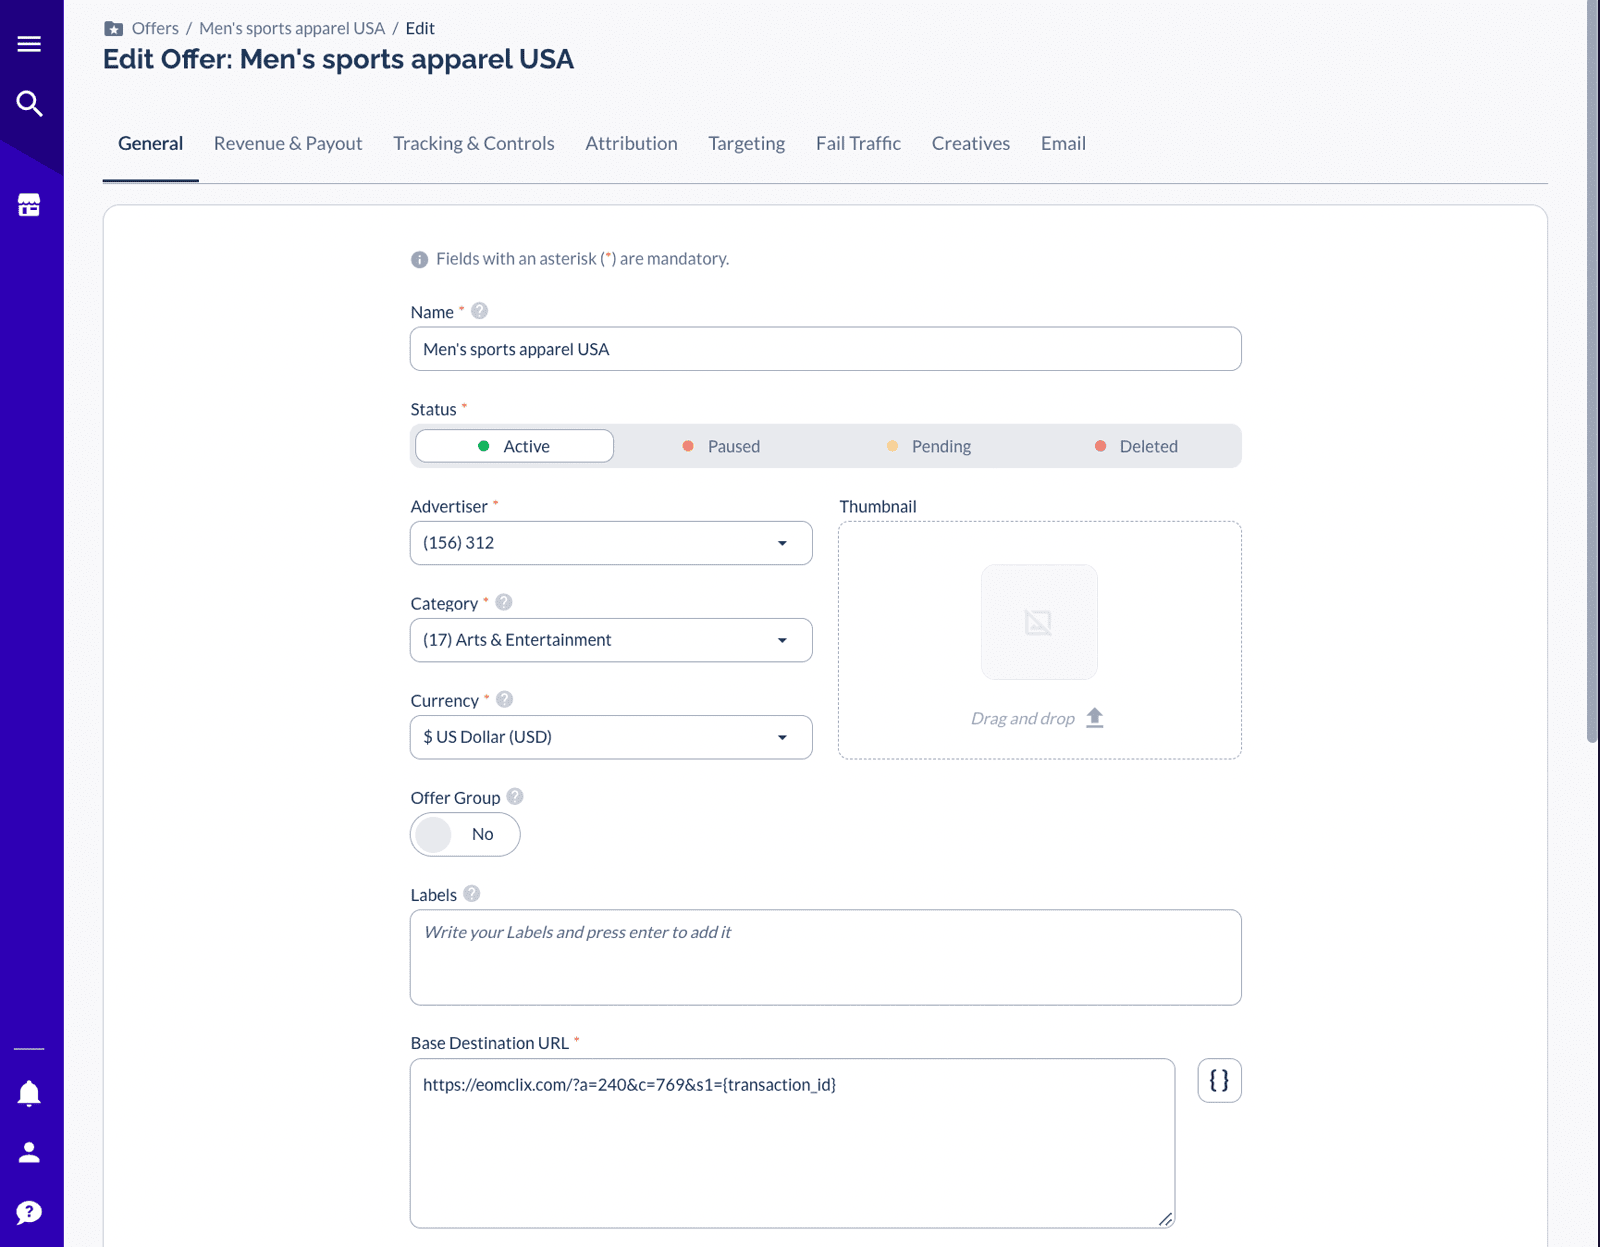
- Add a new Offer in Everflow. For more info on this - [Click Here]
- Append the affiliate's tracking string to the landing page that you've integrated with Konnektive, and enter it as the offer's Default Landing Page URL.
Example: Building the Default Landing Page URL
Landing Page
https://www.yourdomain.com/
Tracking String
?affId=56789&c1=[c1]&c2=[c2]&c3=[c3]
Default Landing Page URL
https://www.yourdomain.com/?affId=56789&c1={transaction_id}&c2={affiliate_id}&c3={optional}
- On the Tracking & Controls page, be sure to select Server Postback as the Conversion Method.
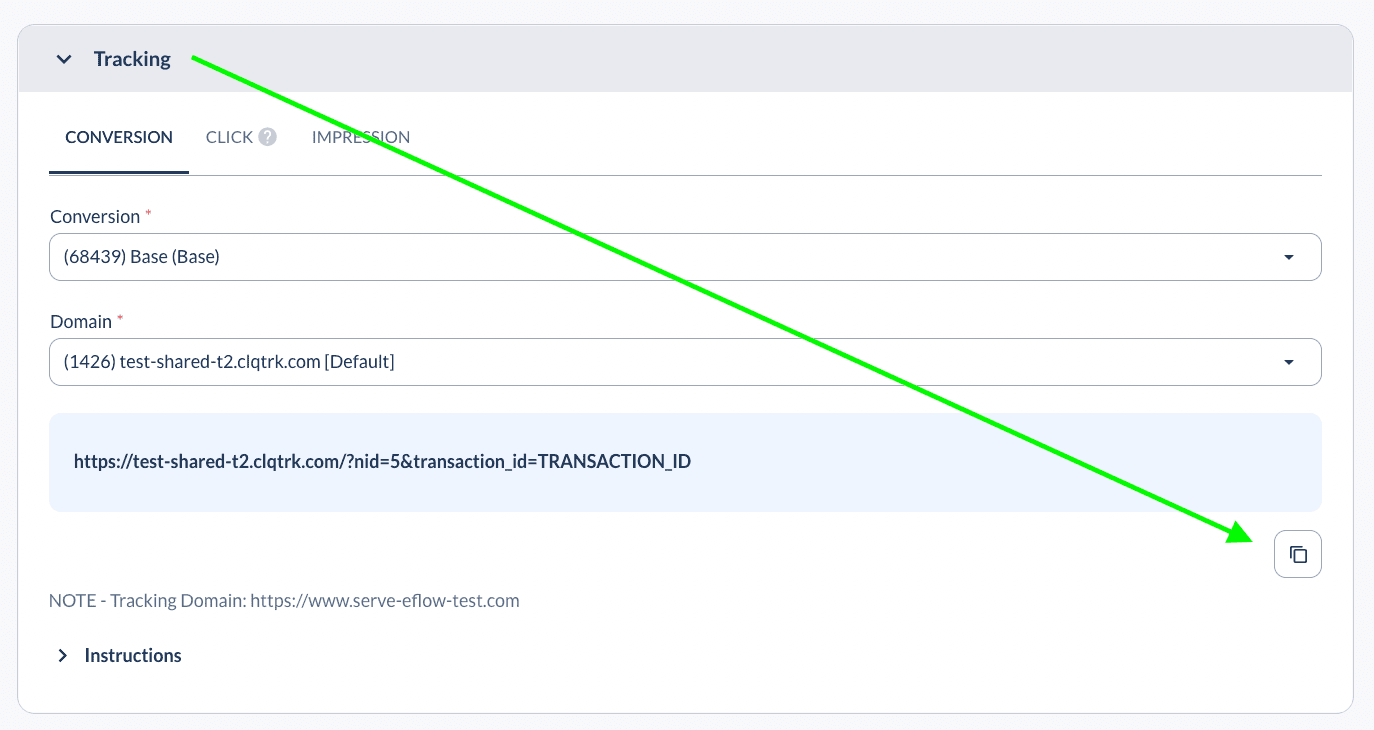
- Once the Offer is added, copy the postback URL from the offer page.
Direct Linking
Everflow Steps
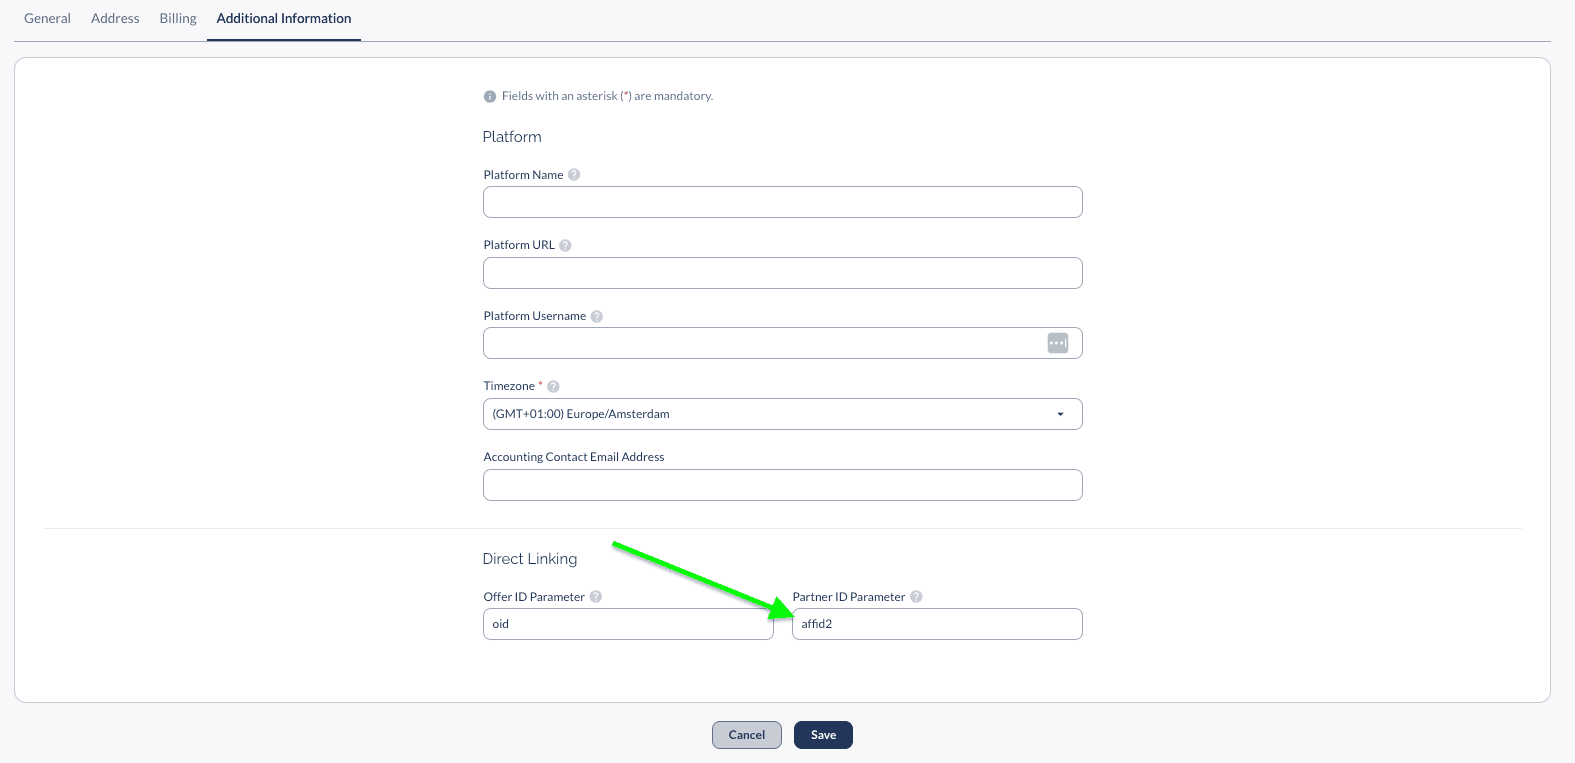
- As Konnektive uses affId as their affiliate parameter, Everflow will need to include a different URL parameter for Partner/Affiliate ID.
- Please go to the Advertiser > Edit > Additional Information > Update the Partner ID Parameter to affid2 > Save.
Konnektive Steps
Add the below script at the very top of the HTML section.
<script type="text/javascript" src="https://www.YOUR-TRACKING-DOMAIN.com/scripts/main.js"></script>
<script type="text/javascript">
  function updateURLParameter(url, param, paramVal){
    var newAdditionalURL = '';
    var tempArray = url.split('?');
    var baseURL = tempArray[0];
    var additionalURL = tempArray[1];
    var temp = '';
    if (additionalURL) {
      tempArray = additionalURL.split('&');
      for (var i=0; i<tempArray.length; i++){
        if(tempArray[i].split('=')[0] != param){
          newAdditionalURL += temp + tempArray[i];
          temp = '&';
        }
      }
    }
    var rows_txt = temp + '' + param + '=' + paramVal;
    return baseURL + '?' + newAdditionalURL + rows_txt;
  }
  EF.click({
    offer_id: EF.urlParameter('oid'),
    affiliate_id: EF.urlParameter('affid2'),
    sub1: EF.urlParameter('sub1'),
    sub2: EF.urlParameter('sub2'),
    sub3: EF.urlParameter('sub3'),
    sub4: EF.urlParameter('sub4'),
    sub5: EF.urlParameter('sub5'),
    uid: EF.urlParameter('uid'),
    source_id: EF.urlParameter('source_id'),
    transaction_id: EF.urlParameter('_ef_transaction_id'),
  }).then(function(transactionId){
    window.history.replaceState('', '', updateURLParameter(window.location.href, 'c1', transactionId));
    window.history.replaceState('', '', updateURLParameter(window.location.href, 'affId', 'YOUR-AFFILIATE-ID'));
  });
</script>
In the example above, we are using the c1 parameter to pass the Transaction ID. If you are wanting to use c2 or c3, then please update the following line in the click script to reflect c2 or c3 such as
window.history.replaceState('', '', updateURLParameter(window.location.href, 'c2', transactionId));or
window.history.replaceState('', '', updateURLParameter(window.location.href, 'c3', transactionId));If you are using another format for the Direct Linking Partner ID Parameter, please have that format reflected in that line of the click script.
For Direct Linking, you will need to be using Checkout Champ, a web-building tool used on top of Konnektive.
Postback Setup: Konnektive
- In the Konnektive platform, navigate to CRM > Affiliates and click the Edit button for the desired affiliate.
- Then, click the Pixels tab.
- Click the [+] button, and set up the pixel as shown below.
- Be sure to select the pixel type: Postback. Then, click Create Pixel.
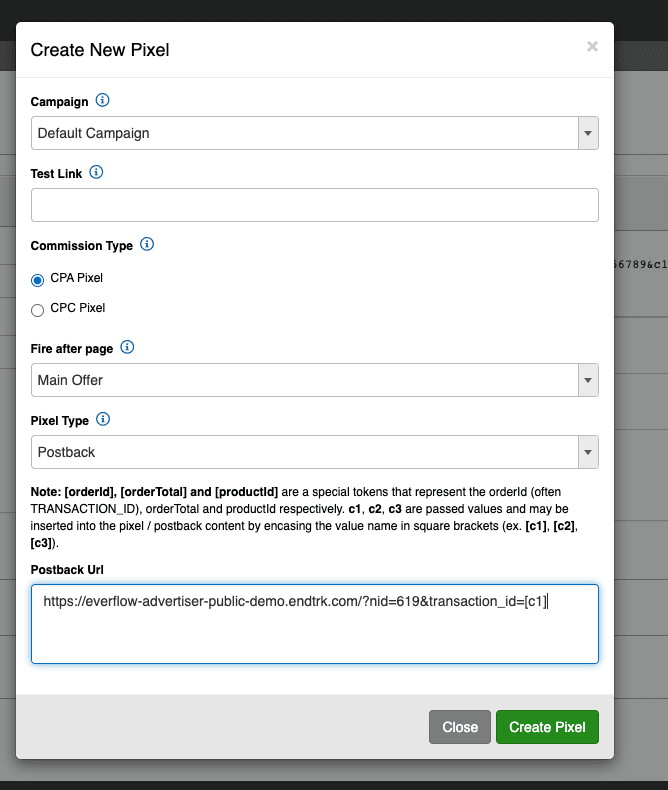
https://www.YOUR-TRACKING-DOMAIN.com?nid=NID&transaction_id=[c1]&amount=[orderTotal]&order_id=[orderId]&email=[emailAddress]Testing the Pixel in Everflow
Additional Events from Checkout Champ
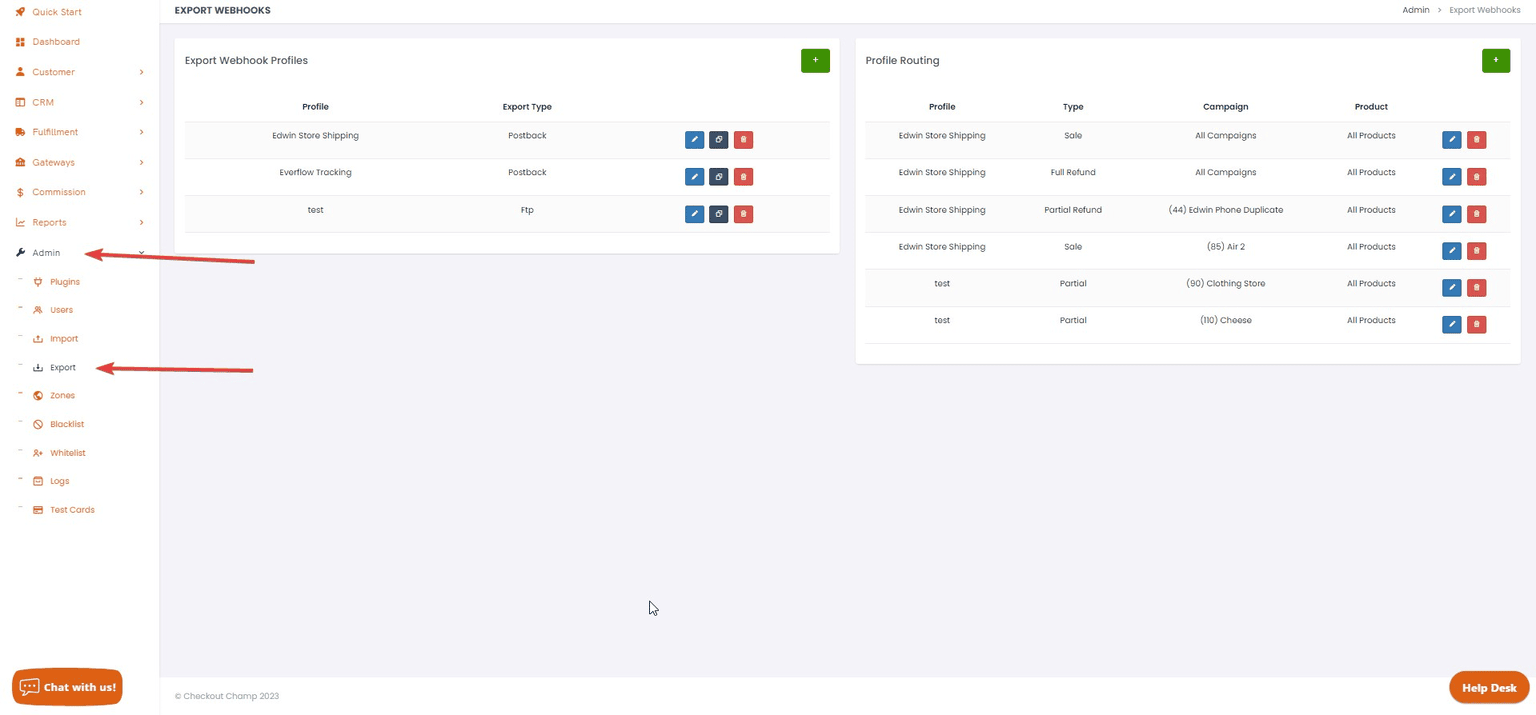
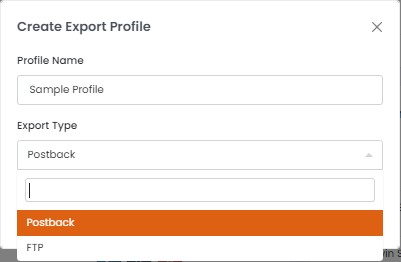
To send additional event data from Checkout Champ to Everflow — such as refunds, chargebacks, recurring orders, or cancellations — use Export Webhook Profiles in Checkout Champ. These webhooks fire postbacks to your Everflow tracking domain whenever specific customer events occur.
For full documentation, see Checkout Champ: Postback Export Profiles.
https://www.YOUR-TRACKING-DOMAIN.com?nid=NID&aid=AID&adva_event_id=ADV_EVENT_ID&transaction_id=[c1]&amount=[orderTotal]&order_id=[orderId]&email=[emailAddress]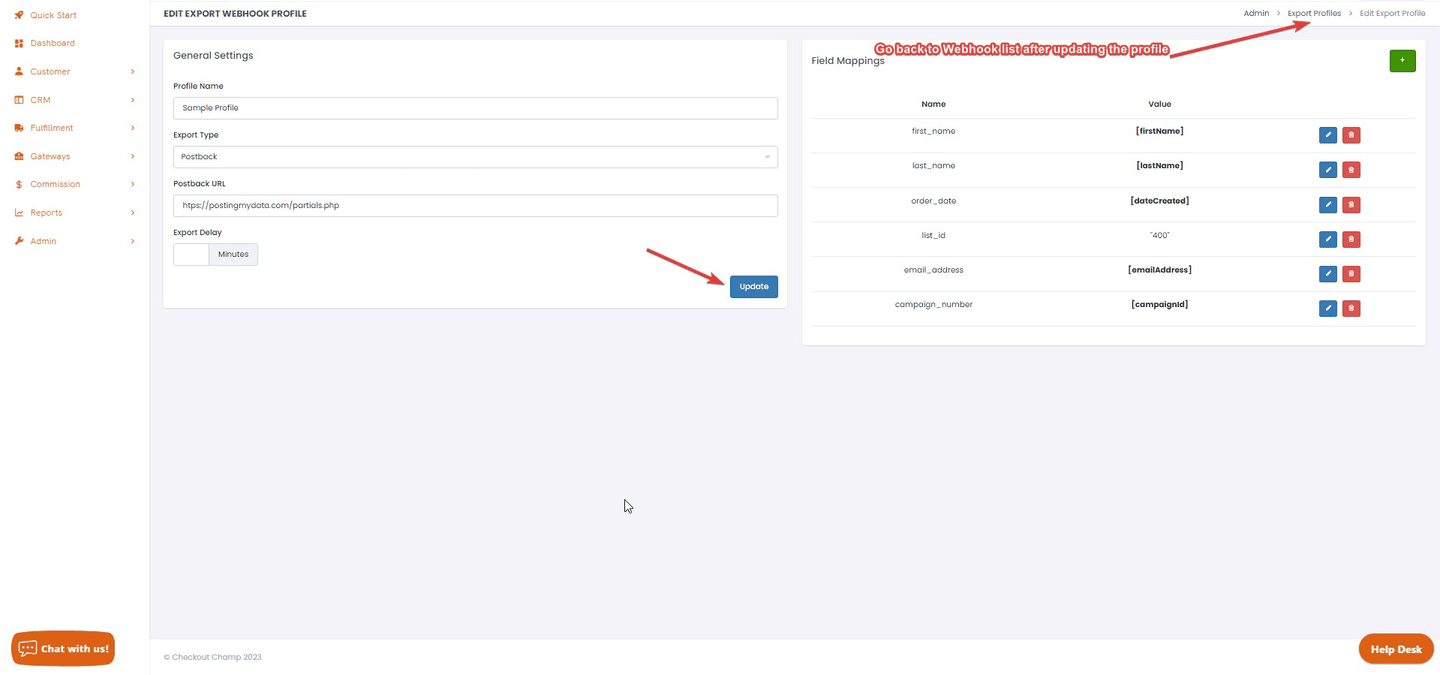

Available Customer Types
When configuring Profile Routing, select the customer type that matches the event you want to send to Everflow.
Orders & Sales
| New Sale | New sales that were successfully billed |
| Upsell | Orders that include an upsell |
| Capture | Orders that have been captured |
| Partial | Incomplete orders (leads) |
| Lead | Incomplete orders without a product assigned |
| COD Pending | Cash on Delivery orders awaiting fulfillment |
Subscriptions & Recurring
| Subscription Started | New sales with a recurring product |
| Recurring Order | Orders created as part of a continuity subscription |
| Pre-Billing | After prebill notification email has been sent |
| Pause | When a recurring purchase is paused |
| Reactivate | When a recurring purchase is reactivated |
| Cancel | When a recurring purchase is cancelled |
Declines & Failures
| Decline | Orders that declined |
| Rebill Decline | When a rebill (recurring purchase) declines |
| Recycle Failed | Orders that reach recycle failed status |
Refunds & Chargebacks
| All Refunds | Orders that have been refunded (any type) |
| Partial Refunds | Orders that have been partially refunded |
| Full Refunds | Orders that have been fully refunded |
| Chargeback | Orders that have been charged back |
Fulfillment & Returns
| Fulfillment Shipped | When fulfillment status shows Shipped |
| Fulfillment Delivered | When fulfillment status shows Delivered |
| RMA Issued | When a Return Merchandise Authorization is issued |
| RMA Received | When a returned item is received |
Other
| Customer Update | Updates made to the customer record |
Tying the affId to Each Affiliate (Optional Setup)
By default, a single affId is set in Checkout Champ and individual affiliates are distinguished through the c1 parameter in the base destination URL, for example:
https://www.yourdomain.com/?affId=02C1ADF0&c1={affiliate_id}&c2={transaction_id}If you would prefer the affId to tie directly to the affiliate ID created in Checkout Champ, hardcode the affId into each affiliate's Partner Tracking Link and use a macro to populate the correct affId on the base destination URL:
https://www.yourtrackingdomain.com/XXXXX/XXXXX/?sub5=KK_AFFIDhttps://www.yourdomain.com/?affId={sub5}&c1={affiliate_id}&c2={transaction_id}

