
Overview
Let’s break down how your affiliate program earns money (Revenue) and pays out to Partners (Payout).
This guide explains the ins and outs of Revenue and Payout, what each option means, the different Actions, Types & Models associated with both Revenue & Payout. We’ll cover custom pricing based on specific Products as well.
The Profit Equation
Before changing any settings, remember the fundamental rule of Everflow reporting:
Profit = Revenue - Payout
- Revenue: What the Network/Advertiser earns from the action.
- Payout: What the Partner earns for generating that action.
- Profit: The margin left over.
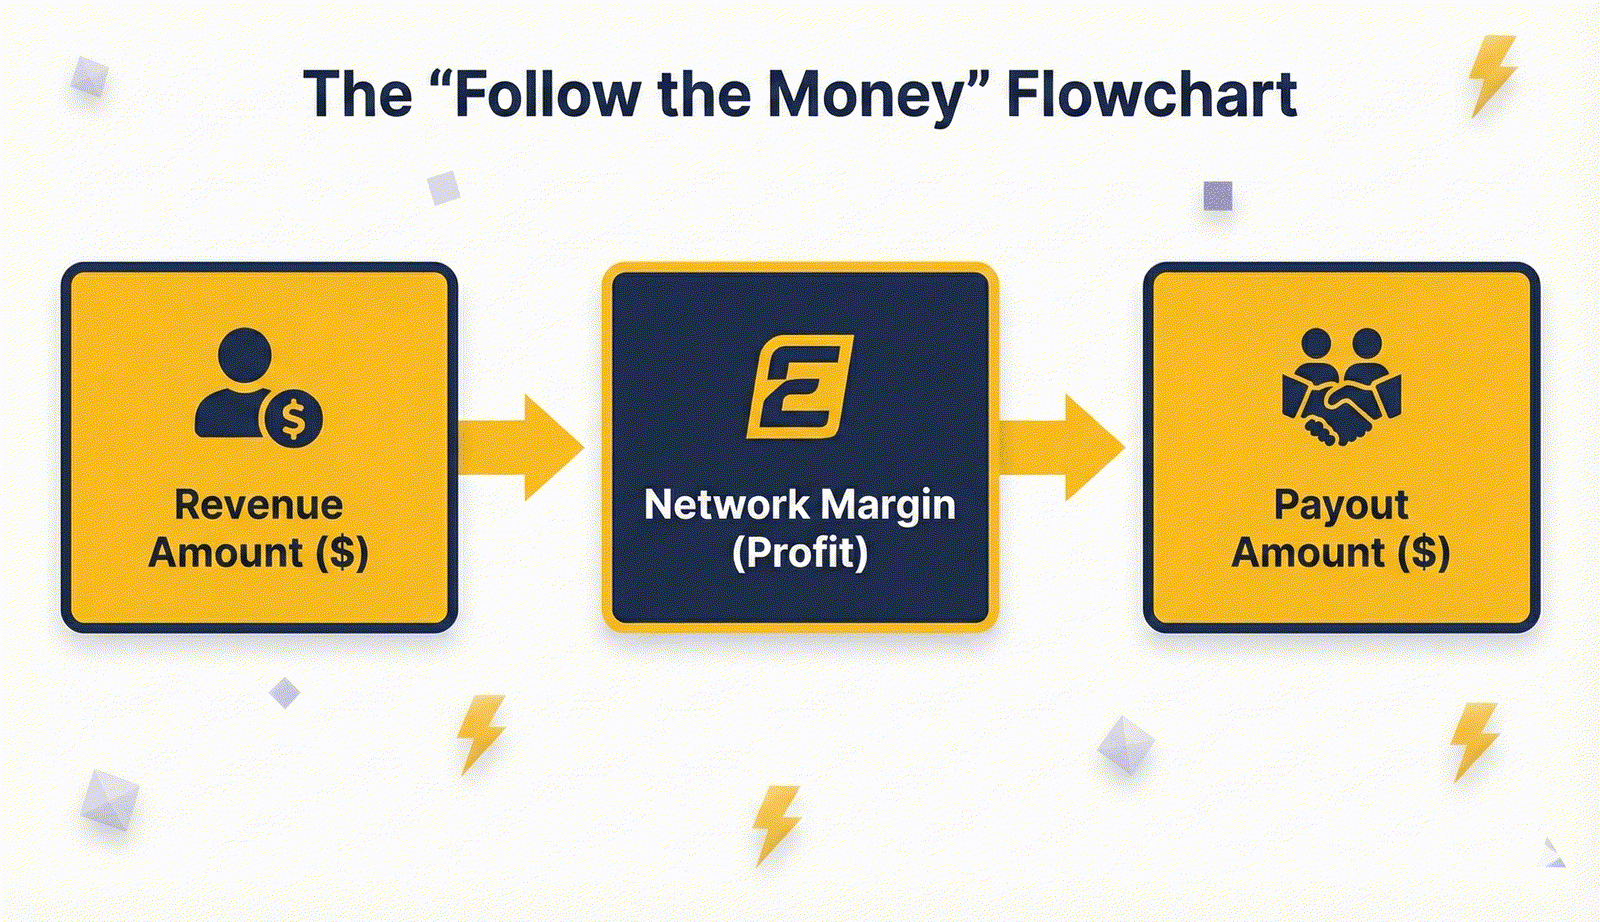
Correctly defining these inputs is the only way to ensure your Profit and Margin reports are accurate.
Key Concepts: Pricing Models
Use this table to choose the right model for your campaign.
Percentage and Mixed types are only available when the Action is a Conversion Event. You cannot have a "Percentage of Click" payout.
Prerequisites: Decision Checklist
Stop! Check your technical setup before configuring the Offer.
Payout Configuration Checklist
Technical Setup: Passing the Sale Amount
If you chose a Percentage or Price Per Product model, your tracking setup must look like this.
Option A: Server-to-Server Postback Add the &amount= parameter to your global postback URL.
Option B: JavaScript SDK Include the amount: field in the conversion function.
Step-by-Step Configuration
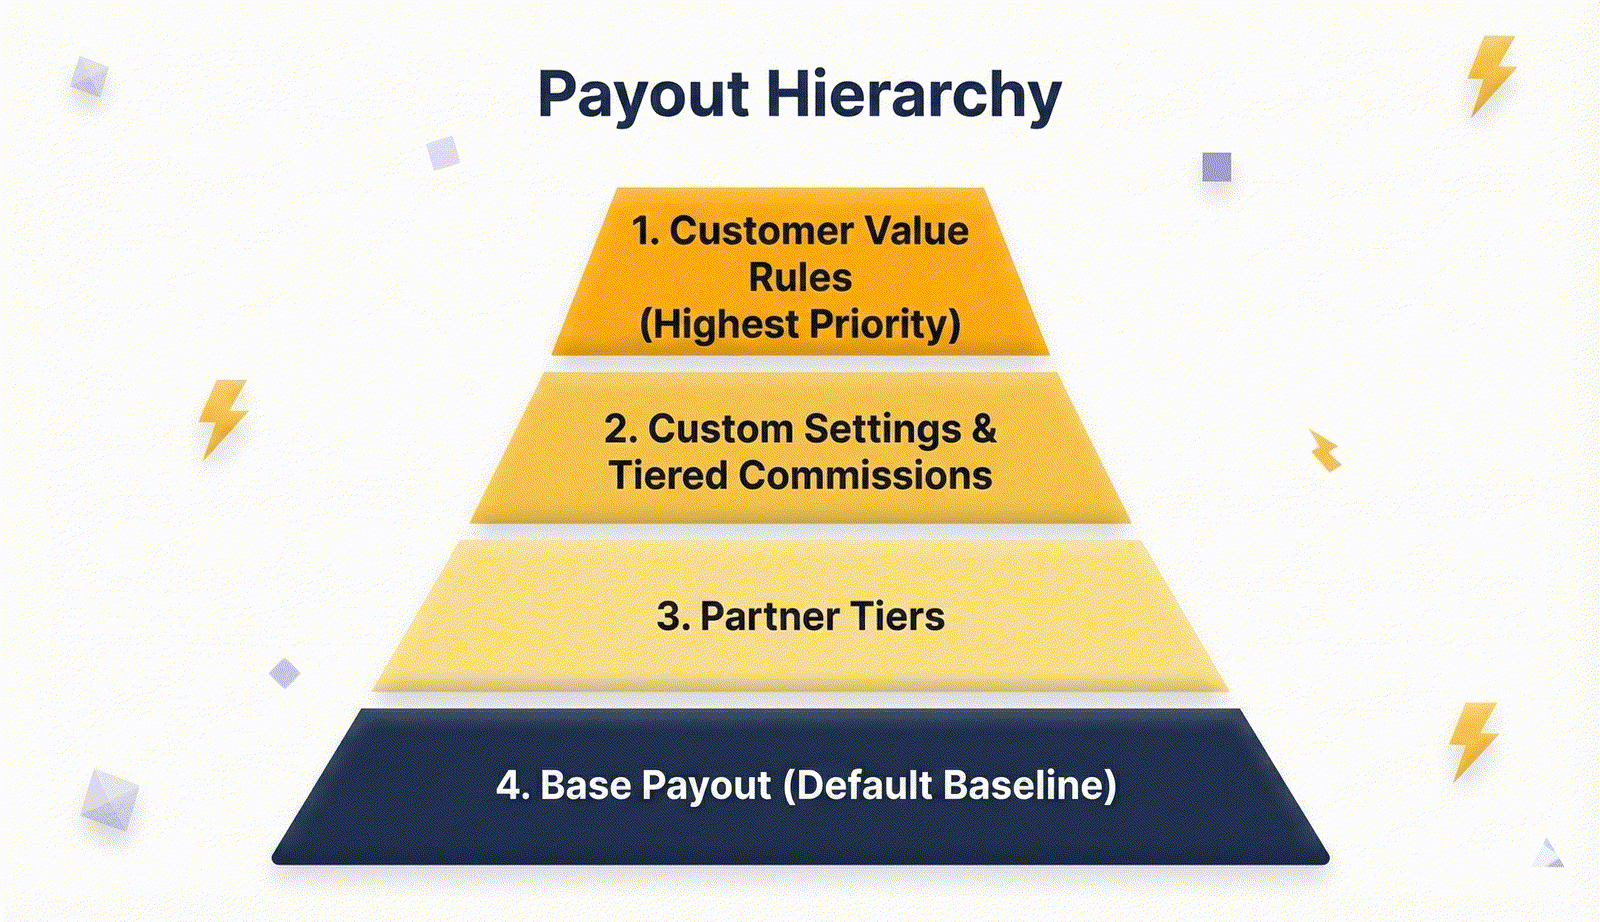
The Payout Hierarchy (Order of Operations)
Everflow allows you to set dynamic payouts. If multiple rules apply to a conversion, the system follows this strict hierarchy (Highest Priority wins):
Advanced Features
1. Price Per Product (PPP) Perfect for e-commerce with varying margins. This rewards Partners based on the specific SKUs in the cart.
- Requirement: Both Revenue AND Payout must be set to Price Per Product.
- Constraint: You must pass the order object (list of SKUs) in your tracking pixel.
- Auto-Mapping: If you use our Shopify, WooCommerce, or BigCommerce integrations, this product data is mapped automatically.
2. Adjustments & Refunds Financials change. Here is how to handle corrections.
- Manual Adjustment:
- Go to Reporting > Conversions.
- Click the three dots <ef-svg-dots-vertical-more></ef-svg-dots-vertical-more> on a conversion row.
- Select Adjust Revenue & Payout to manually change the numbers for that single event.
- Bulk Adjustment: Use the CSV Upload tool in the Adjustments section to update thousands of conversions at once. Note: You cannot adjust "Pending" or "Rejected" conversions—only Approved ones.
- Refunds: If using the Stripe Integration, refunds are tracked automatically in the Reporting > Refunds section. For manual negative payouts (chargebacks), please contact our Support Team to enable negative value parameters.
Bottom Line
Setting up the right Revenue and Payout structure keeps both your business profitable and your Partners motivated. The best approach depends on what you're trying to achieve.
Start with something simple that works for both you and your Partners. You can always adjust your strategy as you learn what works best.
Ready to implement your chosen model? Head over to our setup article for detailed, step-by-step instructions on configuring your Revenue and Payout settings in just a few clicks.


