
Overview
The Custom Settings feature allows you to create specialized configurations for Revenue & Payout, Caps, Landing Pages, and Creatives.
This guide focuses primarily on how to set up Custom Revenue & Payout options.
What Are Custom Settings?
Custom Settings let you create specific rules for:
- Different Payout or Revenue amounts for different Partners
- Special Caps for Conversions
- Partner-specific landing pages
- Custom creatives for specific Partners
Example:
- Custom Setting 1: All Partners - Payout $1.50
- Custom Setting 2: Specific Partner - Payout $1.00
- End Result: Partner receives $1.00 payout (Custom Setting 2 wins because it's more specific).
Custom Revenue & Payout
sub1, adv1, source_id, or any custom name like my_custom_param). Custom rules can match values from partner click URL parameters or the advertiser's server-to-server postback.
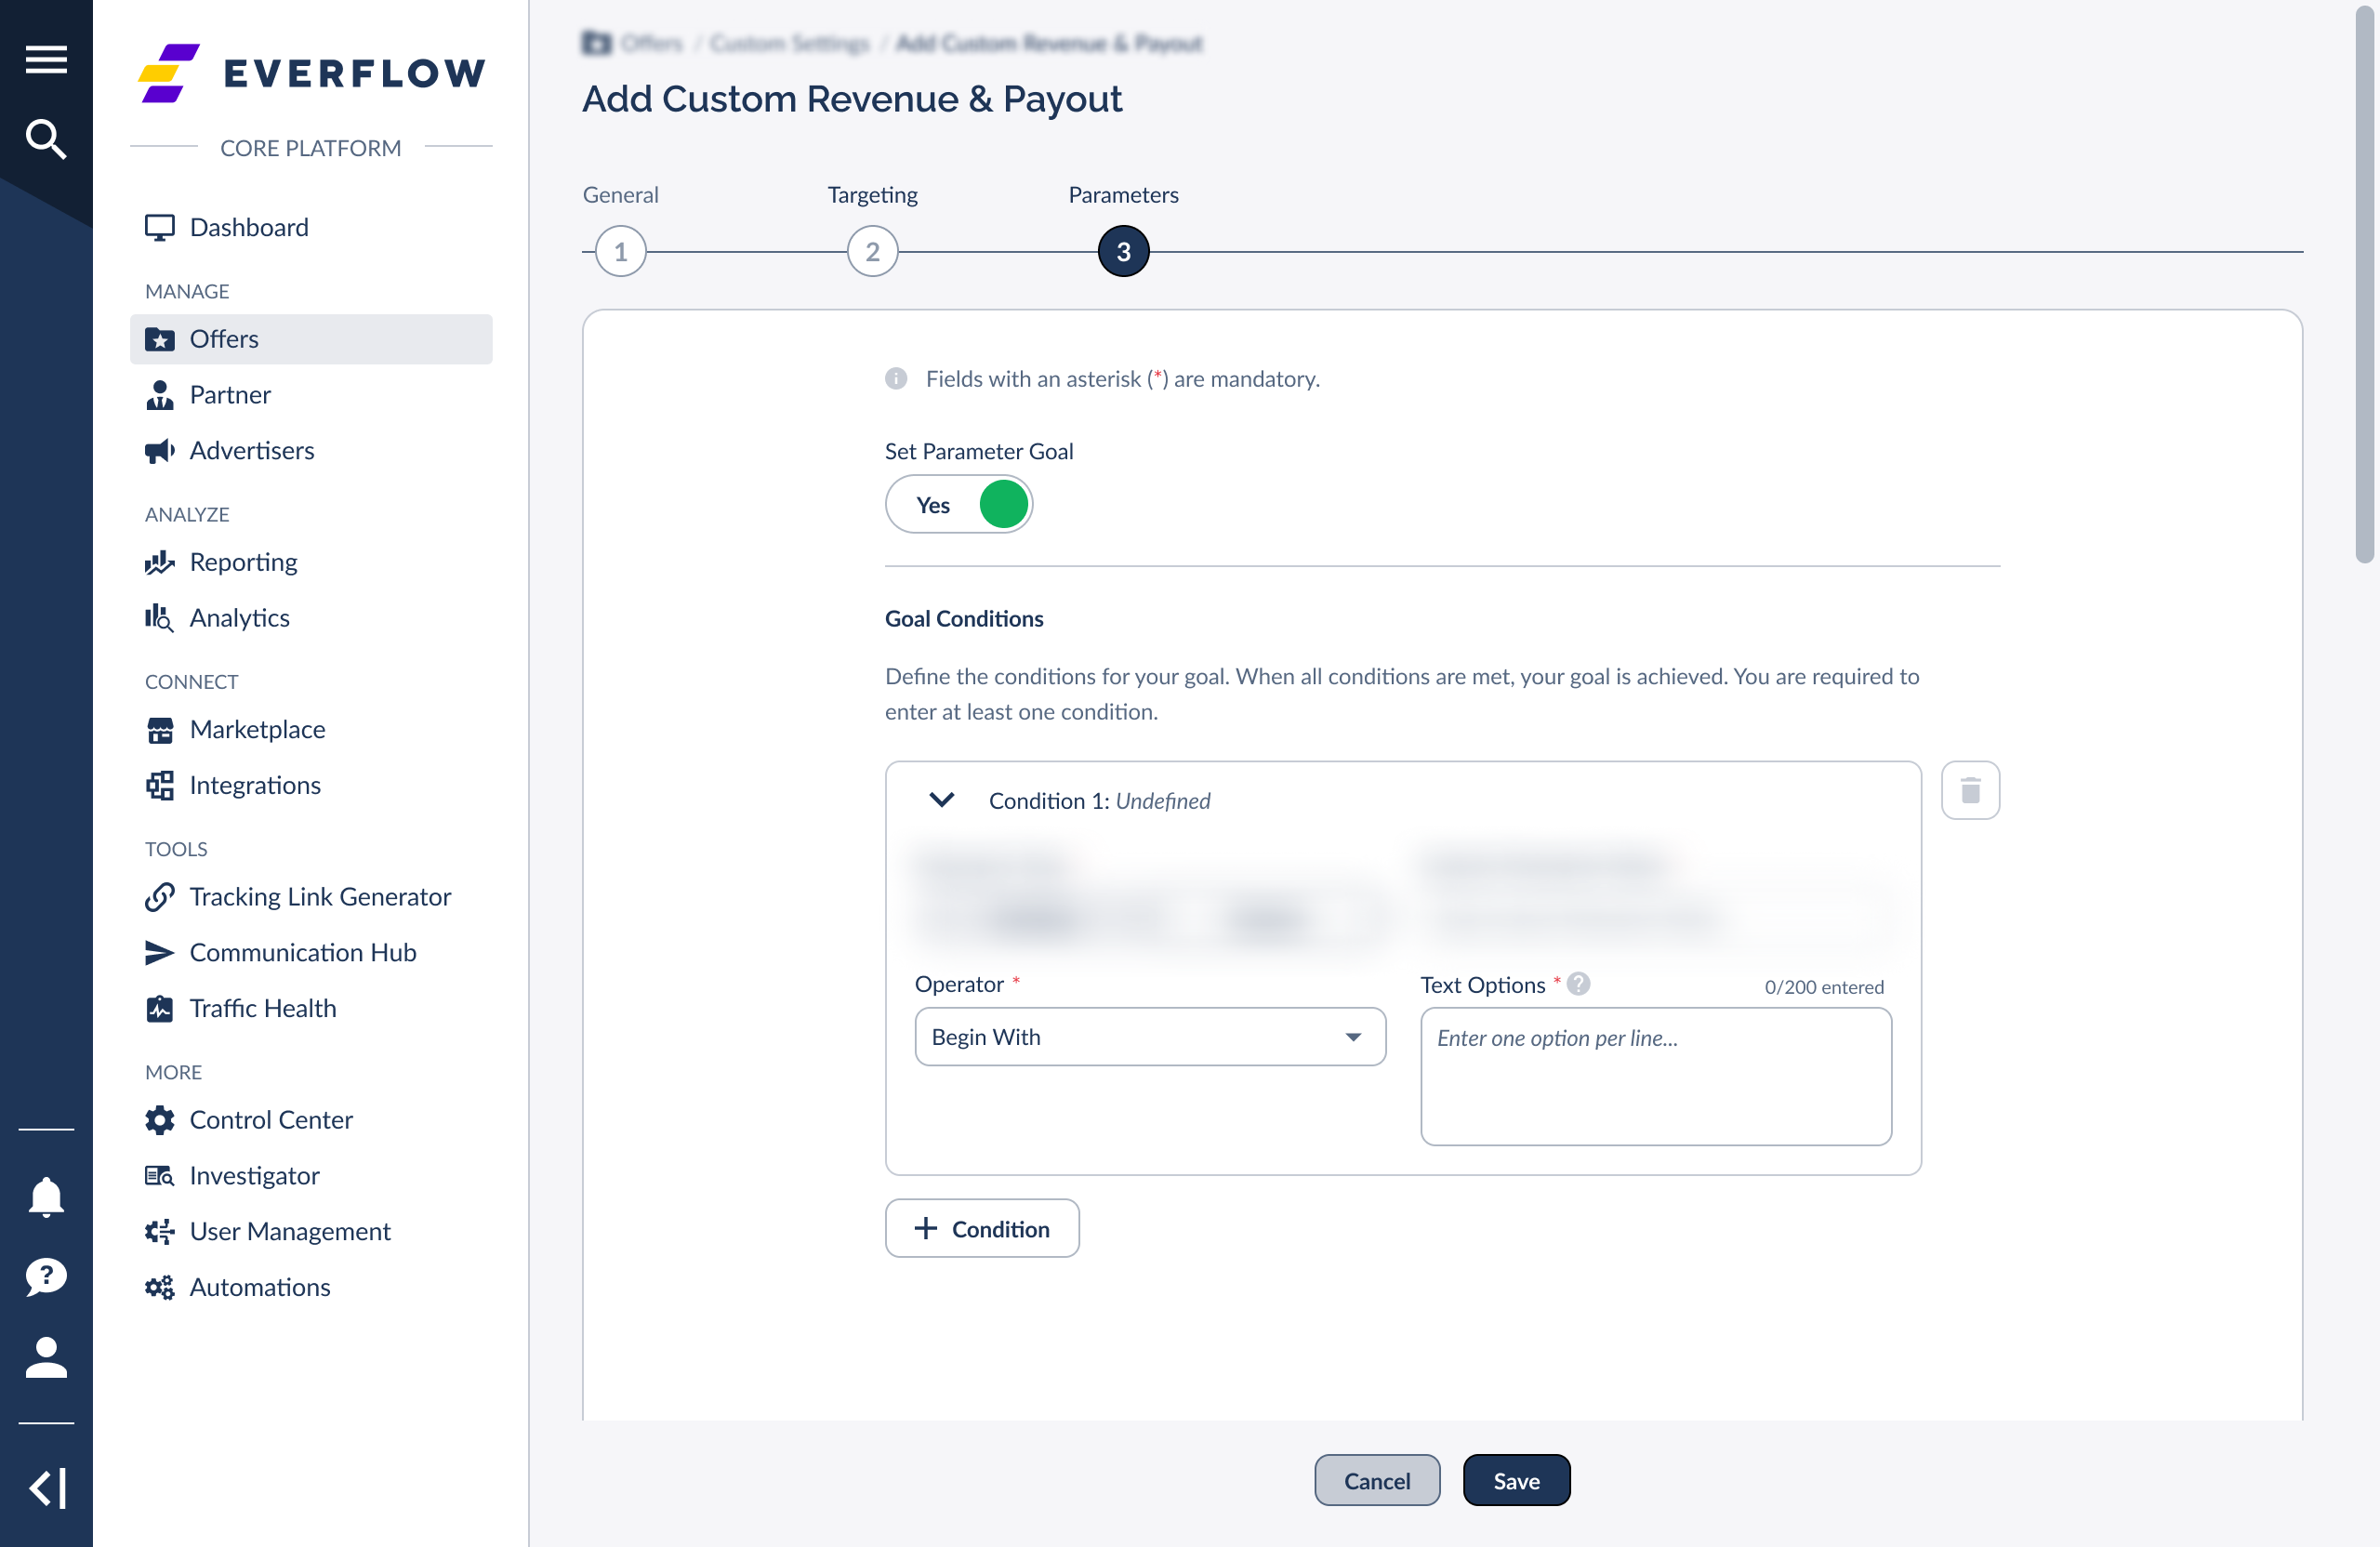
Set Parameter Goal — Visual Reference
Screenshots of the Set Parameter Goal UI in Offer Custom Settings
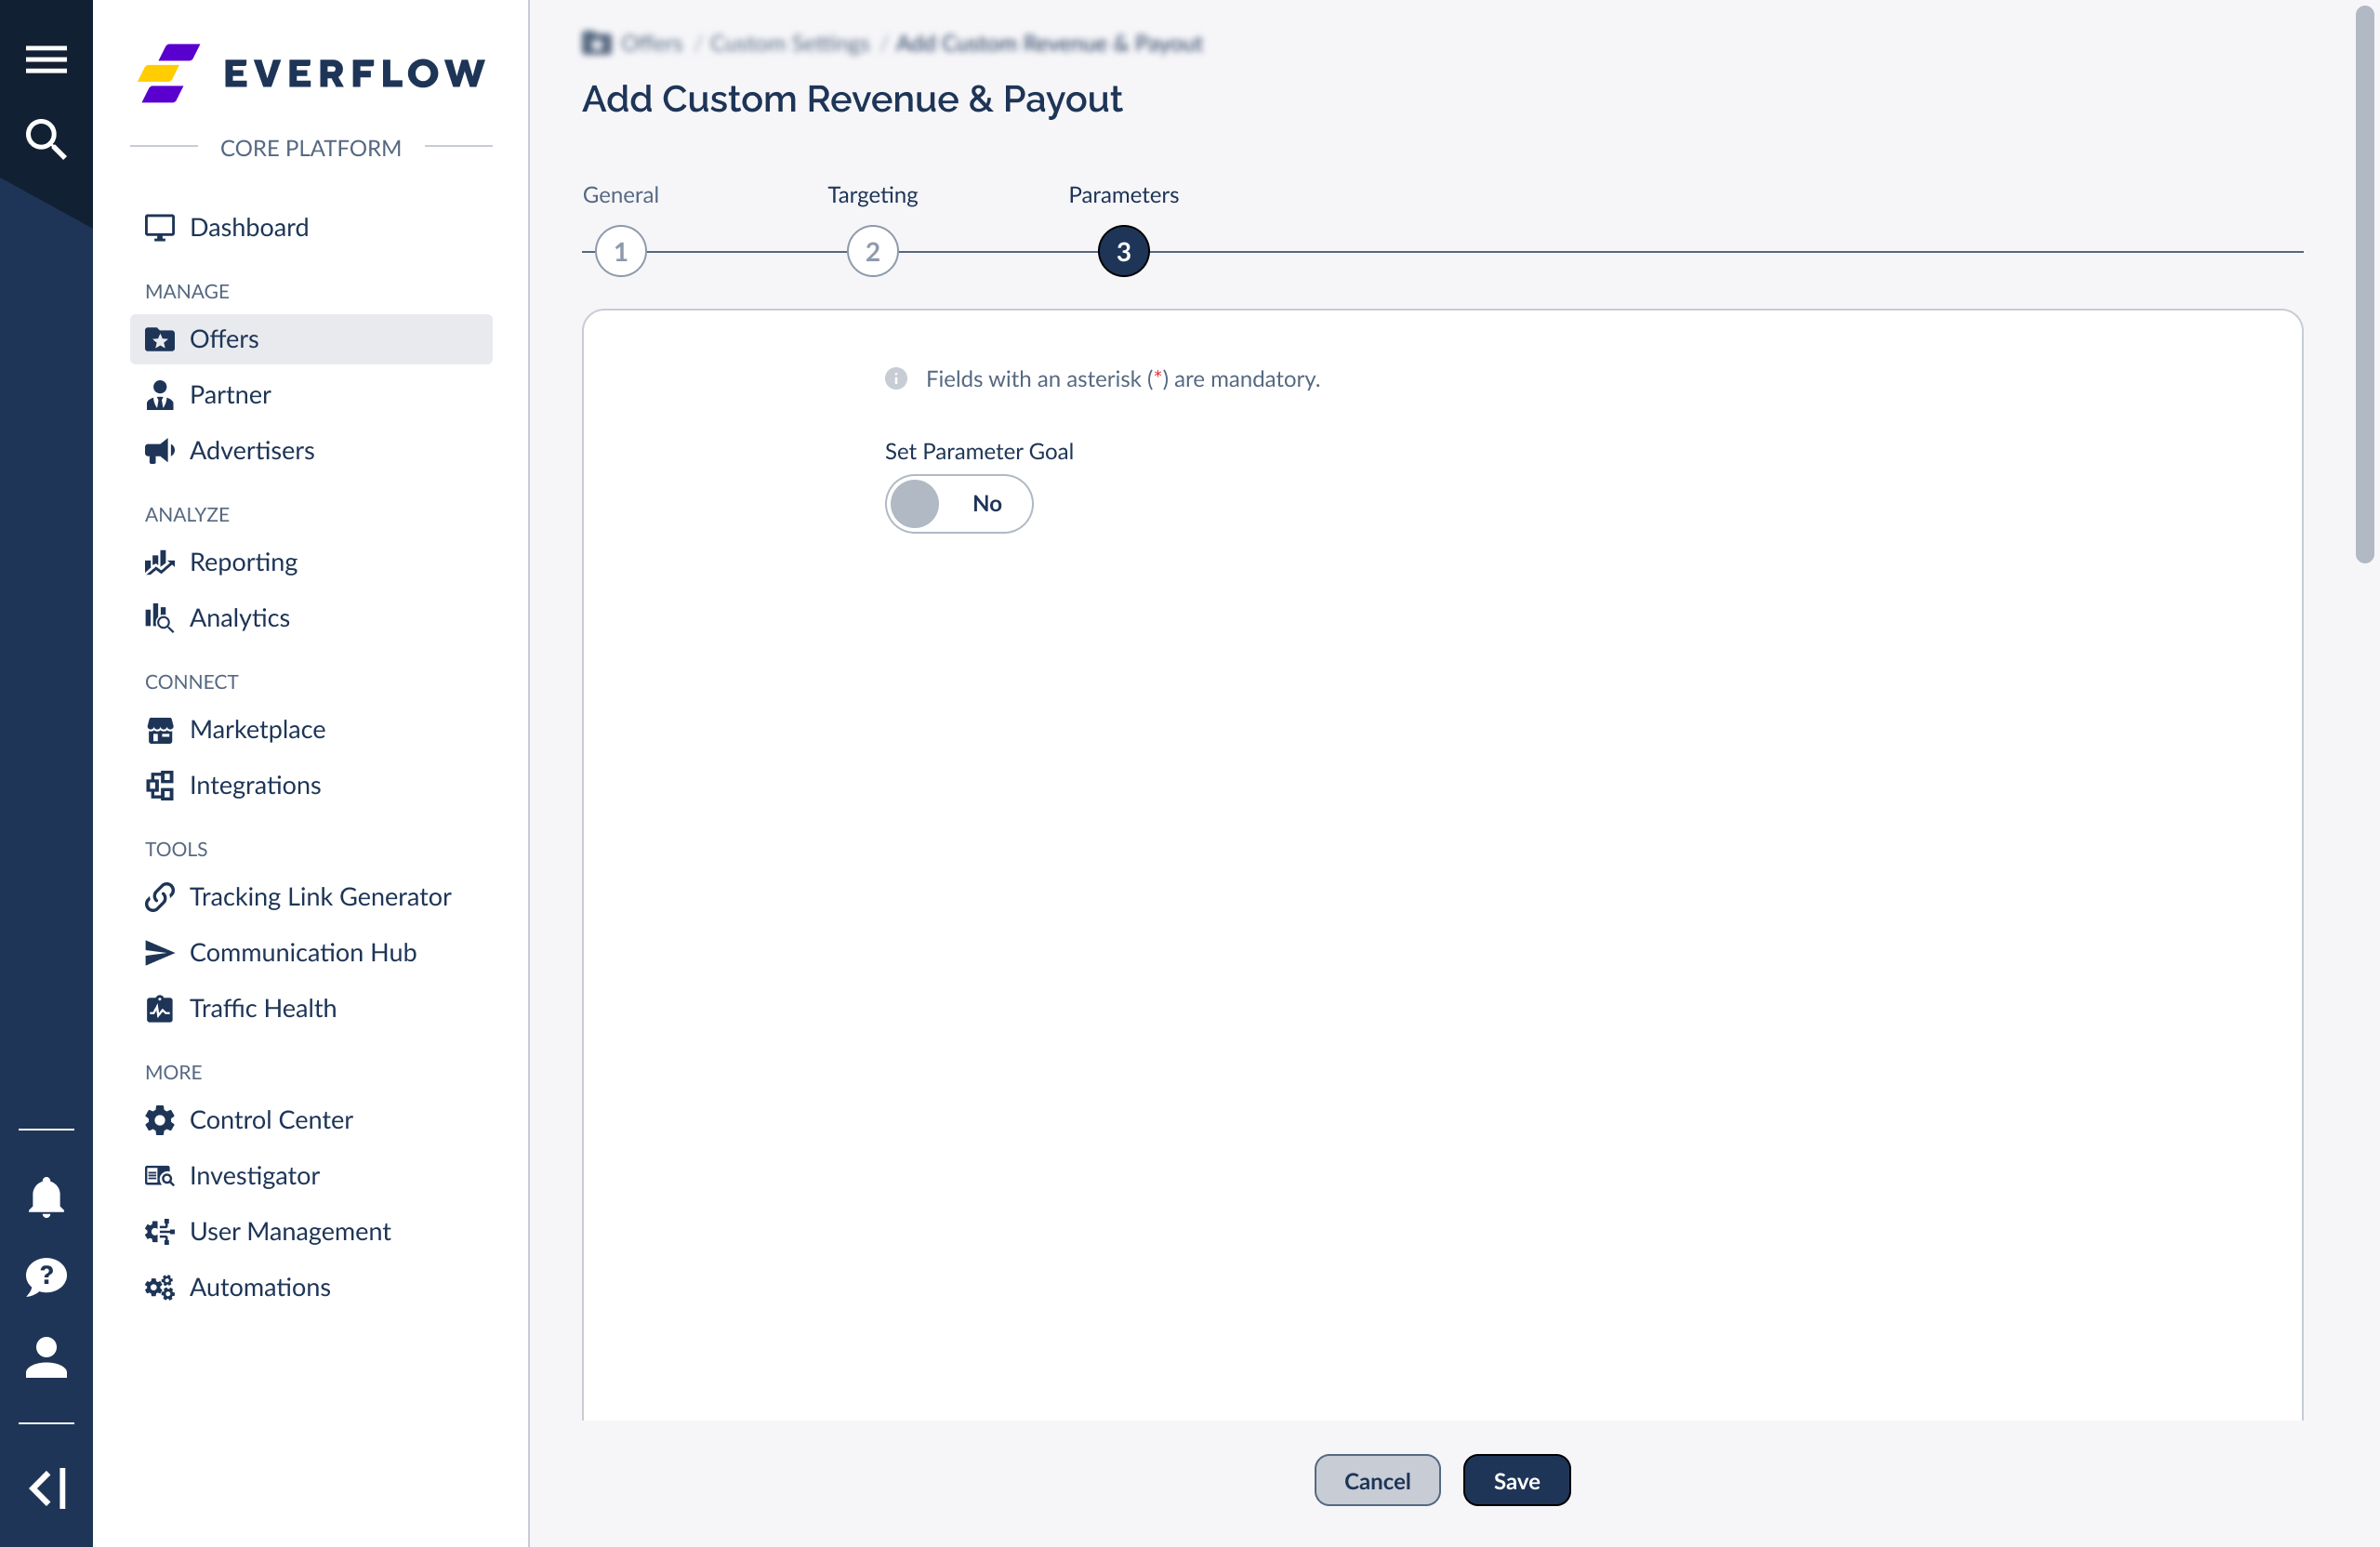
Set Parameter Goal: Off
Toggle this on to define parameter-based conditions for your custom setting.
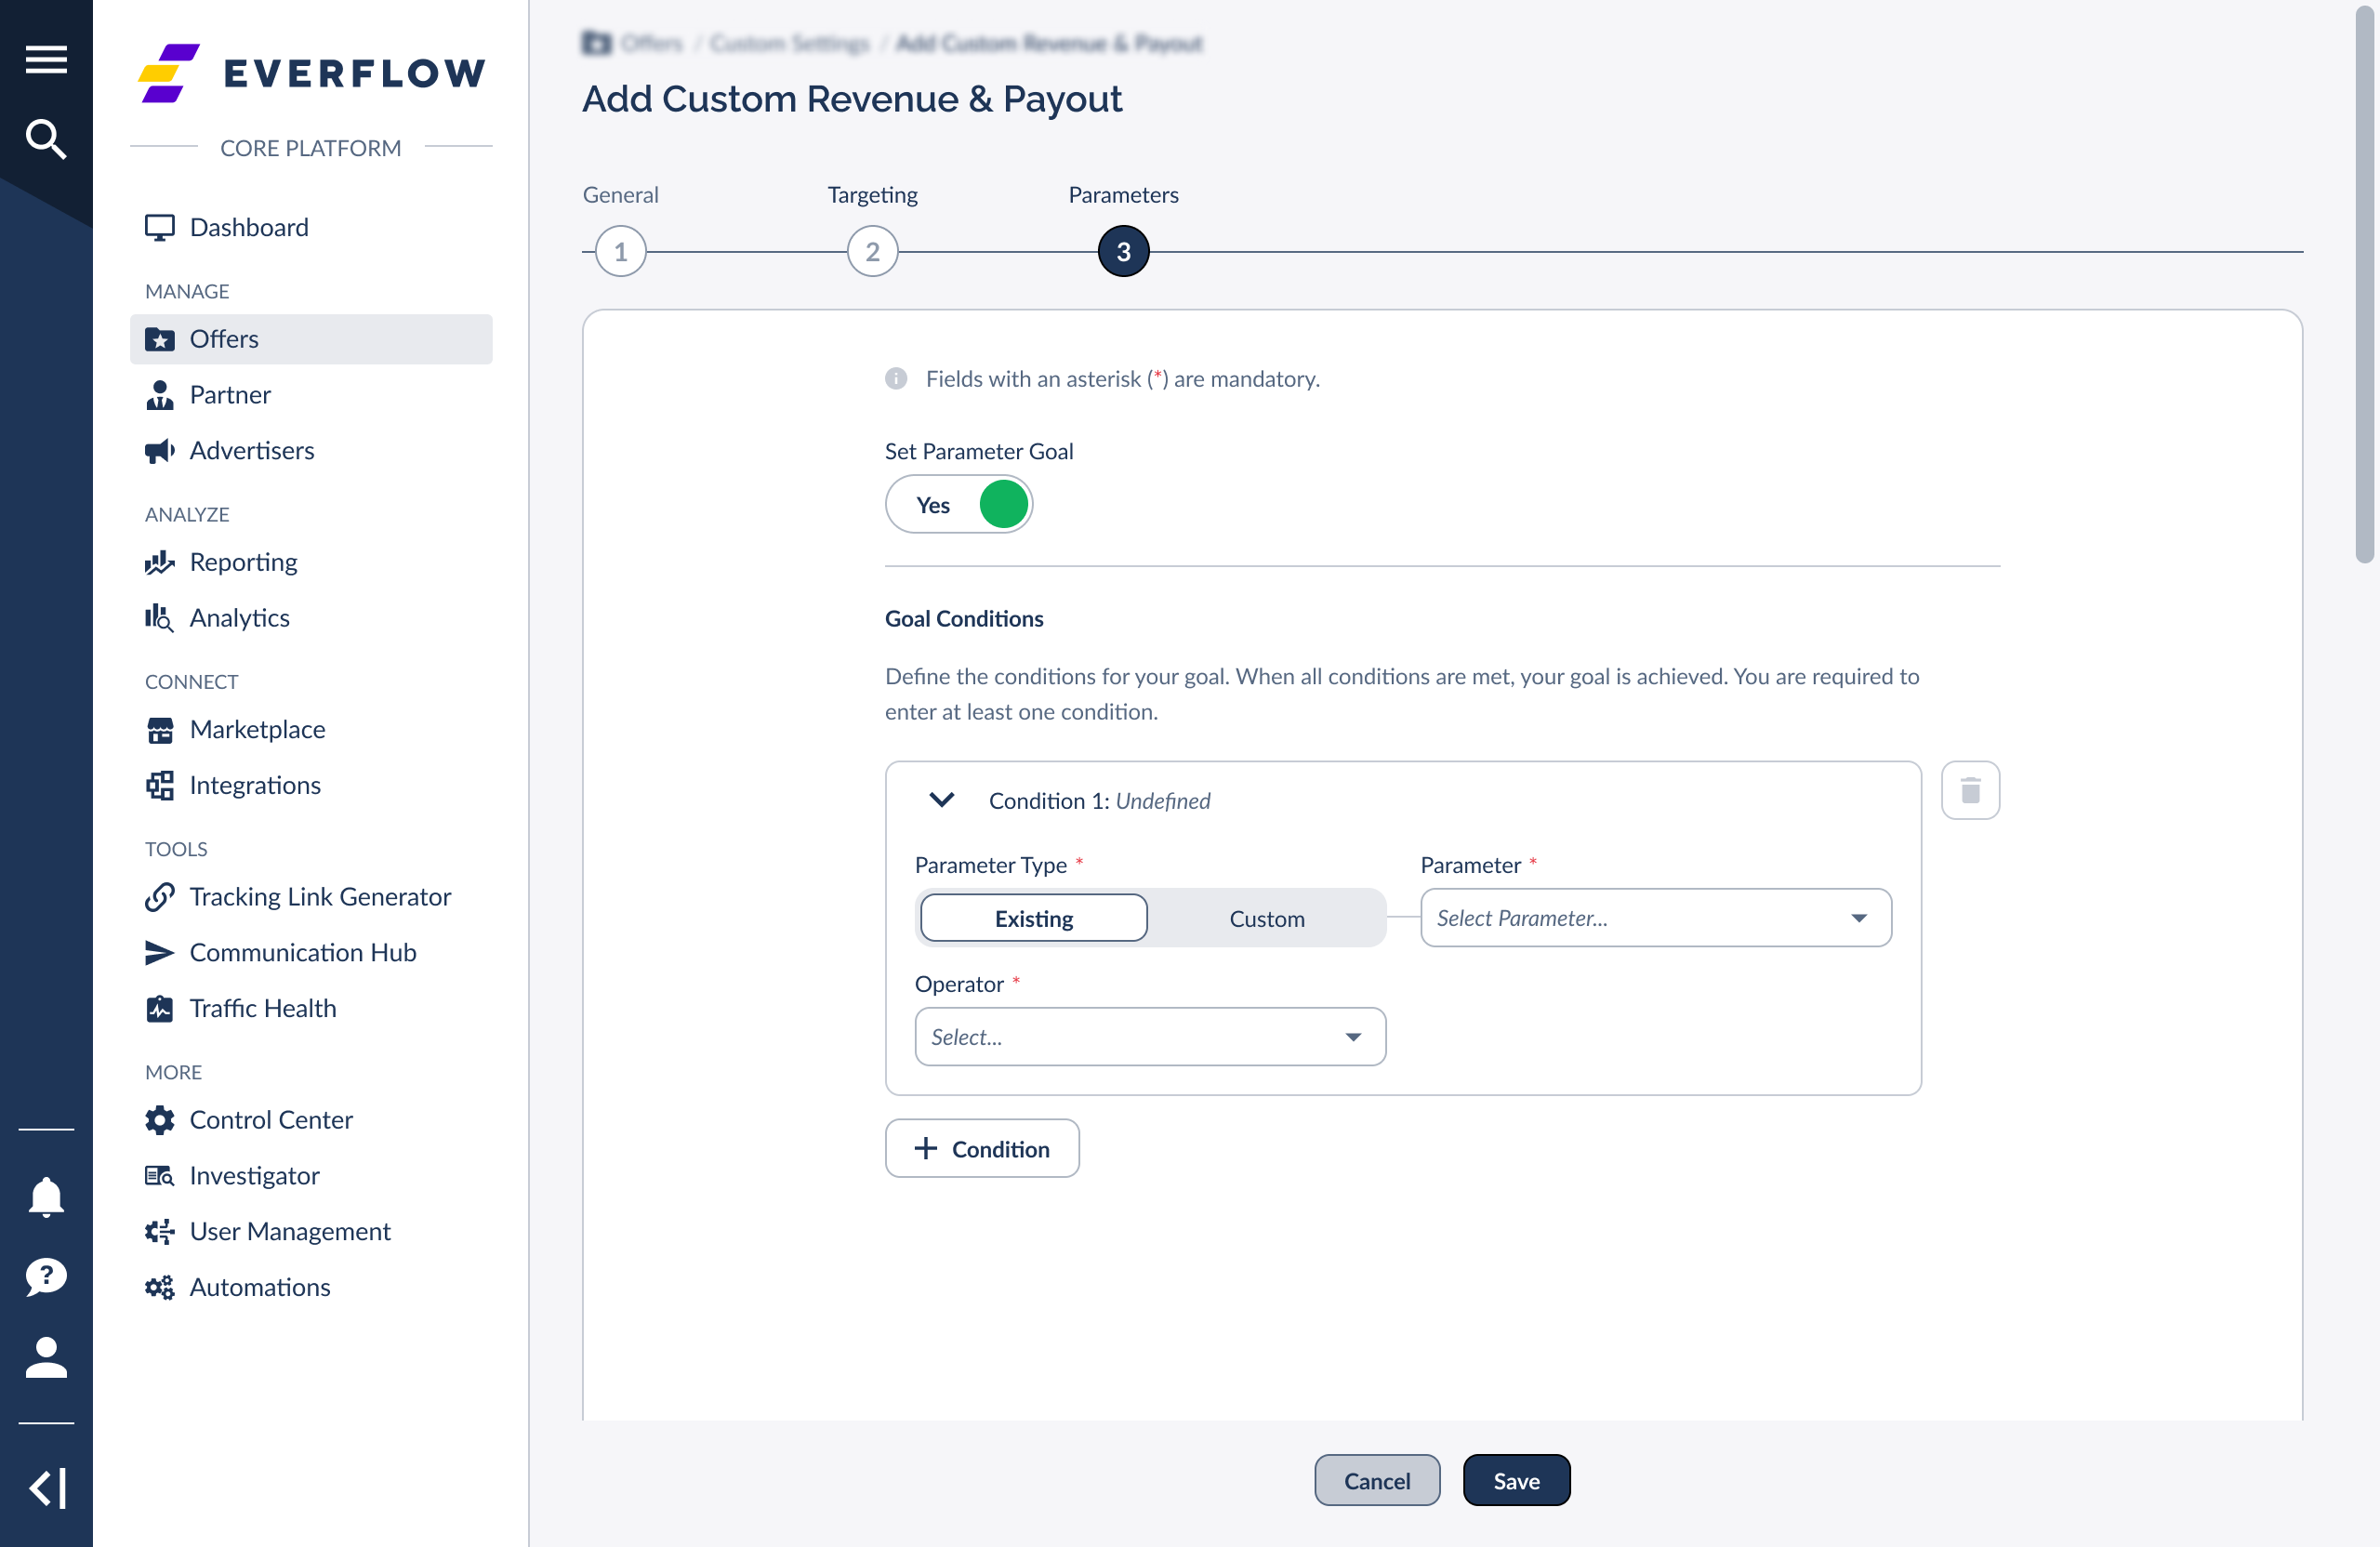
Parameter Type: Existing
Choose from standard parameters like Sub IDs, Adv IDs, Source IDs, or Sale Amounts.
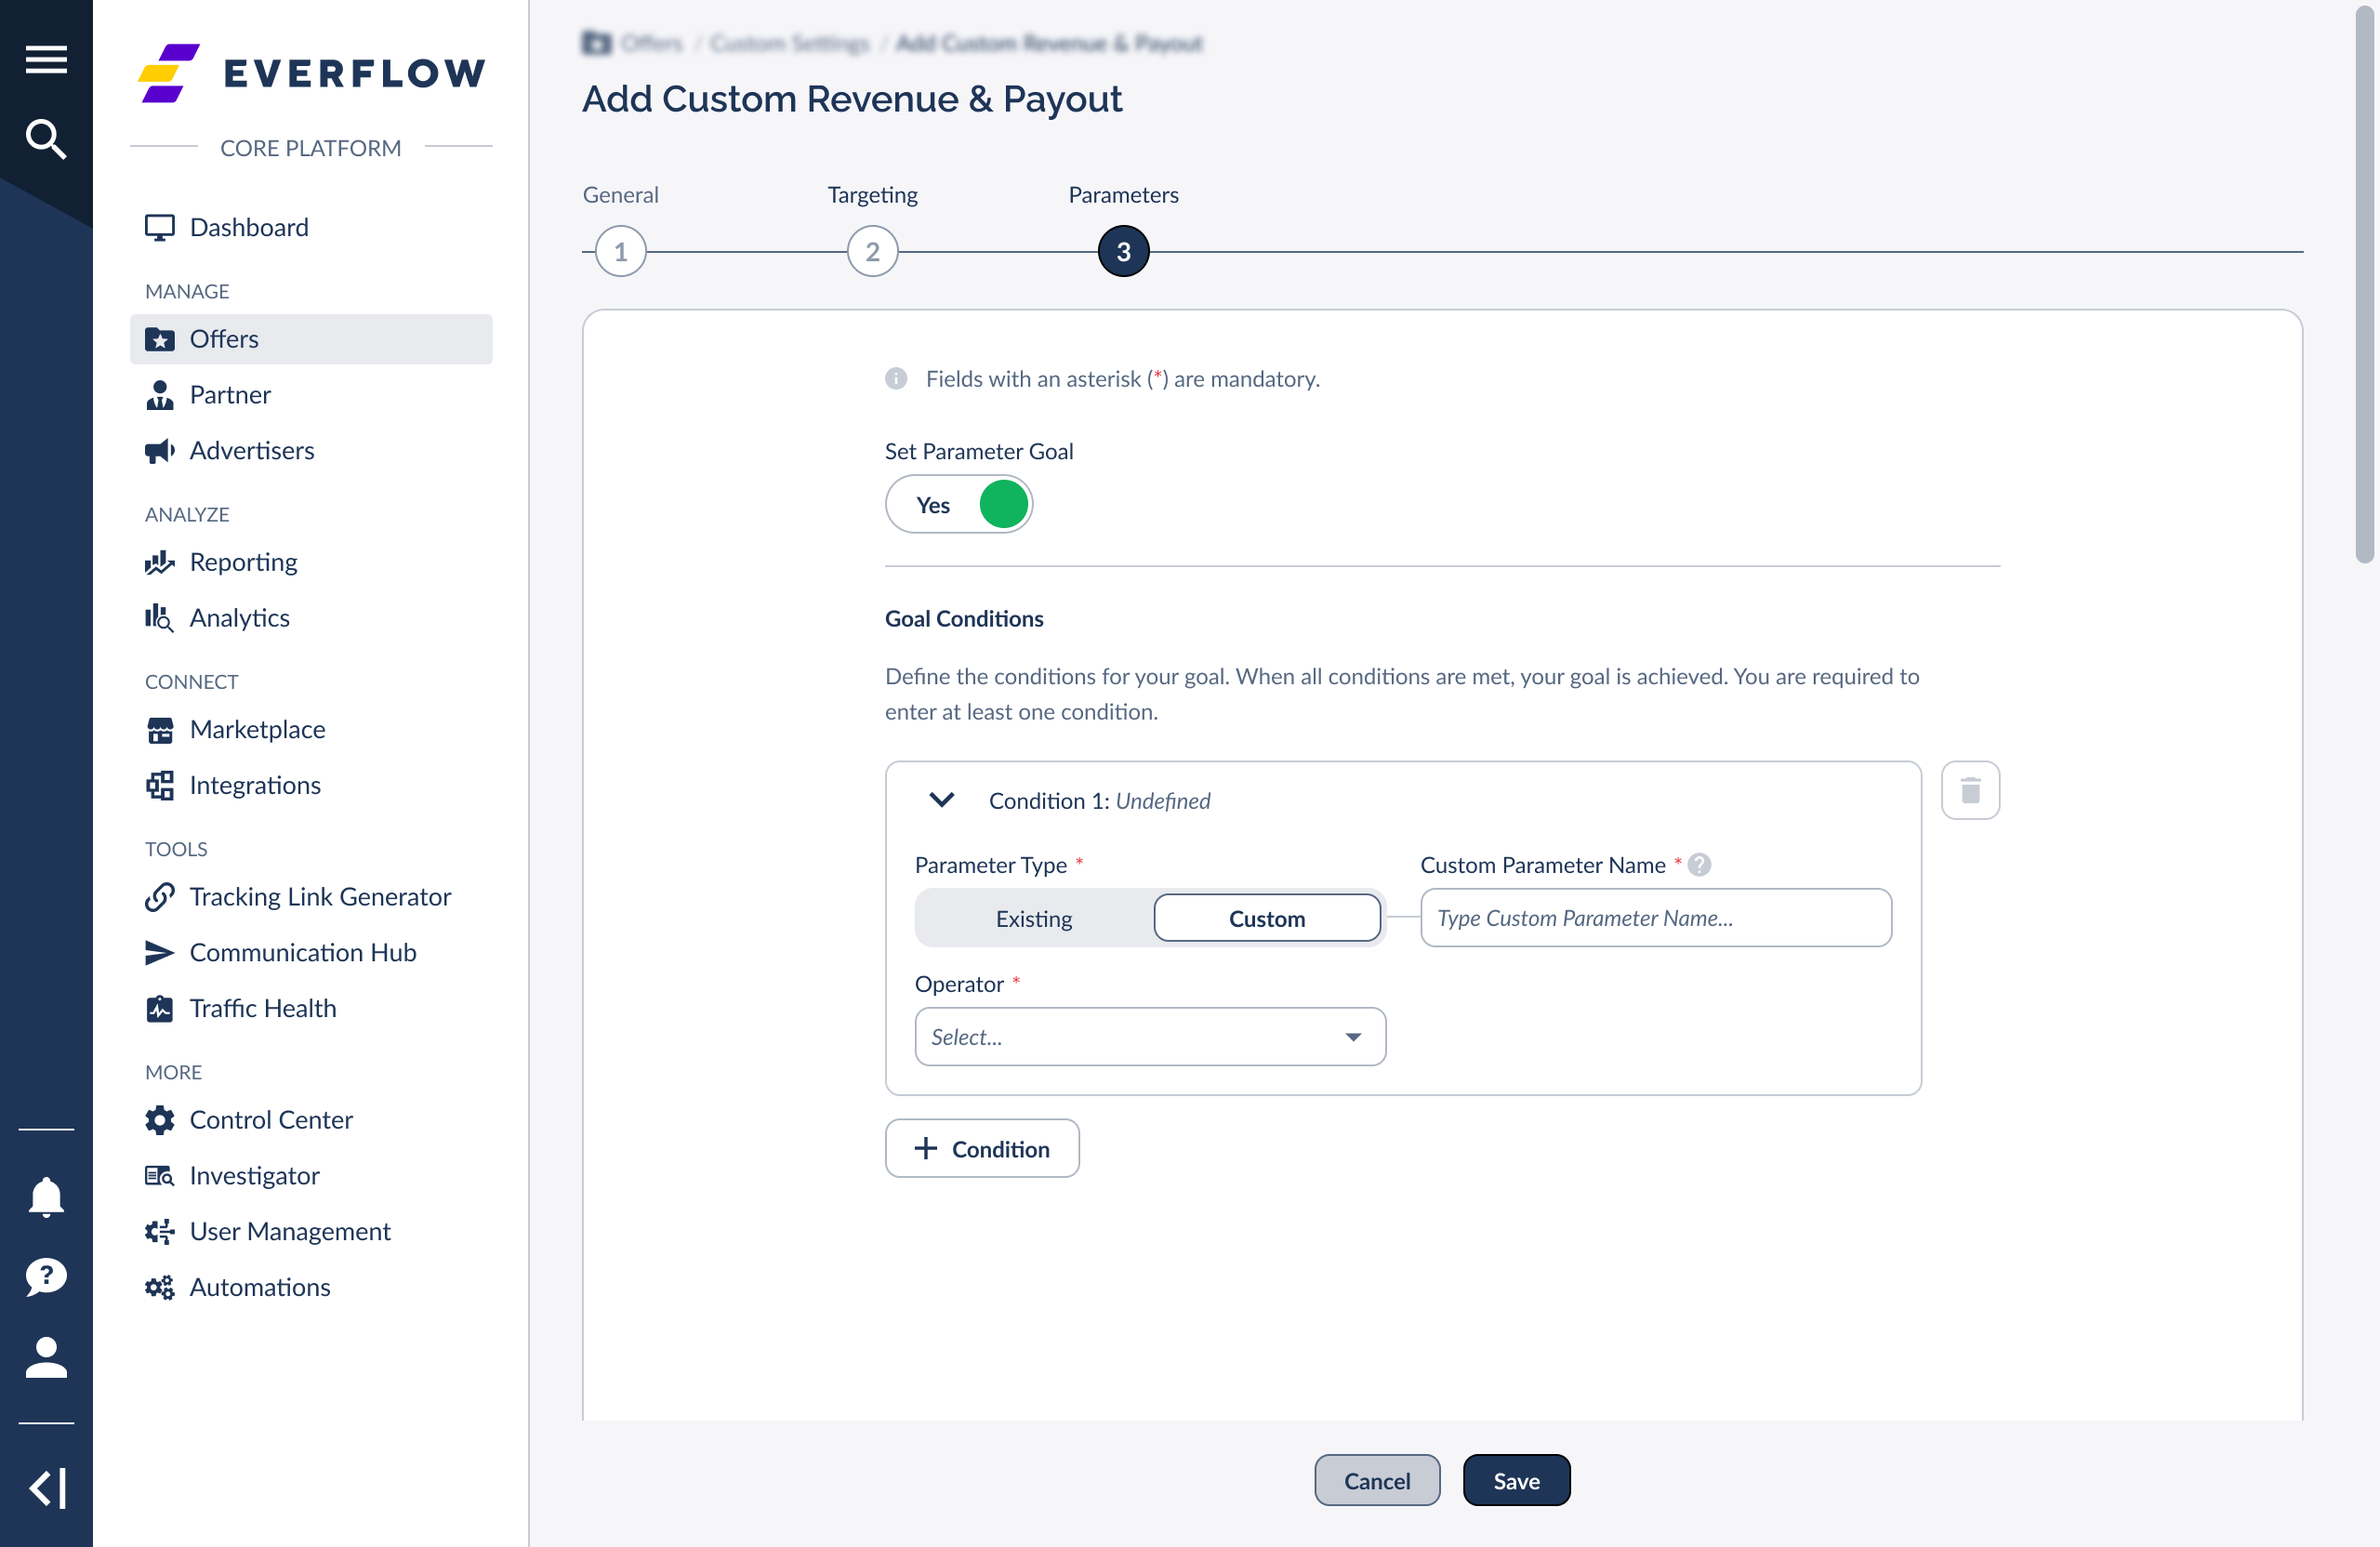
Parameter Type: Custom
Enter a specific parameter name to match (e.g., sub1, adv1, source_id, or my_custom_param).
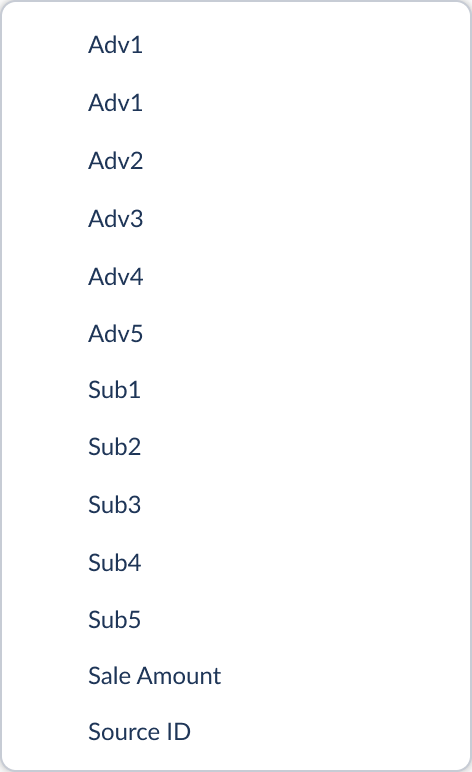
Existing Parameters Dropdown
The full list of standard parameters available when Existing is selected.
Operator: Text Comparison
Text parameters support operators like Contains, Equals, Starts With, and more.

Operator: Number Comparison
Number parameters support Equal To, Greater Than, Less Than, Between, and more.

Multiple Conditions (AND Logic)
Add multiple parameter goal conditions — all must match for the custom setting to apply.
Prioritization of Custom Settings
When more than one custom setting could apply, Everflow decides priority using this order:
- Number of Targeting Rules
- More rules = higher priority
- E.g., targeting 3 countries > targeting just 1 region
- Number of Parameter Goals
- More parameter conditions (Sub IDs, Adv IDs, Source IDs) = higher priority
- Partner Specificity
- Specific Partner settings > All Partners
- Offer URL Specificity
- Specific Offer URLs > All Offer URLs
- Date Range Specificity
- Settings with active dates > Settings with no date
- Creation Time
- Newer settings override older ones
- Tiebreaker
- If settings are identical and created at the same time, the one with the lower ID will likely be applied.
🎯 Custom Settings Priority Simulator
Compare two custom settings to see which one Everflow will apply
Bulk Operations
Import Custom Revenue & Payout Settings
- Go to Offers > Custom Settings
- On the Payout & Revenue tab, click the vertical dots > Bulk Add
- Download the template, prepare your CSV, and upload
Optional CSV Columns Include:
- description
- public_description
- status
- payout_amount (if is_payout_enabled = false)
- payout_percentage (if is_payout_enabled = false)
- payout_type (if is_payout_enabled = false)
- revenue_amount (if is_revenue_enabled = false)
- revenue_percentage (if is_revenue_enabled = false)
- revenue_type (if is_revenue_enabled = false)
- date_valid_from (YYYY-MM-DD)
- date_valid_to (YYYY-MM-DD)
- is_apply_all_affiliates
- affiliates_ids (if is_apply_all_affiliates = false)
- is_apply_all_offer_urls
- offer_urls_ids (if is_apply_all_offer_urls = false; separator should be "|" between Offer URL IDs)
- country_codes
Use 1 for True and 0 for False in Boolean columns
Export Custom Revenue & Payout Settings
- Navigate to Offers -> Custom Settings
- On the Payout & Revenue tab, click the vertical dots > Export
- Choose CSV or JSON
Other Custom Settings
Custom Caps
Set Conversion, Click, or Impression limits at the Partner or Offer level.
If both an Offer and a Partner have caps, Everflow will stop Conversions once either cap is reached.
Custom Landing Pages
Create unique Default Landing Page URLs for specific Partners or tracking conditions.
- URLs can be filtered by Sub IDs, creatives, and more
- You can append Everflow macros to Custom Landing Pages
Bulk Edit Landing Page Status
- Go to Offers -> Custom Settings -> Landing Pages
- Select checkboxes
- Use the Actions dropdown to set as Active/Inactive
Custom Creatives
Upload Partner-specific creatives that are only visible and usable by the selected Partners.
Additional Rules & Timing Behavior
Effective Between Dates
- The Effective Between date range uses the timezone set at the network level.
- The range is inclusive of both dates. For example, dates 11/19 and 11/20 are valid from 11/19 at 00:00:00 (midnight) through 11/20 at 23:59:59.
Day Parting Timing
- If a click comes through during a time that is outside the custom setting's day parting window, but the conversion later occurs inside that window, the setting is evaluated based on the time of the click — not the time of the conversion.
How Rulesets Are Compared for Priority
- When comparing rulesets for priority, Everflow compares the number of rules in the ruleset — not the type of rules.
- The more rules a setting has, the higher its priority.


