Home
Partner Management
Partner Setup
How To Set Up Partners Manually

SERIES:

Partner Setup

How To Set Up Partners Manually

A complete walkthrough of manually creating a new Partner account using the Add Partner form, covering all essential settings from basic information to user access.

Overview

Everflow offers two ways to add Partners to your program: manual setup or self-registration through your sign-up form.

This guide focuses on the manual setup process, walking you through each step to create a new Partner account correctly.

Whether you're adding your first Partner or your hundredth, this guide ensures you'll configure all necessary settings properly.

Before You Start

Make sure you have the following information ready:

  • Partner's business name and contact details
  • Preferred currency and language settings
  • Address information (if needed for invoicing)
  • User account details (email, name) if creating a login

Setp-by-Step Guide
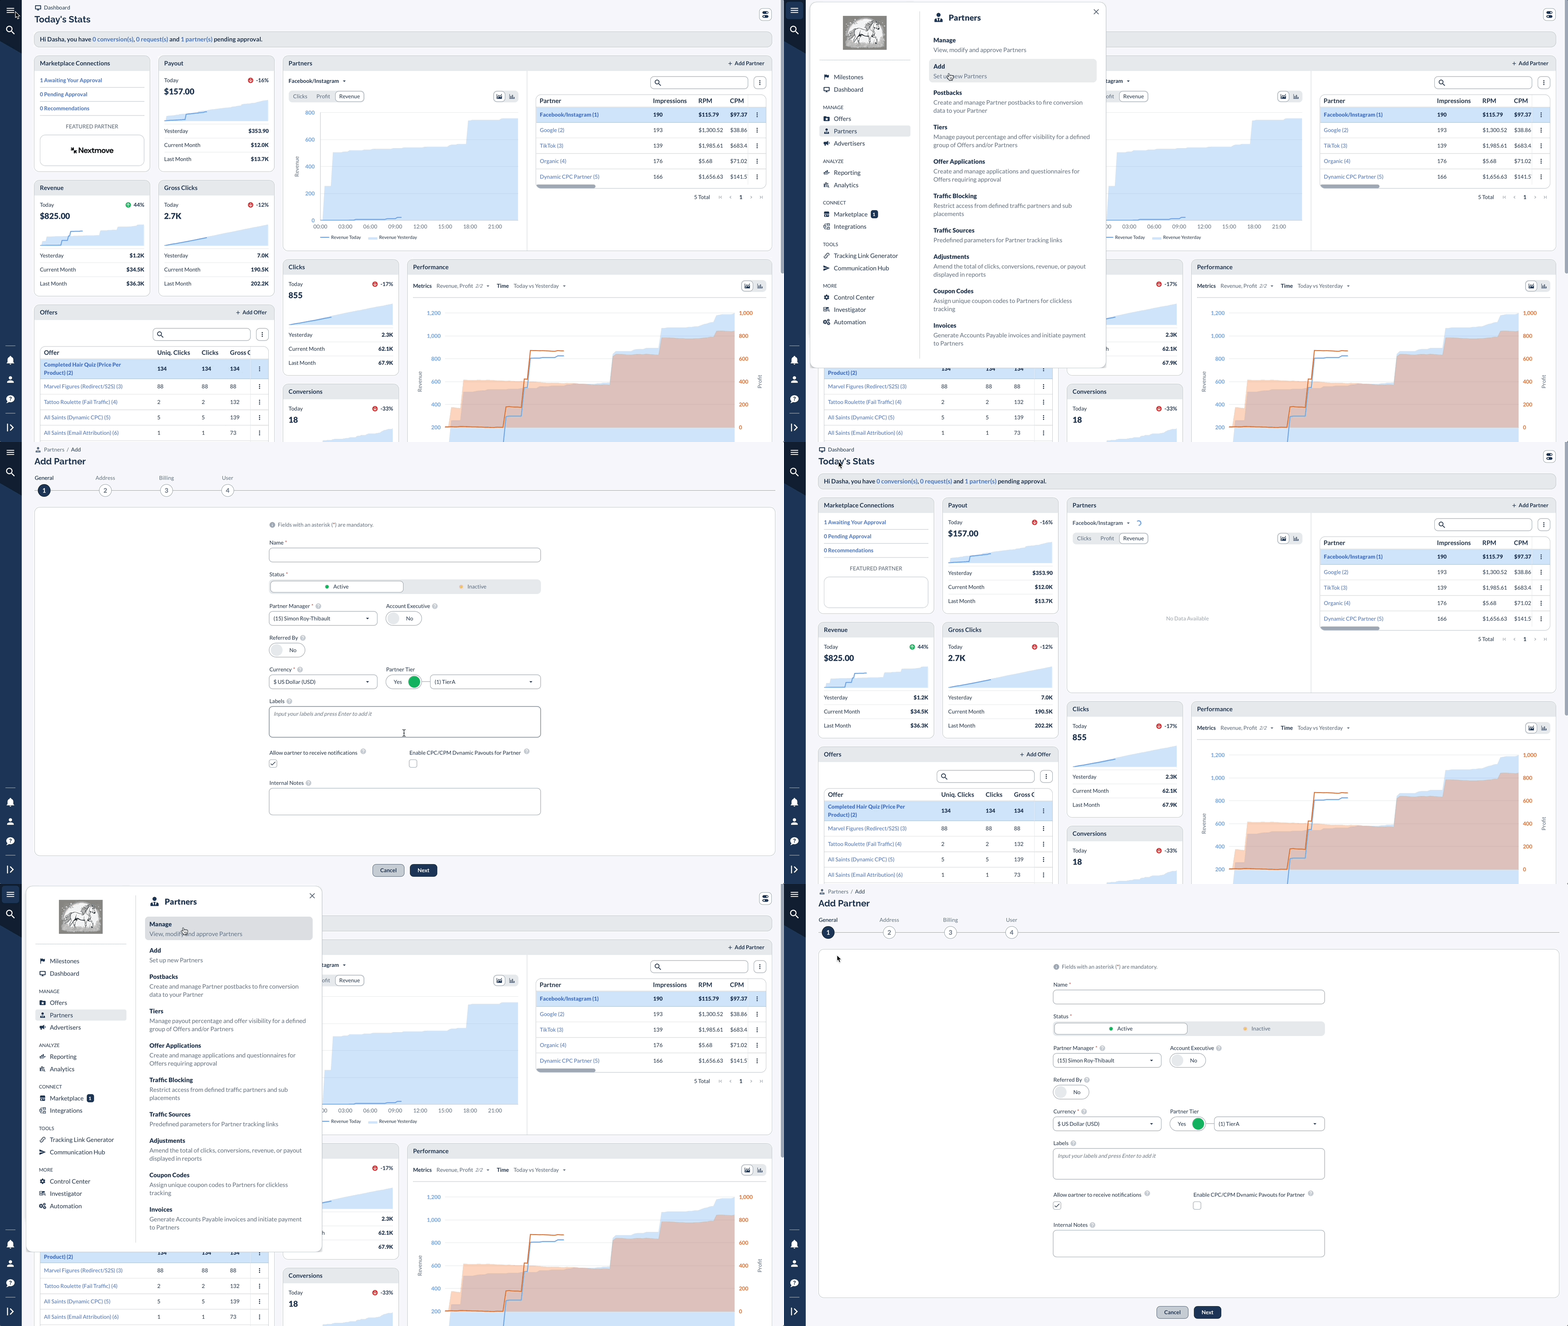
1 Open the Add Partner Form Navigate to Partners in the main menu. Click Add or use the Partner button in the Partners > Manage section.
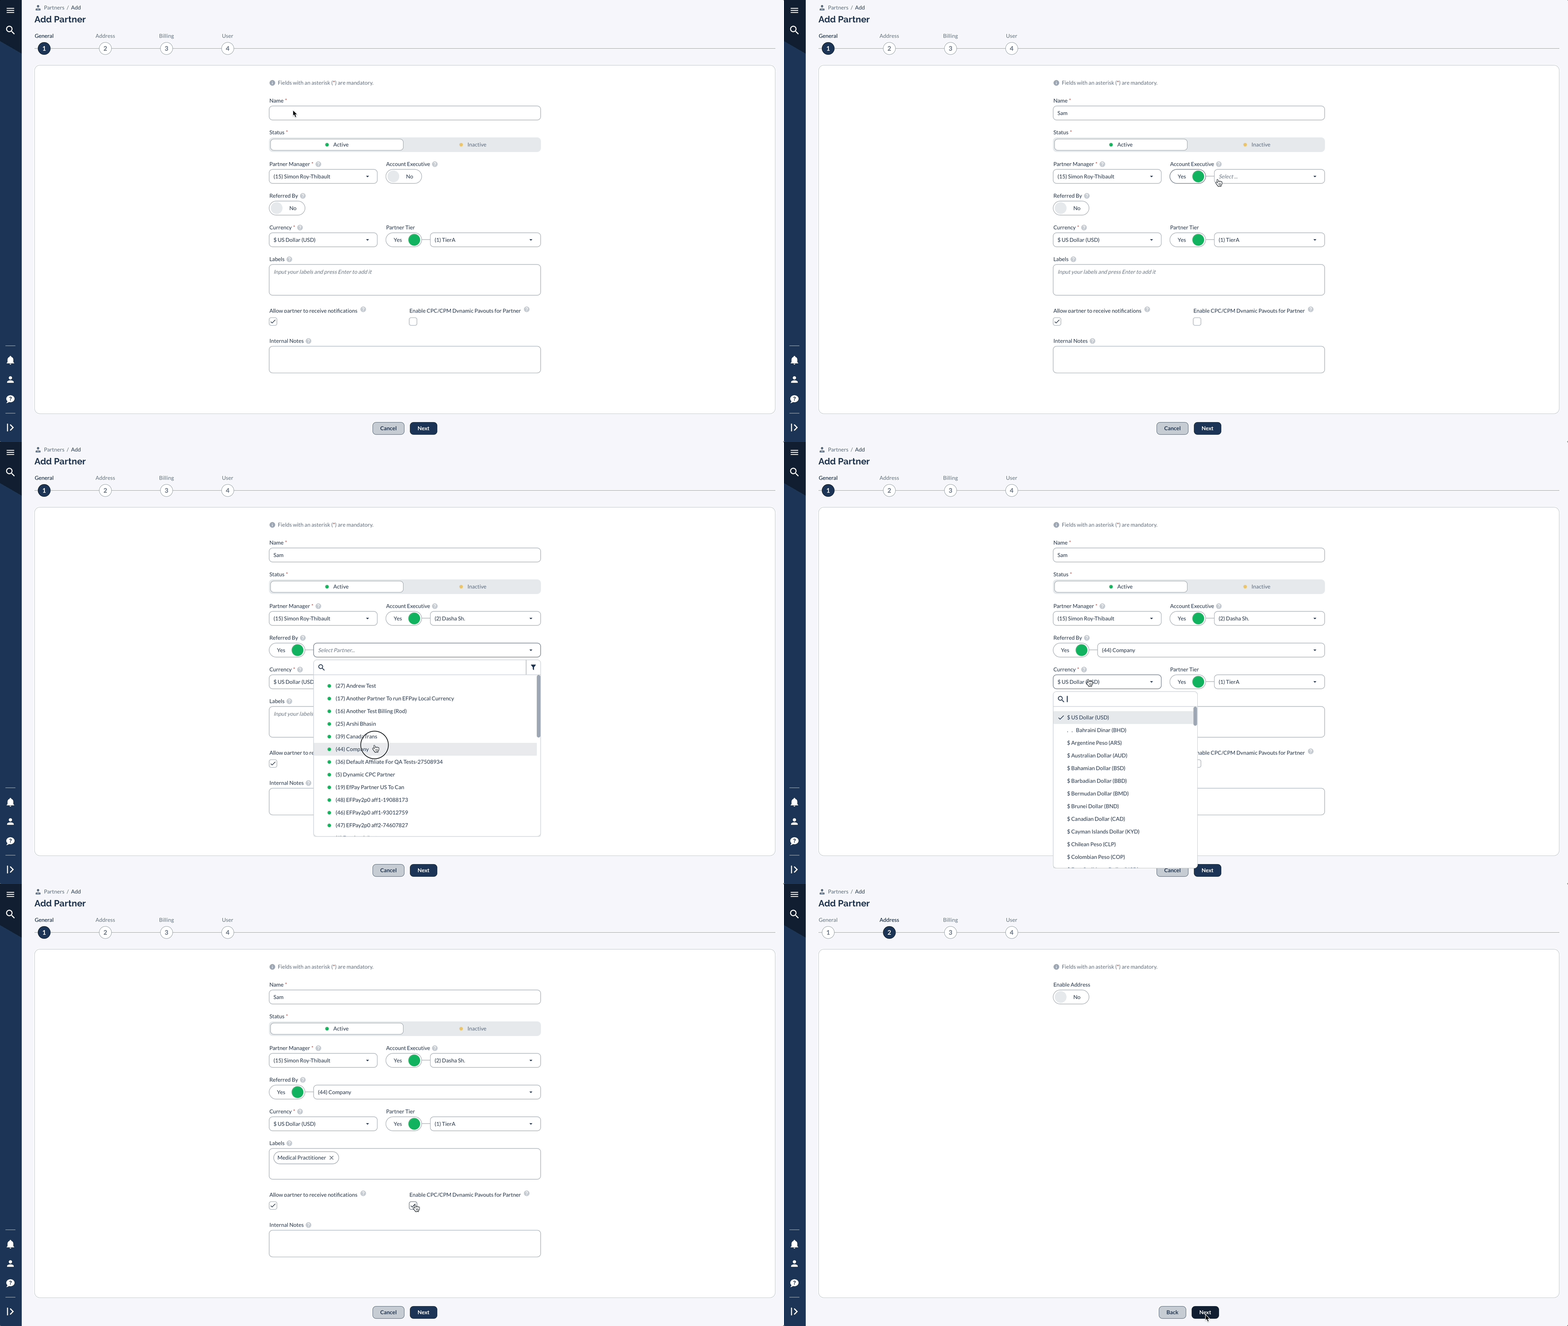
2 Fill in Partner Details Enter the Partner Name (required). Set the Status to: Active: Ready to promote Offers Inactive: Account created but not ready Assign a Partner Manager from the dropdown Select Account Executive (optional) Referred by (if it's a Referral from another Partner since Everflow has an option to set up a Referral program for Partners) Choose the Currency for Payouts (Currency is only for display purpose in the Partner Portal (UI) reporting. It does not control the actual Offer Payout currency.) Set optional features: Partner Tier (for managing bulk payouts) Labels (for organization) Internal Notes (for your reference) You can also: Allow Partner to receive (in app or email) notifications Enable CPC/CPM Dynamic Payouts for Partner Click Next CPC/CPM Dynamic Payouts for Partner feature only works after you have enabled the global setting under Configuration.

When enabled, this Partner will be able to pass their CPC/CPM media buying costs inside of the Tracking Link, which dynamically adjusts their payout on each click/impression.
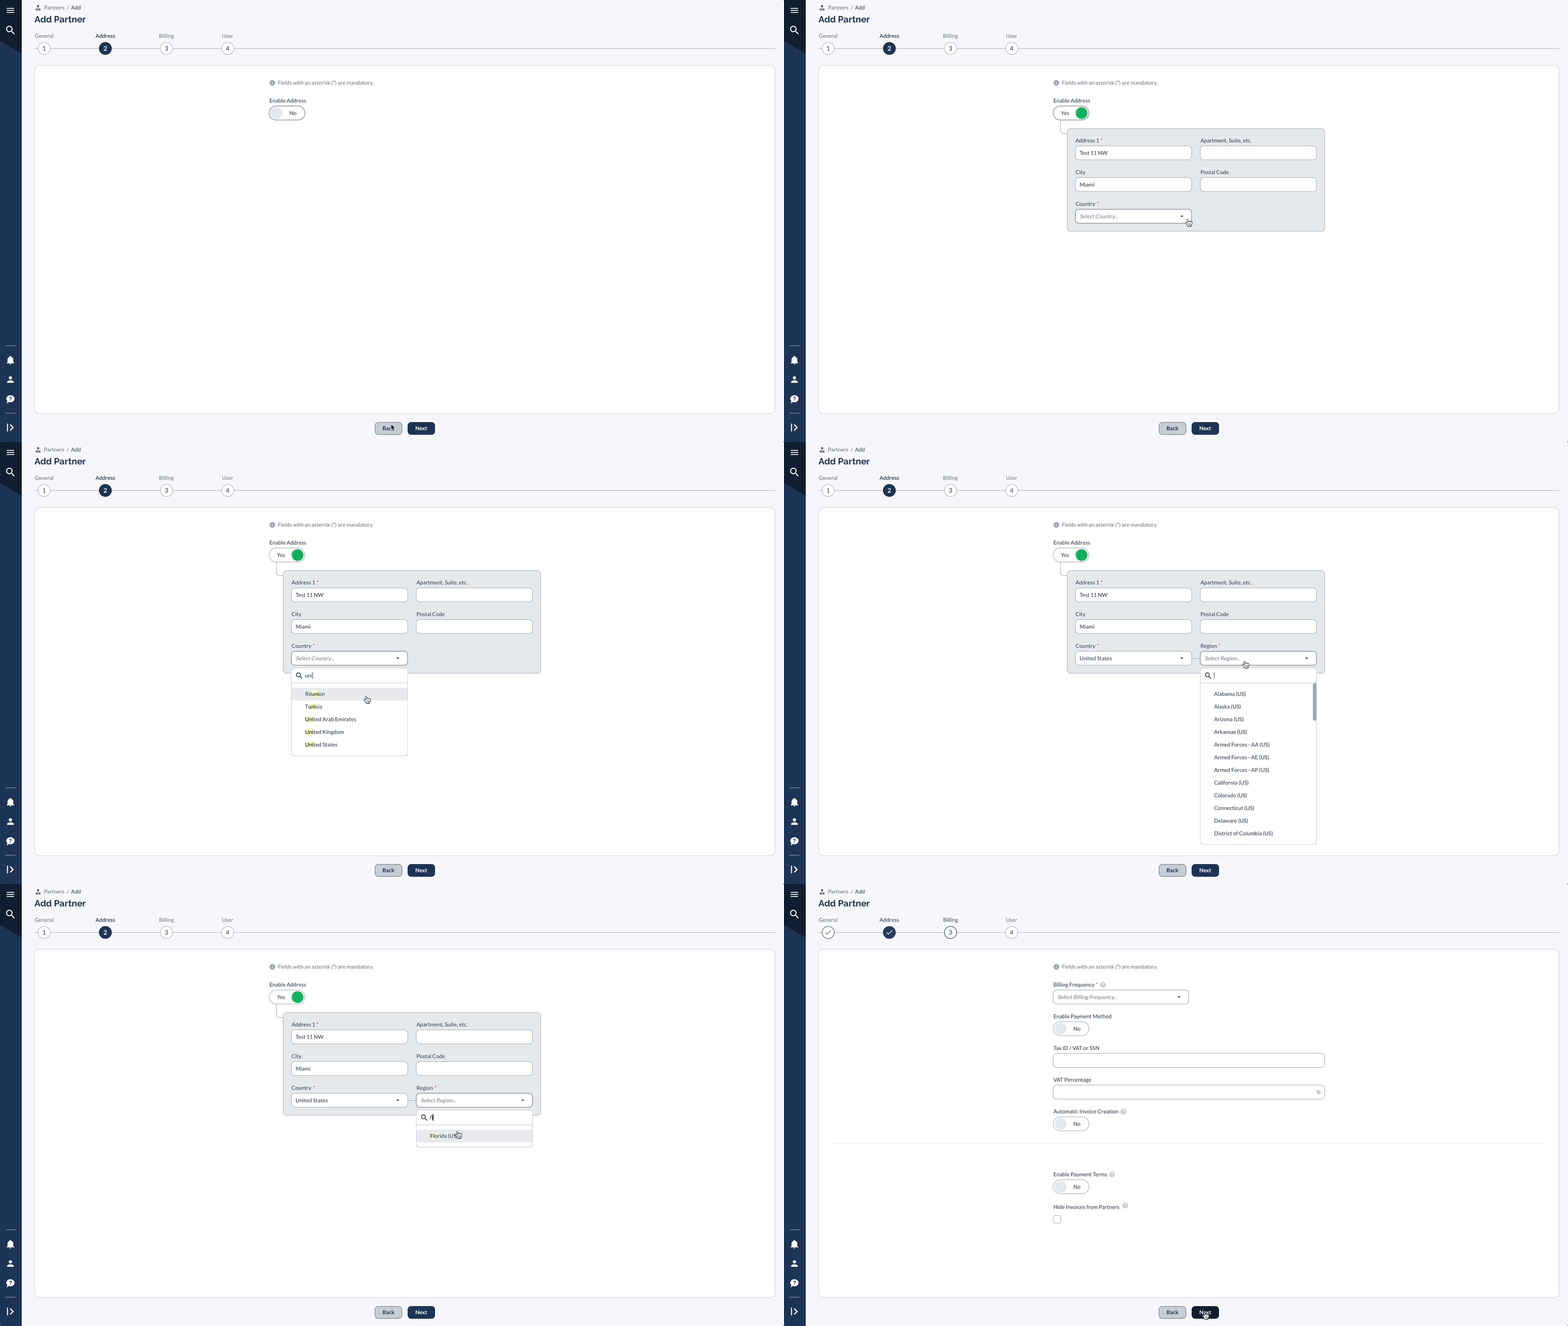
3 Fill in Address Details If enabled, fill in: Address Line 1 Apartment/Suite (optional) City Postal Code Country Click Next
4 Configure Billing and Payment Billing Frequency* (Required) Options: Weekly, Bimonthly, Monthly, Two Months, Quarterly, Manual, Other Select the frequency for generating invoices Payment Method Toggle "Enable Payment Method" to specify how the partner will be paid Available options include: Everflow Pay, Bitcoin, Capitalist, Check, Direct Deposit, Gift Card, Paxum, Payoneer, PayPal, Skrill, Webmoney, Wire Tax Information Enter Tax ID / VAT or SSN if required Specify VAT Percentage if applicable Automatic Invoice Creation Toggle to enable/disable automatic invoice generation If enabled, configure: Auto Invoice Start Date Invoice Generation Delay (No Delay, 1 Day, 1 Week, 10 Days, 15 Days, 30 Days, or Custom) Auto Invoice Creation Amount Threshold Default Invoice Settings Enable Payment Terms: Set specific payment terms (e.g., Net 15) Hide Invoices from Partners: Option to control invoice visibility For Partners like Meta Ads or Google Ads, you should: Set Billing Frequency to "Other" Disable Payment Method Disable Automatic Invoice Creation Disable Payment Terms This configuration ensures no payment-related processes are automatically triggered for these types of Partners. Click Next to proceed to the final step of Partner setup.
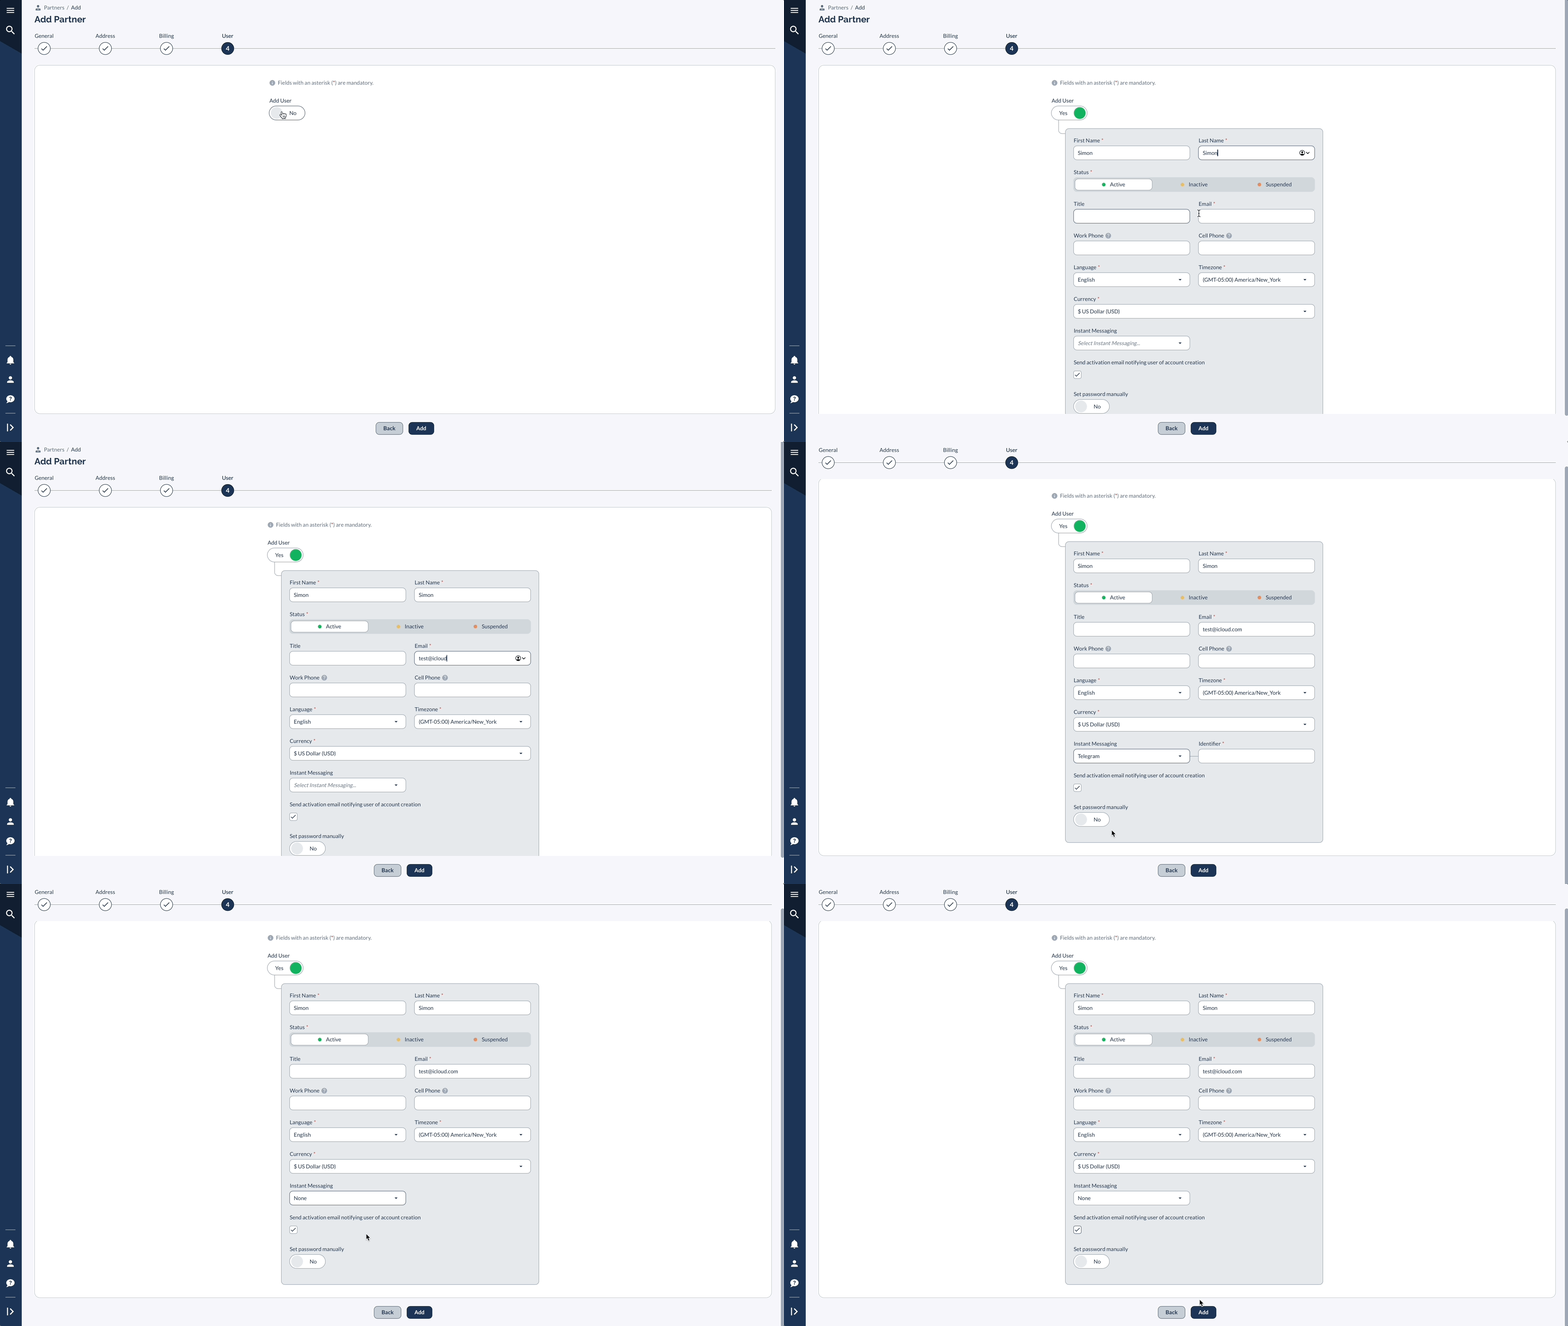
5 Create Partner Login Toggle Add User to create login credentials (if your Partner is not a media buying channel like Meta or Google Ads) Enter required information: (First and Last Name, Status, Email address, Language preference, Timezone, Currency, Others (phone, title, etc.) Choose whether to: Send activation email Or set password manually Click Add to complete the process

Real-Life Example

Let's say you're adding a new affiliate marketing Partner called "Premium Traffic Solutions":

General Information Name: Premium Traffic Solutions Status: Active Partner Manager: John Smith Currency: USD Labels: "Email Traffic" "Newsletter Publisher" User Account First Name: Sarah Last Name: Johnson Email: sarah@premiumtraffic.com Language: English Timezone: (GMT-04:00) America/New_York Send activation email: Yes

After clicking Add, Sarah will receive an email with her login credentials, and you can begin approving her for specific Offers.

Pro Tips

To optimize your Partner management in Everflow, implement these best practices throughout setup.

Create descriptive labels that meaningfully categorize your Partners, allowing for efficient filtering and organization within your dashboard. While configuring each account, take time to document detailed internal notes regarding specific traffic sources or any special arrangements you've negotiated, creating a valuable reference for your team.

Finally, pay careful attention when selecting currency settings, as using multiple currencies across different Partners can complicate your reporting capabilities—particularly in summary cards where consolidated metrics become more challenging to calculate and compare accurately.