
Overview
Instead of manually creating each Partner account, you can let potential Partners apply to your program through a customizable application form (aka Partner signup form).
This guide shows you how to find your sign-up URL, customize the form fields, and set up automated approvals to streamline your Partner recruitment process.
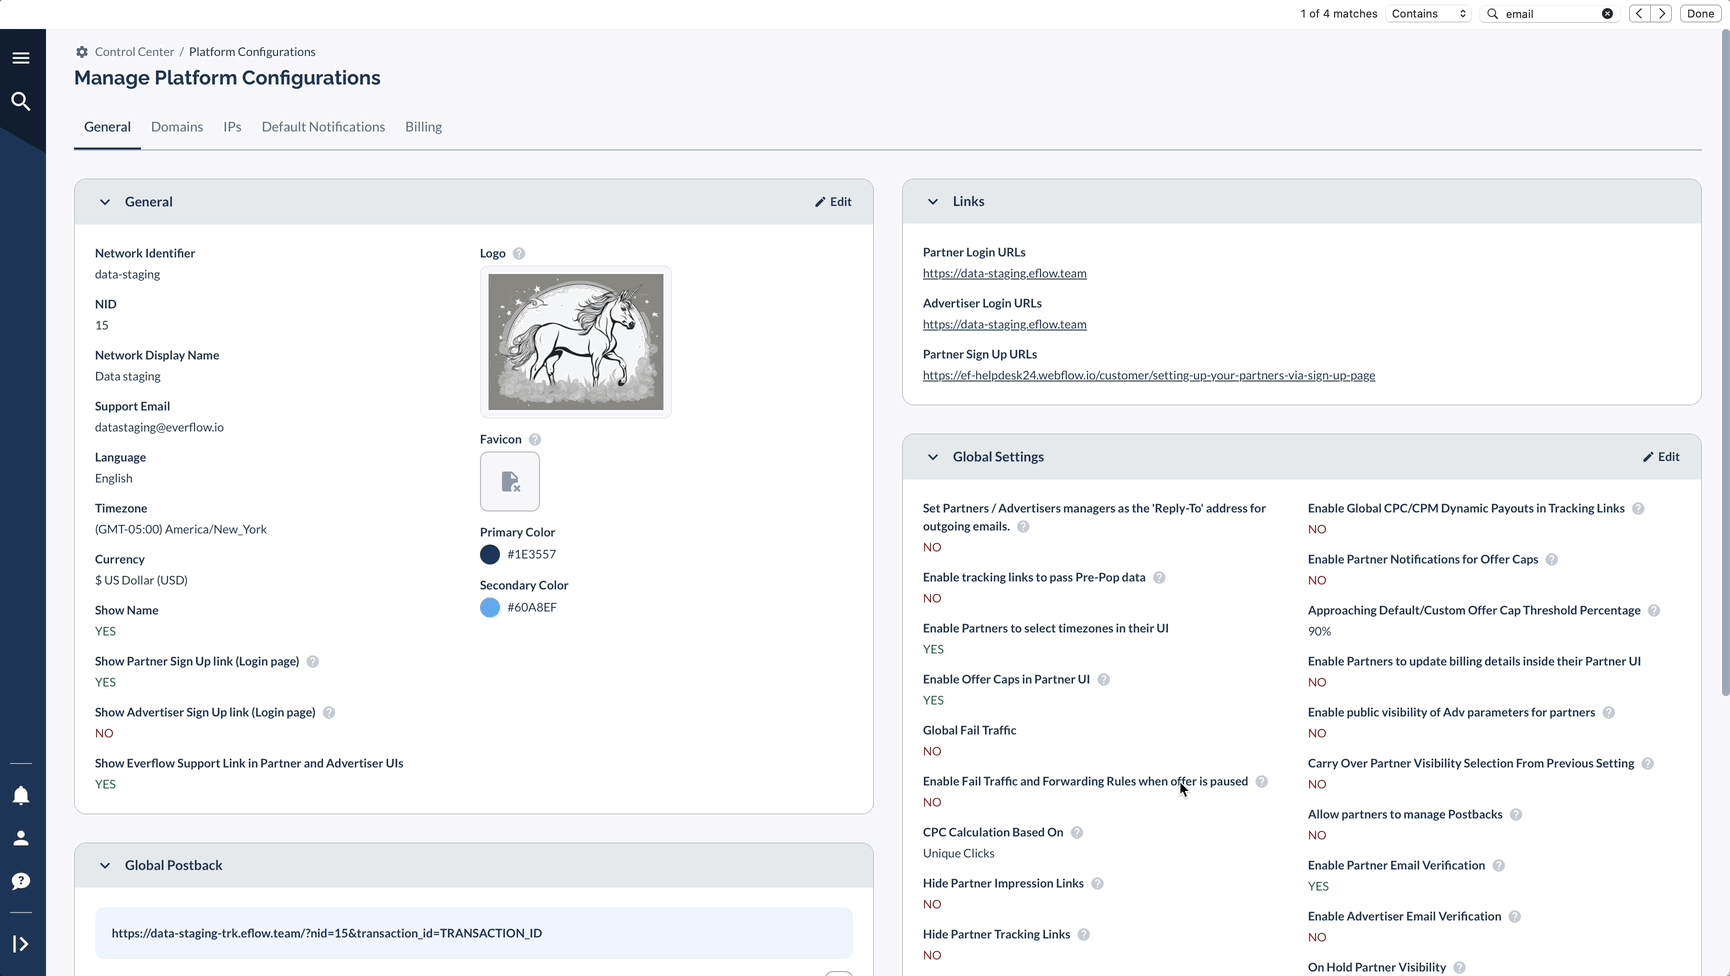
Finding Your Sign-Up URL
When Partners apply through this link, you'll automatically be assigned as their manager.
Customizing Your Sign-Up Form
Configure the settings and appearance of your partner signup form.
General Tab Options
Configure general settings for your signup form.
- External Sign Up URL:
- Toggle this ON to host your application form on your own website
- Toggle OFF to use Everflow's hosted form
- Custom Header:
- Add a welcome message
- Uses HTML formatting
- Appears at the top of the form
- Custom Confirmation:
- Customize the message shown after submission
- Thank Partners and set expectations about next steps
- Language: Choose the language of the sign-up form
- English, Arabic, Chinese simplified, French, German, Italian, Japanese, Korean, Portuguese, Russian, Spanish, and Turkish
Required Fields Configuration
Control which information you collect from Partners during signup.
- Basic Information:
- Legal Entity Name
- Company/Individual/Website Name
- Website/Social Media links
- Contact details (Phone Number)
- Business Details:
- Tax ID / VAT
- Address information
- Promotional methods
- System Settings:
- Language preference
- Timezone
- Currency
Adding Custom Questions
Add custom questions to your signup form to gather additional information from partners.
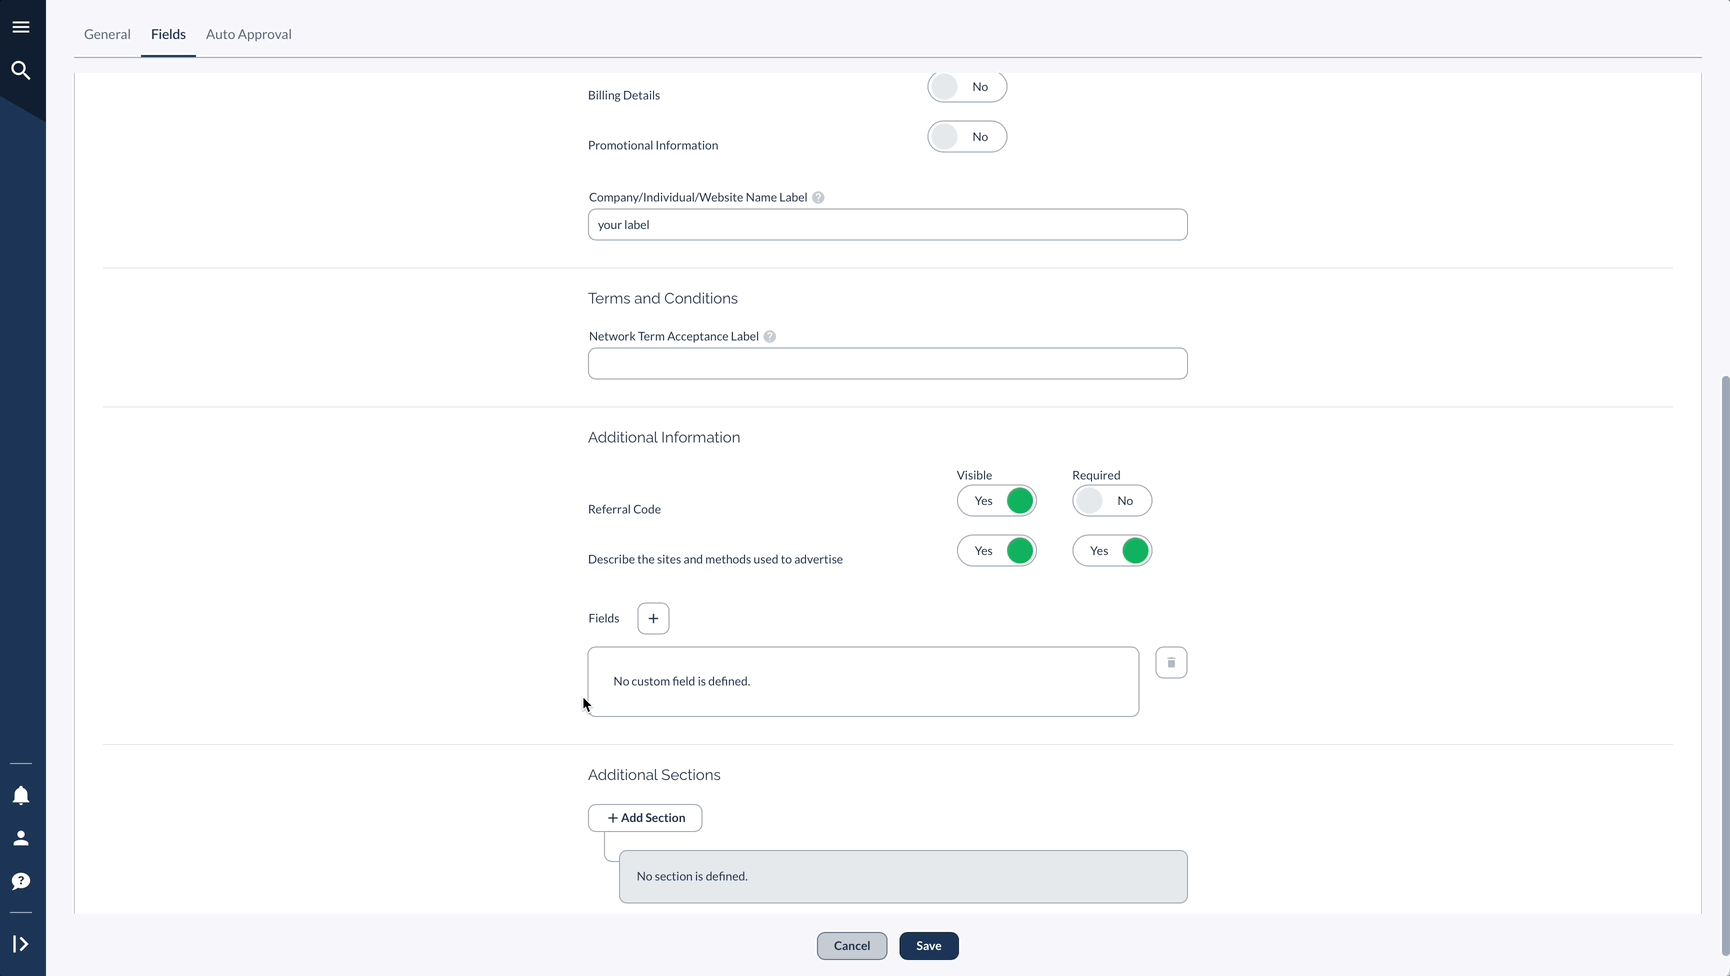
Terms And Conditions
Add and configure terms and conditions for partners to accept during signup.
Setting Up Auto-Approval (Optional)
Configure automatic approval for new Partners.
Real-Life Example
Let's say you're setting up a form for a subscription box company looking for influencers:
- Custom Header (just an example):
- Custom Fields:
- Social Media Handles (Required)
- Number of Followers (Required)
- Content Categories (Multiple Choice)
- Previous Partnership Experience (Text Area)
- Auto-Approval Rules:
- Must verify email
- Automatically approve if over 10,000 followers
- Grant access to entry-level offers
Pro Tips
Create clear, descriptive labels for all fields to eliminate any potential confusion for applicants, making the form intuitive and straightforward to complete. Enhance clarity further by adding helpful explanatory text beside any complex requirements or fields that might need additional context.
Organize your form logically by grouping related questions using Additional Sections, which improves the visual flow and creates a more professional user experience. Before publishing, thoroughly test your application form from an applicant's perspective to identify any potential issues or points of confusion.
Finally, remember to add your personal referral code to the form URL, enabling you to accurately track the source of applications and measure the effectiveness of your various recruitment channels.
Next Steps
After setting up your form:
- Test it thoroughly (You can do a test signup with a test email to see how the process works)
- Share the URL with potential Partners (If you have a public website, you can link from the brand website to the partner signup link)
- You can bookmark the signup URL in your browser for easy access
- Verify and approve your Partners
- Check out Offer visibility settings to control who has access to promote your services or products


