


.svg)

Overview
You are here because you want to pay your Partners from inside Everflow instead of from a separate payments tool. That is what Everflow Pay is: one place to hold funds, collect your Partners' banking details, and send them money, domestic and international.
Everflow Pay is now open to businesses in the United States and internationally, and you apply for it yourself. The form lives in your Everflow account, takes a few minutes, and you finish it in one sitting. No owner or officer needs to be looped in, and if your business is registered outside the US you provide only your business name, with no EIN, SSN or tax forms.
One thing to know before you start: your application is reviewed before your account goes live. This is not a switch you flip. The rest of this article walks you through the form, what happens while you wait, and what to do the moment you are active.
What You Need Before You Apply
There is very little to gather, and what you need depends on where your business is registered. Everything on this list is something you already have.
Everflow Pay is not available to every industry. Confirming that your business sits in a vertical we can support is part of the review, so if you are unsure whether yours qualifies, ask us at pay.help@everflow.io before you apply rather than after.
Applying From the Billing Tab
The whole application is one modal inside your Everflow account. There is no separate portal, no PDF and no email thread.
Open the Application
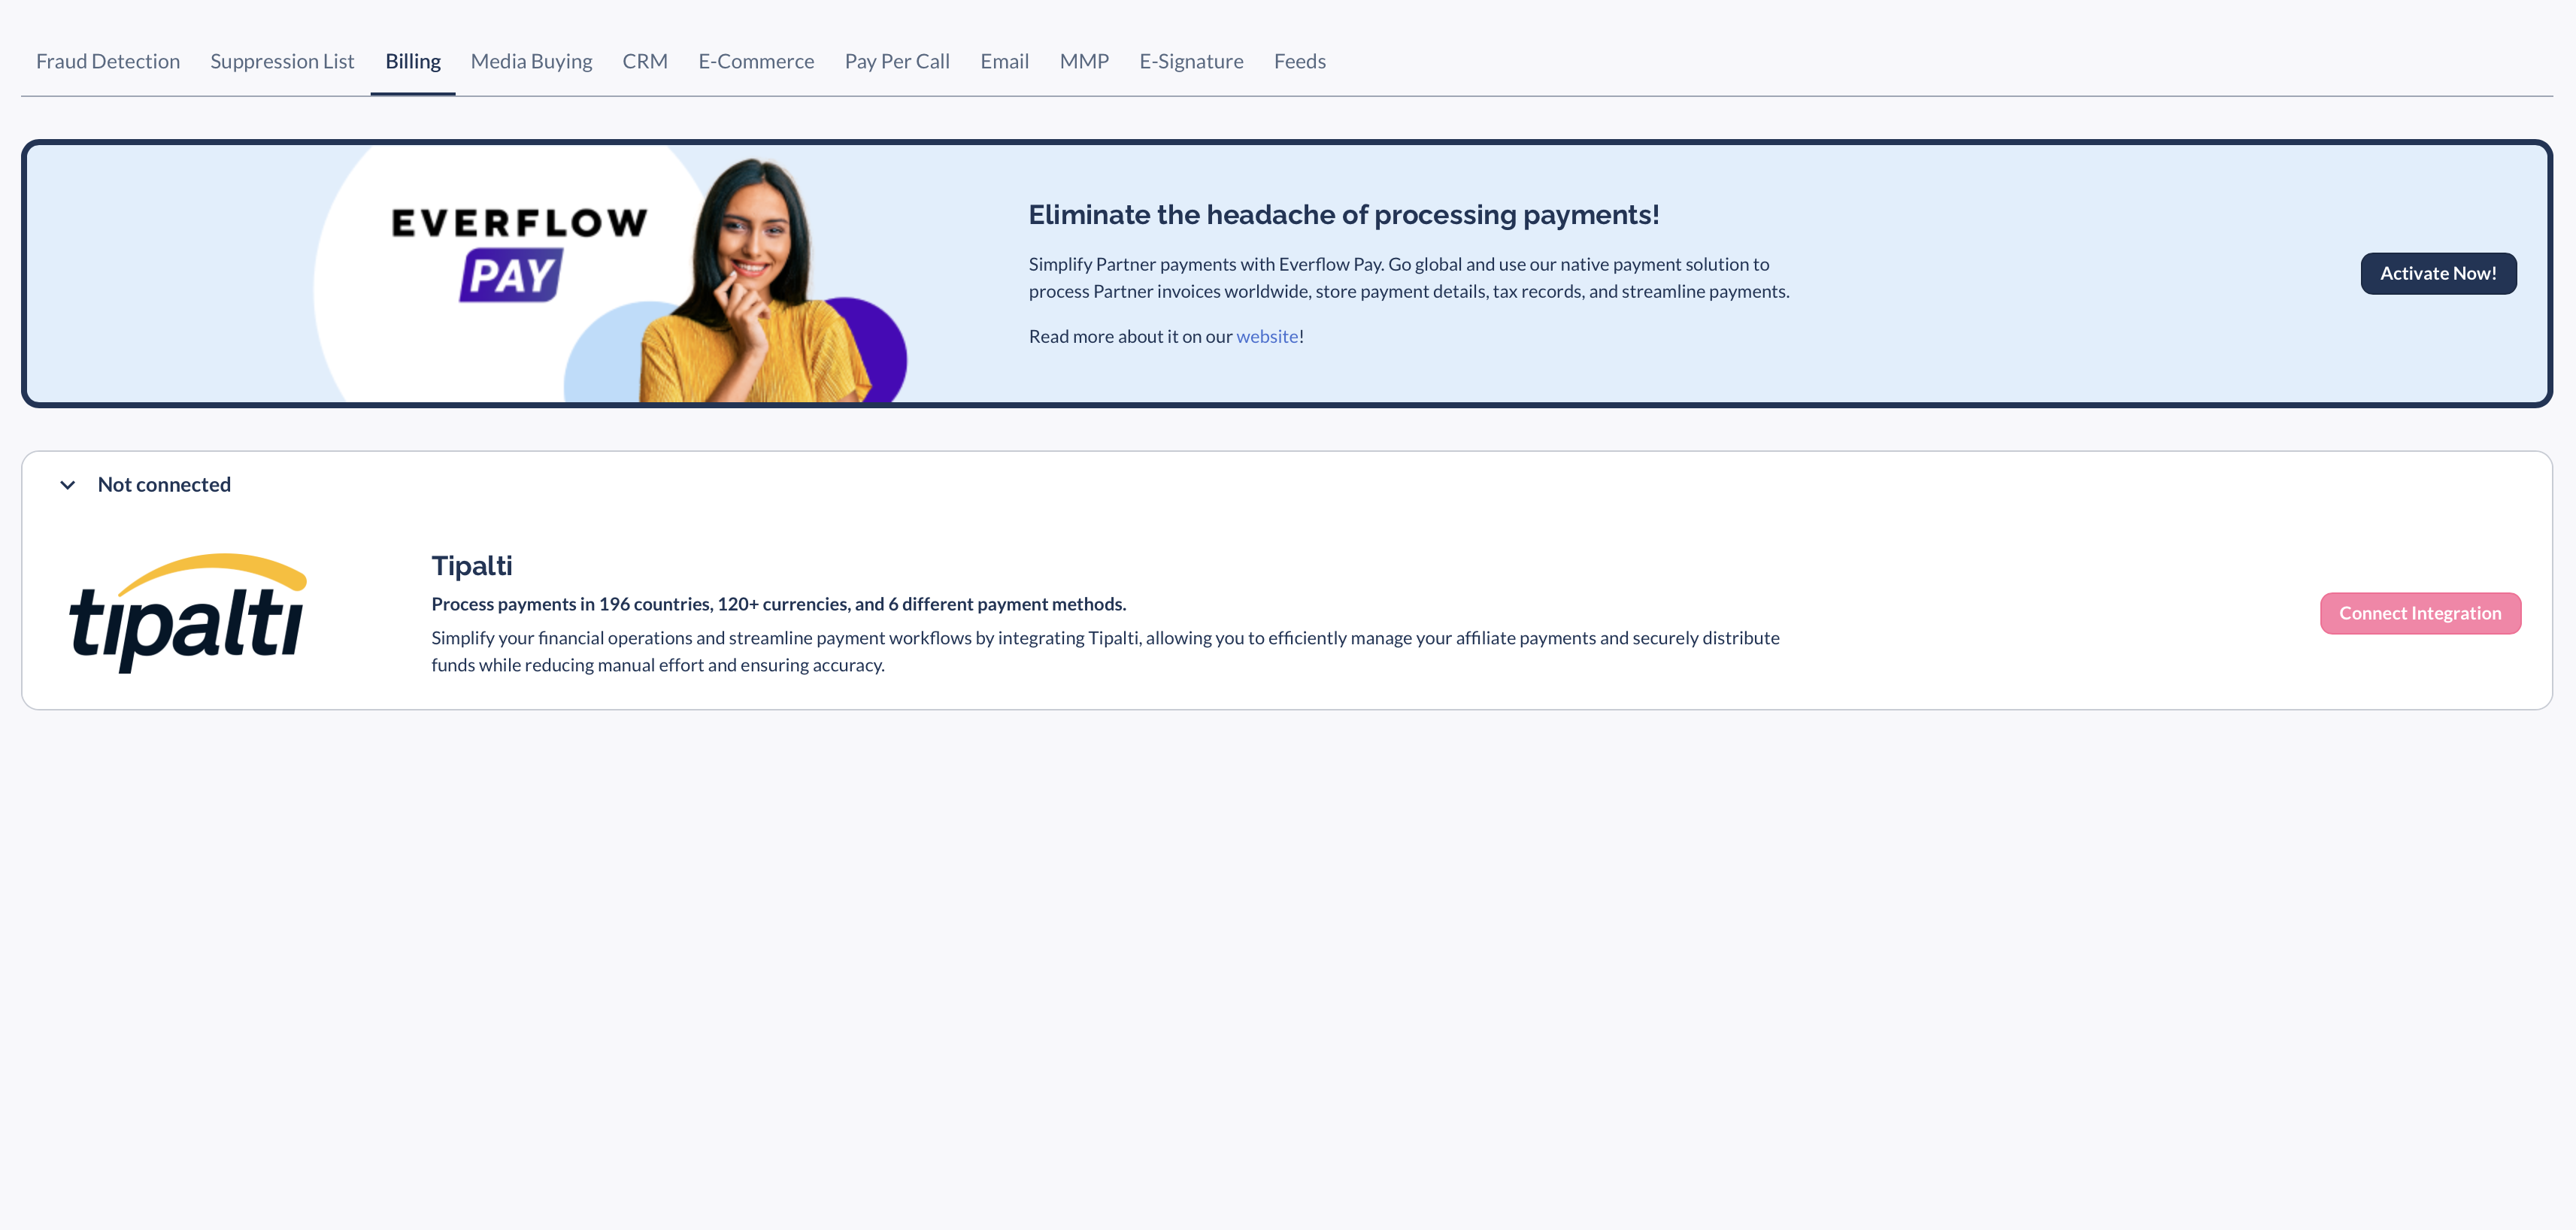
Sign in to your Everflow account, open the main menu and go to Integrations, then the Billing tab.
You will see the Everflow Pay banner, headed Eliminate the headache of processing payments!. Click Activate Now! on the right of it to open the Activate Everflow Pay form.
Fill In the Form
The form is short and it adapts as you answer. A note at the top reminds you that fields with an asterisk are mandatory, and that we collect this information to set up your account and ensure proper tax compliance.
Start with Location. This is the question that decides everything else on the form, so answer it for the country your business is registered in, not the country you happen to be sitting in.
Then choose your Business Structure. A Corporation is a company, organization or entity separate from its owners. A Sole Proprietor is an unincorporated business owned and run by one individual. Pick the one your registration documents say, not the one that describes how the business feels day to day.
If Your Business Is Registered in the United States
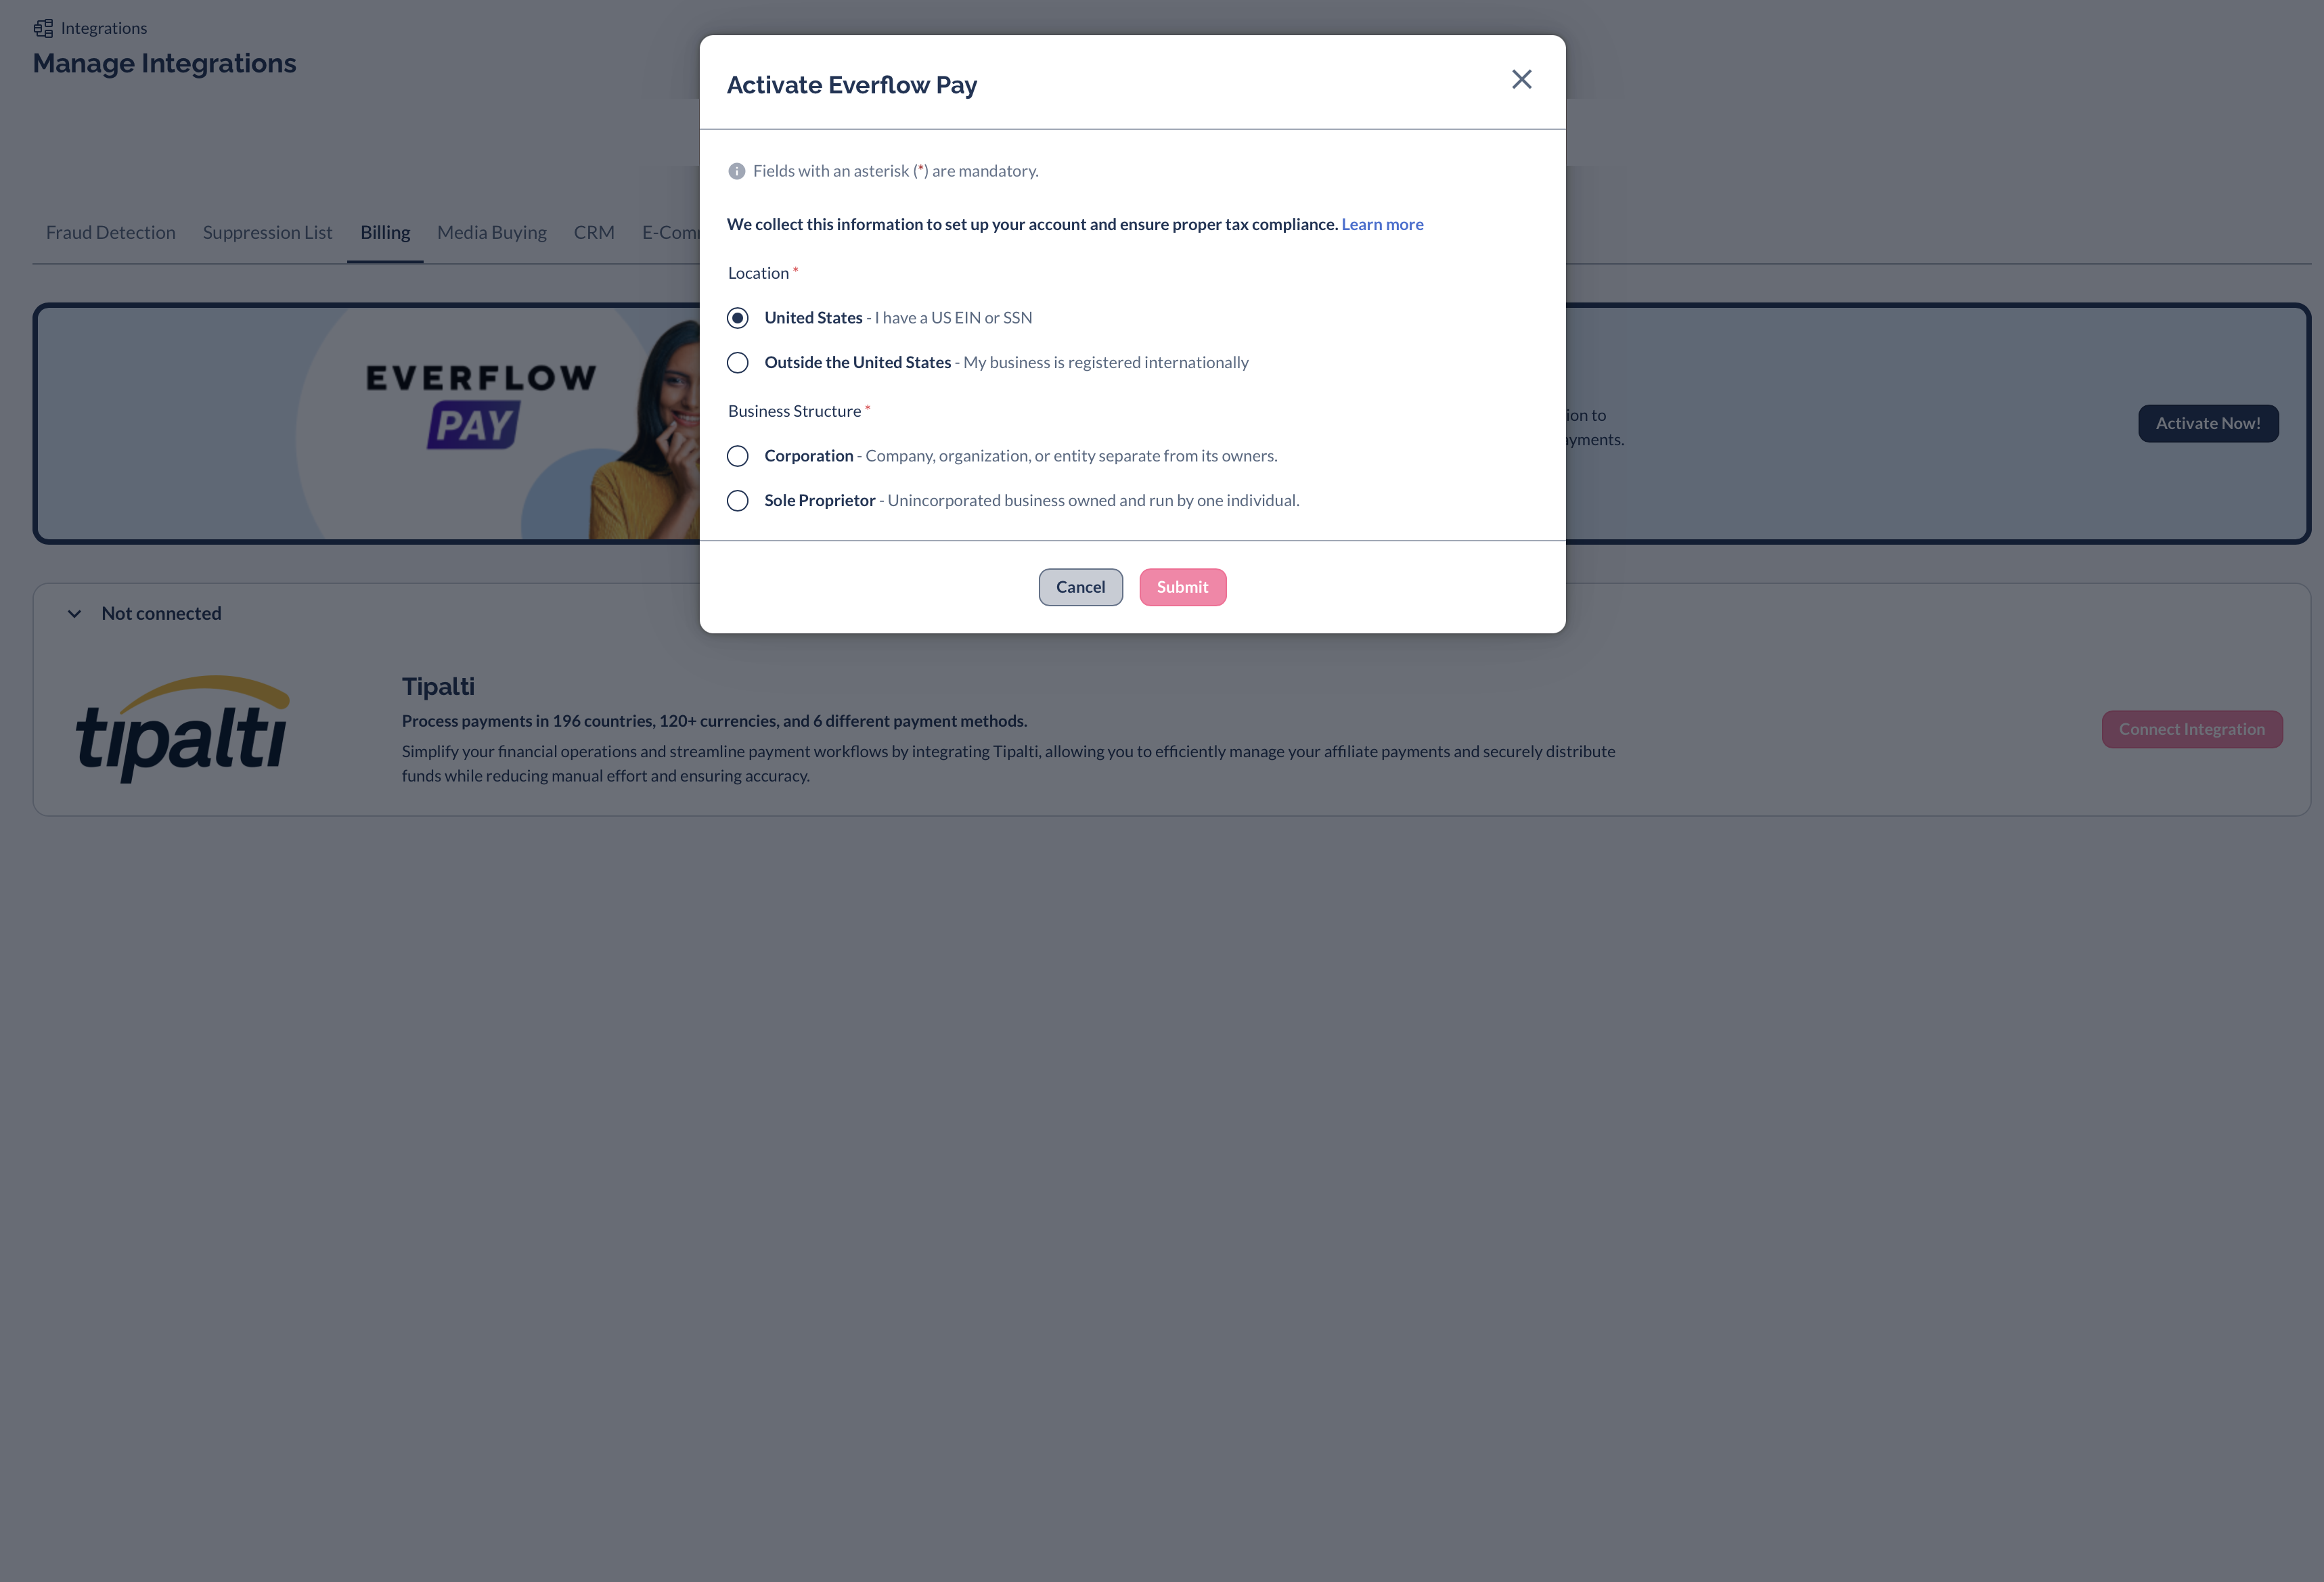
Two more fields appear, and they are named after the structure you just chose. A Corporation fills in Corporation Name, which must match the legal incorporation documents, and then an Employer Identification Number (EIN). A Sole Proprietor fills in Sole Proprietor Name and then a Social Security Number (SSN). Whichever you give, the form tells you it is handled securely and in compliance with privacy regulations.
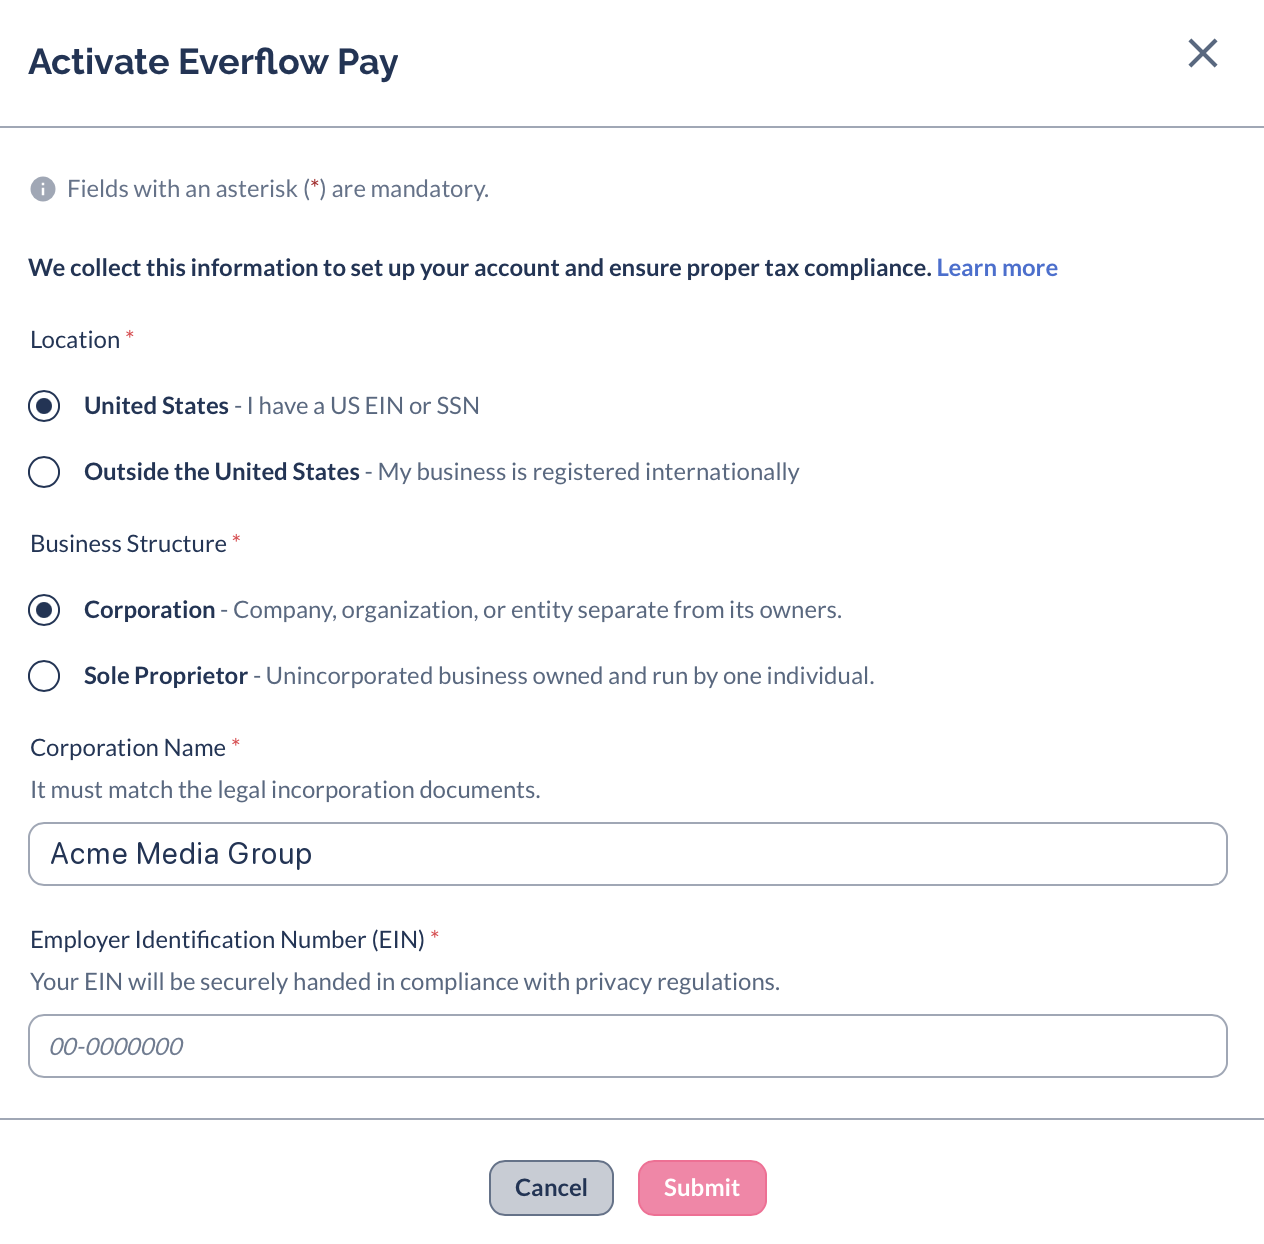
The Sole Proprietor branch asks for the same two things under different names, so you can see which one you are on before you type anything.
If Your Business Is Registered Outside the United States
The form stops at the name field. You fill in Corporation Name or Sole Proprietor Name, and that is the last thing it asks you for. There is no EIN, no SSN and no tax form, and no tax profile is created for you, because US tax collection does not apply to a business registered outside the US.
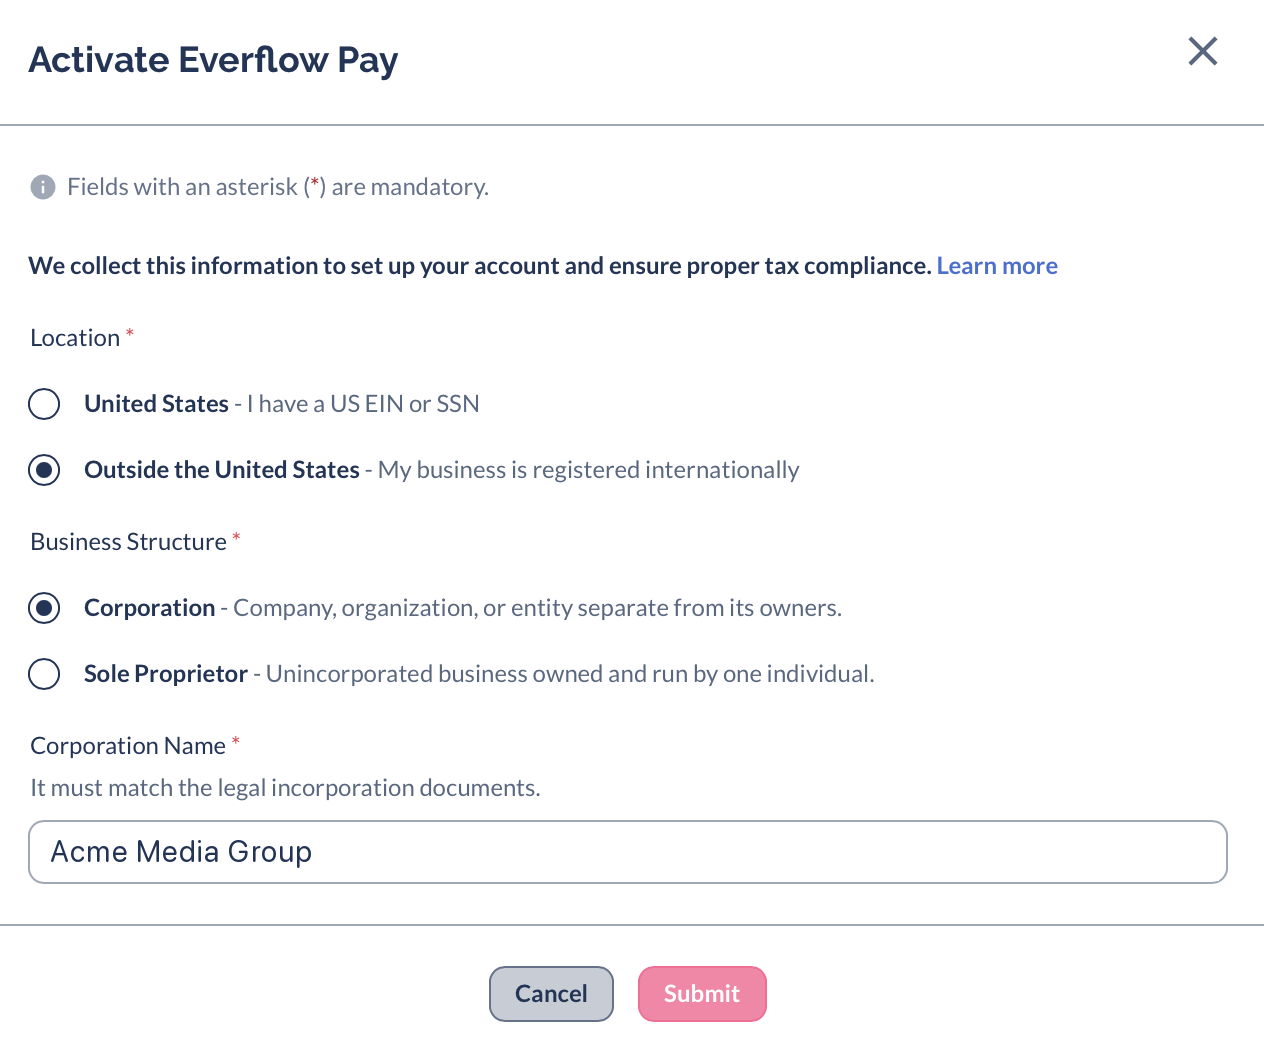
That is the whole international branch. It is worth being precise about what "no tax forms" actually covers, though, because it applies to your activation and not to the rest of the product.
Submit and Confirm
Click Submit. A confirmation replaces the form, headed Information Submitted, telling you that your information has been successfully submitted and that our Everflow Pay team will review it promptly. It also tells you that once your application is accepted you will receive an email with next steps, at the address on your Everflow account.
Click Done to close it. Nothing else is expected of you at this point.
What Happens After You Submit
Your application is reviewed before your account can send money. Two things have to happen, and neither is instant.
First, our Everflow Pay team reviews the application itself, which is where the industry check happens. Second, our payment provider confirms the account it is opening on your behalf. Everflow holds the master agreement with that provider, which is why you are not asked to complete an identity verification of your own, but the provider still confirms every account before it can move money.
We do not publish a turnaround time for this, because it depends on both reviews. What we can tell you is what you will see while it runs, and what tells you it is finished.
Where to Check Your Status
Go back to the same place you applied from, Integrations then the Billing tab. The Everflow Pay banner now carries an Integration Status on the right. While your application is being reviewed it reads Pending, with the line Awaiting Everflow Pay team's approval beneath it. That is the honest, live answer, and it beats guessing from your inbox.
When your application is accepted, you will get an email with next steps at your account address.
If We Need More Information
Occasionally we come back to you with a question before we can finish. If that happens you will hear from us by email, and replying quickly is the single biggest thing you can do to speed your own onboarding up. If you would rather chase it yourself, write to pay.help@everflow.io and quote your Everflow account name.
Once Your Account Is Active
Being active means the Everflow Pay dashboard opens for you, with your wallet, your Payees and your payment history in it. Two jobs are worth doing straight away, and they are independent, so you can start either one first.
Put Money In Your Wallet
Everflow Pay pays your Partners out of a funded wallet, so nothing can go out until something has come in. Your dashboard opens on your funds, and the funding options you see there depend on where your business banks.
Whichever route you take, open the funding instructions and read them on screen. They are issued per account and per currency, so they are not the same for every customer and we deliberately do not reproduce them here. We do recommend funding in USD, because converting from another currency on the way in can attract external FX fees that have nothing to do with us.
The full walkthrough for each route lives in its own article: Funding Your Everflow Pay Account for wire and ACH, and Funding Your Everflow Pay Account via Bank Debit if you are in the US or Canada and would rather we pulled the funds.
Make Your Partners Payable
Your Partners are a separate and much faster path than your own activation was. A Partner fills in their own details from their Partner Platform, and once they submit their banking information they become payable automatically, usually within minutes. There is no test deposit and no waiting period.
What a Partner is asked for depends on you, not on where they are. If your business is registered outside the US, your Partners never submit a US tax form. If your business is US-based, they submit one only when your account requires tax verification. Get Partners Started With Everflow Pay is the article to read before you brief them, and it is worth reading before you send the first invitation rather than after.
Once you are funded and your Partners are payable, you can connect your accounting software so every payment reconciles itself.
From here, the rest of the Everflow Pay documentation follows the order you will actually meet it in.
→ Funding Your Everflow Pay Account, where to find your funding instructions and Reference Code.
→ Get Partners Started With Everflow Pay, what to tell your Partners before they set up.
→ Everflow Pay List Of Countries Served, where you can send money and in which currencies.
→ Understanding Everflow Pay Fees And Who Pays Them, what each charge is and who it lands on.


