Home
Partner Management
Advanced Partner Optimization
How to Create Link Templates With Traffic Sources

SERIES:

How to Create Link Templates With Traffic Sources

Traffic Sources let you create and manage predefined tracking parameters (templates) that automatically append to Partner tracking links, helping with link templates and making standardized affiliate links.

Overview

Traffic Sources transform how you manage partner tracking links by automating parameter setup and standardizing tracking across your network.

Instead of partners manually building complex tracking URLs, they can select predefined parameter sets that automatically append to their links.

Key Terms Key terms related to traffic sources and tracking parameters. ➔ Traffic Source: A preset collection of tracking parameters.
➔ Postback URL: URL for receiving conversion data.
➔ Public Traffic Source: Visible and selectable by partners.
➔ Private Traffic Source: Not selectable by Partners themselves. Made private to one Partner by combining two settings, see below.
➔ Parameters: Tracking values added to links (e.g., sub1, sub2).

Why Use Traffic Sources?

  • Standardize Tracking: Ensure consistent parameter usage
  • Reduce Errors: Eliminate manual parameter entry mistakes
  • Save Time: Automate link parameter configuration
  • Control Data Collection: Define exactly what data you track
  • Simplify Partner Experience: Make link generation easier for partners

Types of Traffic Sources

Public Traffic Sources

  • Visible to all partners in their tracking link generator
  • Partners can choose from available traffic sources
  • Best for common tracking setups used by multiple partners

Private Traffic Sources

Best for partner-specific tracking requirements. Making a traffic source private to one Partner takes two settings, in two different places. Doing only one of them does not produce a private traffic source, and that is the most common point of confusion here.

1Turn off visibility on the traffic sourceGo to Partners -> Traffic Sources and open the traffic source.Untick Visible to Partners.Once unticked, the traffic source no longer appears in any Partner’s Tracking & Asset Generator. Their dropdown lists only the public ones. The field’s own tooltip agrees: enabling the option allows Partners to view and select public traffic sources.

That alone hides it from every Partner and attaches it to none of them. The second setting is what attaches it.

2Assign it to the PartnerGo to Partners -> Manage and select the Partner.Click Edit on the General card. The Traffic Source field is not shown on the read-only view, only in the edit form.Switch Traffic Source to Yes and pick the traffic source, then save.

A Partner can hold one assigned traffic source, so this is an assignment rather than a list of permissions. Full steps are in Applying Traffic Sources below.

What each Partner actually sees

Once both settings are in place the two groups of Partners get visibly different screens, which is the quickest way to confirm you have set it up correctly. Open Tracking & Asset Generator while impersonating each one.

A Partner with no assignment

Still has the Traffic Source dropdown, but it lists only the public traffic sources. Your private one is not in it.

They pick one themselves, and the link carries that source’s parameters, for example sub1=newsletter.

The Partner you assigned it to

Has no Traffic Source dropdown at all. There is nothing for them to choose.

Every link they generate carries the assigned source’s parameters automatically, for example sub1=exclusive.

If the assigned Partner still sees a dropdown, the assignment did not save. If an unassigned Partner can still see your private source in theirs, Visible to Partners is still ticked.
An assigned Partner loses the choice entirelyAssigning a traffic source does not add it to that Partner’s list, it replaces the list. The Traffic Source dropdown disappears from their Tracking & Asset Generator altogether and the assigned parameters are applied to every link they generate, including links they would otherwise have built with a public traffic source. That is the intended behaviour, but it is worth knowing before you assign one to a Partner who was happily choosing for themselves.
Unticking the box on its own does not make it privateThe two settings do different jobs and you need both. Unticking Visible to Partners stops every Partner selecting it, but assigns it to nobody. Assigning it to a Partner while it is still visible leaves it selectable by everyone else as well.
Network users always see every traffic sourceThis setting controls what Partners see, not what you see. As a network user you will keep seeing every traffic source in your own dropdowns whatever this is set to, including the assignment picker in step 2, which lists private sources so that you can assign them. If you untick the box and the traffic source still appears in your view, that is expected and not a sign the setting failed to save.
__wf_reserved_inherit

Setting Up Traffic Sources

Configure traffic sources with tracking parameters and postback settings.

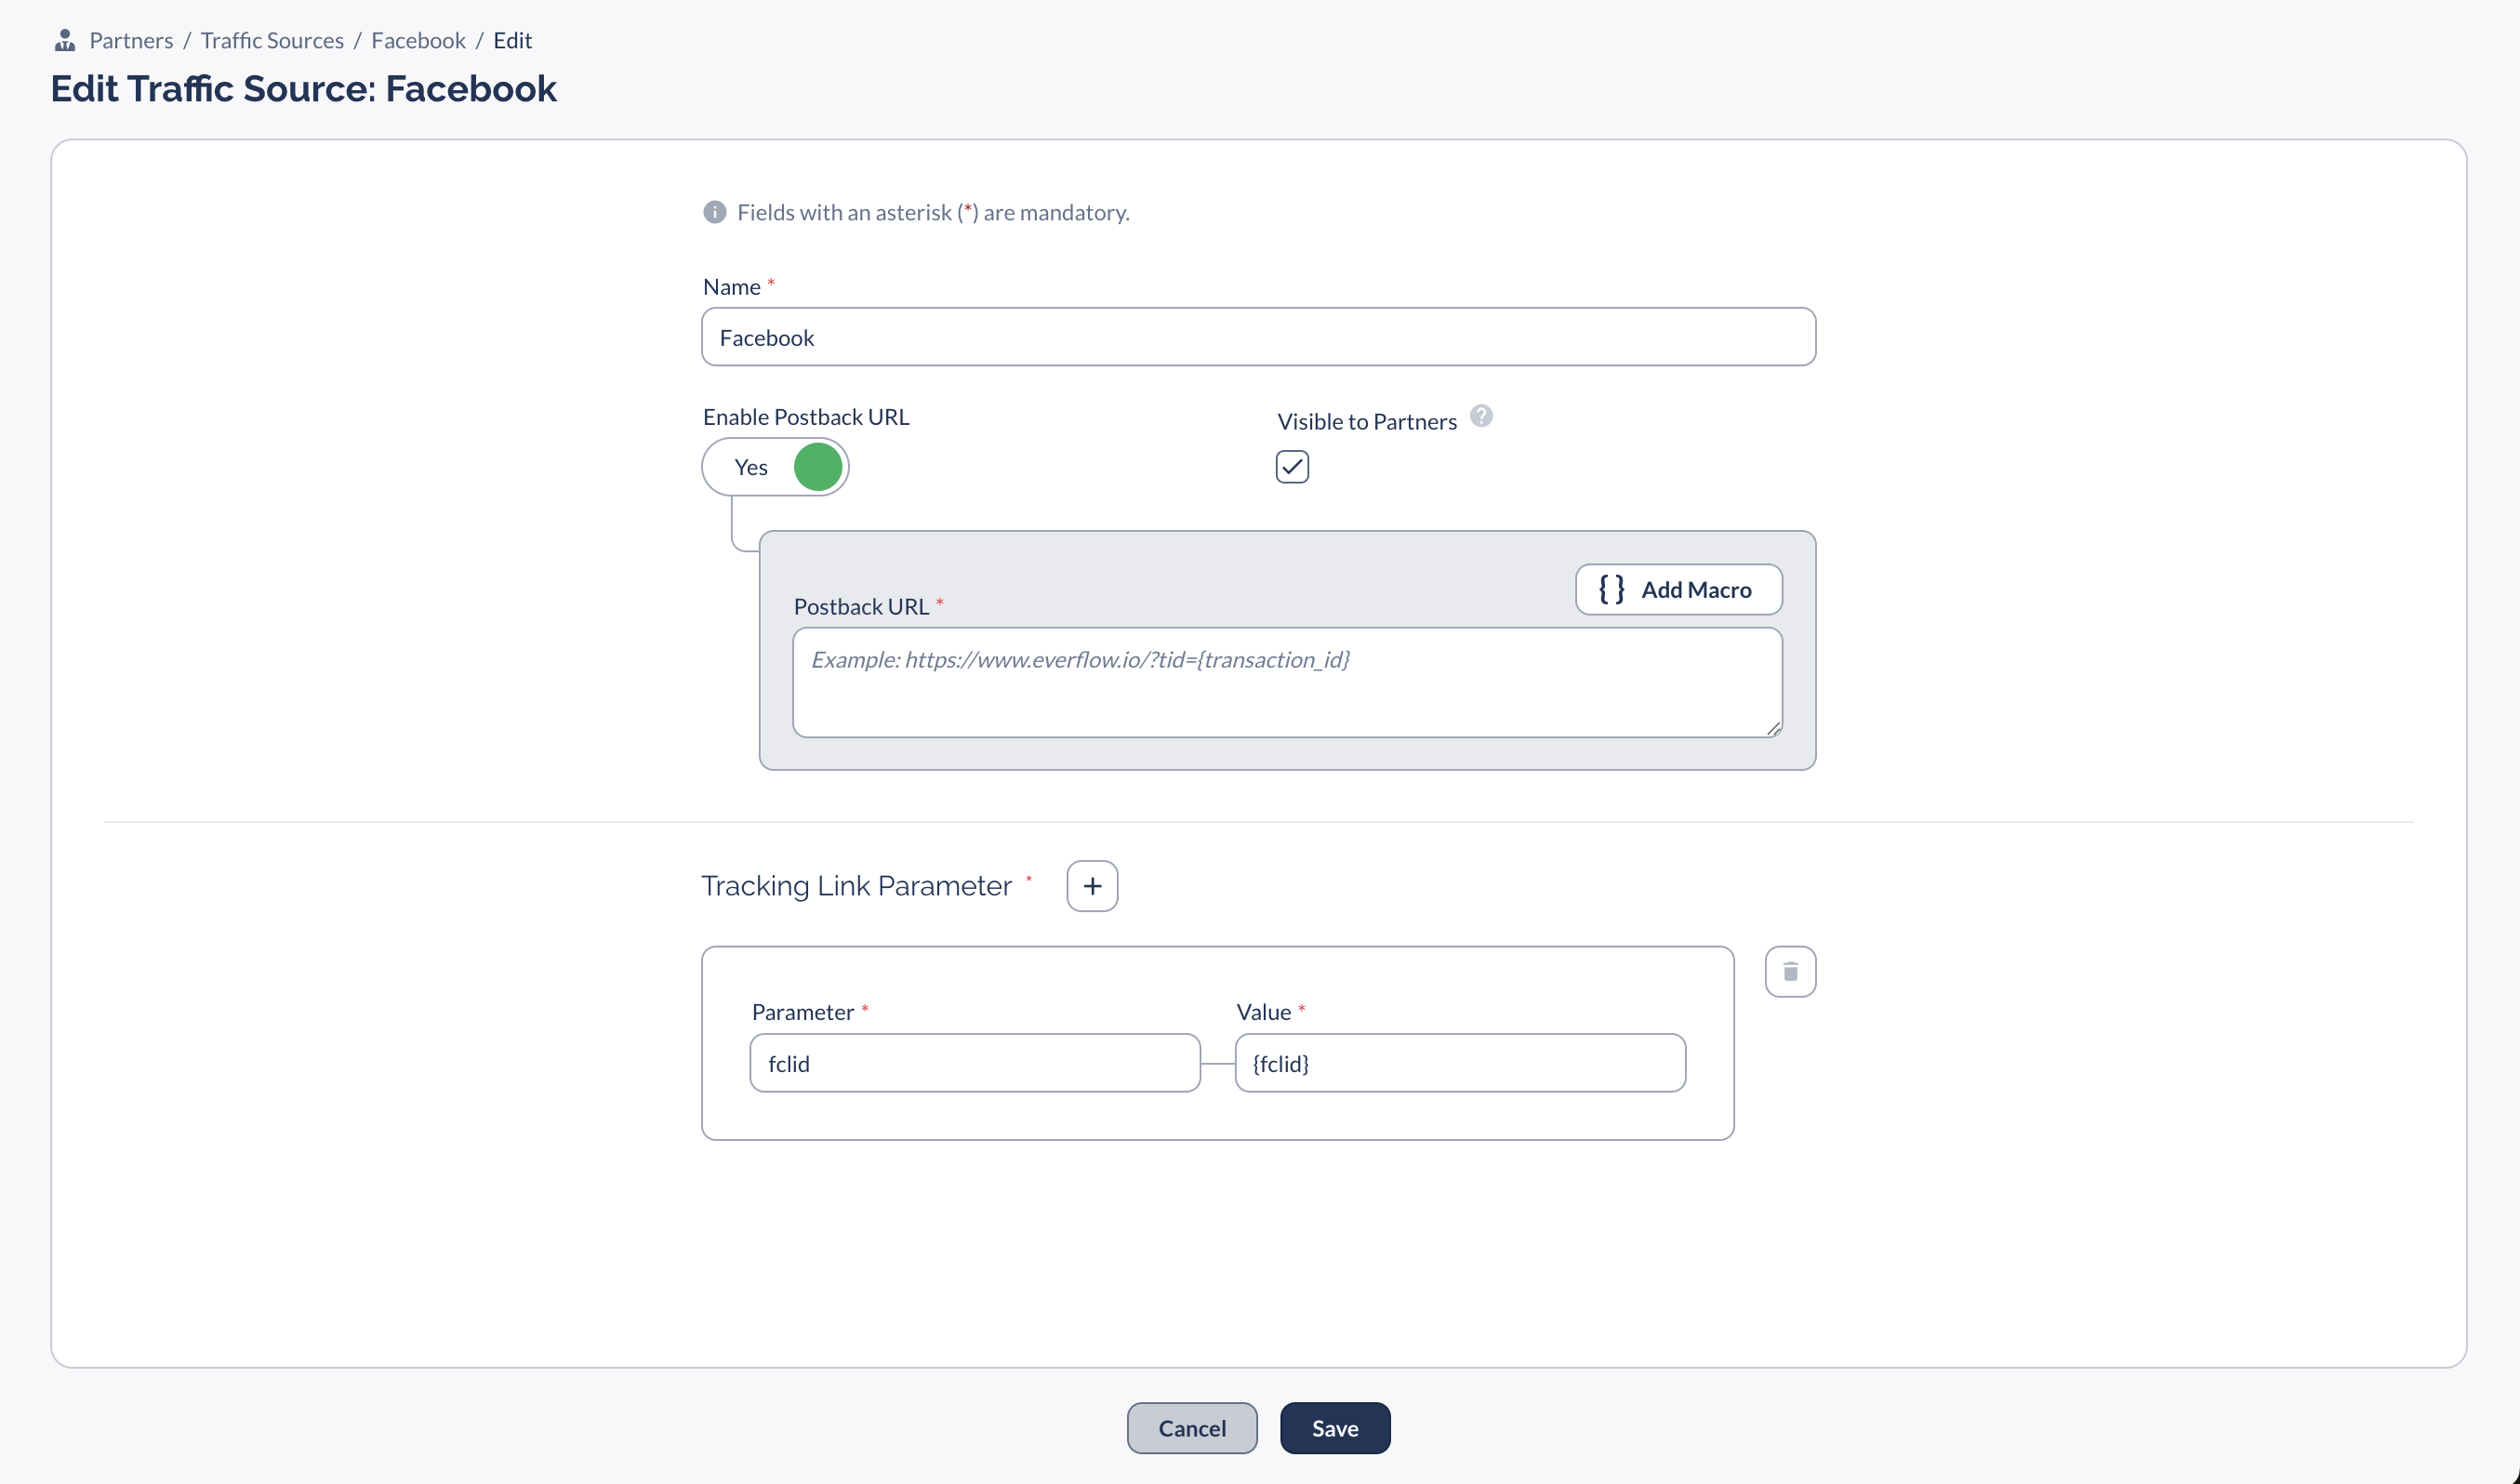
1 Creating a New Traffic Source Navigate to Partners -> Traffic Sources Click Traffic Source Fill in required information: Name (required) Enable/disable Postback URL Visible to Partners is ticked by default, so a new traffic source is public unless you untick it Tracking parameters
2 Configuring Parameters Click the button for Tracking Link Parameters Define parameter names (e.g., sub1, sub2) Set parameter values Add additional parameters as needed
3 Managing Postback Settings Toggle Enable Postback URL Enter Postback URL if enabled Add macros using the Add Macro button Set visibility options

Applying Traffic Sources

Apply traffic sources to individual Partners or tracking links.

To Individual Partners

Assigning a traffic source works whether or not it is visible to Partners. Private sources appear in this picker too. If your goal is to make one private to a single Partner, pair this with unticking Visible to Partners, as described in Private Traffic Sources.

Go to Partners -> Manage Select Partner Click Edit on the General card Enable Traffic Source Select desired traffic source Save changes

To Tracking Links

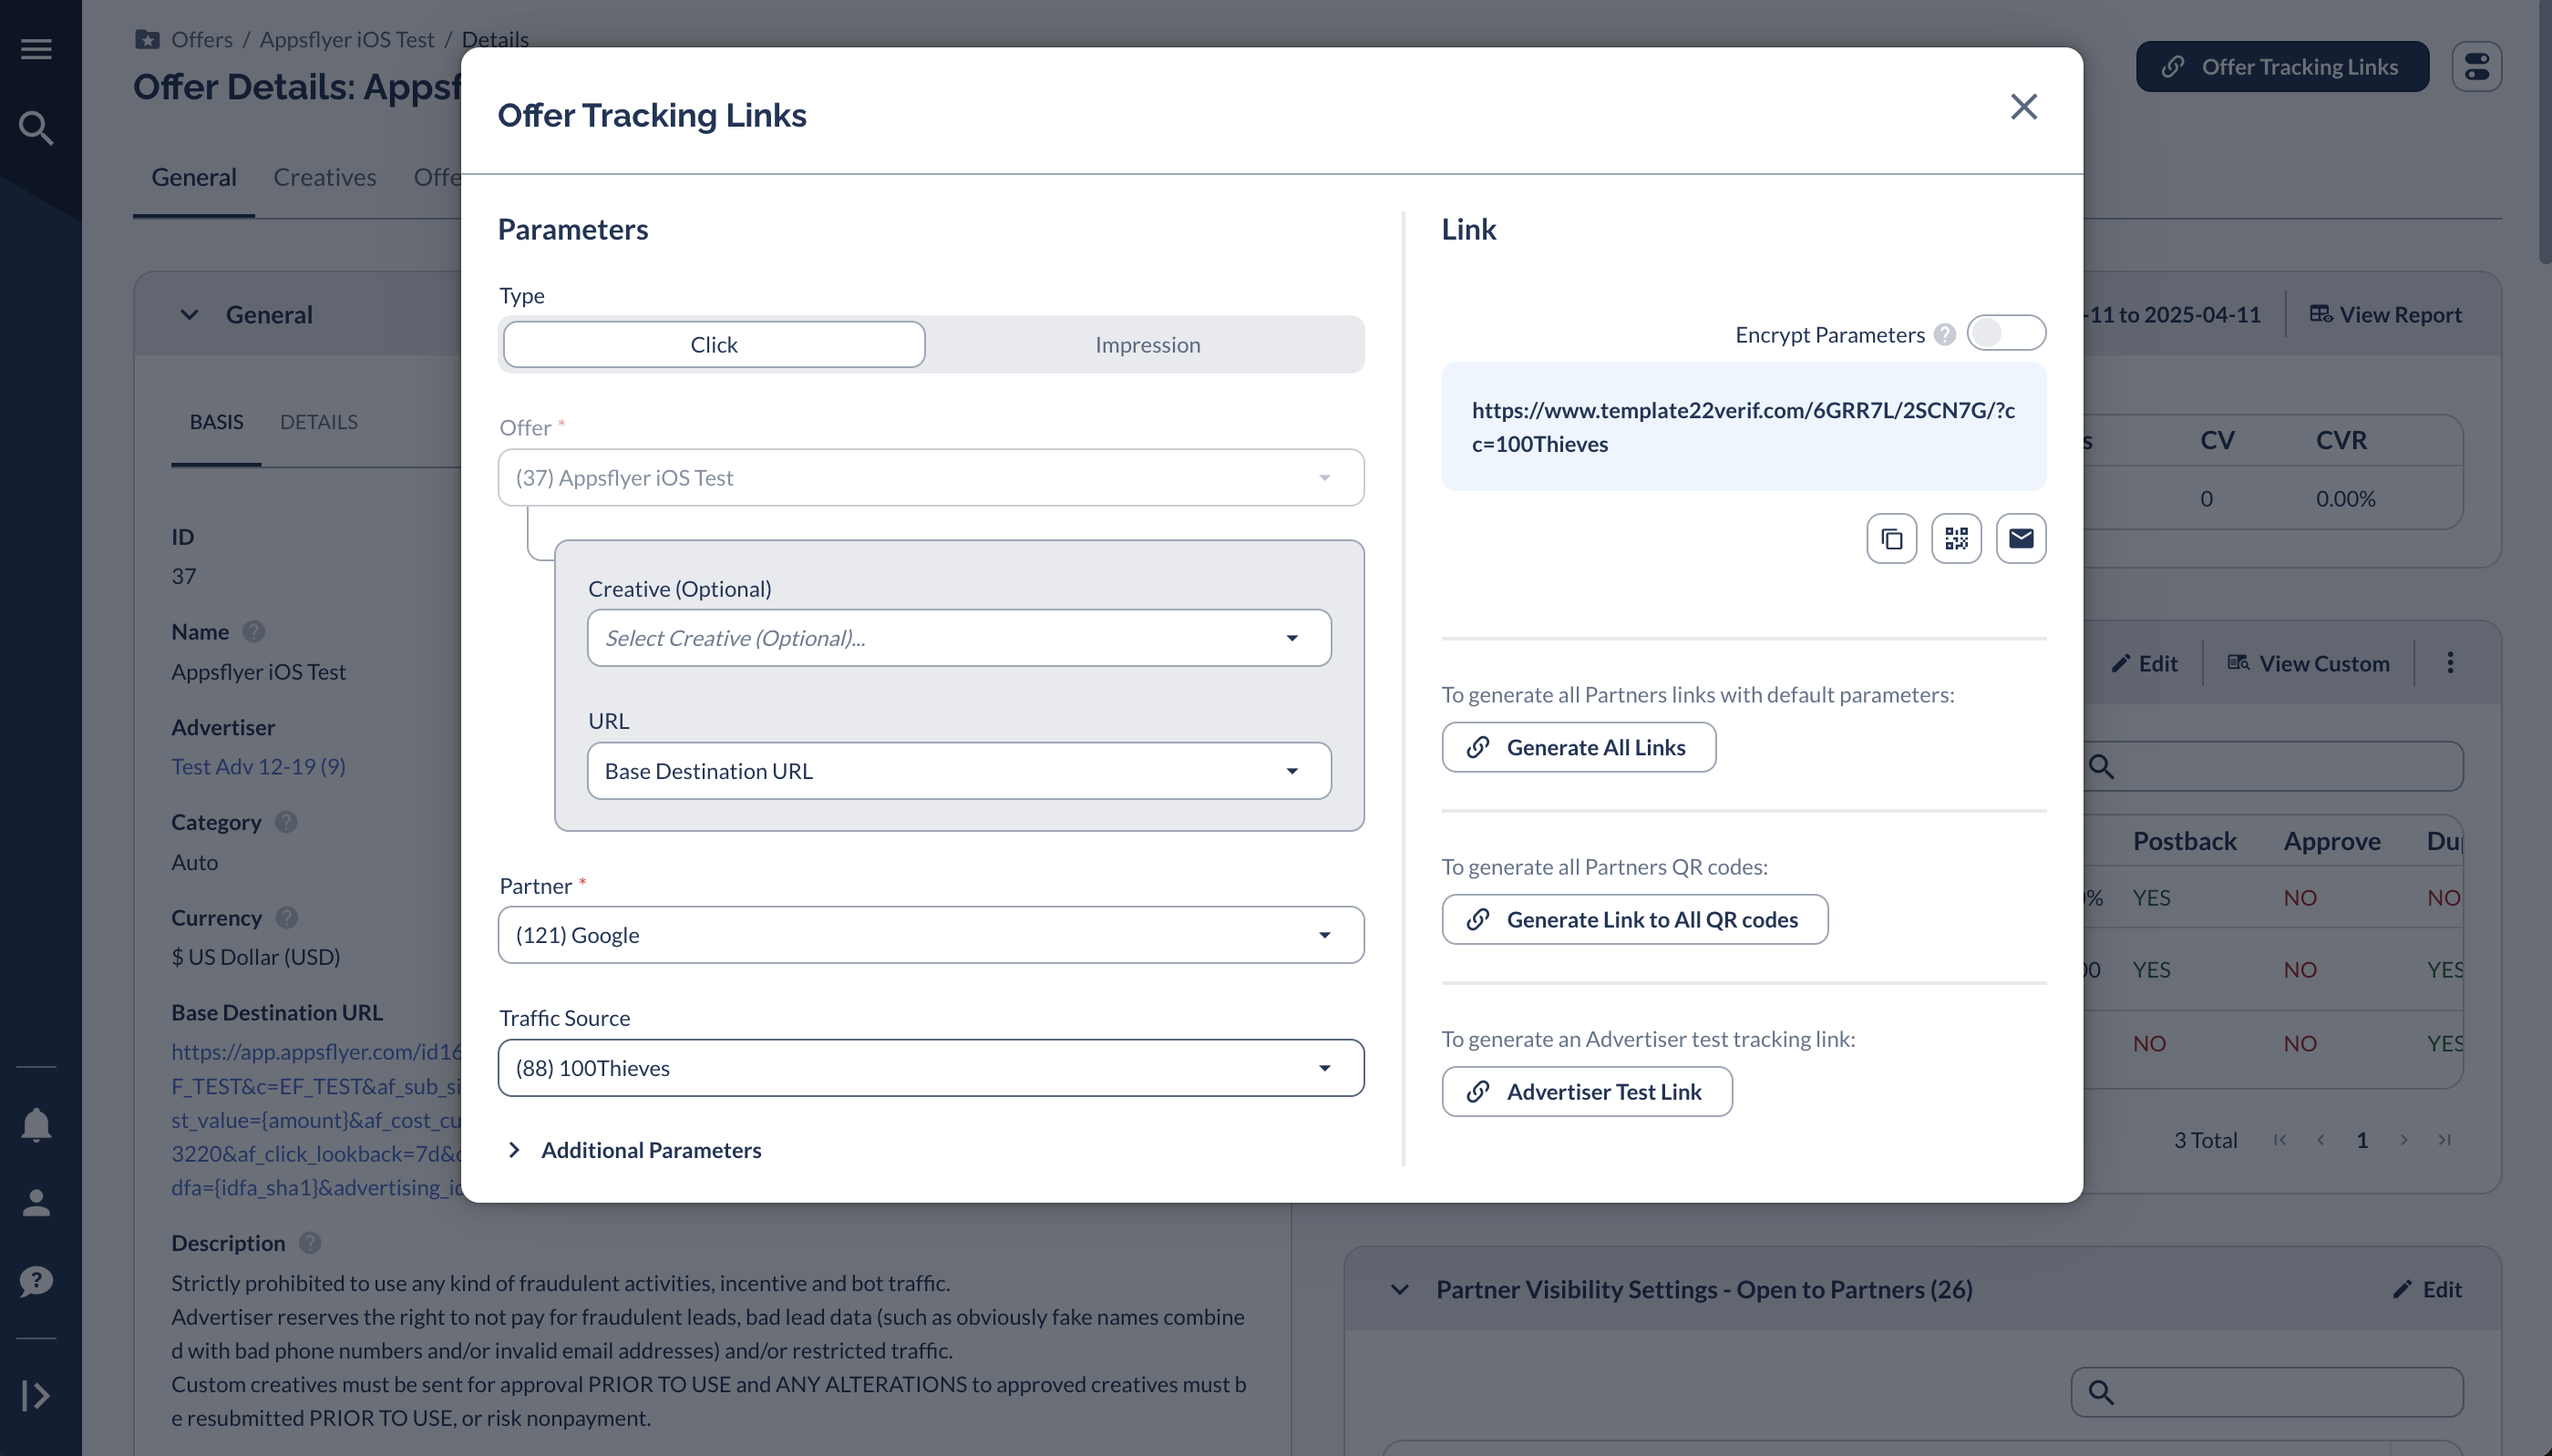
Navigate to Offers -> Manage Select Offer Go to Offer Tracking Links Choose Partner and traffic source Generate link with parameters
__wf_reserved_inherit

Real-Life Examples

To help you understand how Traffic Sources work in practice, let's walk through a real e-commerce tracking setup. This example shows how to track Partners promoting products across different platforms and how the parameters work together.

E-commerce Product Tracking Scenario:

Partners promoting specific products across multiple platforms

Setup Traffic Source Name: Product Tracking Parameters: sub1=[PUBLISHER_ID] - Tracks specific publisher/partner sub2=[CLICK_ID] - Tracks unique clicks sub3=[PRODUCT_ID] - Tracks specific products promoted Base URL: https://shop.example.com/products Traffic Source Parameters: &sub1=[PUBLISHER_ID]&sub2=[CLICK_ID]&sub3=[PRODUCT_ID] Final URL Format: https://shop.example.com/products?sub1=PUB123&sub2=c1k3d2&sub3=PROD456 Real Application When Publisher "PUB123" promotes Product "PROD456": sub1 automatically fills with "PUB123" sub2 generates unique click ID "c1k3d2" sub3 captures product ID "PROD456" Enables tracking of: Which publisher generated the sale Which specific click led to conversion Which products drive the most sales

As you can see from this example, the right parameter setup helps you automatically capture all the important data points from your partner sales.

You'll be able to track everything from the initial Click to the final Conversion and afterwards without tweaking every single link or triple checking if your Partners used the right parameters.