
Overview
This article will show you a complete breakdown of all the JavaScript SDK scripts and associated settings & macros that you’re able to configure.
sub1–sub10 and adv1–adv10 parameter ranges. Add sub6–sub10 or adv6–adv10 to your scripts the same way as the lower-numbered slots.Accessing The Scripts
All three scripts can be found in the same place, here’s how to access them:
How Do I Install These Scripts?
Each of these scripts needs to be installed on the Advertiser's webpage/app. Please read our API Docs for detailed information on how to use each script.
Script Breakdowns
Impression Script
The Impression Script should be triggered when the Tracking Link or Ad is viewed/receives an Impression.
The default, unedited script looks like:
The most important entities here are “offer_id” and “aff_id”, which help associate the Impression with the correct Offer and Partner (Affiliate) that drove the Impression.
All the other parameters are optional.
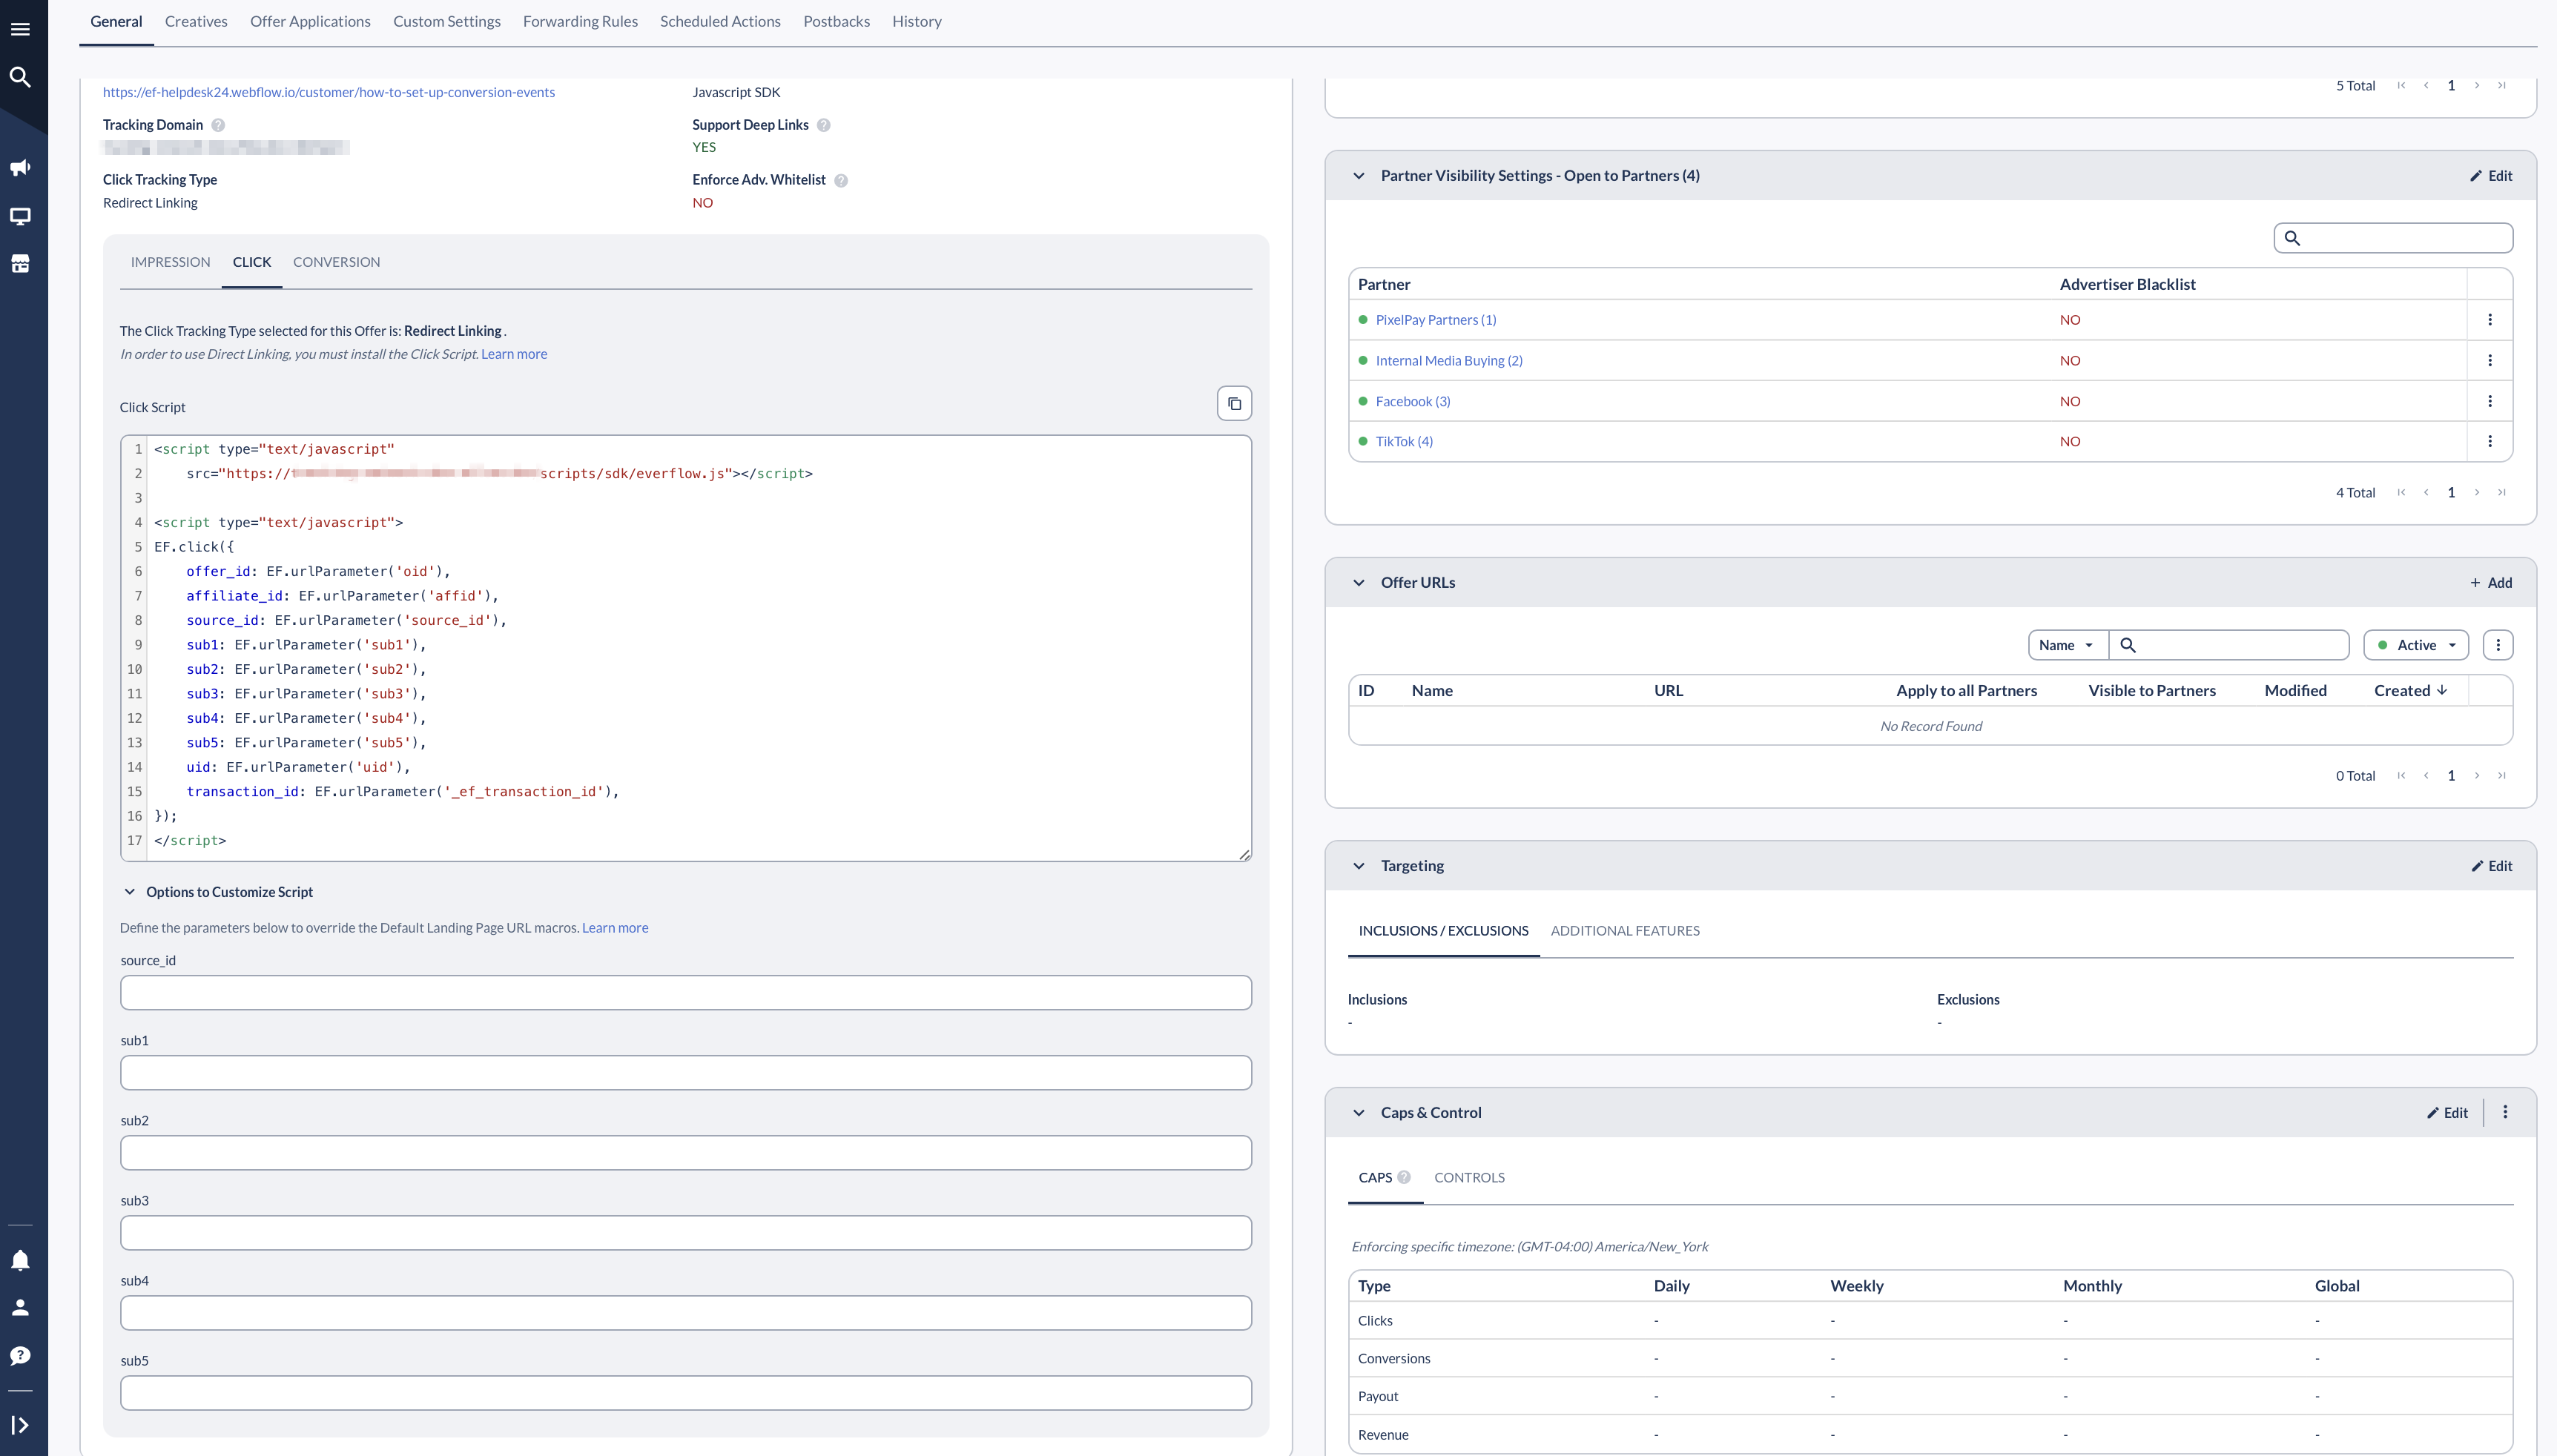
Click Script
The Click Script is generally triggered on page load, when the visitor clicks on a Tracking Link and lands on the Default Landing Page on the Advertiser’s webpage/app.
The default, unedited script looks like:
The most important parameters here are “offer_id” and “aff_id” when using Direct Linking & the “transaction_id” when using Redirect Linking, which help associate the Click with the correct Offer and Partner (Affiliate) that drove the Click.
Conversion Script
The Advertiser should fire off the Conversion Script every time there is a Conversion Event. Each Offer can have multiple Conversion Events associated with it.
The default, unedited script looks like:
Passing Offer ID vs Advertiser ID In The Conversion Script
As an alternative to the script above, you can also fetch a version of the Conversion Script that passes the Advertiser ID instead of the Offer ID. Here’s how to switch between the two:
Here’s what the script would look like in that scenario:
The “offer_id” has been replaced here by the “aid”. The only reason to switch between the two is to use Offer Level vs Advertiser Level attribution depending on the parameter that has been passed to Everflow. To understand Offer Level vs Advertiser Level attribution, please read this guide.
Understanding Optional Parameters
Accessing Optional Parameters
In order to access Optional Parameter settings:
- Using the instructions earlier in this article, find the Tracking card in Offer Details view for an Offer
- For each script, you’ll see Edit Optional Parameters below code block
Click & Impression Script Related Parameters
Sub IDs
Everflow provides 5 Sub IDs, namely: sub1, sub2, sub3, sub4, sub5, sub6, sub7, sub8, sub9, sub10. Generally, it’s to be used by your Partners to send any kind of information over to Everflow that relates to an Impression or Click. But customers are also able to override Sub ID values if needed.
An example would be Partners sending categorical information relating to anything like sale events, specific affiliate names, geo, etc. during the Click. It could be anything.
The big idea being, Impressions & Clicks can be broken down by sub_id’s in Everflow’s Core Platform reports. This helps customers make better decisions around campaign optimization, payouts and more.
Source ID
Use the Source ID to pass in traffic sources like “Meta”, “Google”, or anything else that might fit the description for “source”.
Conversion Script Optional Parameters

Advertiser IDs
Everflow provides 5 Advertiser IDs, namely: adv1, adv2, adv3, adv4, adv5, adv6, adv7, adv8, adv9, adv10. These Advertiser IDs are only applicable to the Conversion Script. Everflow customers can use these macros to send any kind of metadata and associate it with the conversion.
Just like Sub IDs, you will be able to filter and pivot your Conversion related reports on the Advertiser ID values. This helps customers make better decisions.
Amount
Use the Amount macro to send sale related information. RPS (Revenue per sale) related Offers generally need this info.
Attribute an email address to the conversion by passing it in via the Email macro.
Coupon Code
Attribute a coupon code to the conversion by passing it in via the Coupon Code macro.
Order ID
Send in Order IDs (eg: when using E-Commerce integrations like Shopify), to associate order information to the conversion.
Important Notes On Impression Tracking
Impressions And Clicks Are Tracked Separately
Firing the Impression Script only generates an Impression — it does not also register a Click. Nothing is implicit. If you want both an Impression and a Click to be recorded, you must fire both EF.impression and EF.click separately.
EF.impression on one domain and EF.conversion on a different domain will not work as expected. Plan your placements with this in mind.
View-Through With Direct Linking Is Not Supported
View-Through attribution is not possible when using Direct Linking, because Everflow is not redirecting through its system at all. The impression link field available in Direct Linking is only meant as a way to record an Impression from a creative view (if the JavaScript is placed there). Everflow cannot pass a transaction_id from that Impression through to the Advertiser.
View-Through attribution is set at the Offer level, so it does not change how EF.impression is used. To generate an Impression that you can later convert on, the Offer must be set up for View-Through — this is not only about the redirect, it is also about how the Impression is handled on the Everflow side. When set up this way, EF.impression returns a transaction ID and sets a first-party cookie, allowing the conversion to be associated correctly.
Passing Coupon Codes At The Impression Level
In addition to the Conversion Script, you can also pass a coupon code on the Impression Script using the coupon_code parameter in the JavaScript SDK. For example, to capture a coupon code from the utm_source URL parameter, the Impression Script would look like:


