
Overview
Bridge the gap between e-commerce and performance marketing by connecting your WooCommerce store to Everflow's intelligent tracking ecosystem. This integration leverages our Javascript SDK to capture every meaningful customer interaction, from initial click to final purchase.
This integration enables tracking implementation through WooCommerce. It allows for the following:
- Click Script Placed on Landing Page
- Conversion Tracking on the Confirmation Page
- Refund Reporting
Perfect for digital marketers who need reliable attribution and detailed performance data without complex technical overhead. Whether you're tracking single purchases or managing complex SKU-based programs, this integration adapts to your business model while maintaining WooCommerce's natural workflow.
Key Benefits
- Comprehensive tracking through Javascript SDK
- Click tracking
- Conversion tracking
- Support for direct linking in Media Buying campaigns
- Refunds will automatically be tracked in the refunds report
Prerequisites
- Active Woocommerce Account
- Basic understanding of Javascript SDK
Step-By-Step Guide
Step 1: Connect Your Store
In order to begin setting up the WooCommerce Integration you will need to navigate to Integrations.
On the E-Commerce tab, find WooCommerce and click Connect Integration.
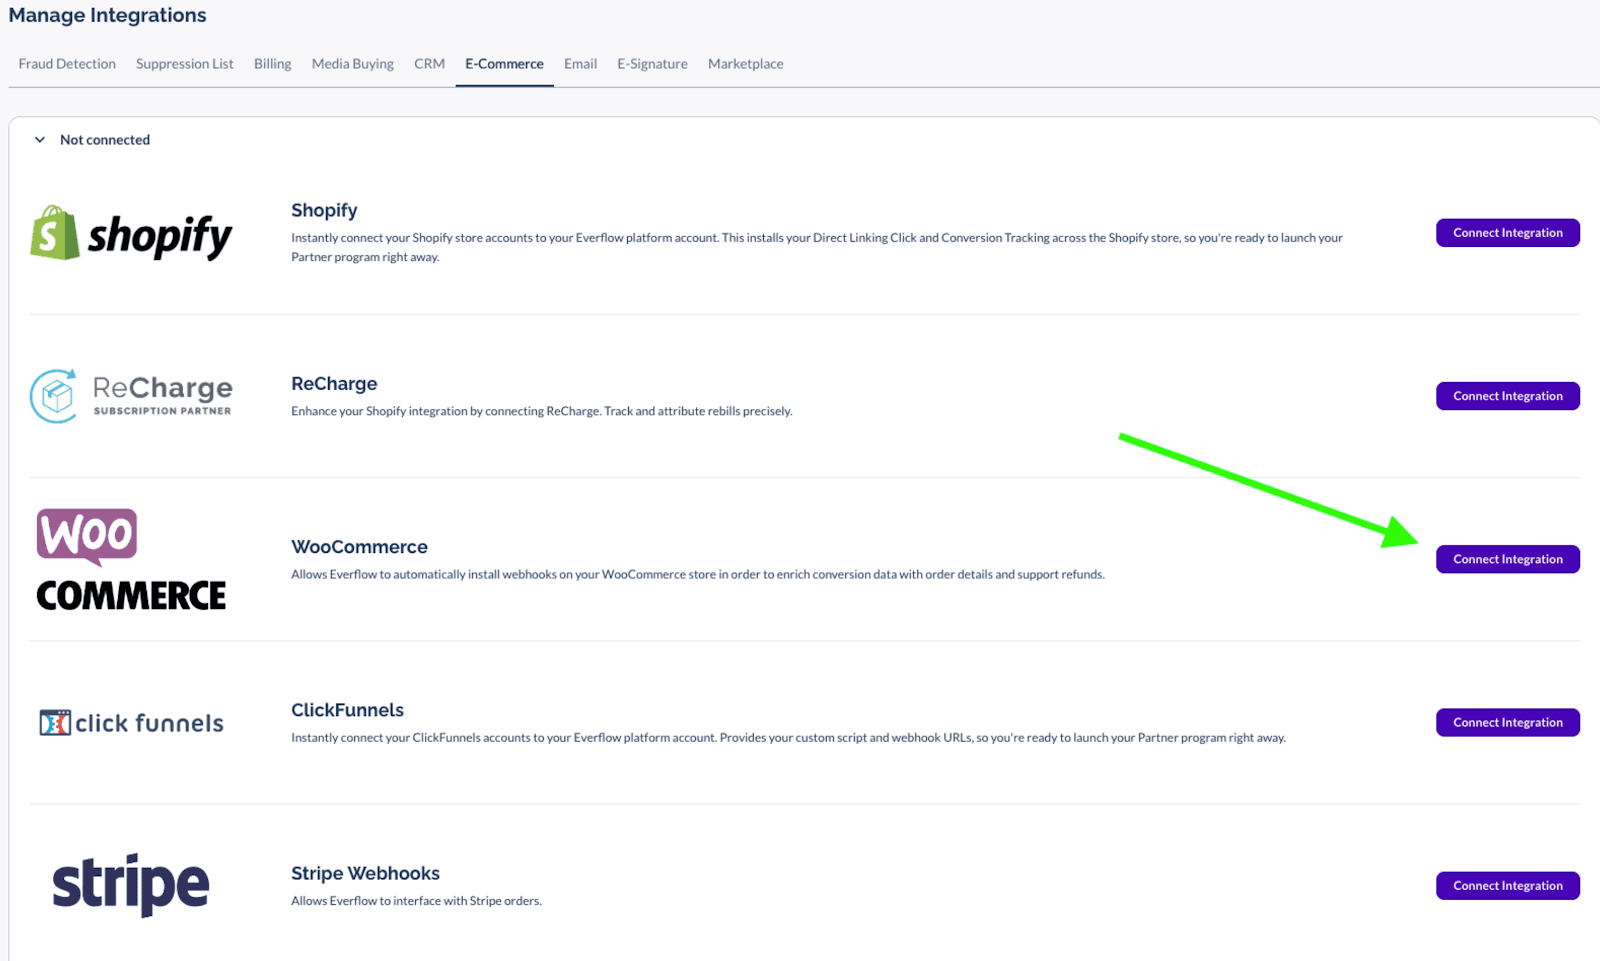
Click [+ Add] in the top right corner.

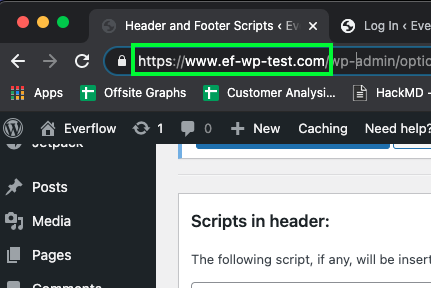
- Shop Domain: URL of your WordPress admin and your WooCommerce Store. For example, www.ef-wp-test.com as shown in the example below:
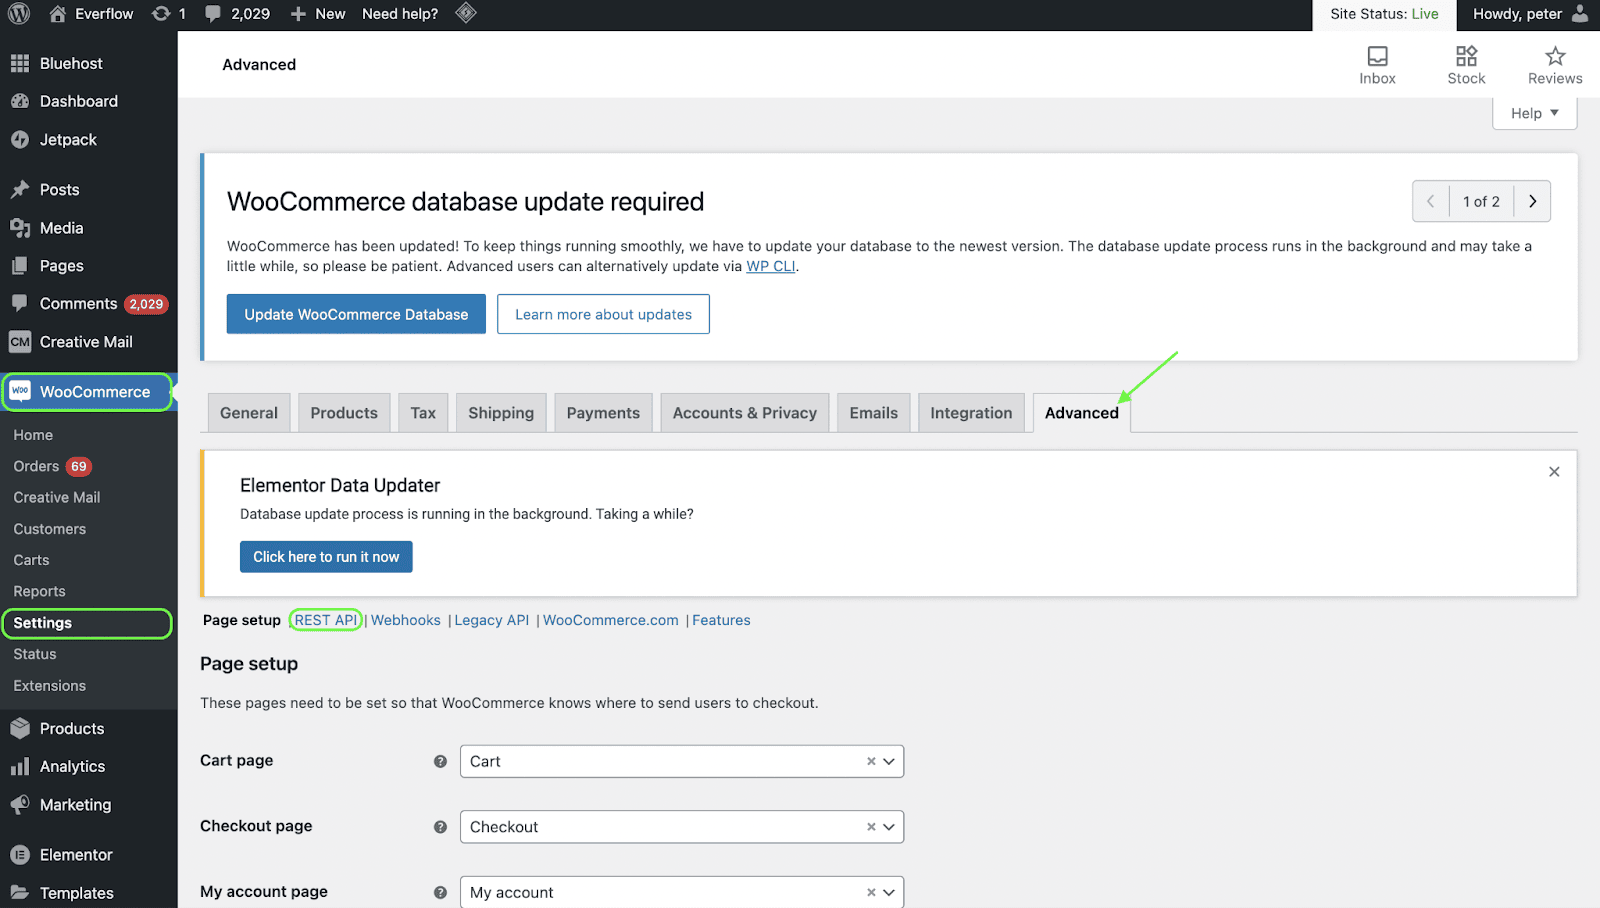
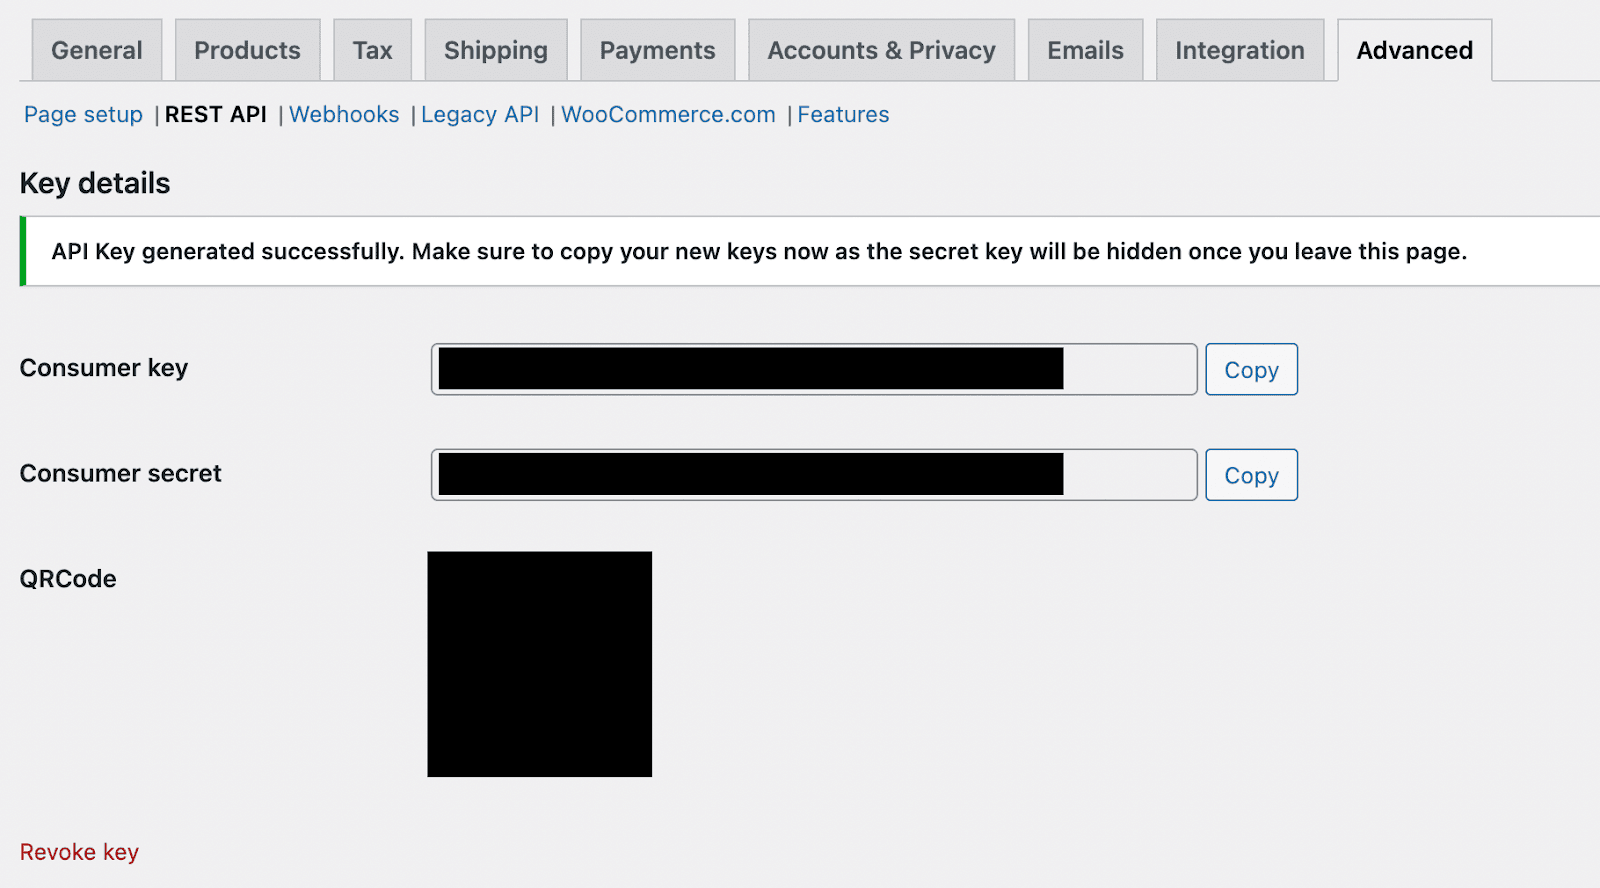
- Consumer Key & Consumer Secret: To access these, navigate to the WooCommerce > Settings > Advanced tab inside your WordPress account:
Click Add Key
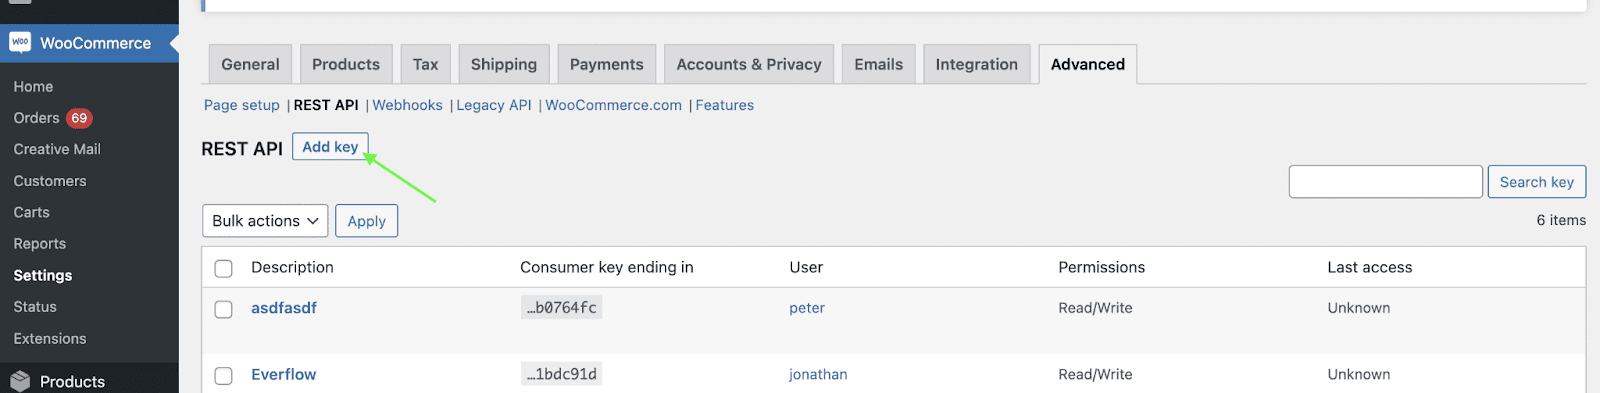
Enter a Description and User, and select Read/Write under Permissions. Then, Generate API Key.

Consumer Key, Consumer Secret and QRCode are available.
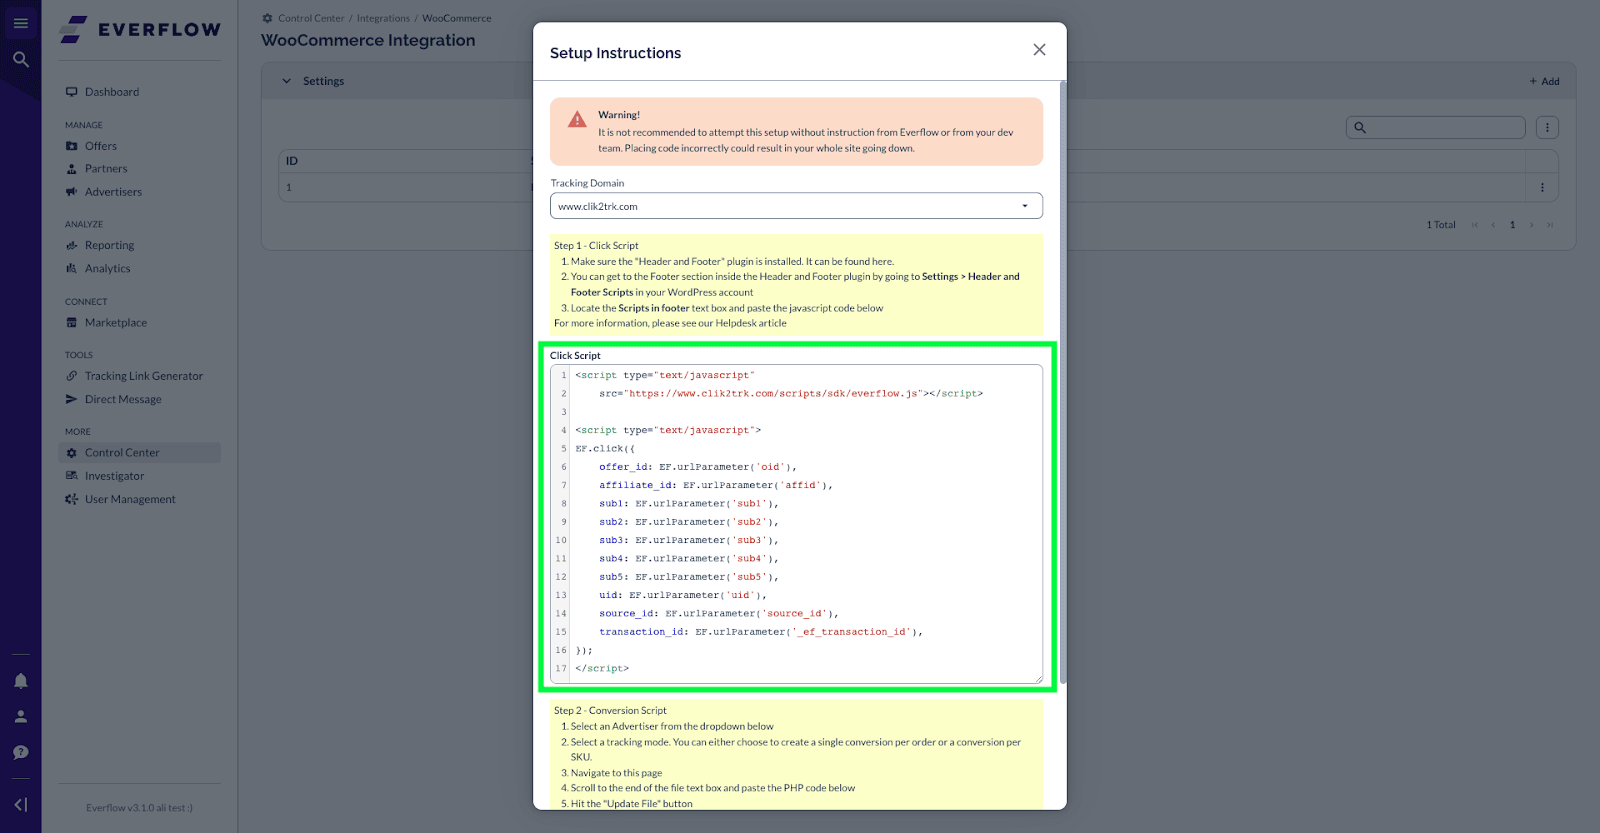
Step 2: Place the Click Script
For the click setup, please add the "Header and Footer" plugin found here.
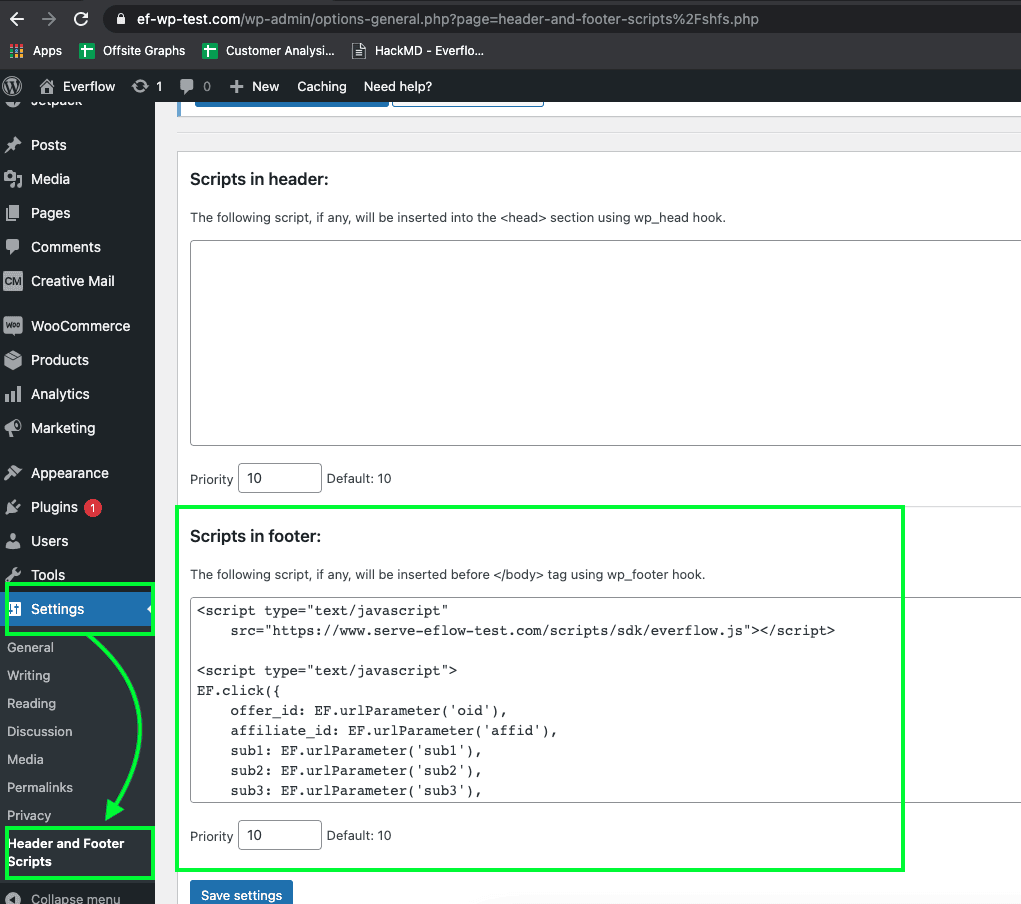
Copy the Click Script from the Setup Instructions and paste it into the Scripts in the footer box of the Header and Footer plugin.
To access the Footer section, navigate to Settings > Header and Footer Scripts in your WordPress account:
Step 3: Generate the Conversion Script
Select an Advertiser from the dropdown in the Step 2 of the Setup Instructions:

Next you will need to choose whether you want to track a Conversion per Order or a Conversion per SKU.
- Conversion per Order: All items will be included in the same Conversion.
- Conversion per SKU: Each item will be its own Conversion
Both methods can be used when utilizing Price Per Product revenue & payout structure. The key difference is how conversions are grouped and tracked, not which revenue structure they support.
Step 4: Place the Conversion Script
Click the "this page" link in point 3 under Step 2 to go straight to the functions.php file.

You can also navigate to Appearance > Theme File Editor > functions.php to access this file.
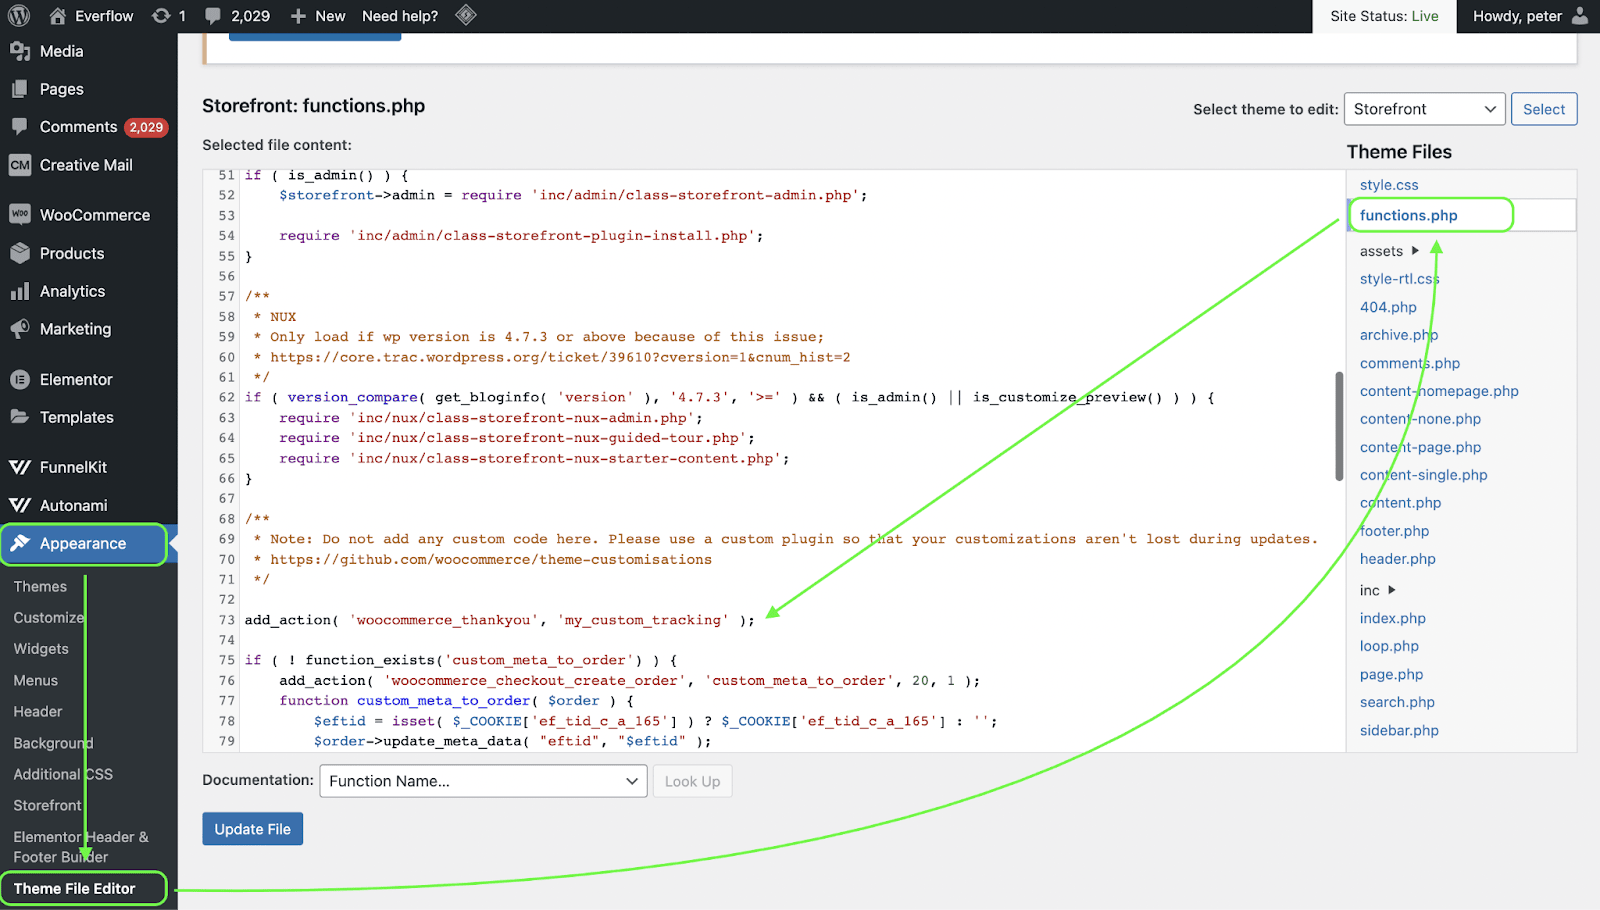
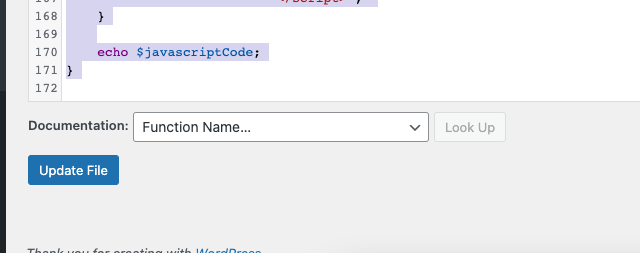
Copy the conversion code from the Everflow Integration and scroll to the bottom of the page and place the code, like this:

Click Update File at the bottom of the screen:
Refunds
For refund reporting, navigate to Reporting - Refunds.
How Orders Sync Back to Everflow
Once your store is connected in Step 1, the integration installs a webhook in WooCommerce. When a customer completes a purchase, that webhook fires and sends the order details to Everflow, which matches the order to the original click recorded by the Javascript SDK. This is what links each conversion (and any later refund) back to the partner and traffic source that drove it—so connecting the store is what keeps order and refund data flowing automatically rather than relying on manual placement alone.
Customizing the Conversion Amount
By default the conversion amount can include tax and shipping. If you want the revenue reported in Everflow to reflect the product value only, you can adjust the conversion script in your functions.php file to subtract these.
For example, to report the order total with shipping removed, subtract the shipping total from the amount:
When tracking a Conversion per SKU, each line item exposes a few values you can choose between depending on what revenue you want to report:
The line total is the price of each item multiplied by its quantity.
Troubleshooting: Price Showing Per Item Instead of the Line Total
Depending on how line items are configured on your store, the p value may return the per-product price instead of the full line total. To correct this, divide the line total by the quantity so the reported price reflects the complete line item:


