.svg)

Overview
The Tipalti integration enables seamless payment processing between Networks (Payers) and Partners (Payees) through Everflow.
This solution supports real-time and scheduled payments via Wire and ACH, simplifying your financial operations.
Prerequisites
Access to your Everflow dashboard.
Either an existing Tipalti account or willingness to create one.
Setting Up the Tipalti Integration
Navigate to
Integrations > >Billing > Tipalti
.
If you don't have a Tipalti account:
Click
Sign Up
to create one.
If you already have a Tipalti account:
Click
Connect Integration
.Toggle the integration to
Enable
.Enter your
Payer (Network) Name
. (The Payer Name appears in the upper right corner of the page for the Payer Name)Enter your
API key
(found in your Tipalti console).
If you don't see the Add option, contact Customer Success.
Configuring IPN Notifications
Copy the IPN URL from your Everflow portal (
Integrations > Billing > Tipalti
).In Tipalti, navigate to
Administration > Integrations > IPN setup
.
Create the following IPNs using the Everflow URL:
Ipn payment completed template
Ipn for payee details changed
Ipn for declined payment group
Ipn for cancelled payment
Ipn for deferred payment
Ipn error template (for rejected payments/invoices)
Working with Entities
Request Multiple Entity Support from Tipalti (not available in their UI).
Once enabled, access via:
Partners - Manage > Partner
> Billing tab, orClick
Edit
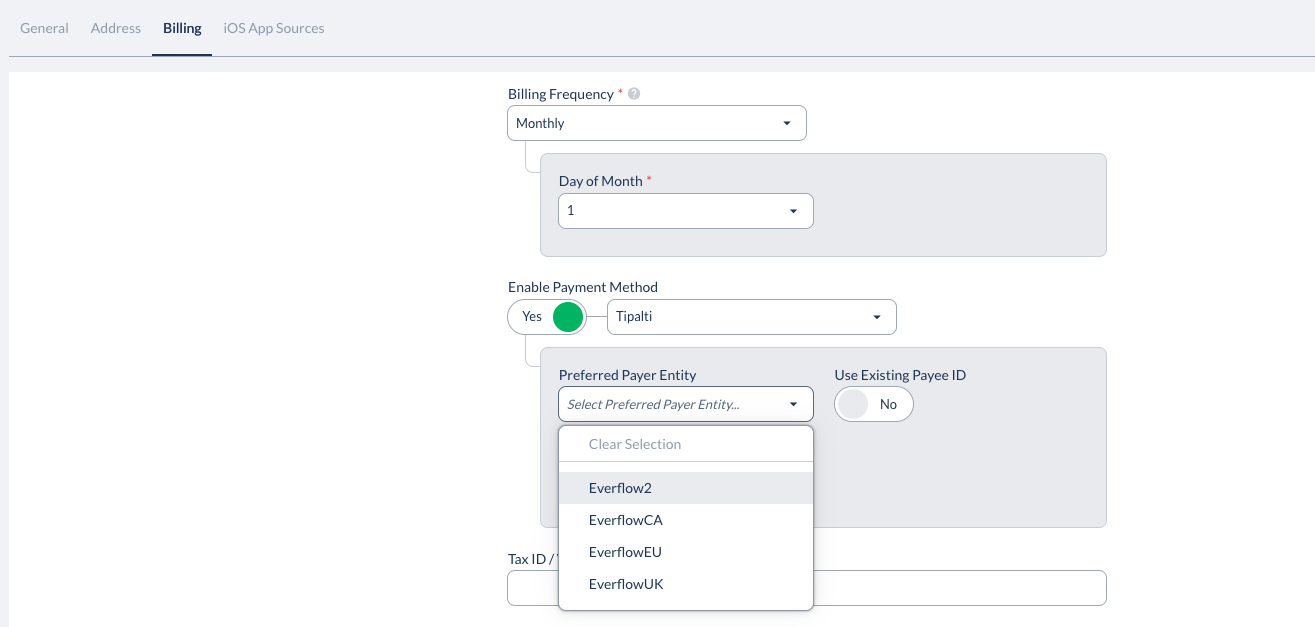
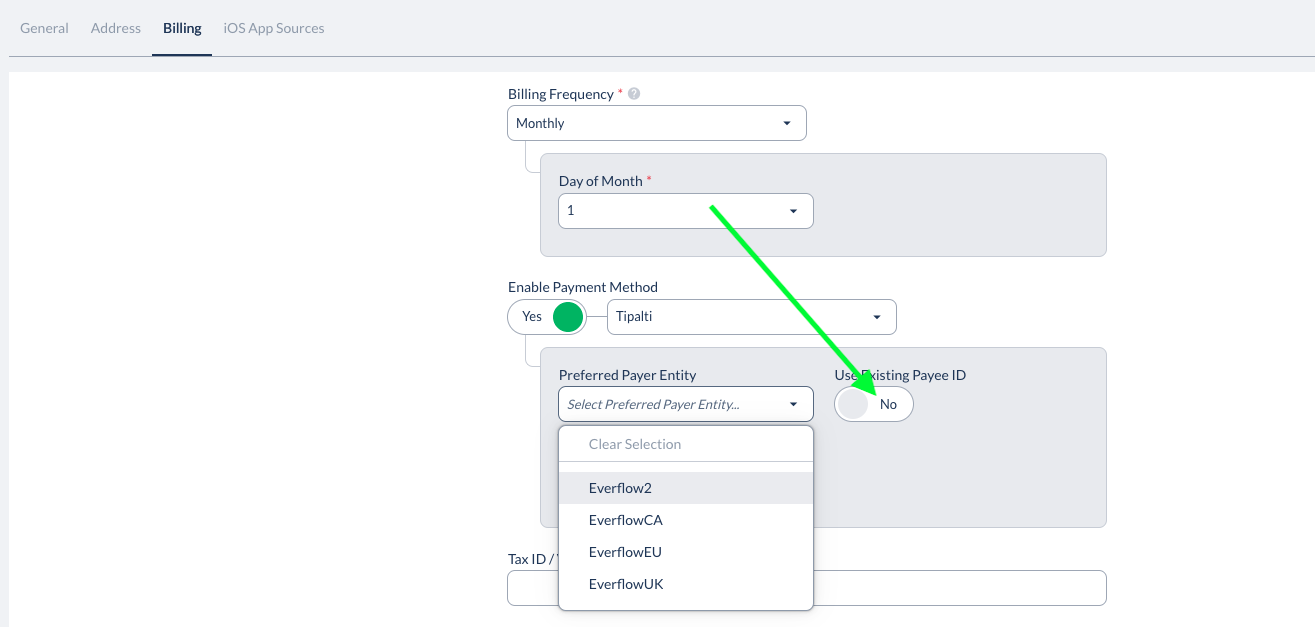
to configure Entity settings.A Tipalti Entity toggle and dropdown menu will appear when adding/editing Partners.
Partner Integration Options
For Partners with Existing Tipalti Accounts
Disable Partner ability to update billing information:
Navigate to
Control Center - Platform Configurations > Global Settings - Edit
.Untick
Enable Partners to update billing details inside their Partner UI
and save. This is the setting that stops Partners editing their own billing details, which is what lets you manage the Tipalti payee link on their behalf.
Update Partner billing information:
Go to
Partners - Manage > Select Partner > Edit > Billing
.Enable
Use Existing Payee ID
.Enter the Partner's Payee ID from Tipalti.
The Partner's status will change to "payable" when setup is complete.

The setting lives on the Global Settings card. Use Edit on that card to change it.
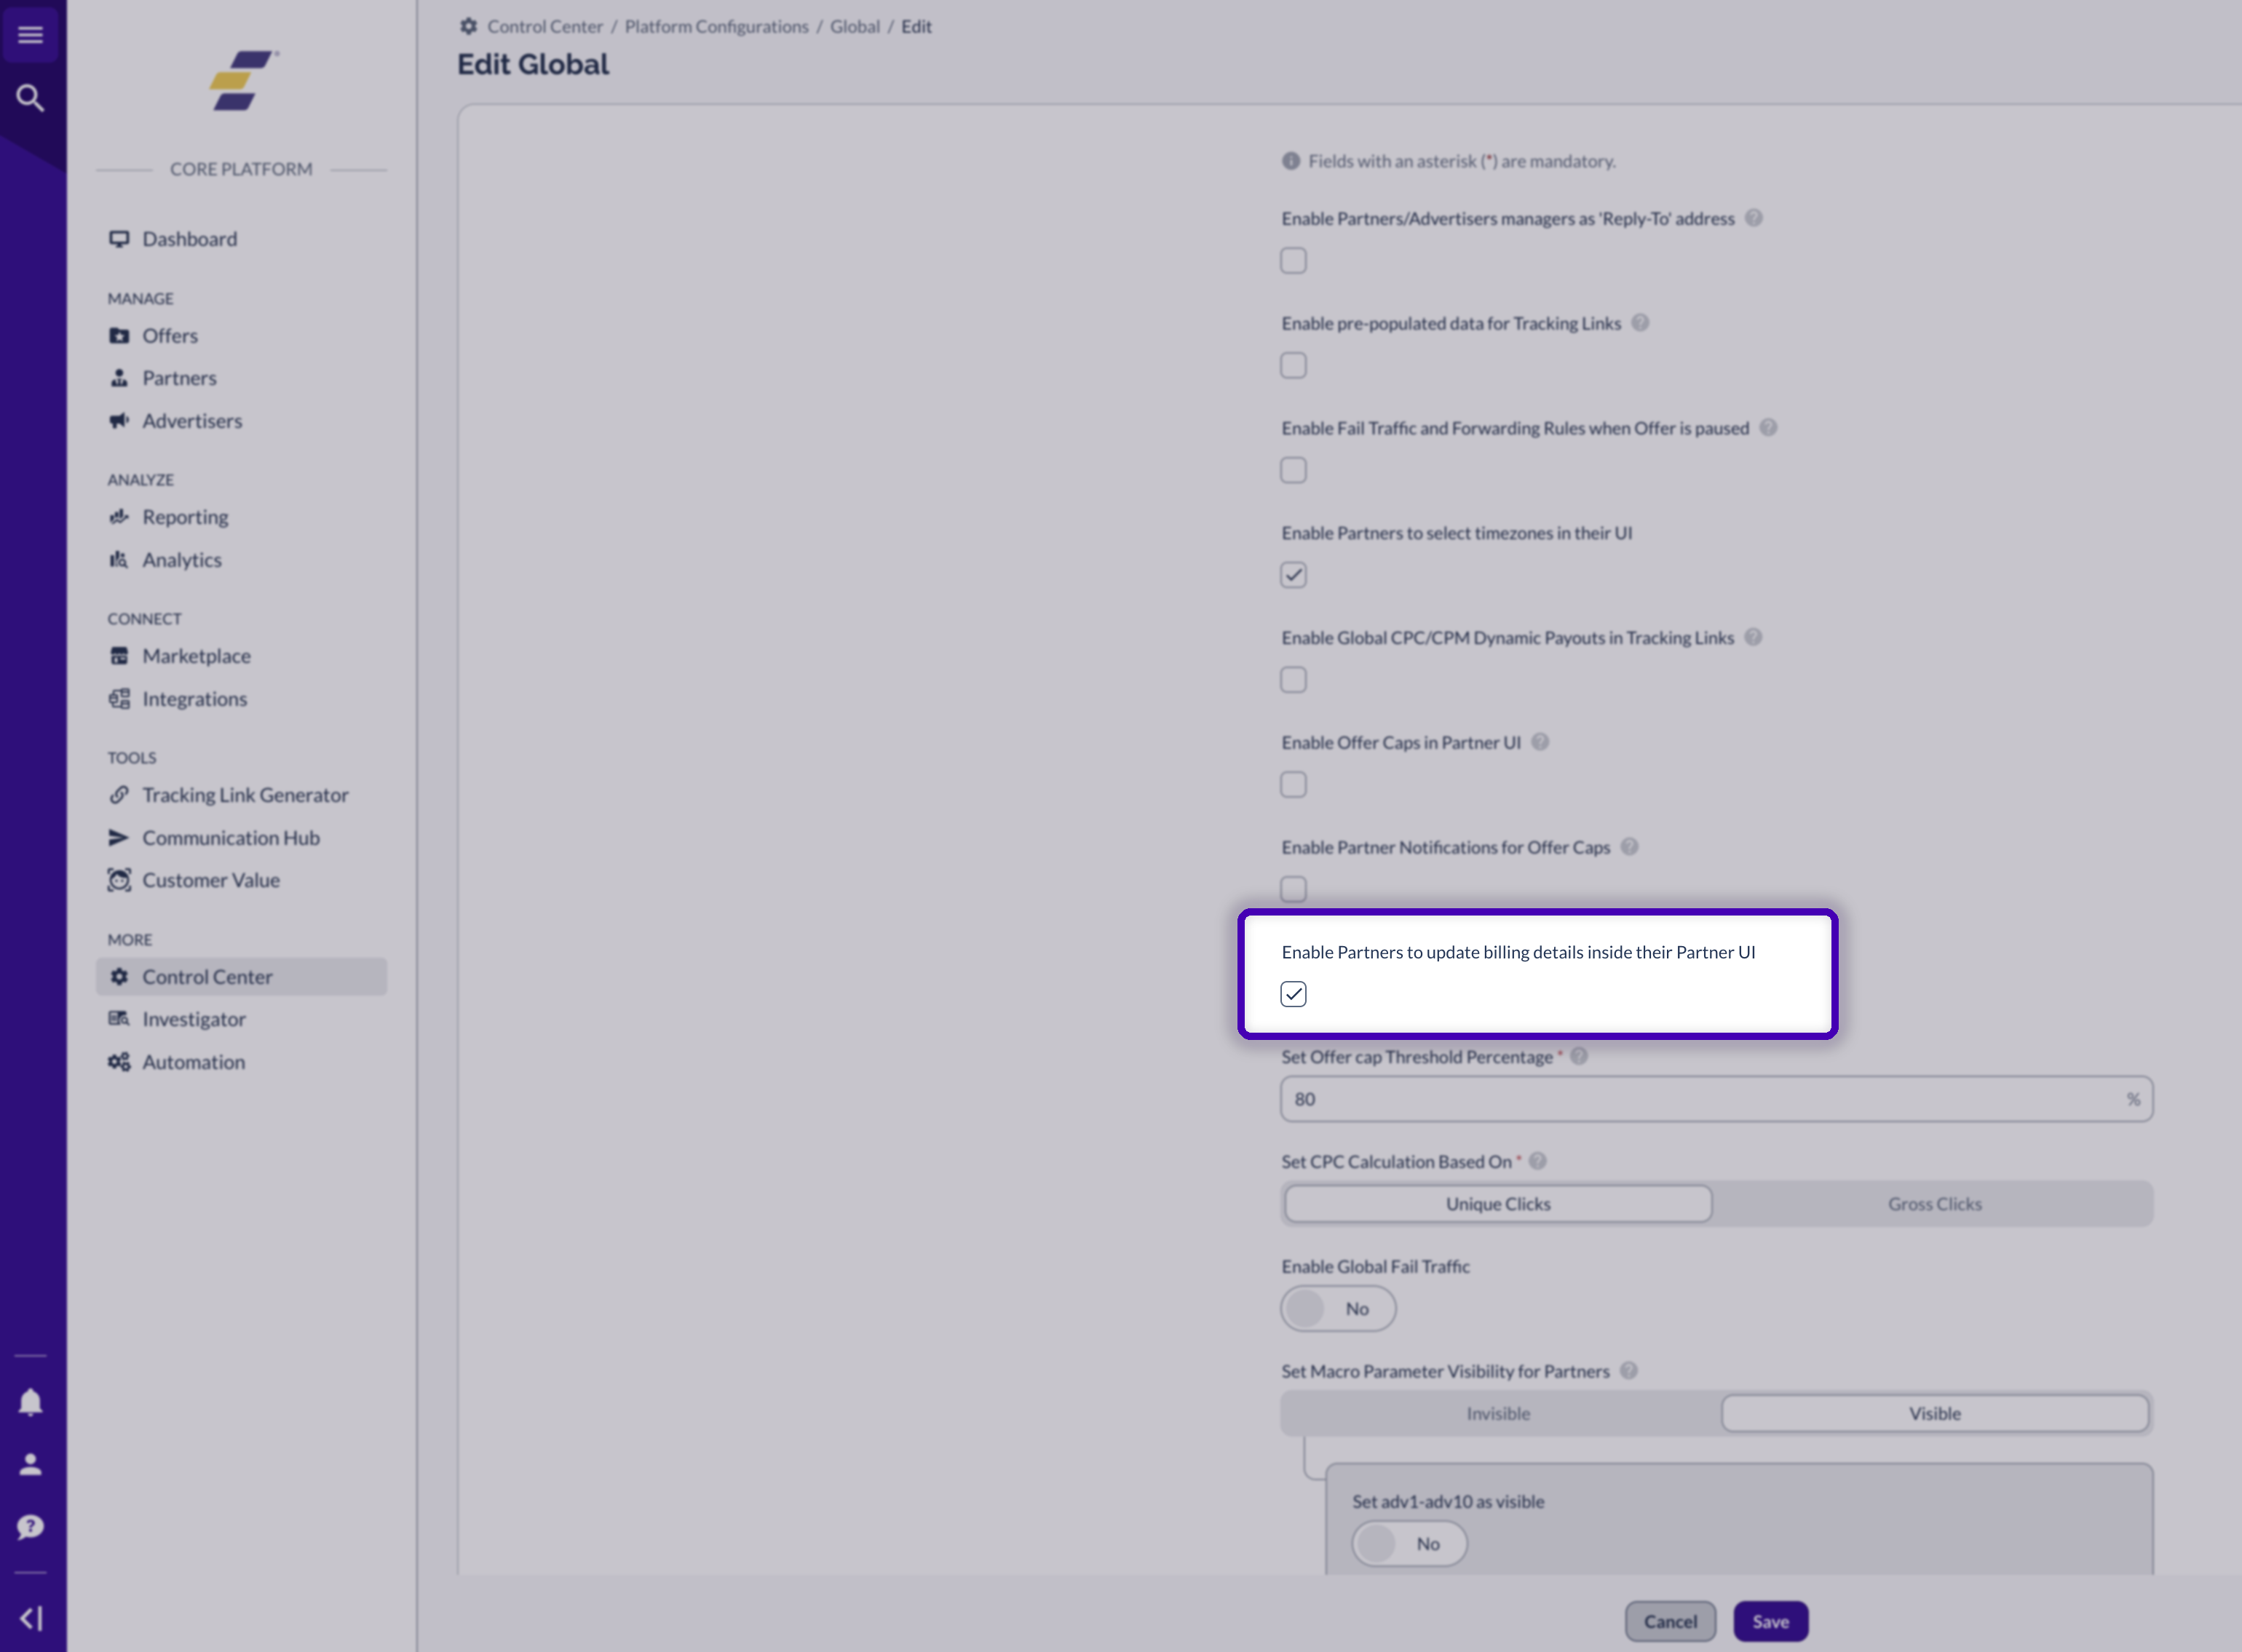
Untick Enable Partners to update billing details inside their Partner UI. It is shown ticked here, which is the default. You are turning it off so the Partner cannot overwrite the payee link you are about to set.
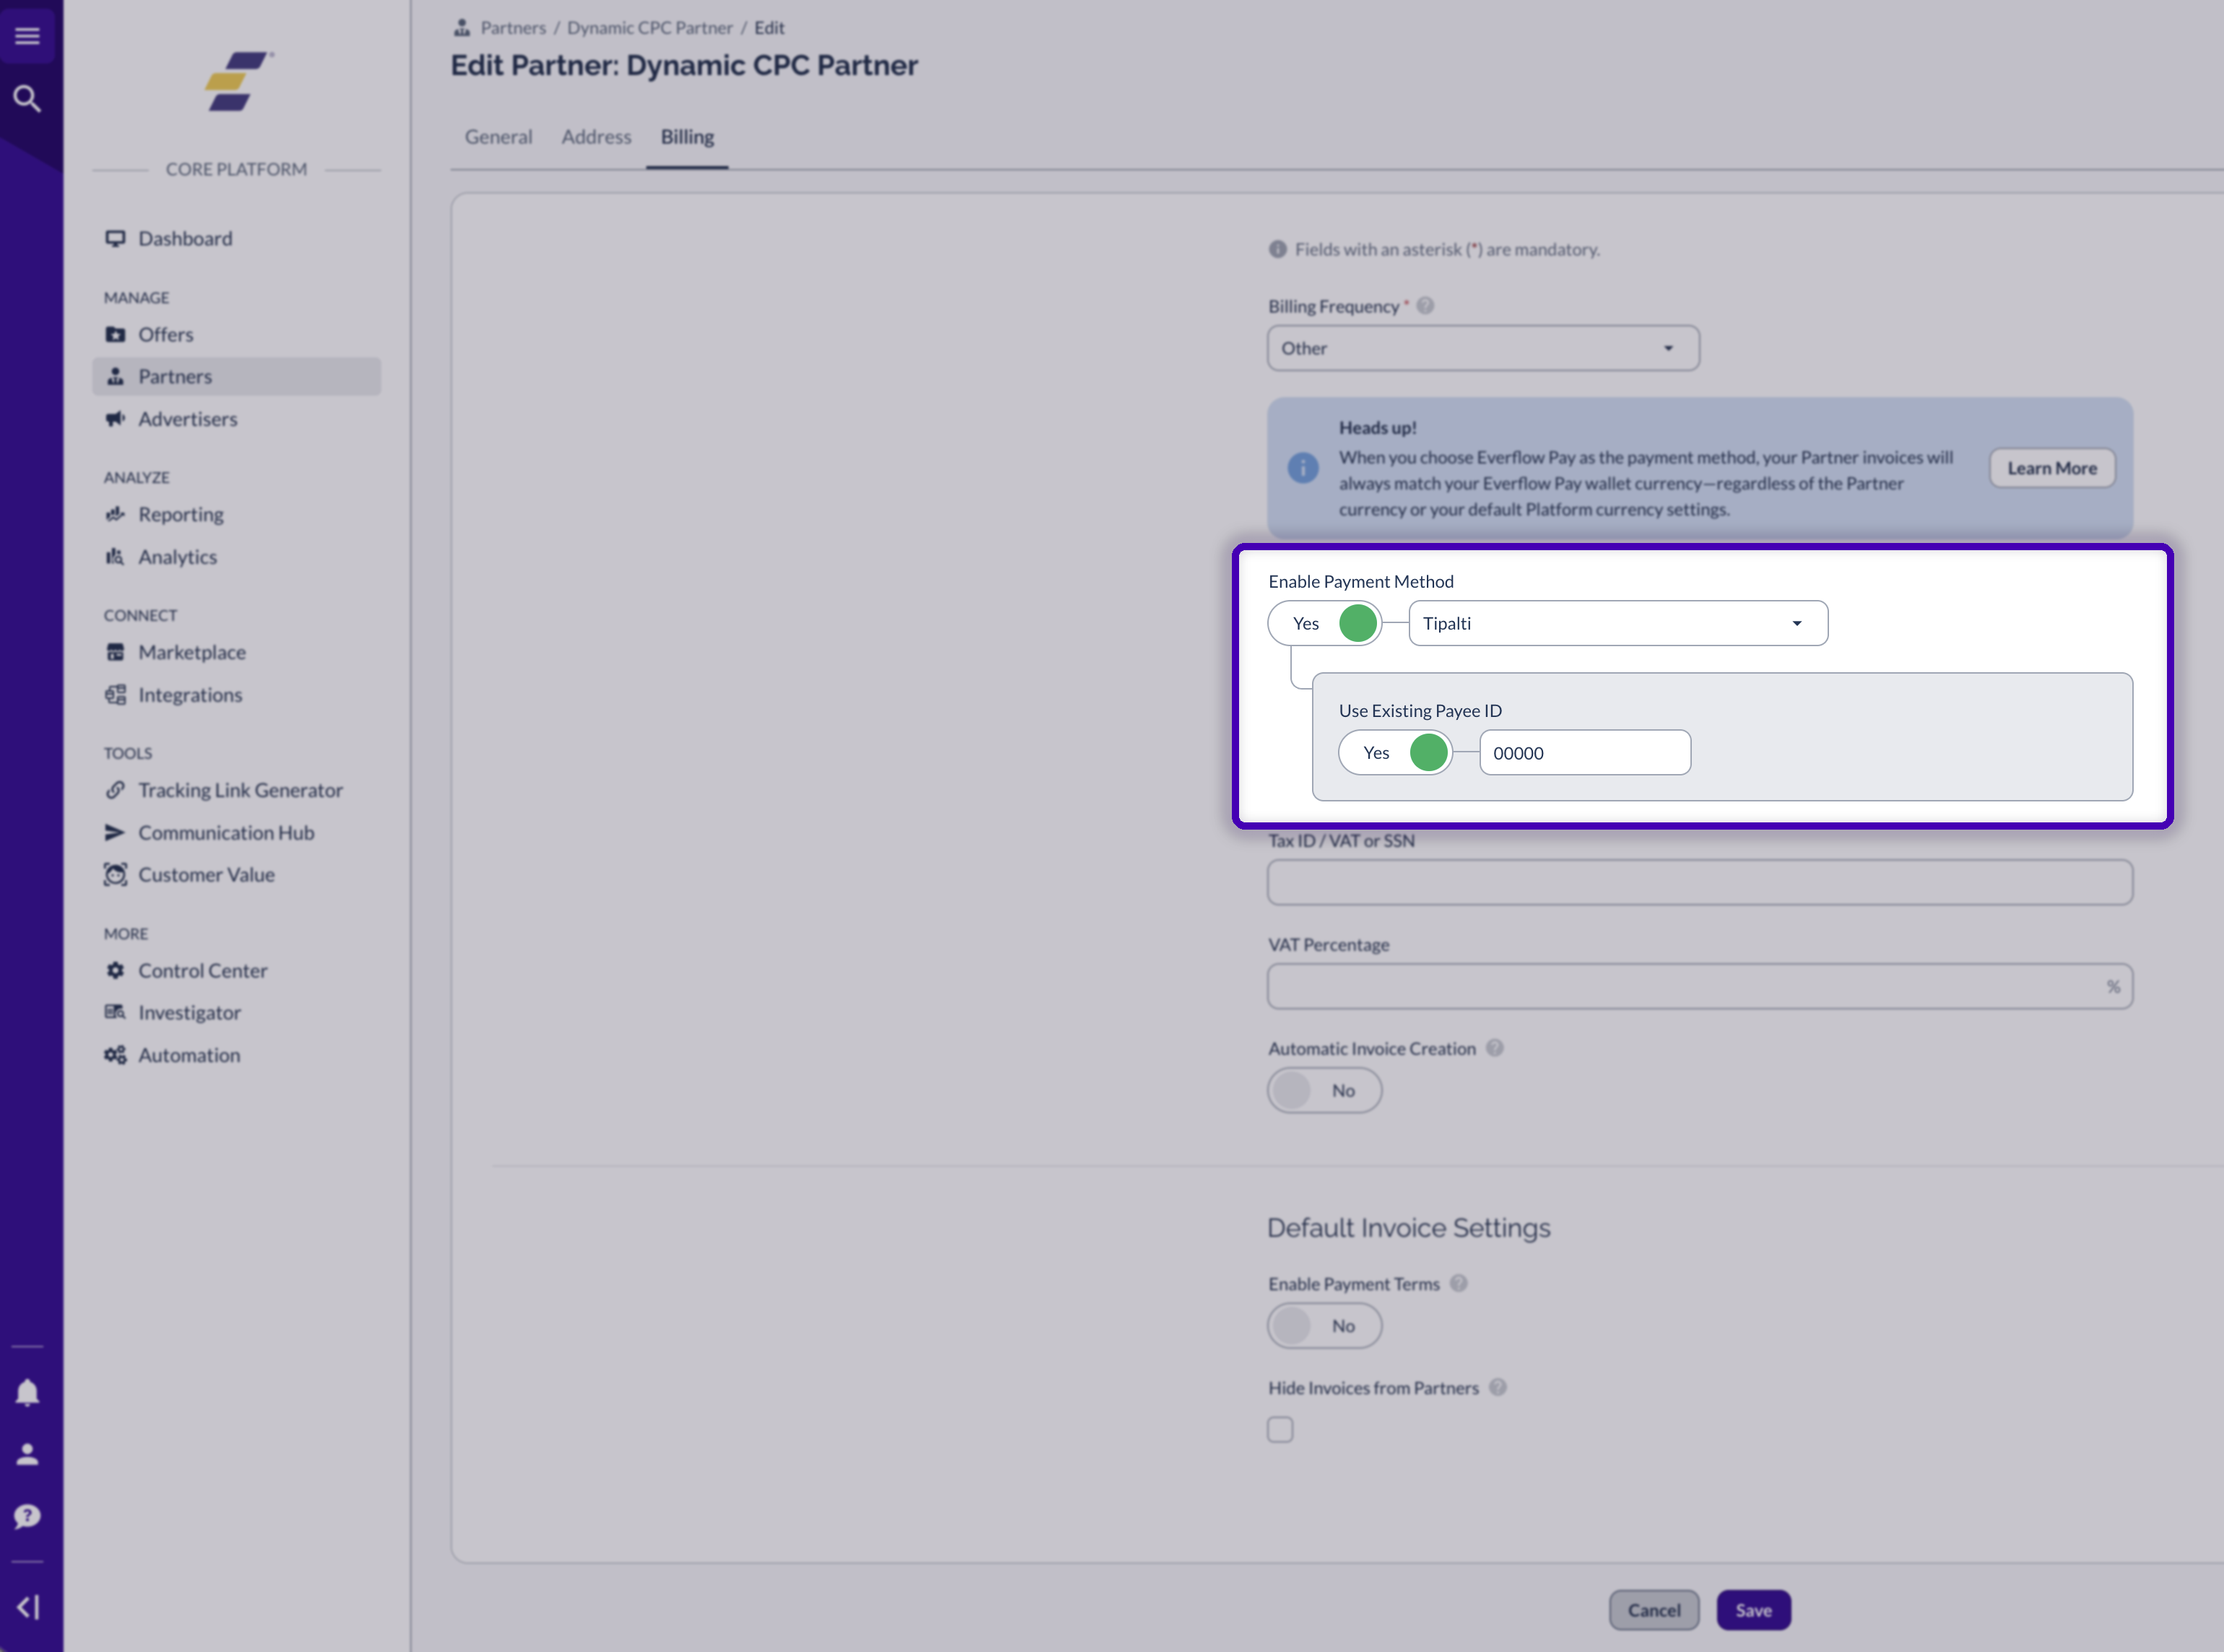
On the Partner’s Billing tab, set the payment method to Tipalti, switch on Use Existing Payee ID and paste the Payee ID from Tipalti.
For Partners without Tipalti Accounts
Disable Partner ability to update billing information:
Navigate to
Control Center - Platform Configurations > Global Settings - Edit
.Untick
Enable Partners to update billing details inside their Partner UI
and save. This is the setting that stops Partners editing their own billing details, which is what lets you manage the Tipalti payee link on their behalf.
Update Partner billing information:
Go to
Partners - Manage > Select Partner > Edit > Billing
.Disable
Use Existing Payee ID
.Instruct Partners to create their account via:
Partner Platform > Company Settings > Billing - Edit
.Partners can update billing information by clicking
Fill Information
.Partners must click
Back to Billing
after completing their information.Everflow syncs with Tipalti every 10 minutes.
Partner status will update to "Tipalti Status: Payable" when ready to receive payments.

Making Payments
Navigate to
Partners - Invoices
.Select the invoice and click
Approve & Pay
.
Depending on your Tipalti configuration, you may need to approve in Tipalti to execute the payment.
Alternatively, click
Approve & Pay
from an individual invoice view.If enabled in Tipalti, you can accelerate payments using Tipalti's NetNow service.
Invoices will only be marked as paid in Everflow after successful payment in Tipalti.