Home
Offers & Tracking
Offer Traffic Optimizations
SmartSwitch For Automatic Optimization and Anti-Fraud Protection

SERIES:

SmartSwitch For Automatic Optimization and Anti-Fraud Protection

SmartSwitch allows you to set clear rules for acceptable traffic, that whenever violated, will block traffic, fail traffic, or send alerts.

Overview

SmartSwitch enables automatic traffic filtering based on predefined rules, helping you:

  • Block invalid traffic automatically.
  • Redirect traffic via Fail Traffic logic.
  • Trigger notifications to alert Partners before action is taken.
  • Optimize performance based on KPIs

Enabling the SmartSwitch Feature
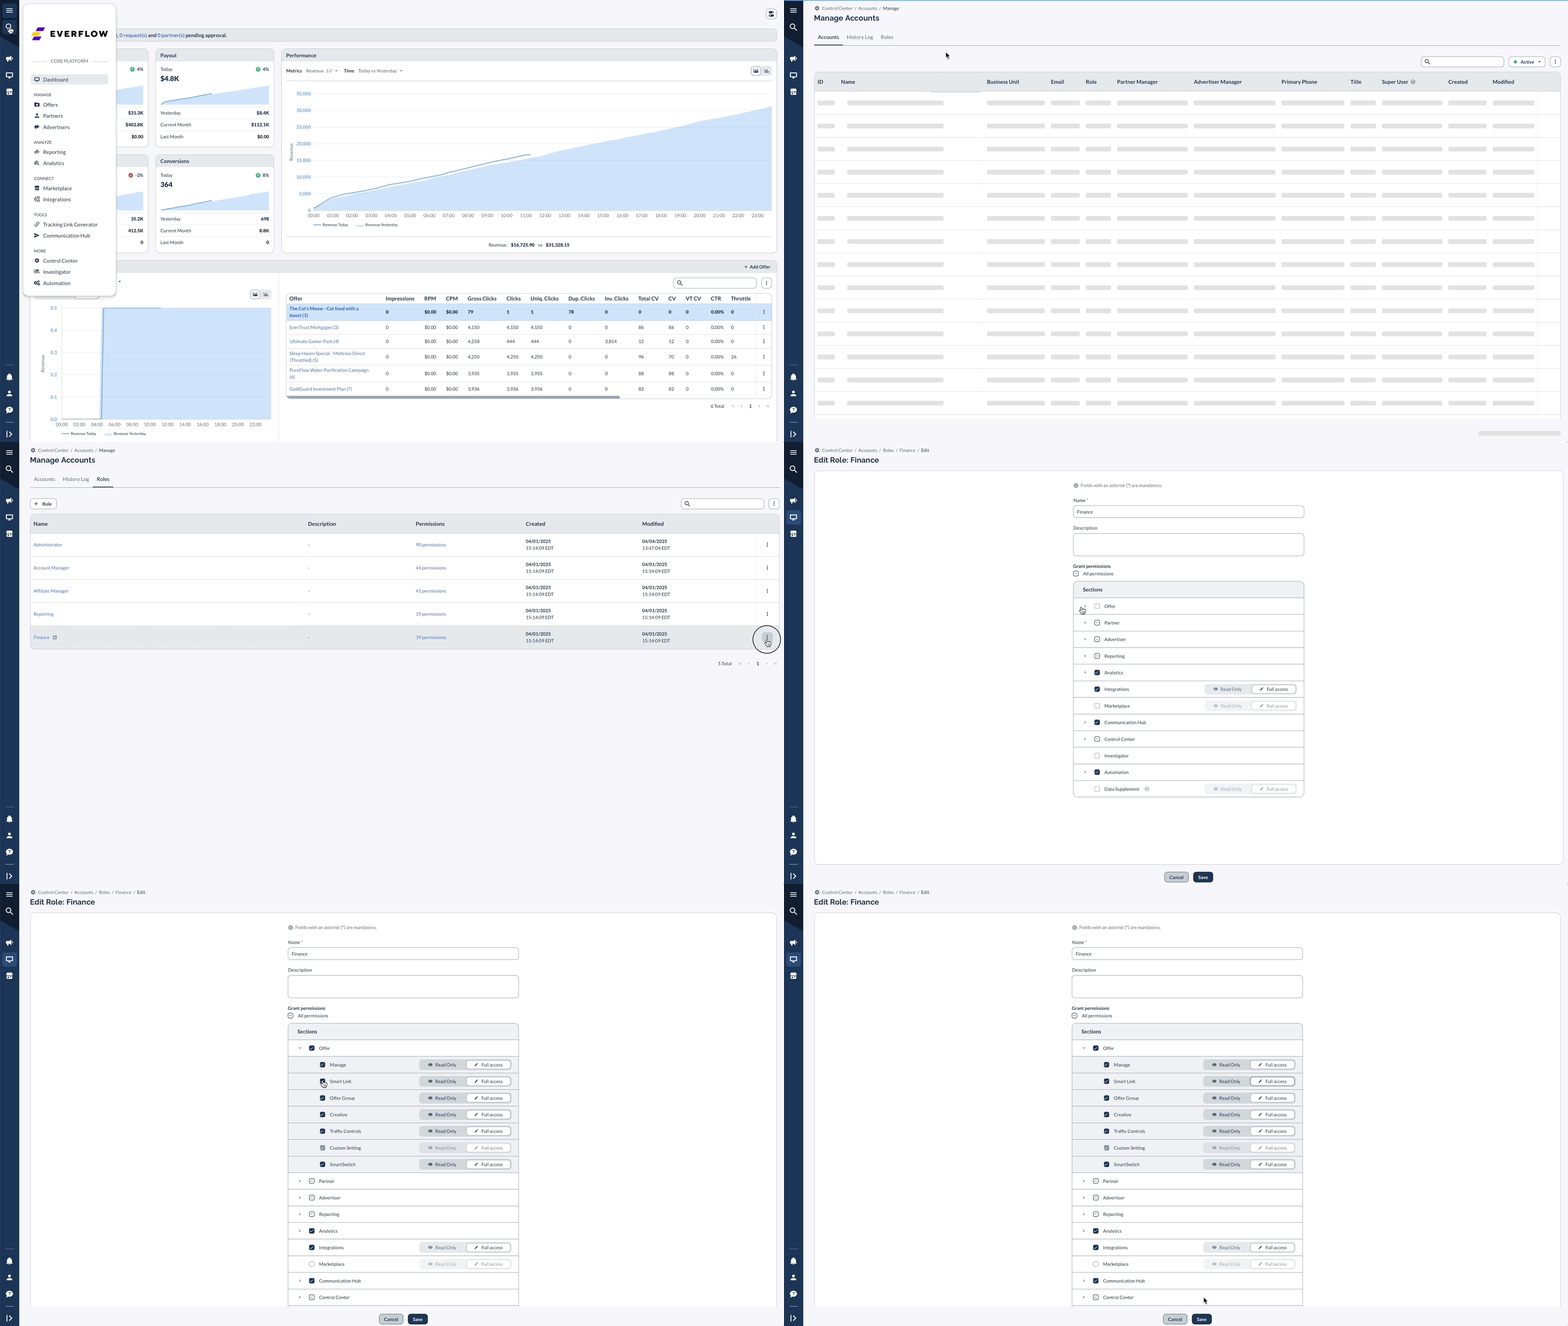
Navigate to: Control Center -> Accounts -> Roles Click the three vertical dots next to the Role you want to modify Under Offers, check the box for SmartSwitch (Full Access or Read Only) Click Save Note Access to roles requires having Administrator Access

How to Create a SmartSwitch Rule

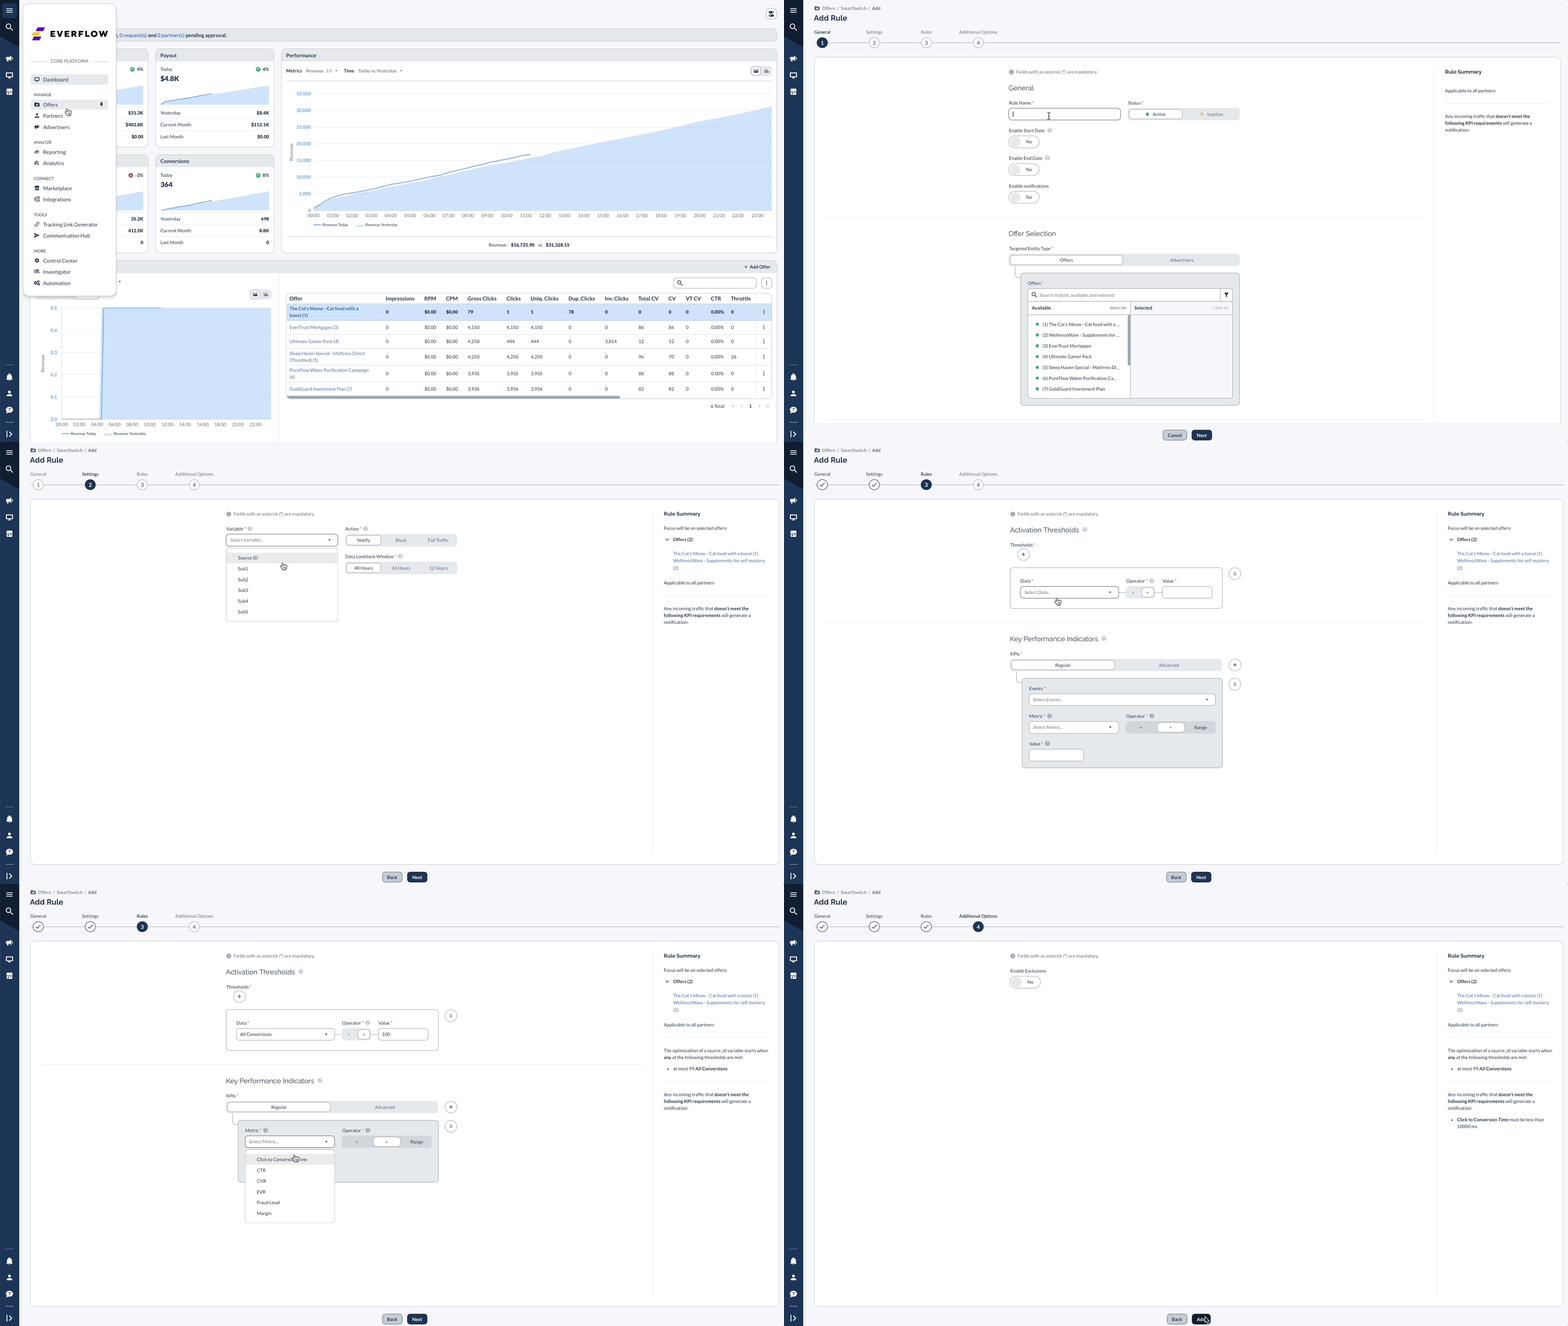
1 Start a New Rule Go to Offers -> SmartSwitch Click Add New Rule Fill out the fields—a live preview of your rule will appear on the right side Note: You can create up to 30 SmartSwitch rules. 2 Configure General Settings Start/End Dates → Set optional timeframes for when the rule is active. Enable Notifications → Alerts Employee Users when traffic is affected by the rule. Notify Partners → Sends notifications to Partner Users if their traffic is affected. Note: Employee & Partner notifications must be enabled in their individual accounts in order to receive these notifications. Targeted Entity Type: Advertiser-Level: Applies to all Offers from that Advertiser. Offer-Level: Applies only to a specific Offer. Click Next to proceed to the Settings tab. 3 Configure Rule Settings Variable: Choose the data source for the rule: Source ID Sub1 - Sub5 Action: Choose what happens when traffic violates the rule: Block Clicks → User is sent to a blank page. Follow Fail Traffic Logic → Redirect to an alternative Offer. Send Notifications Only → No action, just alerts employees/Partners. Run Frequency: Define how often SmartSwitch checks traffic data. Data Lookback Window: Set the historical time window used for analysis. Action Delay: Define the waiting period before the rule takes effect after sending a notification (e.g., 1, 2, 4, 6, 12, or 24 hours). Click Next to proceed to the Rules tab. 4 Define Rule Activation Criteria Set Activation Thresholds Choose the Base, Event, or the particular Event name to which the KPI will be applied. Triggers rule enforcement based on specific metrics. Select a data point and set a minimum or maximum value. Metrics include: Total Clicks, Revenue, Payout, Impressions, Events, Conversions All Conversions (Approved, Pending, Rejected) Define KPI Rules Choose regular KPIs (basic thresholds) or advanced KPIs (complex metrics). Multiple Thresholds use "OR" logic, while multiple KPIs use "AND" logic. Advanced KPI Options: % of conversions from Mobile Traffic (excluding WiFi). % of conversions from WiFi Traffic. % of conversions with duplicate IPs. % of conversions with empty Source ID. % of conversions missing Sub1-Sub5 values. % of conversions without device IDs. Operator Options: Greater Than, Less Than, or Range Click Next to proceed to Additional Options. 5 Exclusions & Finalization Exclude specific Partners/Variable combinations from the rule. Click Save to finalize the SmartSwitch rule.

Managing SmartSwitch Activations

View & Manage SmartSwitch Rules
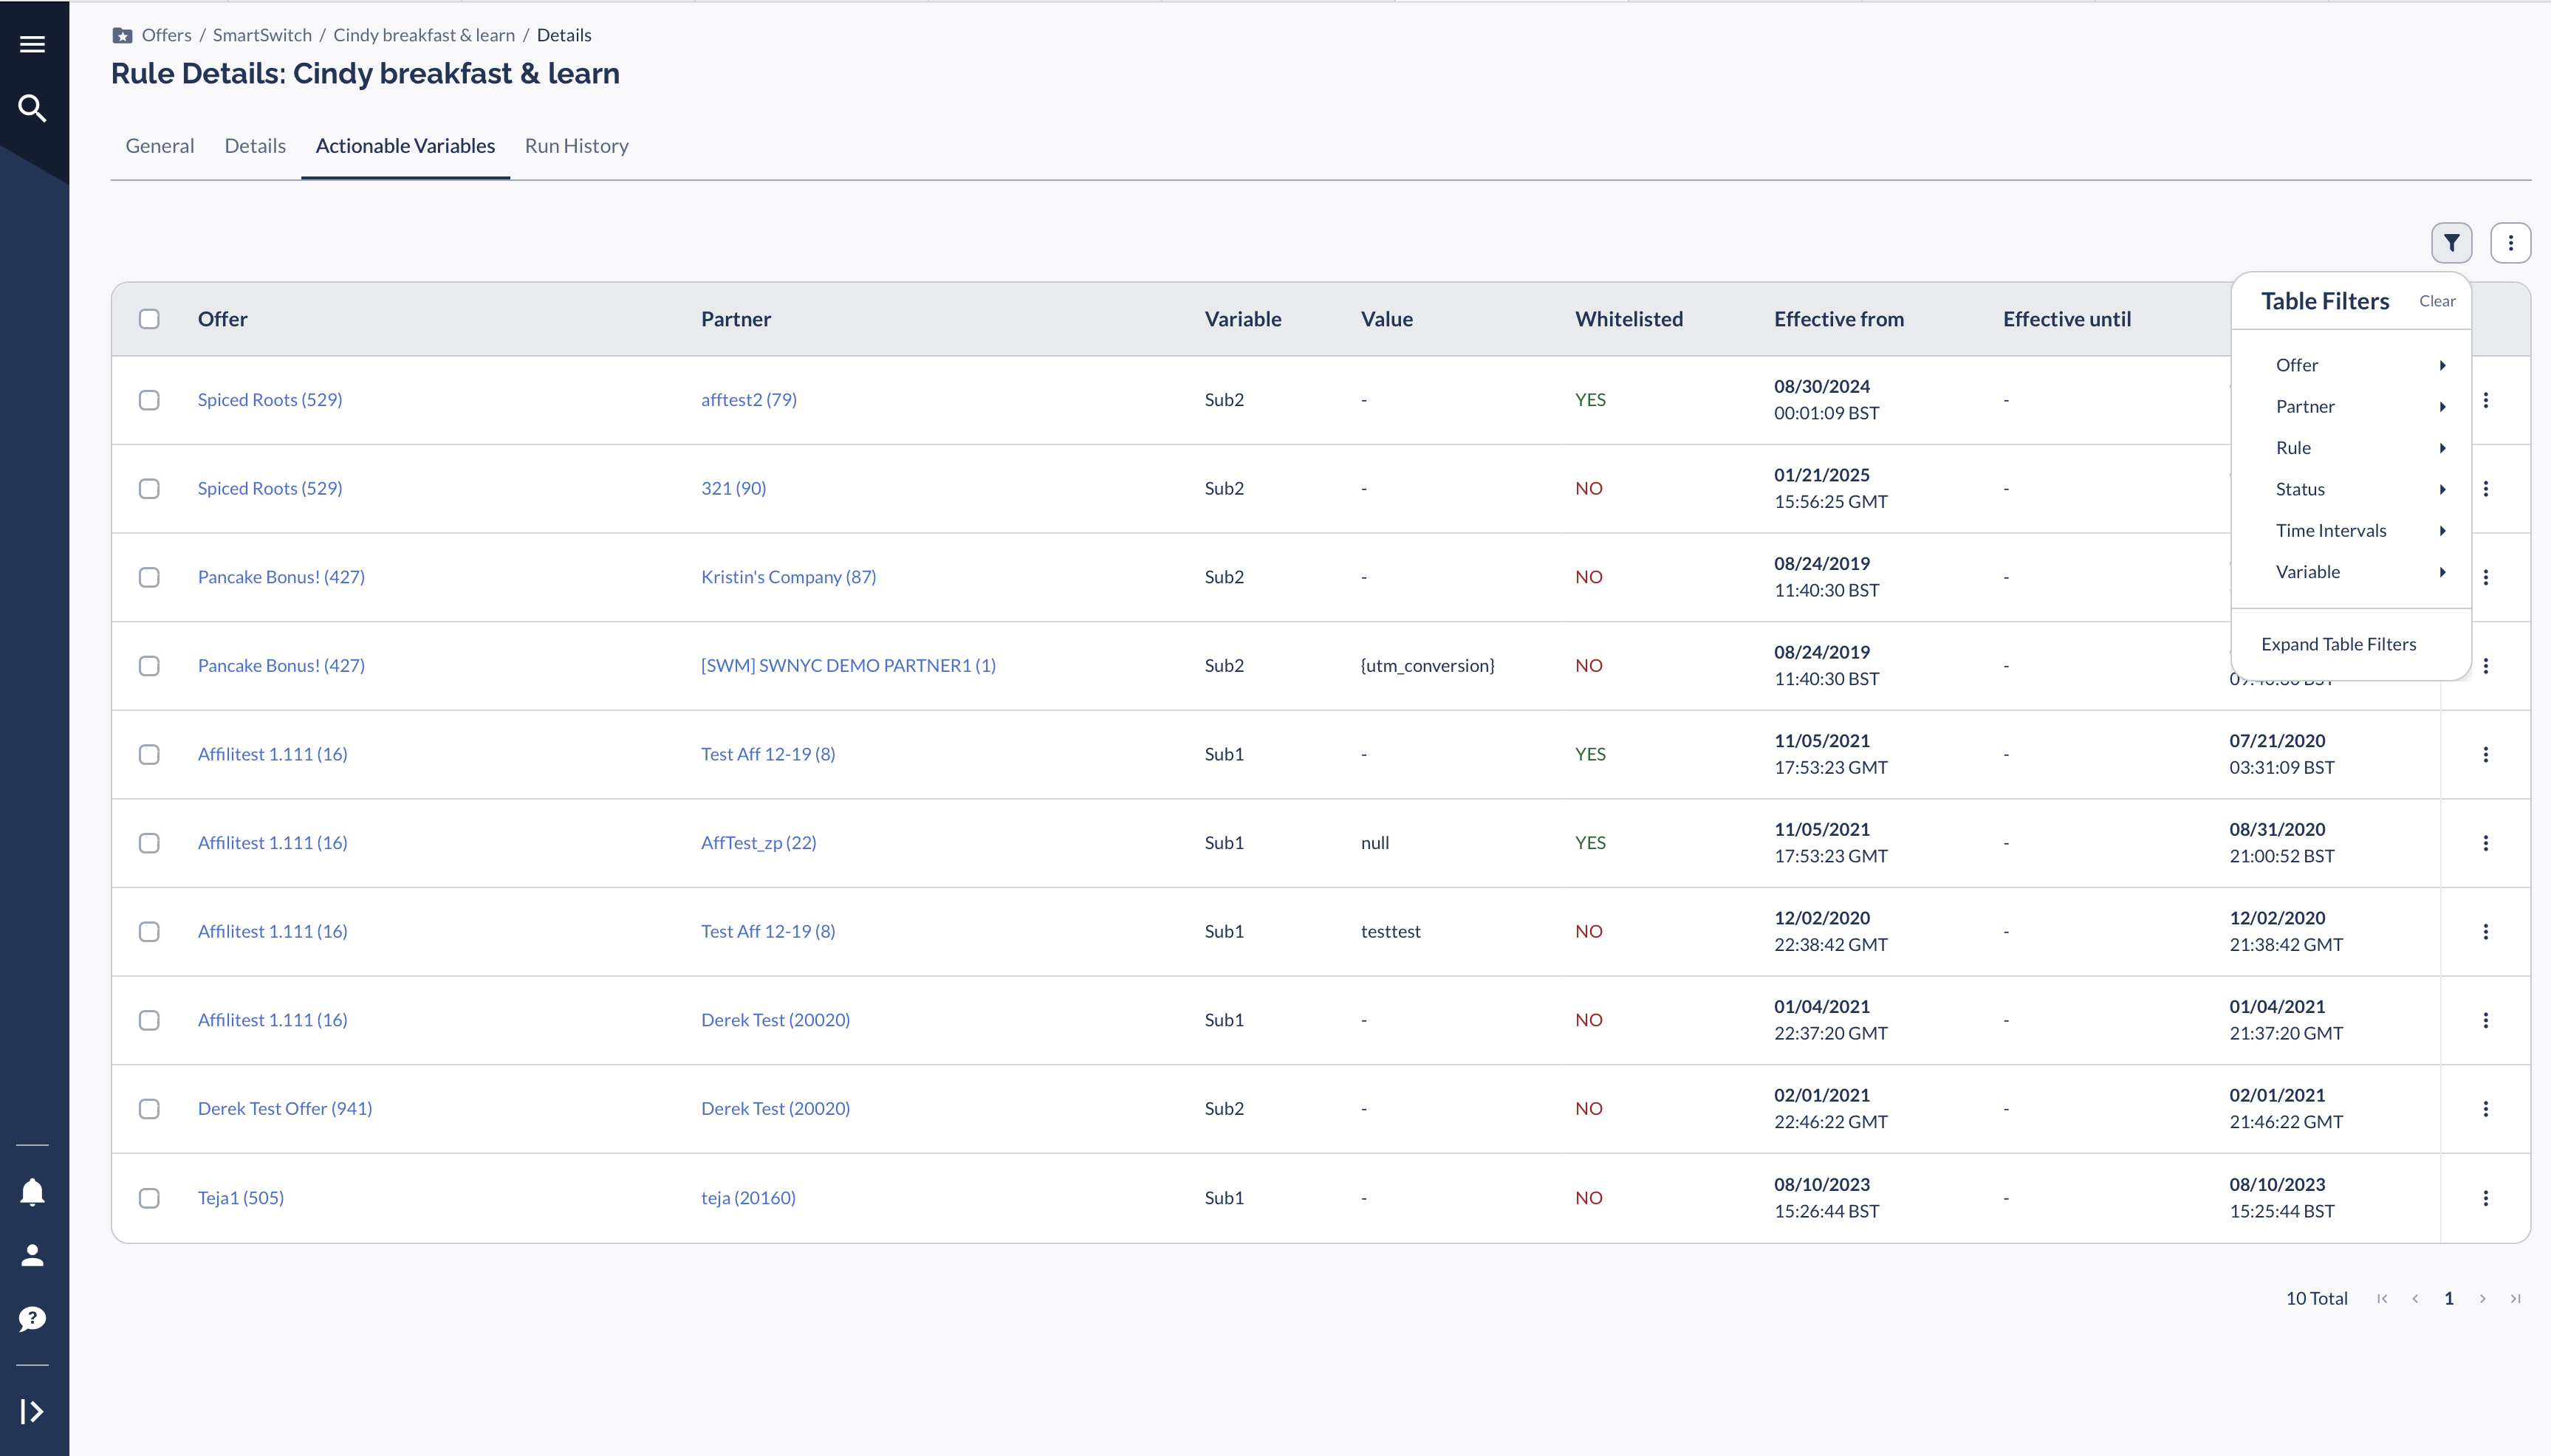
Navigate to Offers -> SmartSwitch
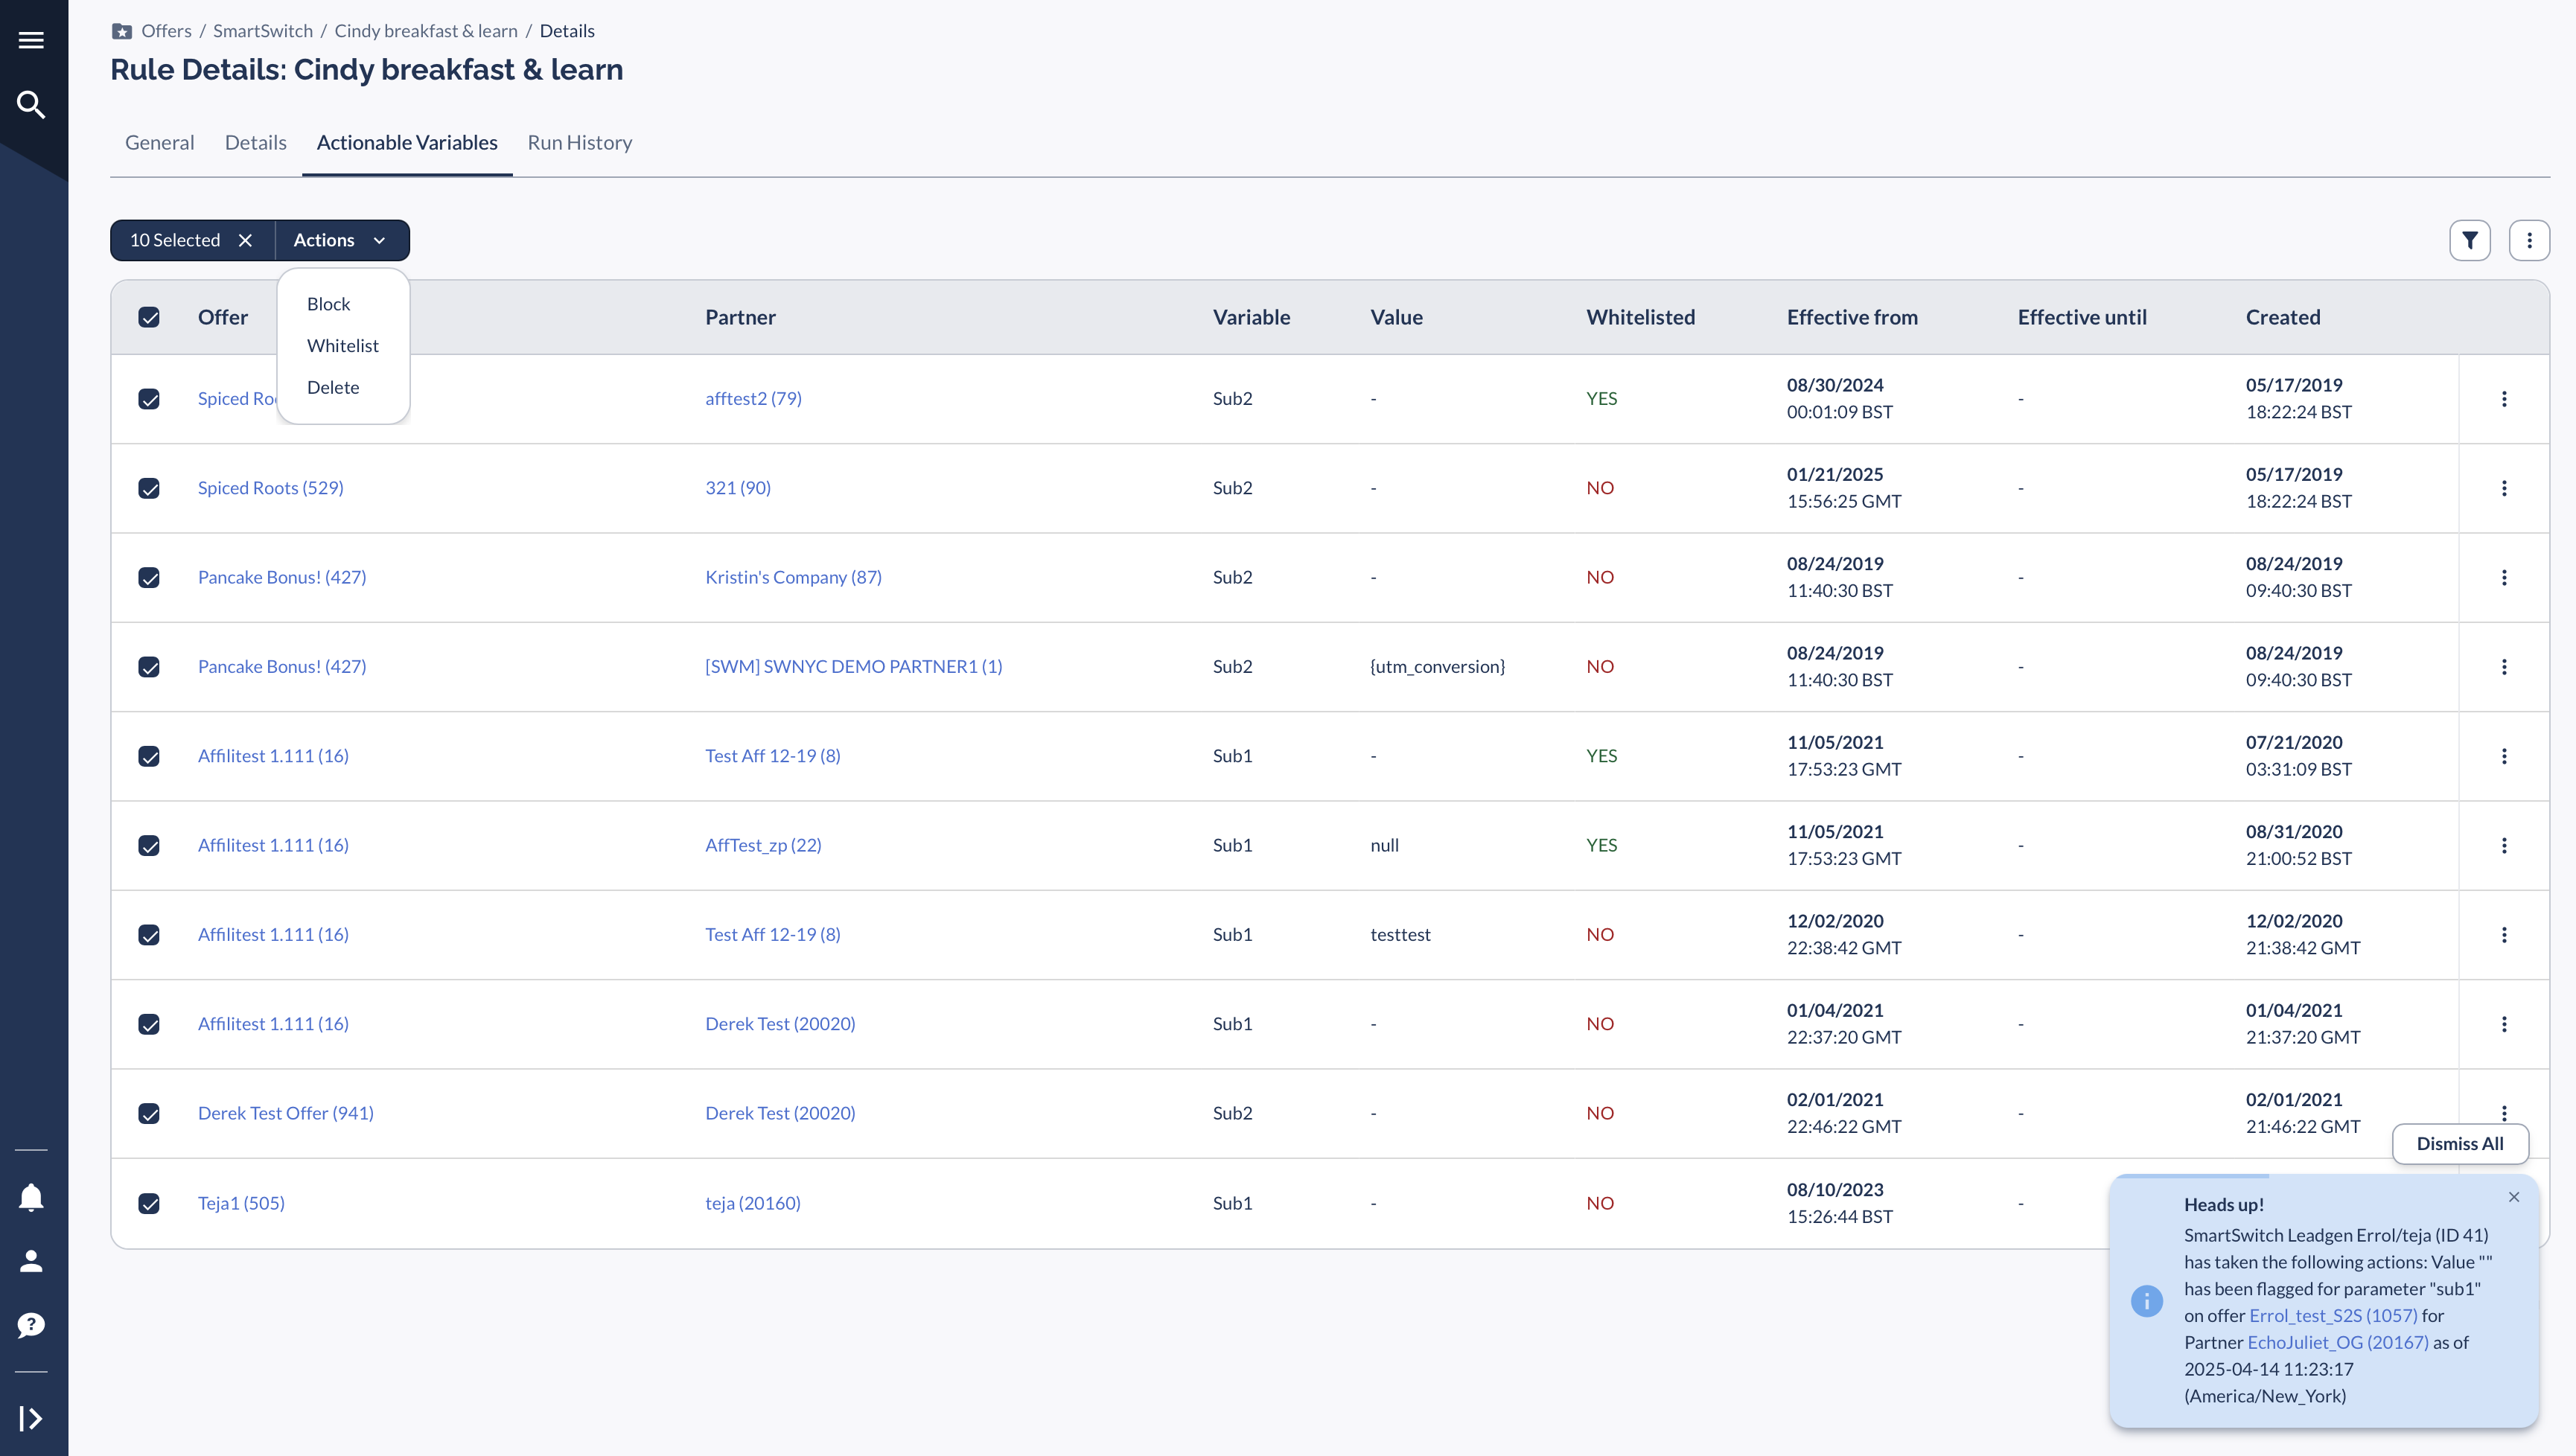
  • Click a SmartSwitch Rule and go to the Actionable Variables tab.
  • Show Filters: Filter data by Offer, Partner, Rule, Status, and Time Intervals.
  • Apply to Selected: Select rules and choose Block, Delete, or Whitelist from the dropdown.
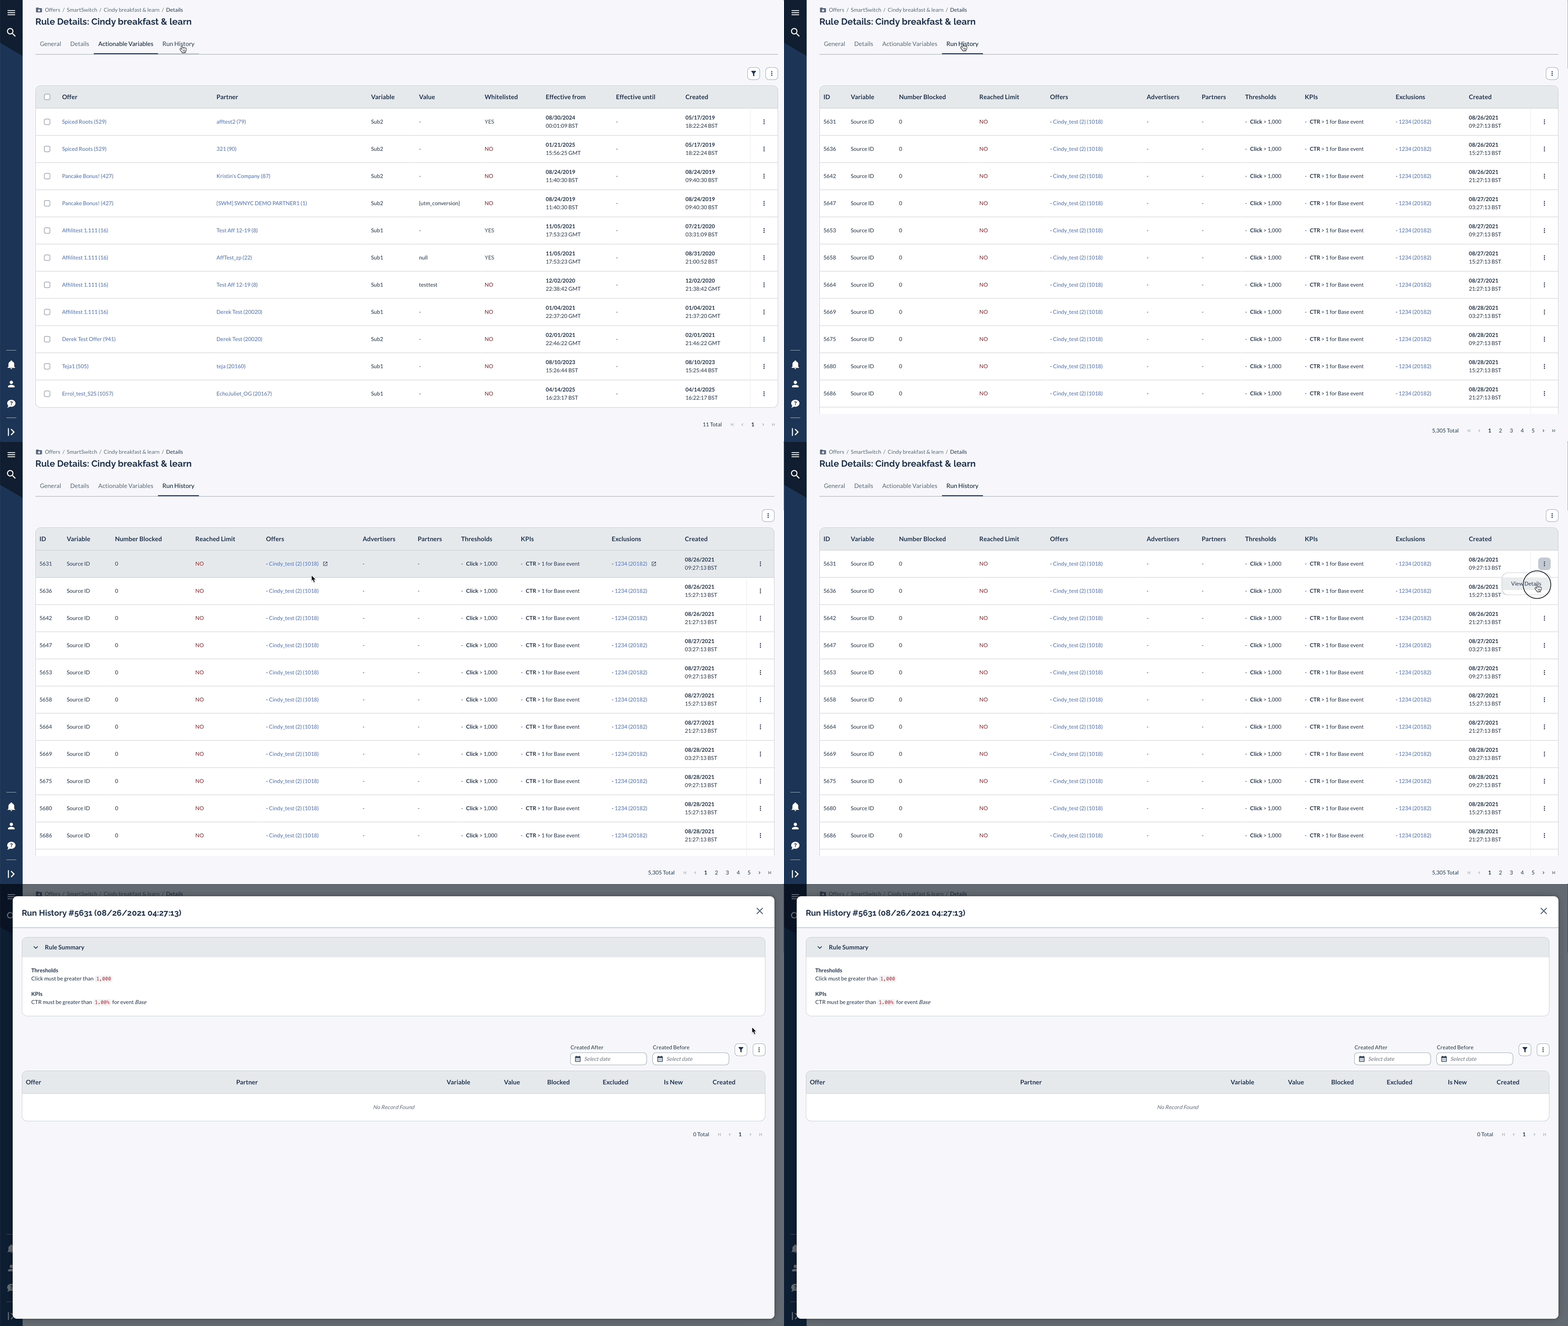
Monitor Rule Execution via Run History

Go to the Run History tab to see:

  • SmartSwitch activations & their associated results
  • Click the three vertical dots for a detailed view of each activation.