Home
Reporting & Analytics
Reporting Settings
Saved, Scheduled, & Requested Reports

SERIES:

Saved, Scheduled, & Requested Reports

How to save and schedule automated reports in Everflow - guide for saving, scheduling, and requesting marketing reports.

Overview

Everflow's Saved & Scheduled Reports is a comprehensive tool designed to simplify your reporting workflow and provide quick access to your most important data.

Whether you're a new user looking to save time or an experienced marketer aiming to automate your reporting process, this feature caters to all levels of expertise.

In this guide, we'll explore the three main components of Saved & Scheduled Reports:

  • Saved Reports
  • Scheduled Reports
  • Requested Reports

We'll also walk through a real-life example showcasing how this feature can streamline your day-to-day operations and help you make data-driven decisions.

Accessing Saved & Scheduled Reports
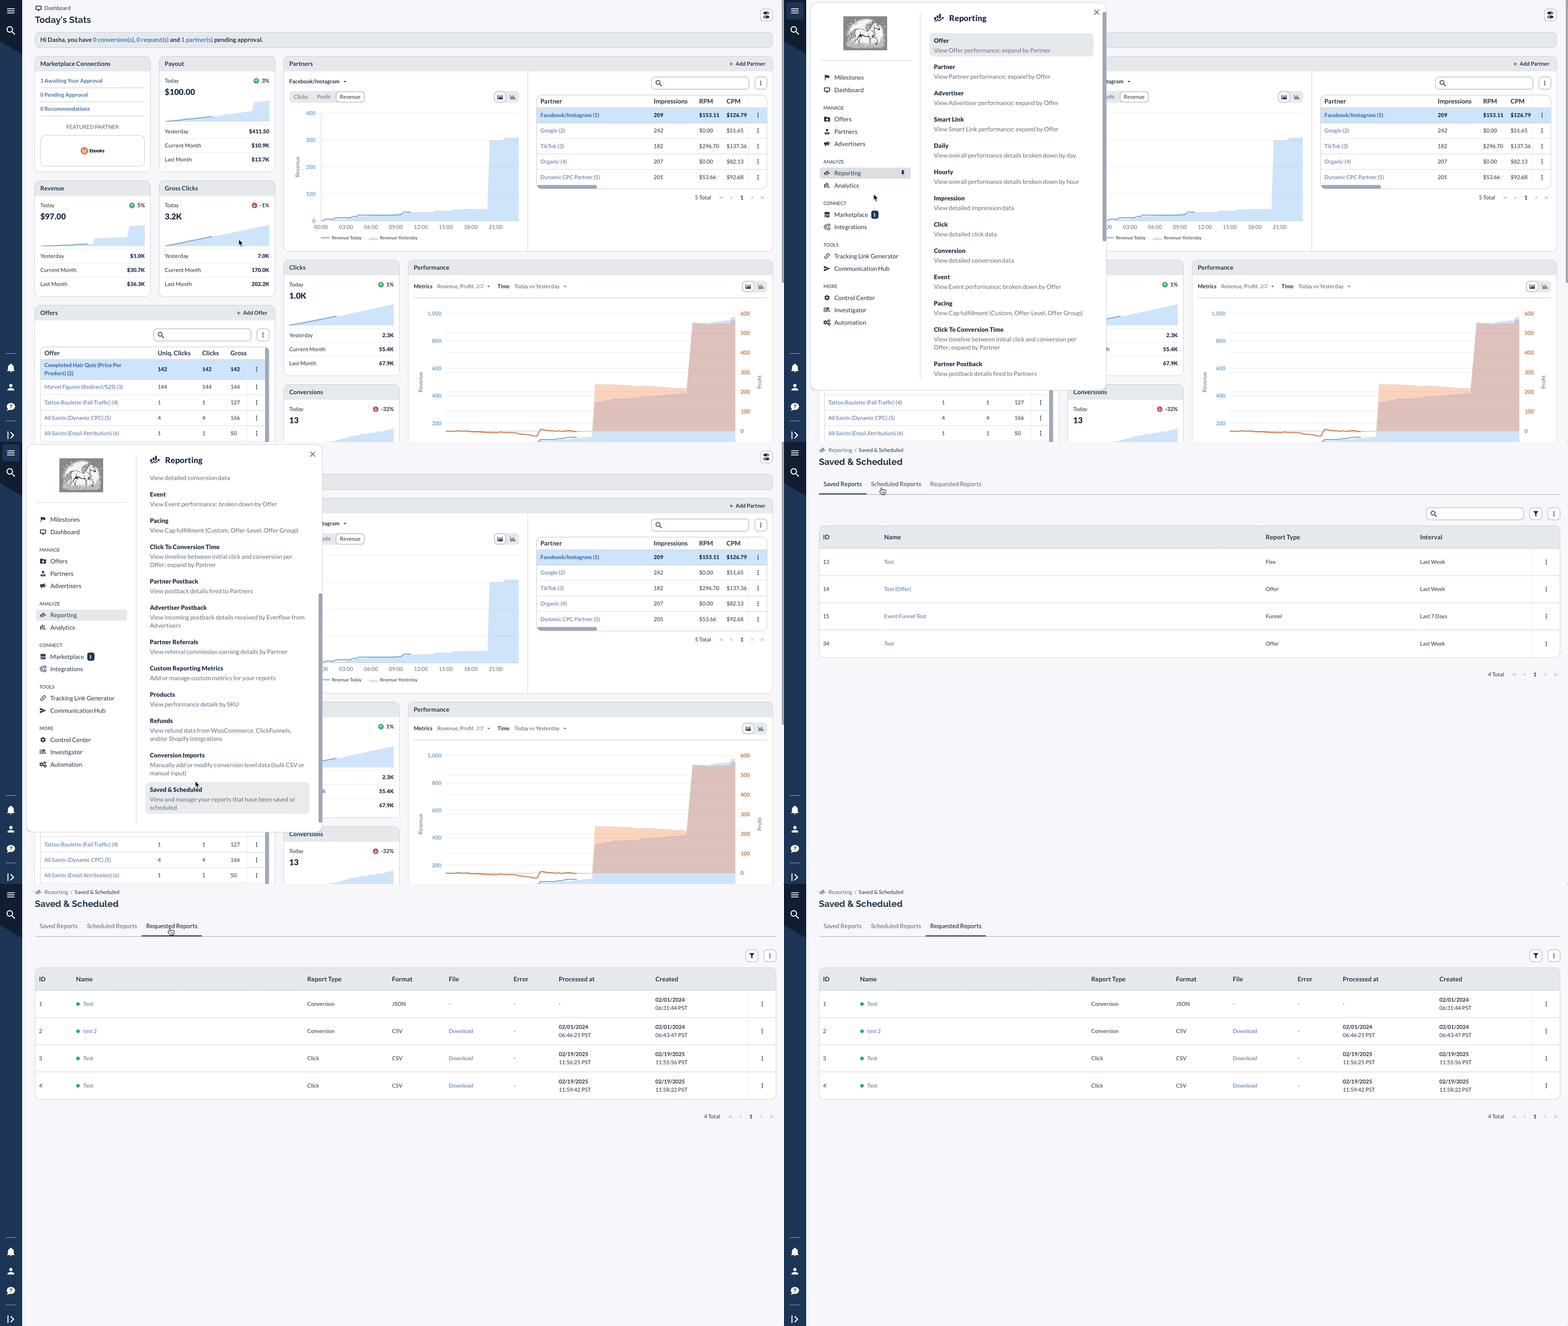
Log in to your Everflow account. Navigate to Reporting > Saved and Scheduled Here, you'll find three tabs: Saved Reports, Scheduled Reports, and Requested Reports.

Saved Reports

Quickly access and manage your frequently used reports.
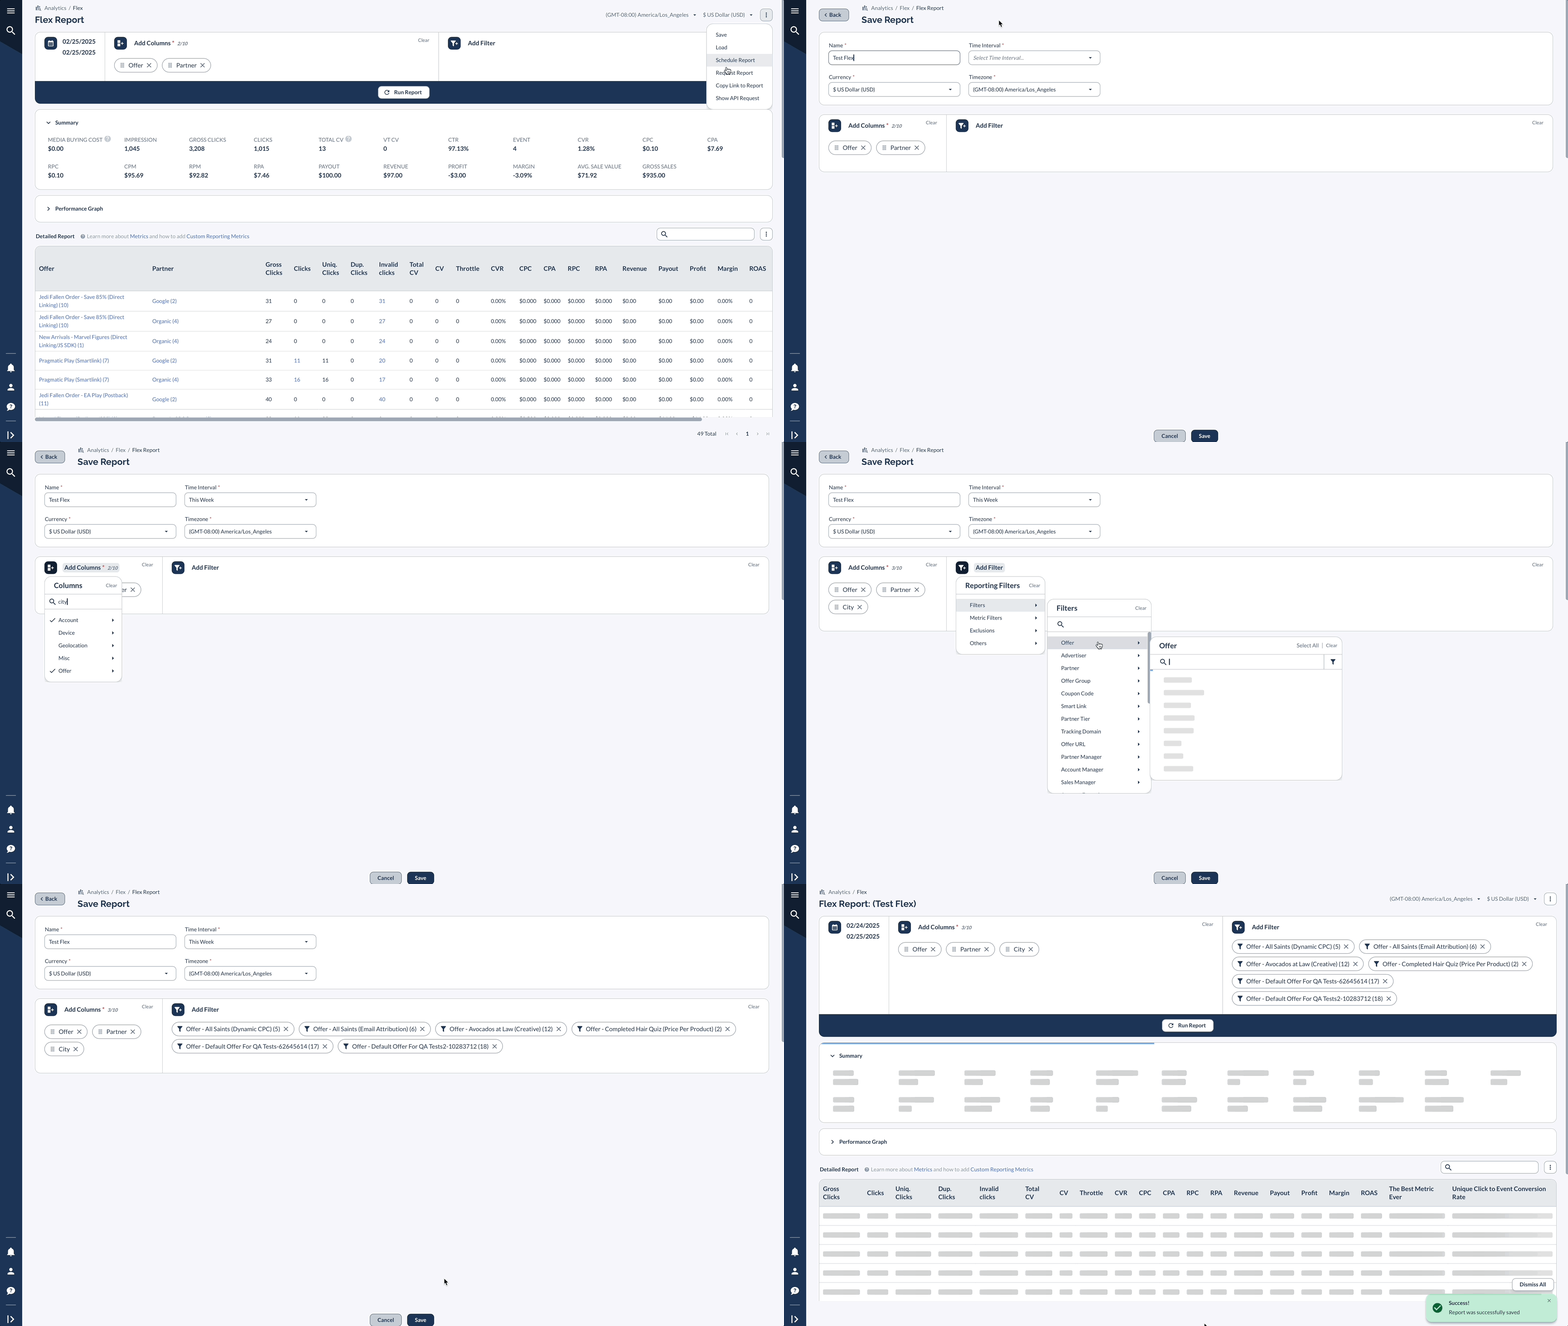
Locate the report you want to work with Click the vertical dots on the right side of the report Choose to run, edit, or delete the report To save a report, go to the specific type of report (Like Redirect) and hover over the hamburger menu click the vertical dots up top. Please note that not all reports will give you an ability to Save / Schedule them.

Scheduled Reports

Automate your reporting process by scheduling reports to generate at specified intervals.
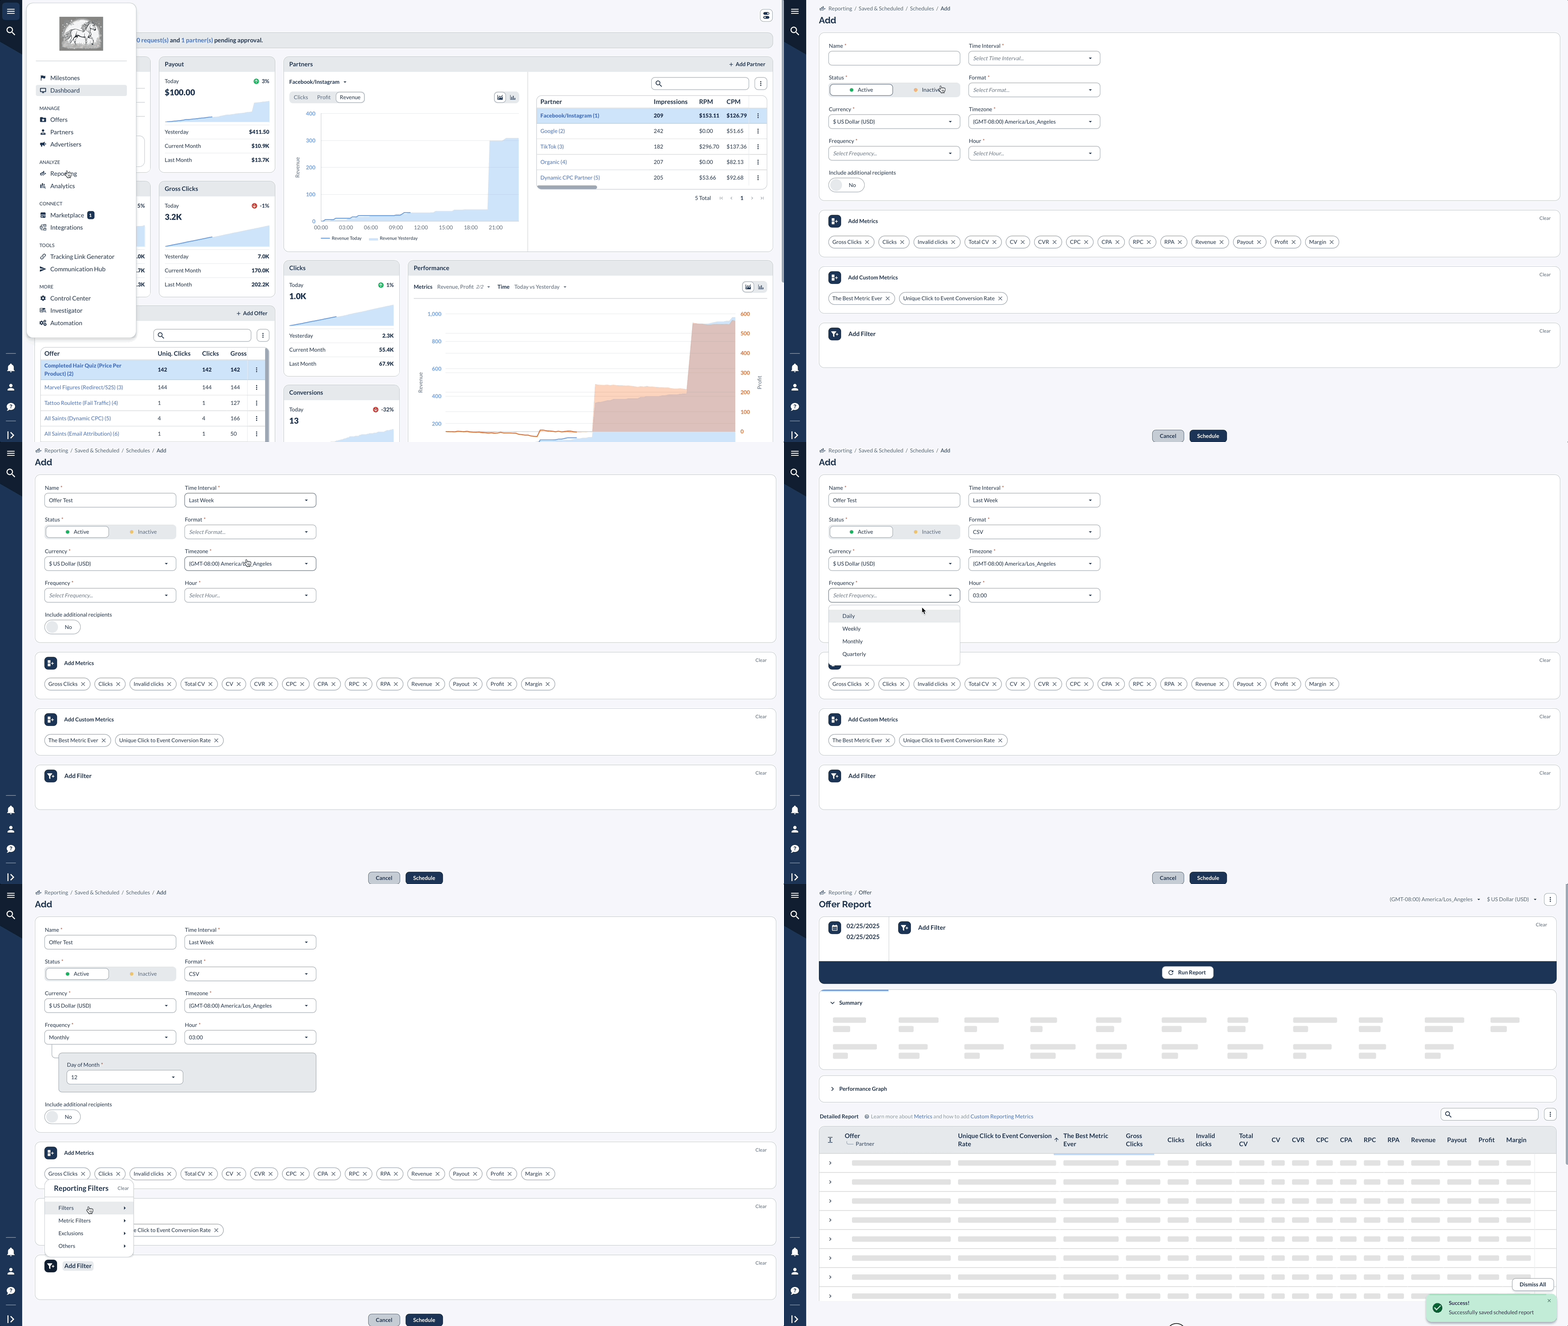
1 Manage Scheduled Reports Find the report you want to modify Click the vertical dots on the right side of the report Choose to view, edit, delete, or set the report schedule to inactive 2 Schedule a Report Specify all required report properties Add any additional email recipients who should receive the report (Optional) Click Add Metrics to include only specific metrics; if not selected, all metrics will be included This option is available only for Offer, Advertiser, Smart Link, Dynamic Nested, Flex, Daily, and Hourly reports (Optional) Make selections under Add Custom Metrics and Add Filter as needed Click Schedule to save your settings

Requested Reports

Request and access data-heavy reports that cannot be loaded directly in the portal.
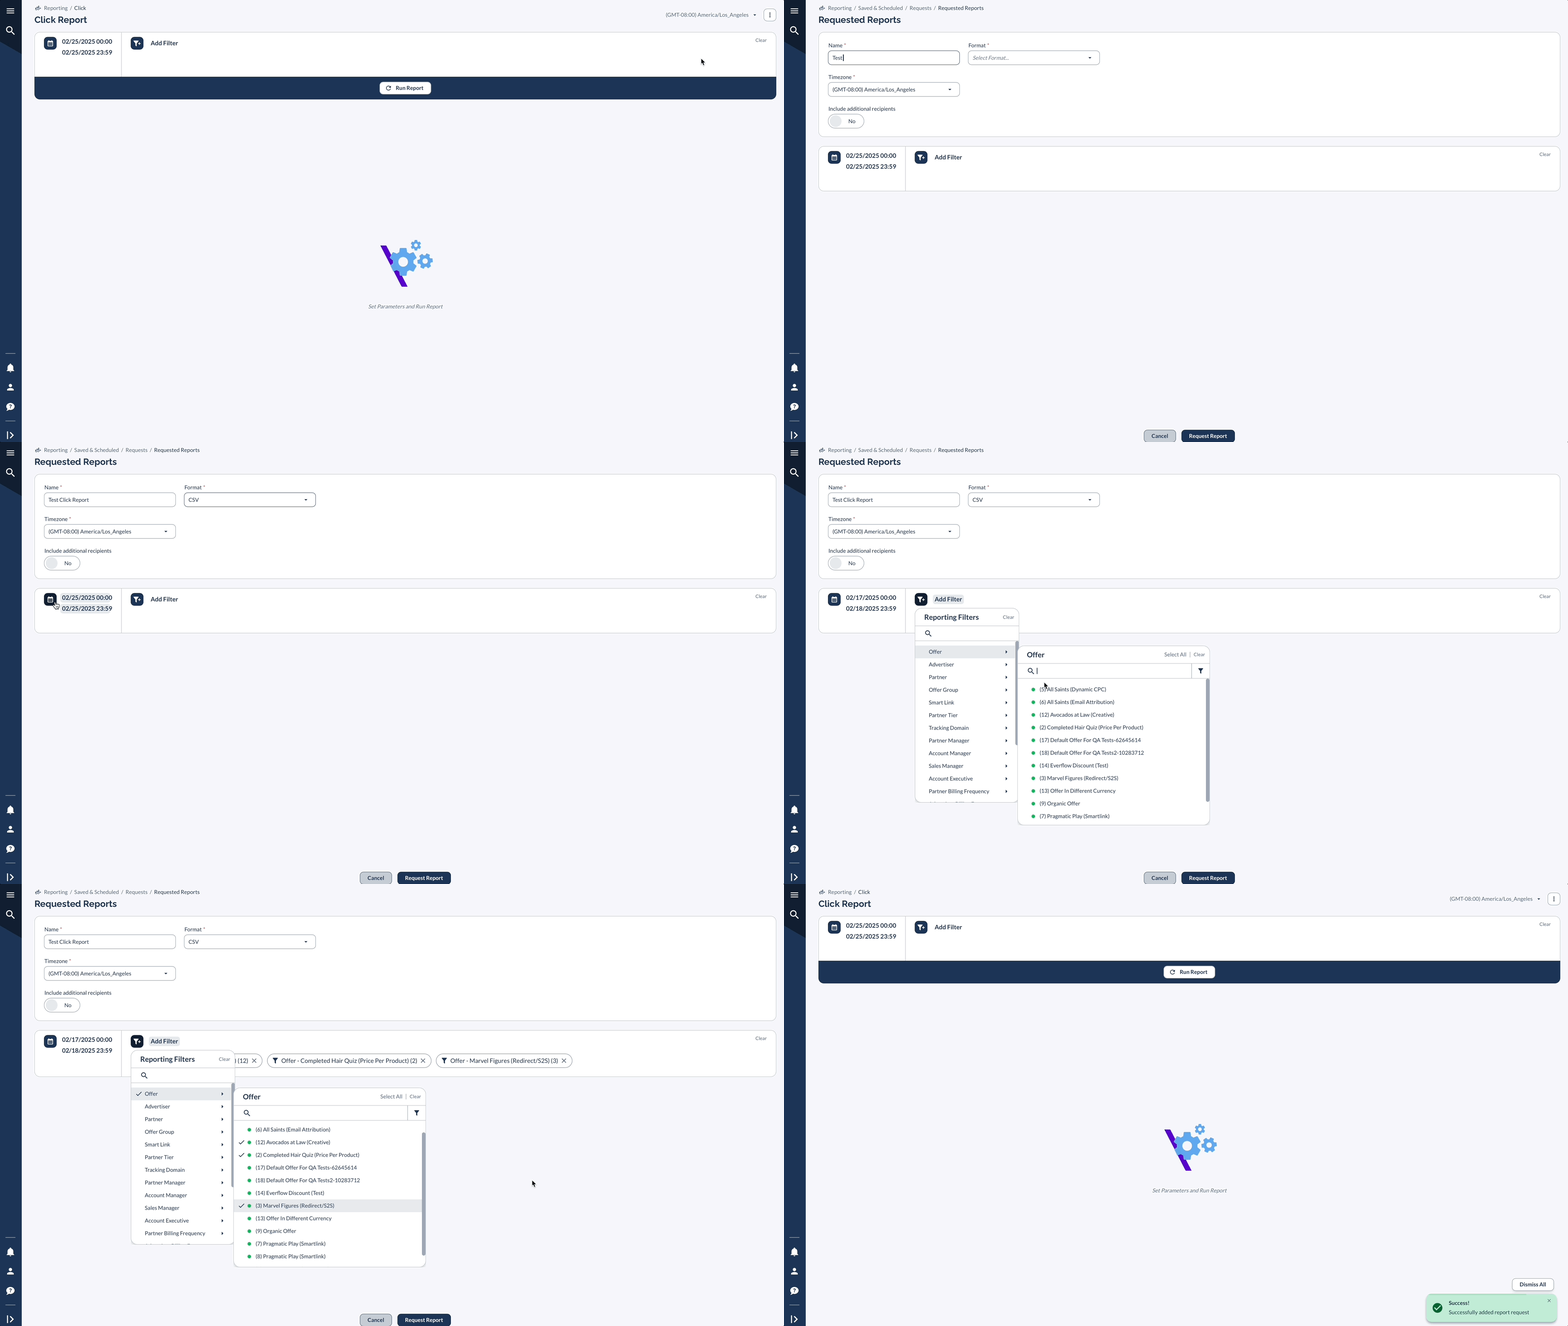
1 Request a Report Navigate to Reporting > Click or Reporting > Conversion (or others that contain too many rows) Click the vertical dots and select Request Report Fill out the required fields Click Request Report You and any additional recipients will receive an email with a link to download the requested report. 2 Download a Requested Report Use the link sent to your email, or Navigate to Reporting > Saved & Scheduled > Requested Reports and click Download in the File column 3 View a Requested Report To view report navigate to Reporting > Saved & Scheduled > Requested Reports and click the vertical dots at the end of any row > View Please note that Conversion data is available in the portal for up to 12 months. For older data, contact Customer Success.

A Real-Life Example

Imagine you're a marketing manager for an e-commerce brand called "Fashionista."

Here's how Saved & Scheduled Reports can help you provide weekly performance updates to your team and monthly reports to your executives:

Create a Saved Report for your weekly team updates: Build a report with key metrics for your team Save the report as "Weekly Team Update" Each week, open the saved report for the latest data Schedule a monthly executive report: Create a report with high-level metrics and insights for executives Set the report to generate automatically on the first of each month Add your executives' email addresses to the recipient list Your executives will receive the report in their inbox every month without manual effort Request a detailed Conversion Report for in-depth analysis: Navigate to the Conversion Report and set your desired filters Request the report and wait for the email confirmation Download the report from your email or the Requested Reports tab Analyze the data to identify optimization opportunities

By leveraging Saved & Scheduled Reports, you can streamline your reporting process, ensure data accessibility, and focus on strategic initiatives.

Quick Summary

In marketing, it's all about making data-driven decisions.

By using Saved, Scheduled, and Requested Reports, you can optimize your reporting workflow and drive better results for your campaigns.

In other words, it will help you not miss crucial data, inform important stakeholders, and keep your team members aligned.