
The Goal
Your Shopify store is set up to offer customers additional products after their initial purchase is complete. You want to track these valuable upsells as a distinct conversion event in Everflow to properly reward the partners who drive them.
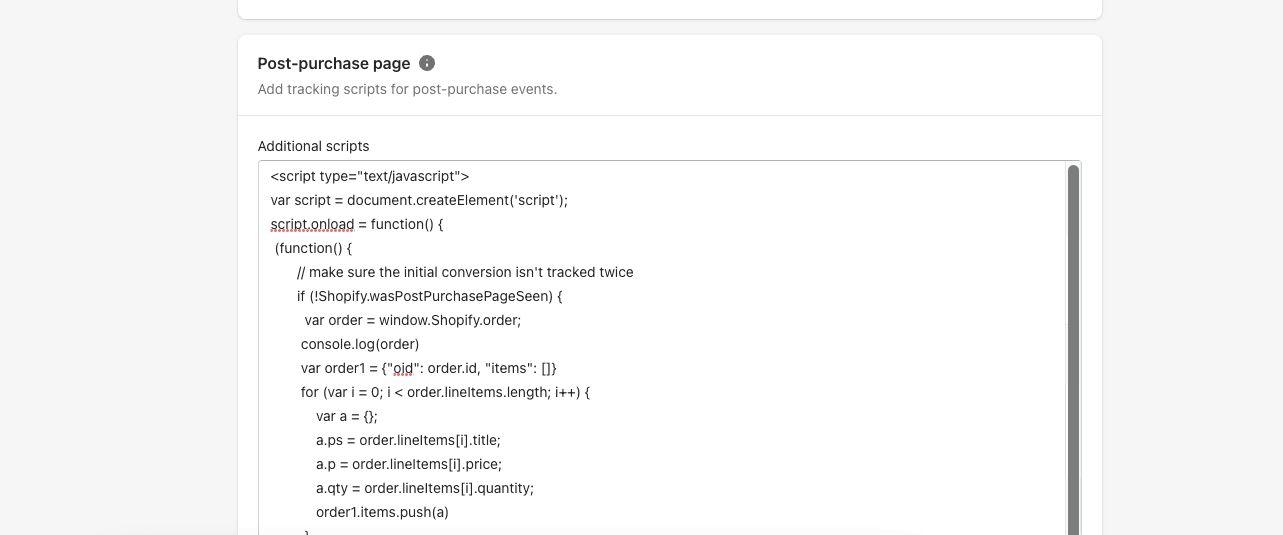
This guide walks you through the process of placing a script in your Shopify settings to track those post-purchase events.
Before You Begin
- You need an active Shopify account with a post-purchase upsell app or feature enabled.
- In Everflow, you must have an Offer ready with a specific Advertiser-Level Event created for the upsell (e.g., "Post-Purchase" or "Upsell").
Code Snippet:
Example (Using our sample data):
The Result
You're all set! When a customer completes an upsell after their initial purchase, the script will fire and send the conversion data to Everflow.
You will see it recorded under your designated upsell event, allowing you to accurately track performance and manage payouts for these high-value actions.
Tracking with Checkout Extensibility
Newer Shopify stores use Checkout Extensibility, which changes where tracking scripts can live. The key points to be aware of:
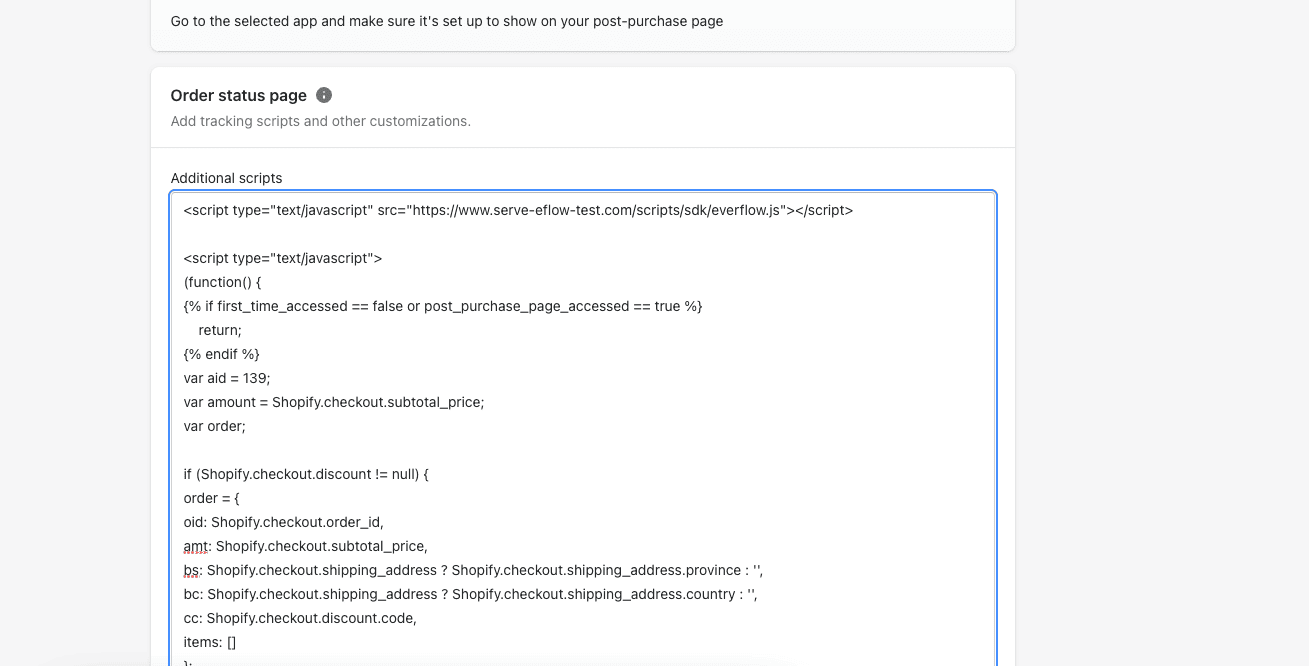
- Checkout Extensibility removes the Order Status (Thank You) page "Additional scripts" section. However, the Post-purchase page "Additional scripts" section described above remains available, so the post-purchase upsell method in this guide still works.
- For everything other than the post-purchase upsell, Checkout Extensibility stores track events using Customer Event Pixels instead of the classic "Additional scripts" boxes.
Tracking Other Events with Customer Event Pixels
Beyond post-purchase upsells, you can track any of Shopify's standard customer events (for example, product_added_to_cart or checkout_completed) using Customer Event Pixels. This works for both standard Shopify and Shopify Plus stores. Shopify maintains the full list of standard event names in its Web Pixels API documentation.
To set up a Customer Event Pixel, you will need the same Everflow values gathered in Step #1 (Tracking Domain, Advertiser ID, and Advertiser Event ID), plus the exact Shopify standard event name you want to track.
Code Snippet:
Adjusting the Conversion Amount
When you use the Everflow Shopify integration's conversion script, the value sent to Everflow can be tailored to match how you want partners rewarded.
Shipping cost
By default, the integration sends the
Excluding tax and shipping (Checkout Extensibility)
On Checkout Extensibility stores, you can calculate a precise amount that excludes both tax and shipping before sending the conversion:
Passing Additional Data in adv Parameters
You can enrich your conversions by passing extra details into the adv1 through adv5 parameters of the conversion script. The exact field names differ slightly between the classic checkout and Checkout Extensibility.
SKUs
To pass every purchased SKU in a single adv parameter on a Checkout Extensibility store, build an array of SKUs from the line items and send it as a comma-separated string:
Customer first and last name
To include the customer's name, use the checkout object's shipping or billing address fields in an adv parameter within your custom conversion script:
Customer email
Email is collected automatically only when a conversion comes in through the API or webhook. To make sure email is always passed in your conversion script, add the email field explicitly:
New vs. Returning Customers
Shopify exposes a value that indicates whether a buyer is placing their first order. On a Checkout Extensibility store, you can pass this true/false value into an adv parameter so you can distinguish new customers from repeat customers in your reports:
If you would rather record returning customers (where isFirstOrder is false) as a separate event, you can branch the conversion to add an Advertiser Event ID only for returning buyers:
Passing Currency
On Checkout Extensibility stores, you can pass the order's currency alongside the conversion so multi-currency stores report correctly:
Order Number vs. Order ID
Shopify has two different order identifiers, and only one of them can be passed through your conversion script:
Tracking Alongside TikTok
If you also run TikTok tracking with the Shopify integration, capture the TikTok click identifier (ttclid) by adding a parameters object to the EF.click() call in your Shopify integration's click script, then store the returned transaction ID back on the cart:


