Home
Integrations Library
Customer Relationships Integrations
Keap Integration (Formerly Infusionsoft)

SERIES:

Keap Integration (Formerly Infusionsoft)

Learn how to use Email Attribution to send event data from Keap (formerly Infusionsoft) to Everflow.

Overview

The Keap integration enables you to track customer actions in Keap (formerly Infusionsoft) and attribute them to the appropriate marketing partners in Everflow.

Using Email Attribution, this integration captures email addresses from web form submissions and uses them as the unique identifier to connect user journeys across both platforms.

This allows you to track not just initial conversions, but also follow-up actions like purchases, sign-ups, or other valuable events in your customer journey. By connecting these systems, you can reward partners based on the true value of the leads they send, not just the initial conversion.

Setup Instructions

Step #1: Configure Your Everflow Offer

Set up the Offer in Everflow, including any relevant Events. When setting up the Offer, be sure to: Under Tracking & Controls, use Direct Linking. Under Attribution, enable Email Ownership, and select the one you're tracking in Keap as the Associated Event. In this example, the base event is a Purchase.

Step #2: Get Your Tracking Scripts

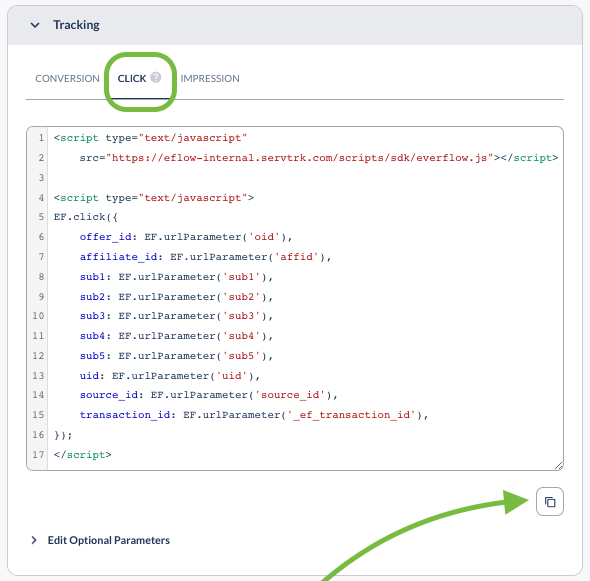
  • Copy the EF.click script from the Offer page. Keep this code handy as you will need to paste it into Keap soon.
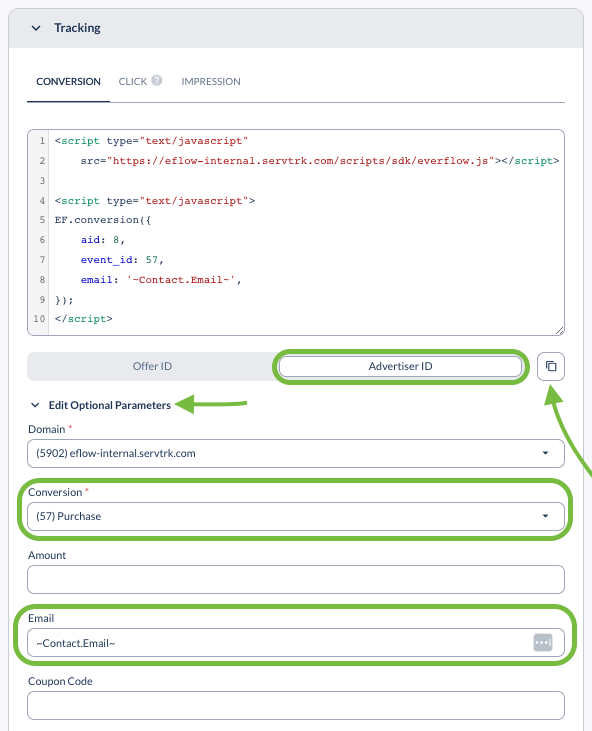
For the EF.conversion script, we recommend selecting Advertiser ID (instead of Offer ID) as the identifier. Click Edit Optional Parameters, and select the desired event from the dropdown (Purchase) and fill in your macro for email (Contact.Email). Copy the EF.conversion script and keep it handy as you will need to paste it into Keap soon.
Step #3: Create a Campaign in Keap

In Keap, click Campaign Builder and select Add a Campaign. Then, you may name your campaign.

Step #4: Set Up Web Form Goal

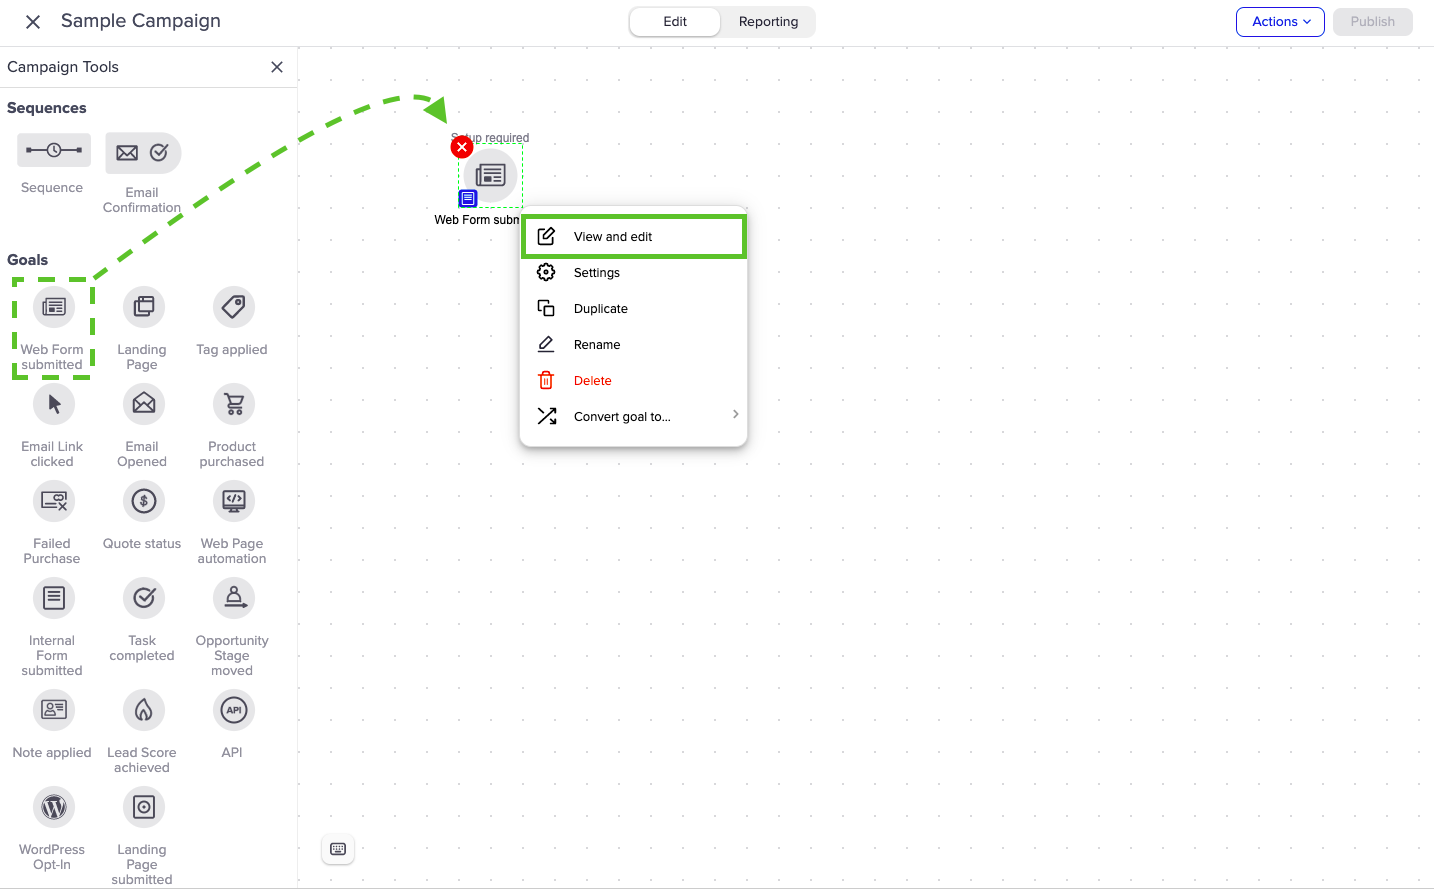
Under Goals, drag Web Form Submitted over to the right side. Then, click on the icon to select View and edit.

Step #5: Add the Click Script

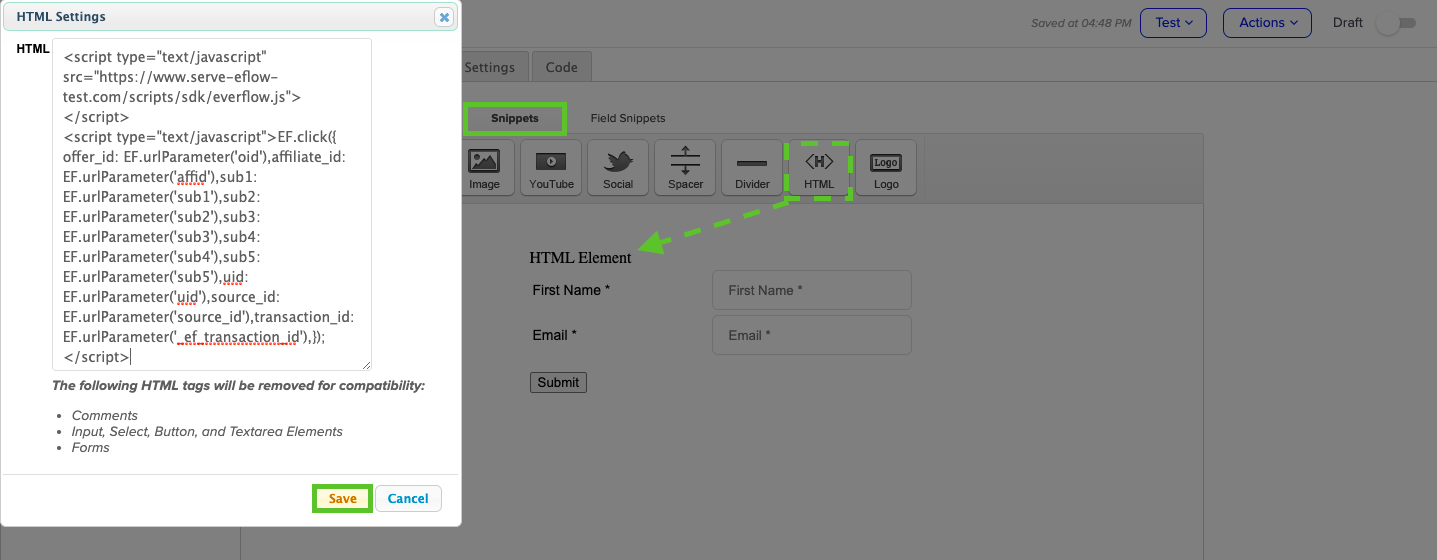
Click the Snippets tab. Drag the HTML snippet to the area below. Then, paste the EF.click script. Save.

Step #6: Navigate to Thank You Page

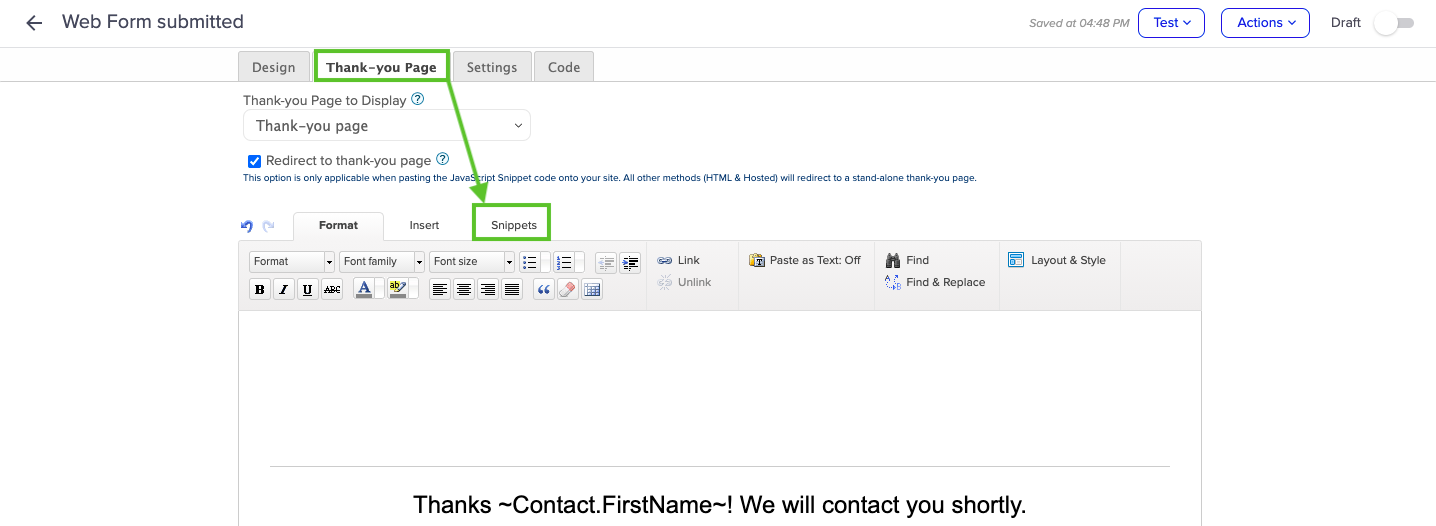
Next, click the Thank You Page tab, then Snippets.

Step #7: Add the Conversion Script

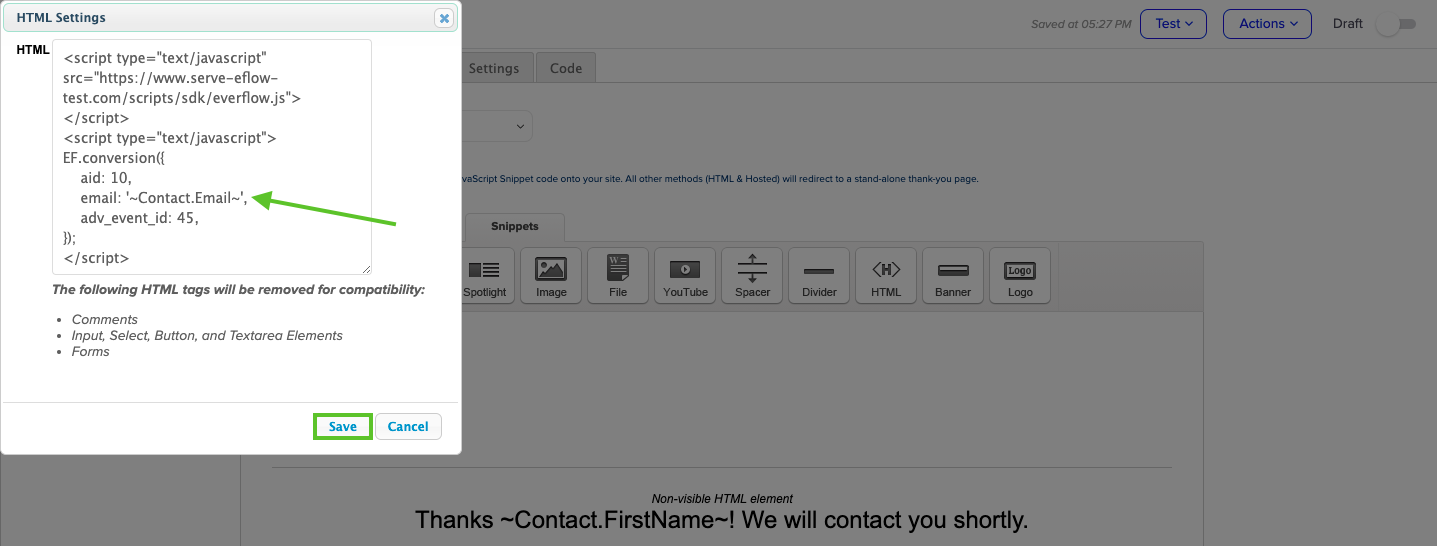
Drag the HTML snippet to the area below. Then, paste the EF.conversion script and be sure to check that the proper macro for Email is included in the code. Save.

Step #8: Activate Campaign

  • Turn on the toggle labeled "Draft" to "Ready."

Step #9: Publish Campaign

Click Publish.

Step #10: Implement on Your Website

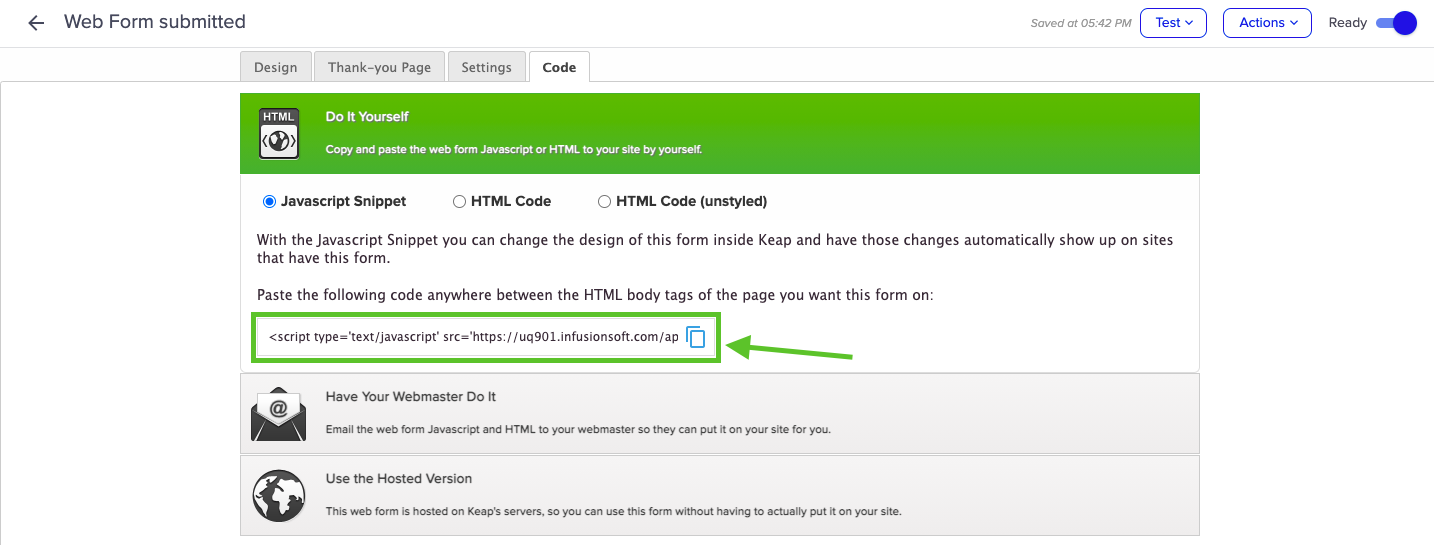
Go back to the Edit screen, and then click the Code tab. Copy the Javascript Snippet and paste it onto your website.