Home
New To Everflow
Account Setup
How To Manage Roles & Permissions

SERIES:

How to Manage Employee Permissions & Roles

How To Manage Roles & Permissions

Learn how to set up roles and access levels in Everflow that match each team member's job needs while keeping your data secure.

Overview

Roles help you create efficient workspaces in Everflow. Each Role can have specific access levels based on what your team members need to do their jobs. For example:

  • Finance teams mainly need access to invoices, payment process tools, and basic reporting
  • Marketing teams focus on Offer management and performance metrics
  • Account managers need Partner data and communication tools
  • Data analysts require deep access to reporting and analytics

You can customize each Role's permissions to show only relevant tools and hide everything else, making the platform simpler and more focused for each team member.

Understanding Access Levels

Everflow offers two main permission types:

  • Full Access: Lets users view, add, and edit
  • Read Only: Lets users view but not make changes
Note Only users with both Super User status AND the appropriate role permissions can add new employees and modify their profiles and authorizations

Setting Up Roles

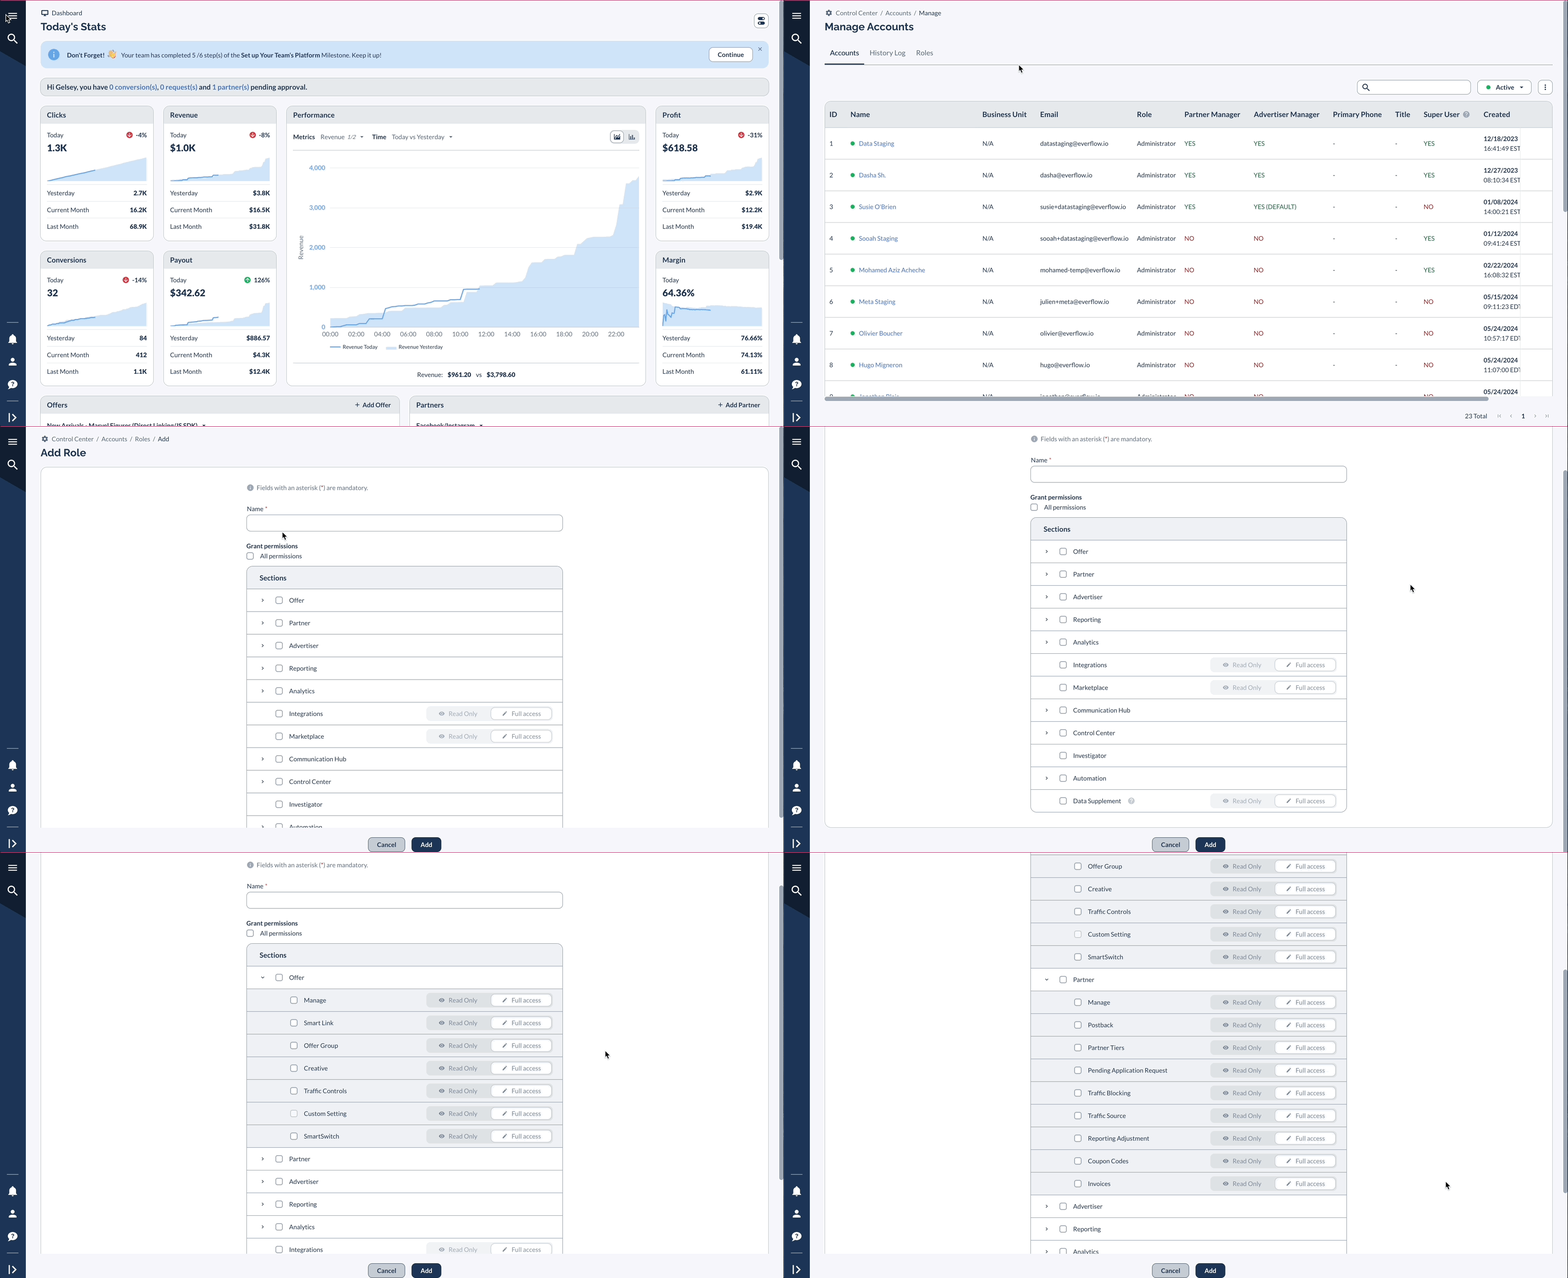
‍Find role settings in Control Center -> Accounts -> Roles:
Click + Role to create new roles Name your role Set permissions by section Use All permissions checkbox for full access Click > to customize individual sections (specific Report or section in Control Center) Set specific access levels per section
Dashboard reporting remains visible to all roles Menu items can be hidden for simplification Permissions can be adjusted anytime Role changes take effect immediately

Common Role Examples

Finance Team Focused on financial operations:
✓ Invoice Management ✓ Reporting Adjustments × Hidden: Offers × Hidden: Partners Etc.
Data Team Optimized for data analysis:
✓ Full Reporting Access ✓ Analytics Tools ✓ Read-Only Offer Access ✓ Read-Only Partner Data Etc.
Senior Account Manager Complete management toolkit:
✓ Full Offer Access ✓ Partner Management / Advertiser Management ✓ Complete Reporting ✓ Analytics Tools
Junior Account Manager Training-focused access:
✓ Read-Only Offer Access ✓ Read-Only Partner View ✓ Basic Analytics & Reporting × Limited Editing Rights

Quick Reference: Common Tasks

Task Location Notes Create Role Control Center -> Accounts -> Roles Click [ + Role ] Assign Role Control Center -> Accounts Use Edit option to change / assign Roles for Accounts (Users) Modify Permissions Roles Section Expand with -> for details when adding or editing a Role

Best Practices

Start everyone with basic access and add permissions when they need them for their work. Make sure each person's access matches what they do in their job. Review permissions regularly to keep them up to date, and maintain clear records of everyone's access levels.

All roles can see basic dashboard reporting, but you can customize what else they view.