Home
Offers & Tracking
Tracking Fundamentals
How To Create & Assign Advertiser Level Events

SERIES:

How To Create & Assign Advertiser Level Events

Get started with Advertiser Level Events and learn how to streamline tracking across multiple Offers, create consistent event tracking, and simplify campaign management with industry-specific event strategies and best practices.

Overview

Advertiser Level Events in Everflow allow you to track key actions—such as signups, purchases, and retention—across multiple Offers from the same Advertiser. Instead of setting up separate events for each Offer, you can create a global event that applies to all relevant campaigns, streamlining tracking and reporting.

Key Terms Definitions of important terms. ➔ Advertiser Level Event: Global event that applies across multiple Offers from the same Advertiser
➔ Base Conversion Event: The main action you want someone to take, like downloading an app or making a first purchase
➔ Event Postback: URL that fires event data back to Everflow (uses &adv_event_ID= parameter)
➔ Event ID: Event ID from Everflow to pass in Partner Postback
➔ Attribution: Determines which Partner should get credit for a conversion

Why Use Advertiser Level Events?

The Challenge

Imagine you're managing a ride-sharing app's marketing campaigns. You have:

  • 10 different Offers
  • 5 different cities (you might consider creating Offer for each city)
  • 3 different promotion types

But you need to track the same events for all of them:

  • App Install
  • First Ride
  • Payment Setup
  • Repeat Rides

Without Advertiser Level Events, you'd need to create these events 10 or even 50 different times! Even for 10 Offers, it would mean manually adding 40 events.

The Solution

With Advertiser Level Events, you:

  • Create each event once
  • Apply it across all Offers
  • Maintain consistent tracking
  • Save significant setup time

Setting Up Advertiser Level Events

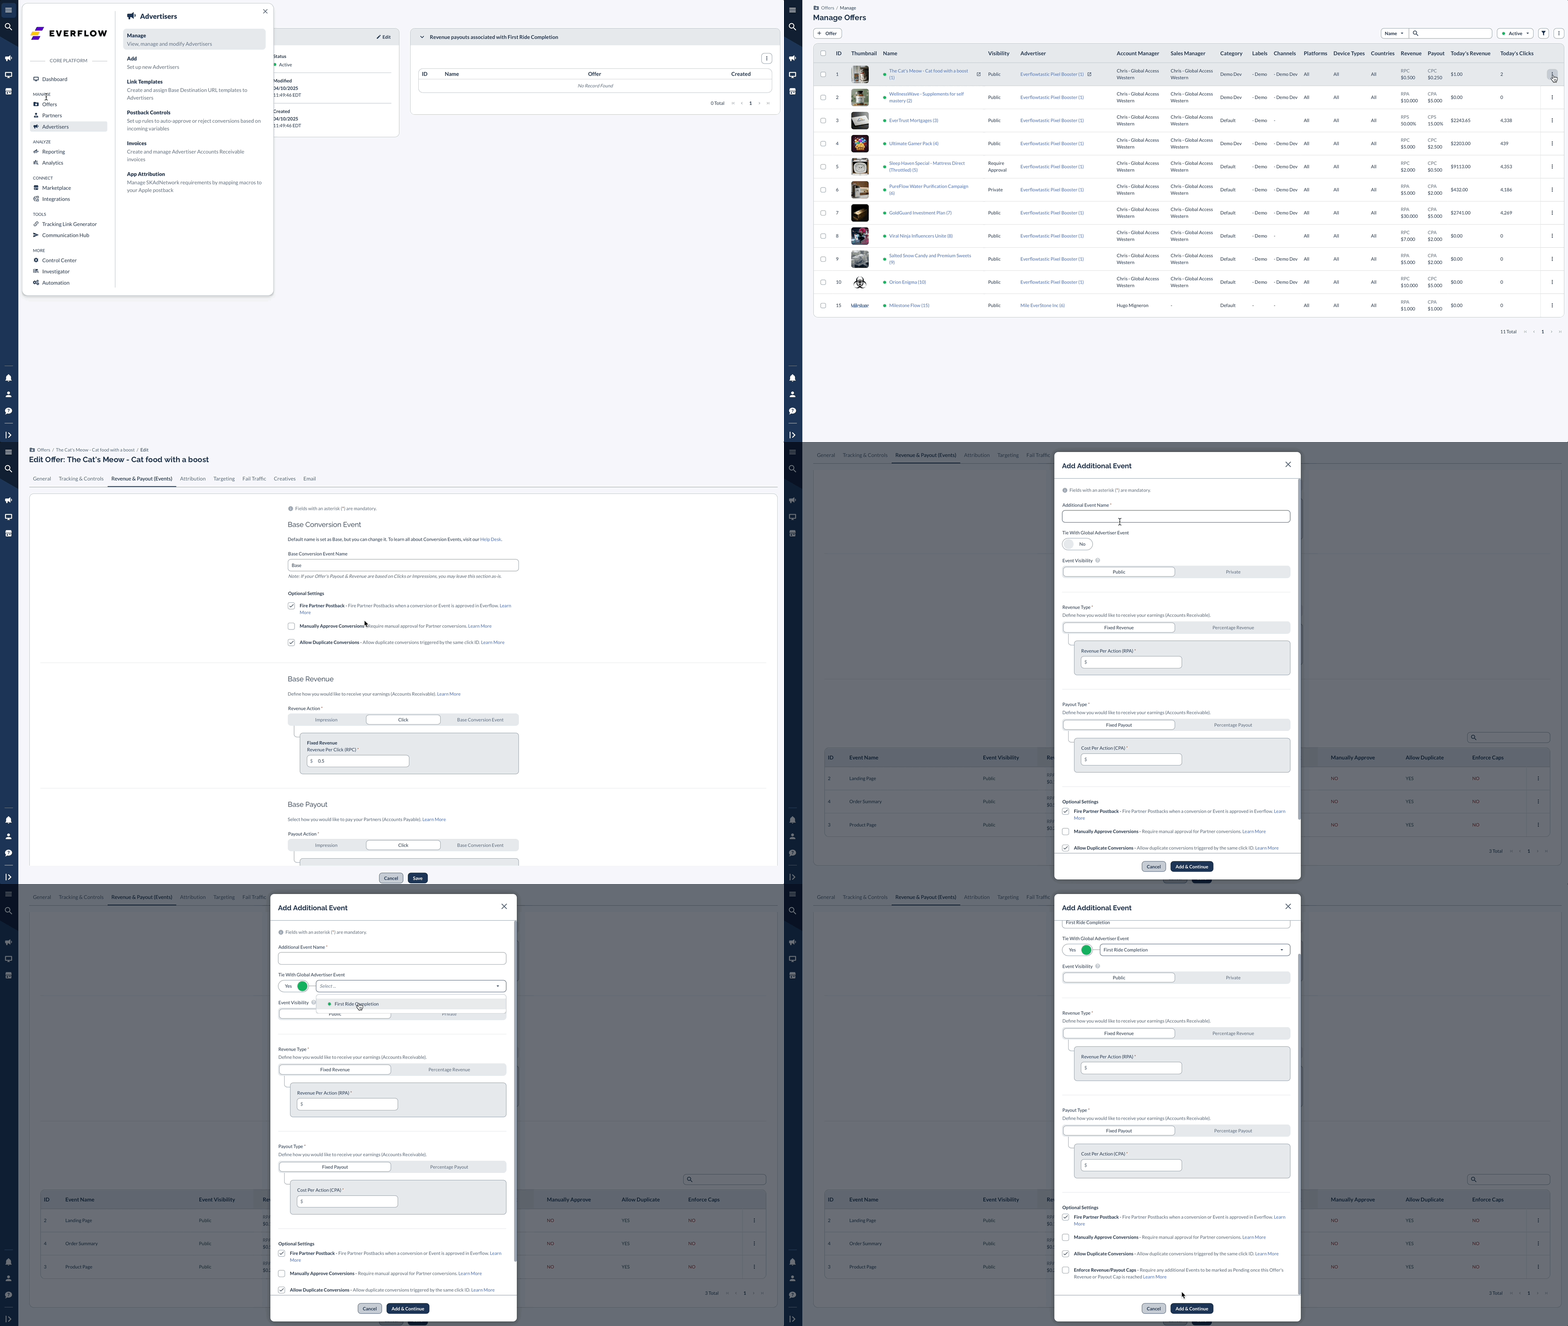
1 Create the Event Navigate to Advertisers → Manage Select Advertiser Click Events tab Click Event Enter: Name: example - "First Ride Completion" Status: Active
2 Apply to Offers Go to Offers → Manage Select target Offer Edit Revenue & Payout under the General tab Click Add Event Enable "Use Advertiser Event" Select the event from dropdown Configure Advanced Settings: Choose Revenue Type - Amount earned from the Advertiser for successful events Manually Approve Events - When enabled, hides events from partners and won't fire their postbacks Allow Duplicate Events - Enables multiple 'Approved' events from same Transaction ID Enforce Revenue/Payout Caps - When reached, additional events are marked as Pending

You can create a single event postback URL for multiple Offers from the same Advertiser.

Find the URL on your Offer page:
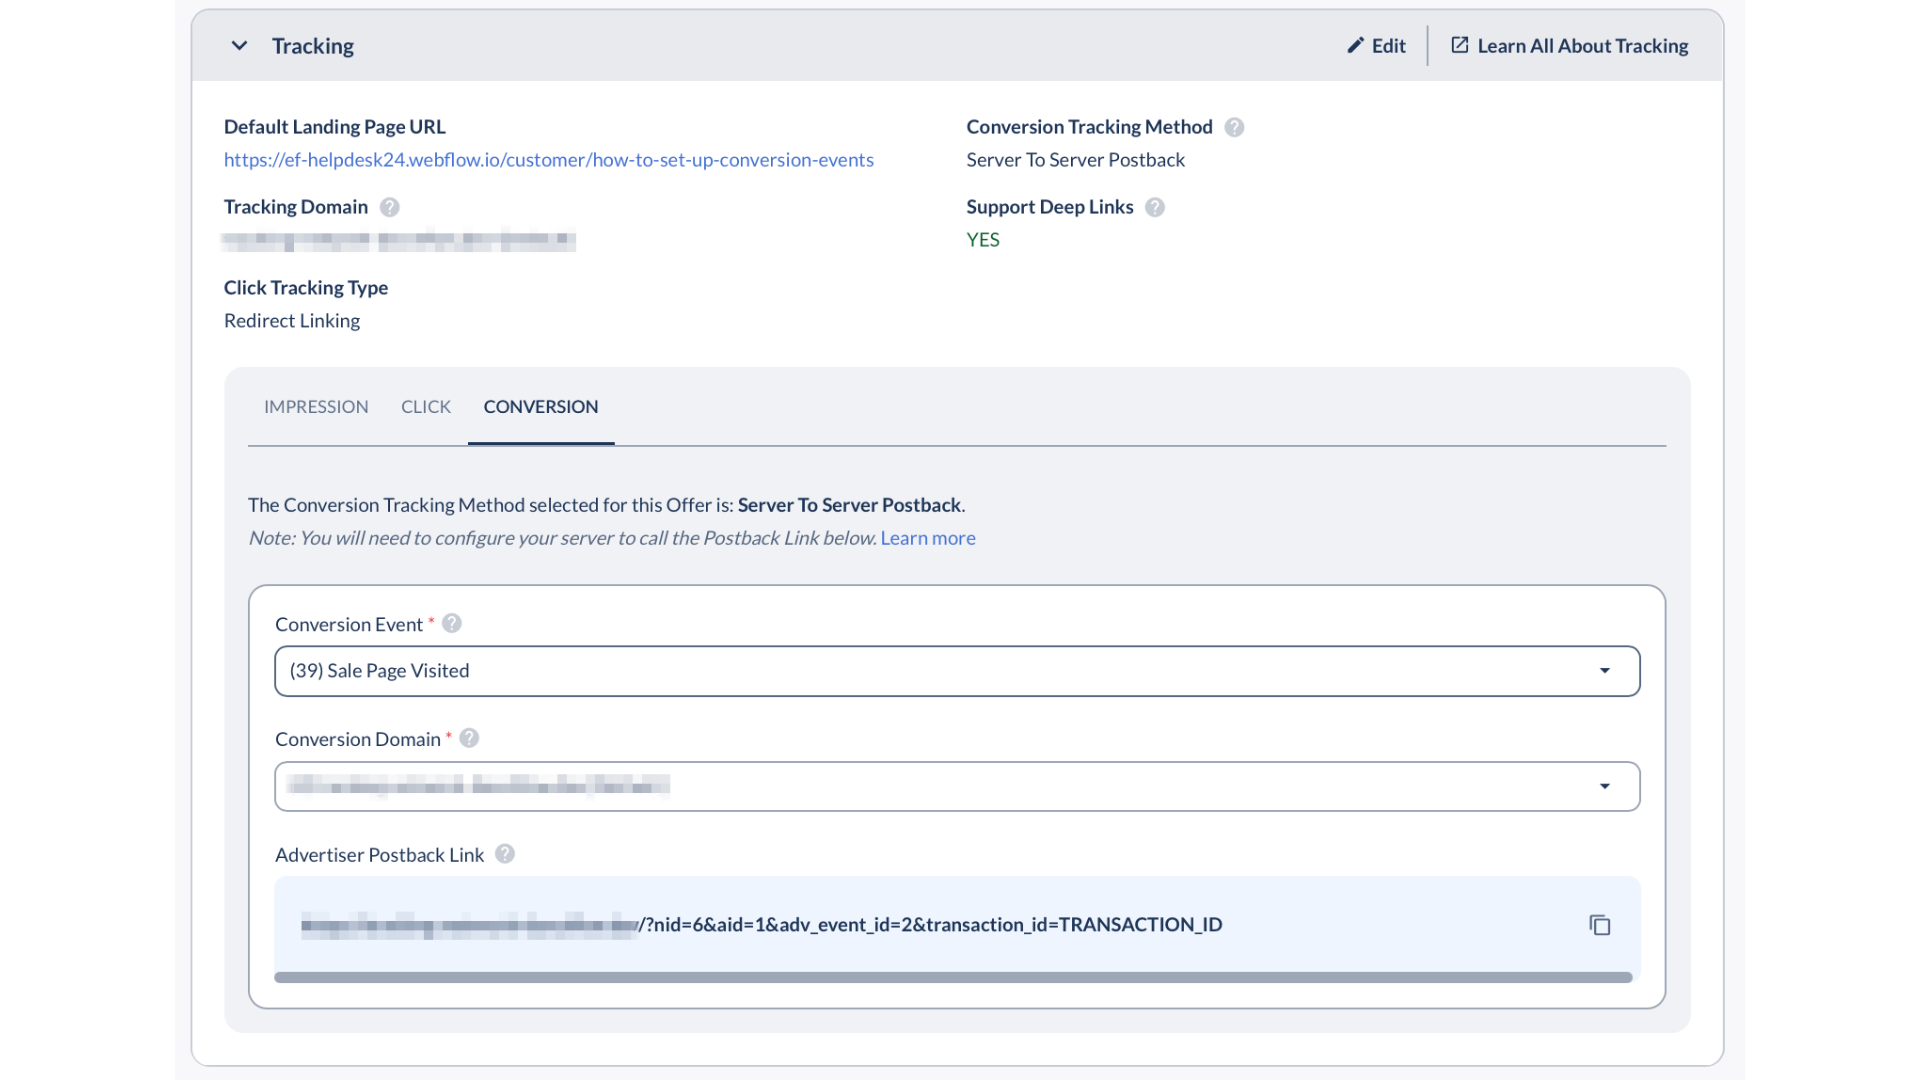
3 Configure Postback Scroll to the Tracking card almost at the bottom of the General tab Click the Conversion tab Select your Event in the Conversion dropdown Copy the Postback URL (contains &adv_event_ID= parameter, instead of the individual Event ID from the Offer level.) Provide it to your Advertiser so they can fire those events into Everflow

Best Practices

When setting up Advertiser Level Events, focus on creating clear and consistent naming conventions that make sense across your entire marketing ecosystem. Start by keeping event names simple and straightforward, using present tense and avoiding special characters. Think about how you'll use these events across different offers and try to use common, easily understood terms.

Before implementing widely, take the time to identify your most common events, document their specific IDs, and thoroughly test them across multiple offers. This approach helps ensure smooth tracking and reduces confusion down the line. Once implemented, regularly monitor your events for consistency, keep an eye on postback success rates, review attribution accuracy, and continuously verify that your data collection is working as expected.

By taking a thoughtful and systematic approach, you'll create a robust event tracking system that provides meaningful insights into your marketing performance.

Common Events by Industry

Industry Basic Events Monetization Events Engagement Events Retention Events E-commerce Sign Up Email Submit Profile Complete Add to Cart Purchase Checkout Start Product View Wishlist Add Review Submit Repeat Purchase Referral Mobile Apps App Install Registration Tutorial Complete In-App Purchase Premium Upgrade Subscription Feature Use Content Share Profile Update Daily Login Friend Invite Achievement Newsletter Join SaaS Trial Start Account Create Onboarding Complete Plan Upgrade Payment Add Feature Unlock Project Create Team Invite Integration Setup Monthly Active Renewal Expansion Gaming Game Install Character Create Tutorial Done First Purchase Coin Pack Buy Battle Pass Level Complete Friend Add Guild Join Daily Quest Season Pass Tournament Join Finance Account Open KYC Complete Card Link First Deposit Investment Premium Account Trade Execute Portfolio View Alert Set Monthly Trade Balance Increase Referral Education Course Browse Sign Up Profile Complete Course Purchase Premium Access Material Buy Lesson Complete Quiz Take Note Create Course Finish Certificate Get Review Submit

Example Event Flow:

E-commerce Flow:

Sign Up → Email Submit → Purchase → Repeat Purchase

Gaming Flow:

Install → Tutorial Done → First Purchase → Daily Quest

SaaS Flow:

Trial Start → Onboarding Complete → Payment Add → Monthly Active

These are example Events - you should customize them based on your specific business needs and tracking requirements.