
Overview
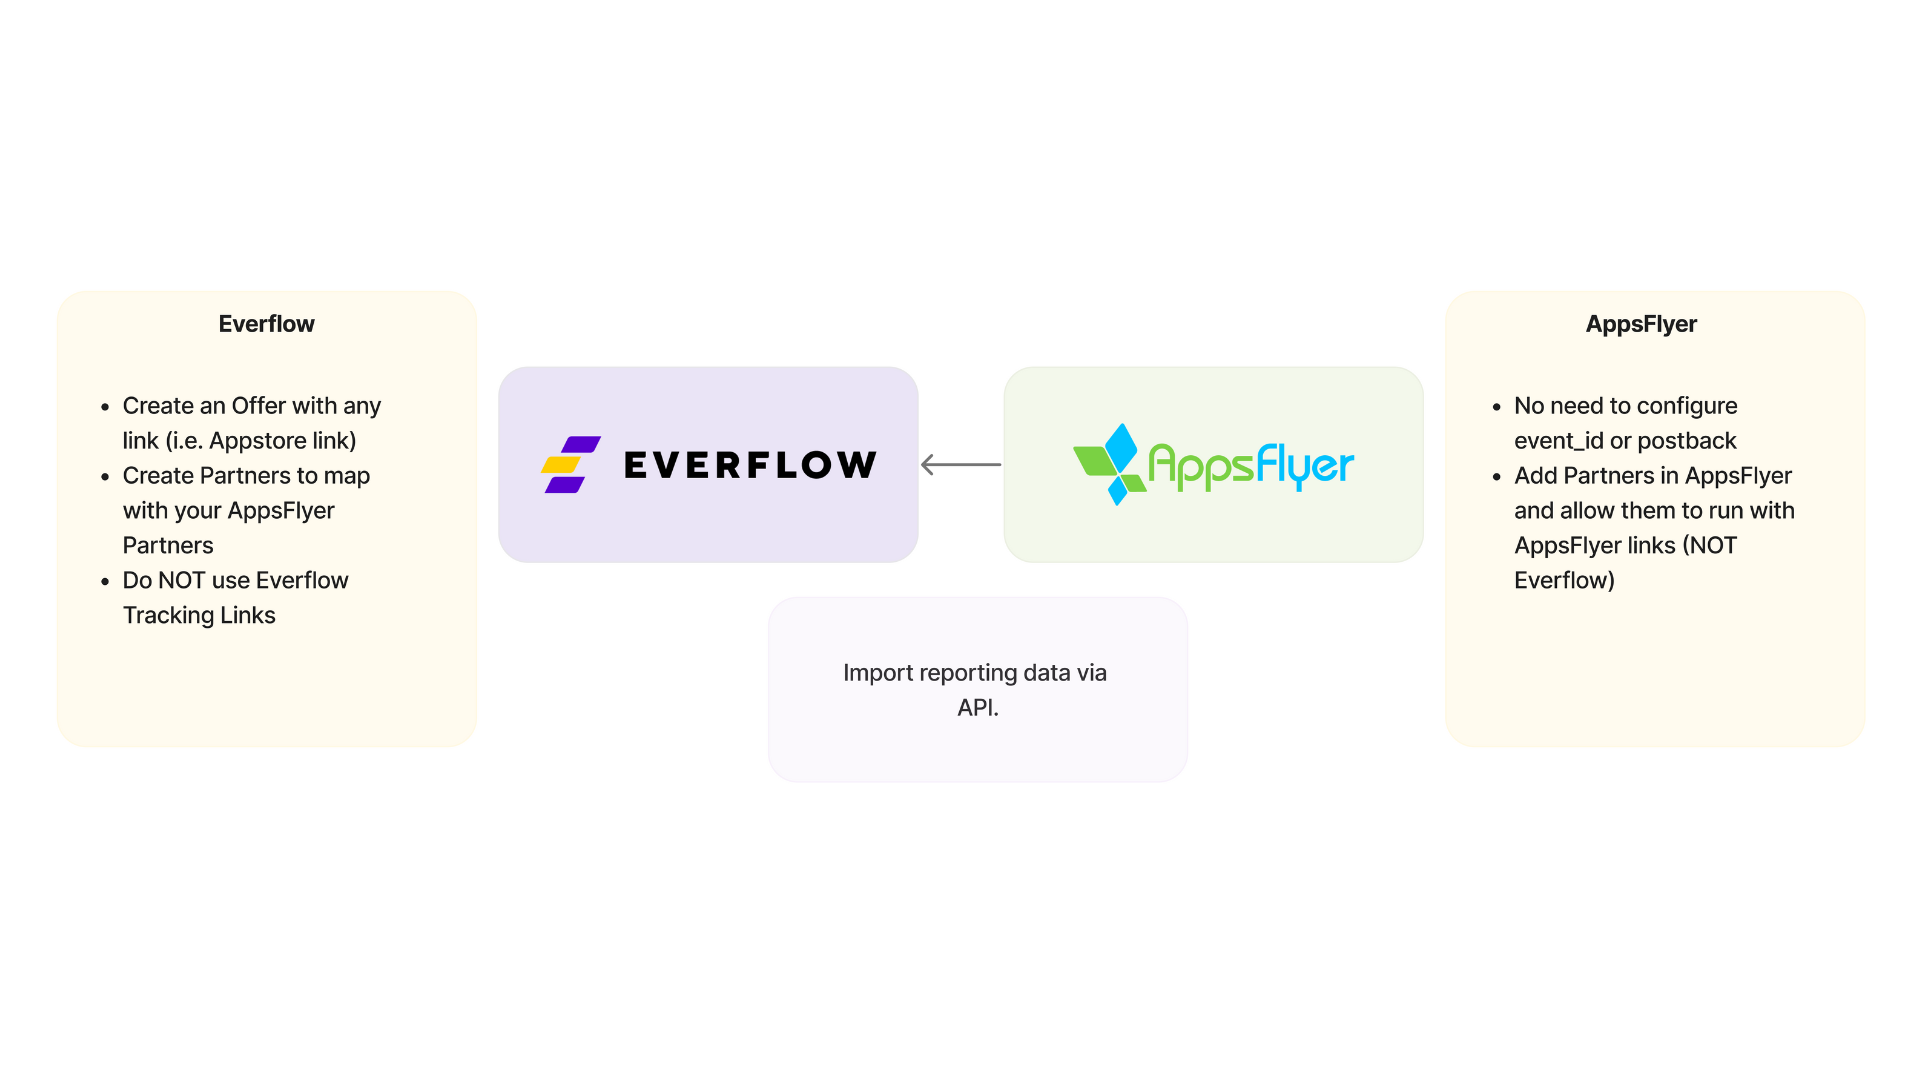
The AppsFlyer integration allows you to sync into Everflow reporting data from all of your AppsFlyer Network or Agency accounts and map that data across multiple Offers.
This way, you can view all your AppsFlyer data in a comprehensive manner within Everflow:
- Map every AppsFlyer event to corresponding offer events
- Track partner and ad sources that don't use Everflow links
- Send media buying traffic directly to promoted apps
- Receive AppsFlyer advertiser & partner data in Everflow
- Avoid leakage by directly showing AppsFlyer data
- Save countless hours when setting up AppsFlyer offers
- Pay out all AppsFlyer partners
- Drill into AppsFlyer data to understand ROl in Everflow
Integration Configuration
- Click Configure and enter your AppsFlyer API key (one integration allows only one API key).
- This will enable syncing all the apps associated with your AppsFlyer account.
In such a case, please get in touch with support@everflow.io to have this set up with the Everflow Partner account.

- Once the integration is set up, you can start configuring your apps by clicking Add App.

Step 1: App Configuration - General Settings
- In this step, you need to provide the App ID from AppsFlyer and the date from which you want to start importing data into Everflow.
- Everflow will then import all historical data from the specified date and continue updating daily.

Step 2: App Configuration - Mapping Configuration
Next, you need to select whether you want to map the app to an existing Offer or Advertiser in Everflow.
- If you choose an Offer, all reporting will be associated with that Offer, and you can only use events that belong to that Offer.
- If you choose an Advertiser, you can use Advertiser-level Events that belong to the selected Advertiser.

- Click Sync Now to import your Campaigns, Publishers, and Events from AppsFlyer.
- Map each AppsFlyer entity (campaigns, events, publishers) to its corresponding entity in Everflow.

Below is an example of the Mapping Configuration step.
- During the Mapping Configuration step, you'll see a list of your AppsFlyer entities (campaigns, events, publishers). In our example, their names were masked for privacy.
- Map each of these AppsFlyer entities to its corresponding entity in Everflow.
- This allows Everflow to correctly import the data associated with each entity.
Example: AppsFlyer Event - Everflow Event

In addition to mapping Campaigns and Events, you must map each of your publishers from AppsFlyer to an affiliate/partner in Everflow (otherwise the integration will not work).
- For every publisher you map, you'll need to specify what percentage of the cost (your Revenue in Everflow) should be counted as their payout in Everflow. This is a similar concept to PRV in Eveflow Payout Type.
- To make this process easier, you can use the Bulk Edit Payout Percentage option to set the Cost percentage (Payout) for multiple publishers at once.

Metric Mapping
Step 3: App Configuration - Additional Settings (Optional)
- Some AppsFlyer setups may not expose the cost to the advertiser.
- In such cases, you can manually set the cost for specific events.
For example, if the default cost is $11, but you want it to be $10 for a particular publisher, you can specify that here.

Reporting Within The Integration
After completing the configuration, data from AppsFlyer will start appearing in your Everflow Reports and Analytics.
Every segment of reporting that is imported from AppsFlyer will also be visible in the Report section like below.

- You can access the Reporting section either from within an App Configuration (see Screenshot above) or at the top level of the AppsFlyer integration (to view data for all apps).
- By clicking Source Details, you can view additional information related to each reporting line.


- If needed, you can revert any reporting entry by clicking Revert.
- This will cancel all data associated with that entry and update the reports accordingly.

General Reporting
You can view your Cost data alongside other performance metrics. To do so, navigate to our "Reporting" section.
Taking our Offer Report as an example.
- You can view your AppsFlyer Cost in the corresponding Revenue column within Everflow.

For other metrics, use our Metric Mapping table to find corresponding metrics between AppsFlyer and Everflow.
Resyncing Data
Finally, it is also possible to resync the data from AppsFlyer.
When to Resync Data
You may need to resync data from AppsFlyer in the following scenarios:
- To ensure all entities (e.g., a new publisher) are covered in Everflow
Partners will only become visible in the integration after they have recorded activity / data in AppsFlyer. To sync and map new entities:
- Refresh the data in the integration page using Sync Now button
- Map the newly visible entities to their corresponding Everflow entities on the same page
- (Optional) To backfill historical data for these new entities:
- Return to the main menu
- Click the Sync Data button

- Specify the desired historical time range for data synchronization

To refresh data that has been modified on the AppsFlyer side (by p360 Protection or other reasons)
- Initiate Resync Process: From the AppsFlyer integration page, locate the app for which you want to resync data. At the end of that app's row, click the Sync Data button

- Select Time Interval: A popup window will appear, asking you to select the time interval for which you want to sync data from AppsFlyer.
- Confirm Resync: After selecting the desired time interval, click the Sync Data button in the confirmation window.
- Data Refresh: Everflow will now automatically resync and refresh the data from AppsFlyer for the specified time interval. The updated data will be reflected in your reporting within Everflow.

By following these steps, you can ensure that your Everflow reporting stays up-to-date with any changes or additions made in your AppsFlyer account.
How to Enable Data Supplement
Enable Data Supplement in order to see the reports within the integration.
Control Center > Accounts - Roles.

Types of Data Sync
Sync Data
The Sync Data button runs a retroactive sync, pulling data from the sync date you select all the way up to now.
Scheduled Sync
The Scheduled Sync runs automatically at 0:00 UTC every day once the integration is set up. It only looks back on the last 24 hours of data.
Comparison
Example: because the Scheduled Sync only looks back 24 hours, a conversion whose conversion date falls outside that window won't be picked up by the Scheduled Sync, but it will be captured by a manual Sync Data run.


