


.svg)

What You Are Setting Up
You are reading this because an Advertiser or network you work with pays through Everflow Pay, and they need your banking details before they can send you any money. Setting that up is a one-time job you do yourself, from your own Partner Platform account. There is no application to submit and no test deposit to wait for.
The form asks three things: who you are, where you bank, and your agreement to the terms. When you submit it, your Payment Method Status changes from NOT PAYABLE to PAYABLE, usually within a few minutes. That one status is what decides whether an invoice can be paid out to you, so it is the thing to watch.
What to Have Ready
Gather these before you start and the whole thing takes about ten minutes. If you have to stop and hunt for a SWIFT code halfway through, it takes an afternoon.
Where to Find Everflow Pay Configuration
Everything lives on one screen in your Partner Platform. Open it from the left sidebar.
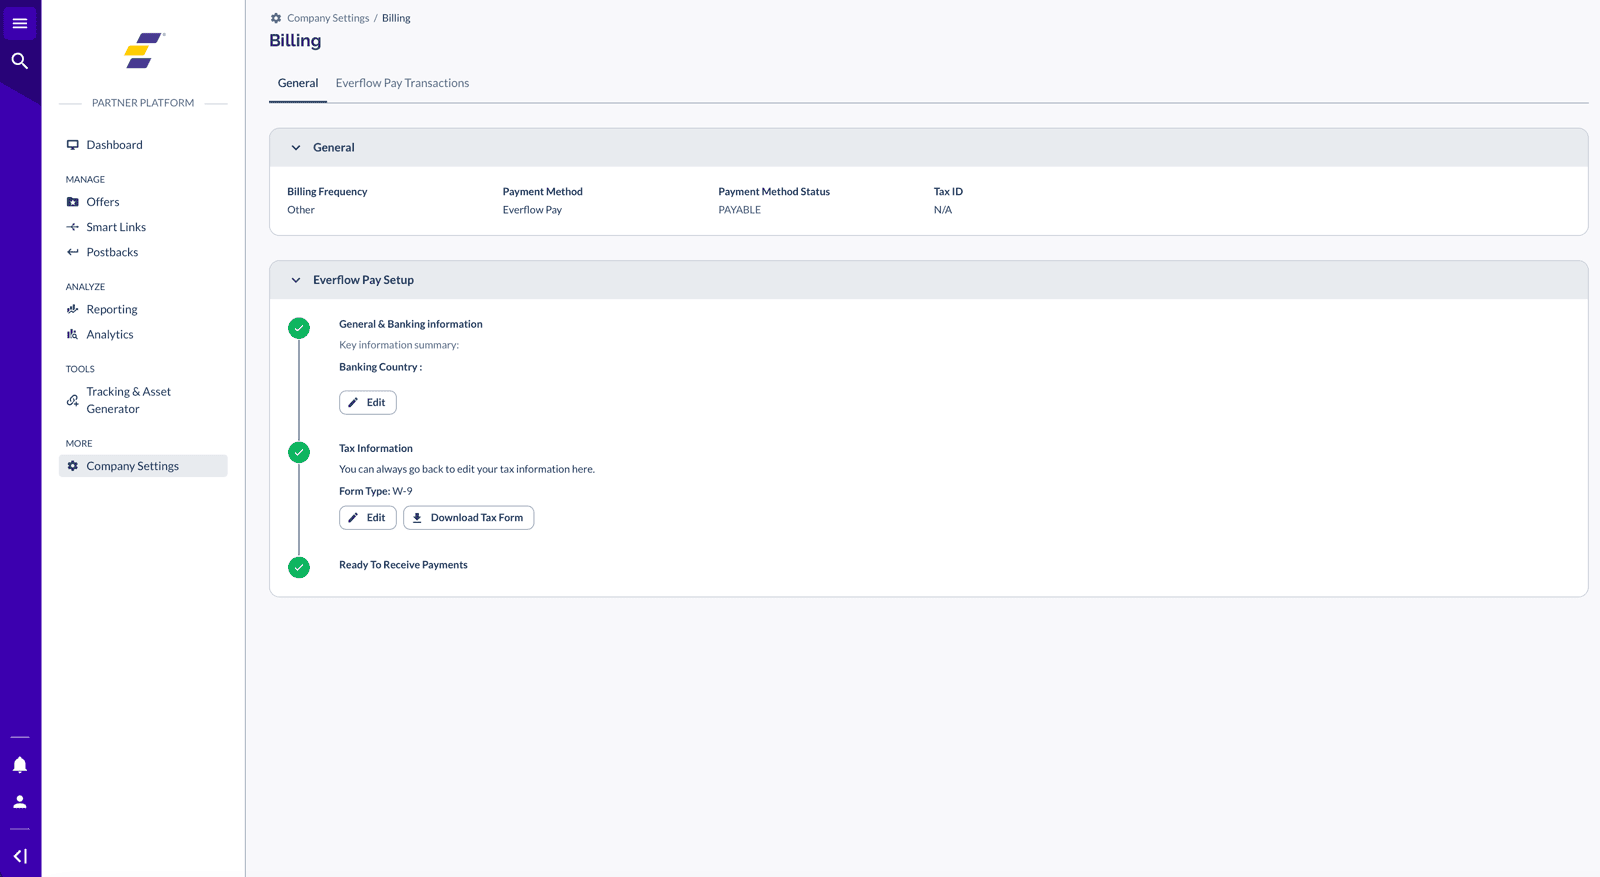
The top card, General, is your summary. It shows your Billing Frequency, your Payment Method, your Payment Method Status and your Tax ID. Below it sits the Everflow Pay Configuration card, which is the progress tracker for your setup. There is also an Everflow Pay Transactions tab at the top of the page, where your payments appear once money starts moving.
The Configuration Card Has Two Shapes
Before you begin, the card lists the stages you are going to move through. How many stages you see depends on the business that pays you, not on where you are.
Both versions are live. If you are looking at a colleague's screen and yours has one stage fewer, neither of you is missing anything. Whichever card you see, the form behind the Start Configuration button is the same three screens: General, Banking, then Review and T&C.
One label to watch for, because it confuses people: a field marked with a red asterisk is mandatory, and the form tells you so at the top of every screen.
Here is the card once every stage is green, so you know what you are working towards.
Step 1: Business and Contact Details
Click Start Configuration and you land on the General screen. It has three sections, and the first one changes shape depending on your answer to the first question.
Sole Proprietorship or Corporation
Under Business Information, pick your Structure. There are two options and they ask for different things.
Sole Proprietorship (individual)
Choose this if you work as yourself rather than through a registered company. You will be asked for Beneficiary First Name and Beneficiary Last Name. Use the names exactly as your bank has them. A mismatch between the name on the form and the name on the account is one of the most common reasons a payment bounces back.
Corporation (company, organization, or entity)
Choose this if you are paid as a registered business. You will be asked for a single Business Name instead of a first and last name. Again, match your bank records.
Both structures then ask for the same address block: Business Address 1, an optional Business Address 2, Country, Region/State, City and Zip/Postal Code.
Your Tax ID
Below the address sits a Tax Information section with a single field, Tax ID, marked as mandatory. This is a number, not a form. It is not the same thing as a W-9 or a W-8, which are covered further down.
The help text on the field tells you which number to enter: for US-based users it is your SSN or EIN, and for international users it is your local equivalent tax or business registration number, for example a Business Number or SIN in Canada.
Point of Contact for Payments
The last section on this screen asks for an Email and a Phone Number. The email is the important one. Everflow uses it for everything to do with your payments and banking, so pick one you will keep reading rather than one that goes to a shared inbox nobody checks.
Click Next to move to Banking.
Step 2: Banking Details
The Banking screen starts almost empty. There is one field, Bank Country, and nothing else appears until you choose one. That is deliberate: the fields a bank needs are different in every country, so the form waits to find out where your money is going.
Pick the country your bank account is actually held in. It should match the country you gave as your address on the previous screen.
Which Fields You See Depends on Your Bank Country
Once the country is set, the form asks for exactly the details that country's banking system needs. Three shapes cover almost everyone.
If your bank is in the United States
You will be asked for your routing number, your account type and your account number. Payments to US bank accounts go out as a next-day ACH transfer.
If your bank is in Canada
Canada has its own set of fields, and it is the only country where you pick your bank from a list rather than typing its name. You will be asked for Bank Name, Bank Account Currency, Bank Account Number, SWIFT/BIC, Transit Code and Bank Institution Number. All six are mandatory.
Choosing Canada also brings up a Heads Up! banner with a Learn More link.
If your bank is anywhere else
You will be asked for a SWIFT/BIC code, your Bank Account Number and your Bank Account Currency, plus any extra codes your country's banking system requires. Your bank publishes all of these, usually on your statement or in your online banking profile.
Click Next when your fields are filled in.
Step 3: Review and Terms
The last screen, Review and T&C, plays everything back to you as plain text: your business information, your tax ID, your point of contact and your banking details. Read the banking block properly. This is the last moment where fixing a typo costs you nothing.
Everflow puts an Attention notice above the banking summary for the same reason: double-check your account number, because an error there delays your payment rather than failing it loudly.
At the bottom, under Legal, tick the box to agree to the terms and conditions. It is mandatory, and Submit stays inactive until you do. Then submit.
If Your Payer Requires a Tax Form
This section only applies if your configuration card showed a Tax Information stage. If it did not, you can skip straight to the next section. Partners paid by a business registered outside the US do not file a US tax form at all.
The tax form is separate from the Tax ID you entered in step one, and it is handled by Everflow's tax provider rather than inside the Everflow Pay form. Your payer decides whether it is required. If it is, the stage stays open with a button to select your form, and you pick the one that matches your situation.
Which Form Applies to You
A W-8 is routine, not exotic. Every partner outside the US who is paid by a US business files one. A W-9 stays valid until your details change; a W-8 is valid for three years unless your status changes before then.
Your banking and your tax form are independent
You do not have to wait for one to start the other, and submitting your banking details does not depend on your tax form being accepted. Whether an unverified tax form blocks a payment is a setting your payer controls, so if you are unsure, ask them.
After You Submit
Your configuration card fills in. The first stage turns green and expands into a Key information summary showing your point of contact, your tax ID and your banking details, with your account numbers partly masked and an eye icon to reveal them. Ready To Receive Payments turns green underneath, and your Payment Method Status at the top of the page reads PAYABLE. That is the whole confirmation. There is no email to wait for and no verification deposit.
Once you are through, the General card at the top of the page is where you check your status at a glance.

Changing Your Details Later
The completed stage has an Edit button. Use it whenever you change bank, change address or change the person who handles your payments. Update it before your next invoice is paid rather than after, because a payment sent to a closed account has to be traced and returned before it can be re-sent.
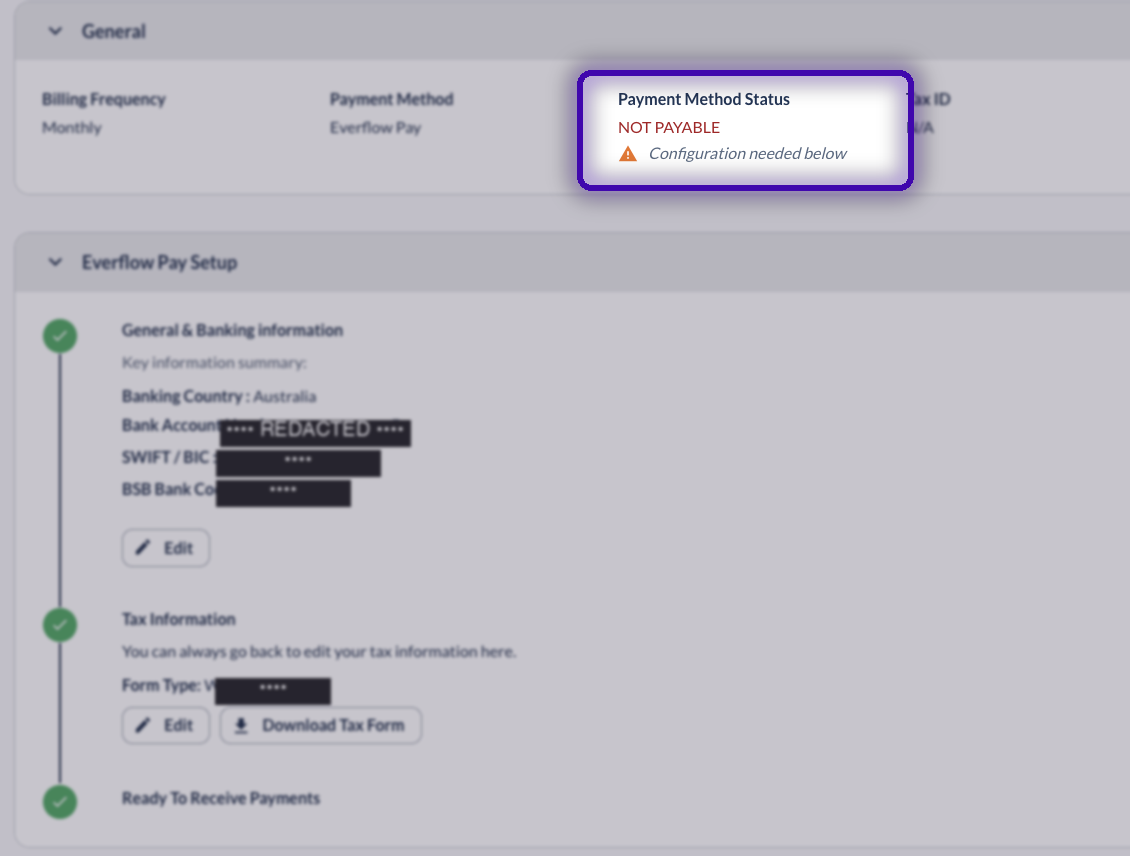
If Your Status Still Reads NOT PAYABLE
The screen tells you what is outstanding, but four causes account for most of it.
A stage is not finished
Look at the configuration card. Any stage that is not green still needs something from you, and the card says what.
Your payment method is still set to Wire
Wire is no longer available as a payment type for partners. If your billing still has Wire selected, you will stay NOT PAYABLE until you switch to Everflow Pay, and nothing in the setup form will fix it for you. This one catches long-standing partners more often than new ones.
Your payer requires tax verification and your form is missing or failed
If the Tax Information stage is open, or the details you filed did not validate, resubmit them. Check the spelling of your legal name and the tax ID against your official records, since a single transposed digit fails the check.
Your payee record is inside a short holding window
Some payers apply a short waiting period to newly created payee records before they can be paid. It clears on its own and there is nothing for you to do.
If none of those apply and your status has not moved, write to pay.help@everflow.io with your partner name and the country your bank is in.
→ How Partner Payments Work. What happens between a conversion and money in your account.
→ How To Get Paid As A Partner. Payout structures, billing frequency and net terms.
→ How To Manage Your Billing & Invoices. Where to find your invoices and check their status.
→ Configure Your Payment Settings On The Marketplace Platform. The equivalent setup if you are paid by several Advertisers through the Marketplace.


