Home
Partner Platform
Running Traffic
Meta (Facebook) Attribution For Partners

Meta (Facebook) Attribution For Partners

Everflow's Meta integration enables real-time conversion tracking through Meta's Conversions API, eliminating the need for website pixels while providing more reliable attribution data for networks and affiliates.

Overview

This integration connects Everflow with Meta Business Manager to provide seamless, real-time conversion tracking that goes beyond Meta's standard capabilities. By using Meta's Conversions API (CAPI), you can push conversion data directly from Everflow to Meta without placing pixels on websites, improving tracking accuracy and campaign optimization.

What's ChangedLast updated Jul 24, 2026▼
Jul 24, 2026 Updated
Clarified how dynamic Event Source URL macros resolve by explaining the advertiser's role in passing the converting domain via their postback.

The setup process has been streamlined with the latest Meta SDK, making implementation straightforward for networks managing internal campaigns and affiliates running Meta ads. Remember that direct linking is required per Meta's policies—using redirect links could put your Meta account at risk.

Key Benefits

Real-Time Data Synchronization

  • Instant conversion data transmission to Meta Business Manager
  • Improved tracking accuracy and reliability
  • Better optimization capabilities for campaigns

Simplified Implementation

  • No direct website pixel placement required
  • Streamlined setup process with latest Meta SDK
  • No Meta Developer Settings app creation needed
  • Access Token generation through simplified process

Who Is This For?

This integration is specifically designed for:

Primary Users

  • Network operators managing internal Meta campaigns
  • Affiliates running Meta advertising campaigns
  • Performance marketers requiring precise attribution data

Secondary Users

  • Marketing teams needing consolidated reporting
  • Campaign managers seeking optimization insights
  • Technical teams implementing tracking solutions

Prerequisites

Prerequisite
Description
Required Accounts & Setup
Active Everflow account with configured offers
Meta Business Manager account
Proper access permissions in both platforms
Technical Requirements
Implementation of Javascript SDK for direct linking
Understanding of Meta's Conversions API
Ability to configure server-side tracking
Critical Requirements
Direct Linking Implementation: Must use Javascript SDK
NO Redirect Links: Using redirect links risks Meta account flagging
Offer Configuration: Active and properly configured offers in Everflow
Important Considerations
Direct linking is mandatory per Meta requirements
Redirect links usage may result in Meta account flags
Latest Meta SDK simplifies the integration process
Real-time data synchronization requires proper setup maintenance
Time and Resource Estimation
Setup Time: 15-30 minutes
Technical Expertise Level: Intermediate
Required Team Members: Marketing operations specialist or technical integration lead

A Step-By-Step Guide

1
Generate an Access Token
To use the Meta Conversions API, you will need an access token. Inside Events Manager, follow these steps:
Choose the
Pixel
you want to implement.
Select the
Settings
tab.
Find the
Conversions API
section and click on the
Generate access token
link under
Set up manually
, and follow the instructions pop-up:
The
Generate access token
link is only visible to users with developer privileges for the business. The link is hidden from other users.
Heads Up!
Once the token is generated, be sure to keep a copy of it as you will not be able to see it again, and will need to enter it in Step #2.
2
Add Meta App (Meta) to your Everflow Partner Login
Login to your Everflow Partner account.
Navigate to
Company Settings - Integrations
, then click
Add Business
on the Meta Business Accounts card.
Fill in the fields with the information collected in Step #1 and Step #2. Business Name can be any name you choose. Save.
3
Setup Meta Pixel in Everflow
Navigate to
Postbacks
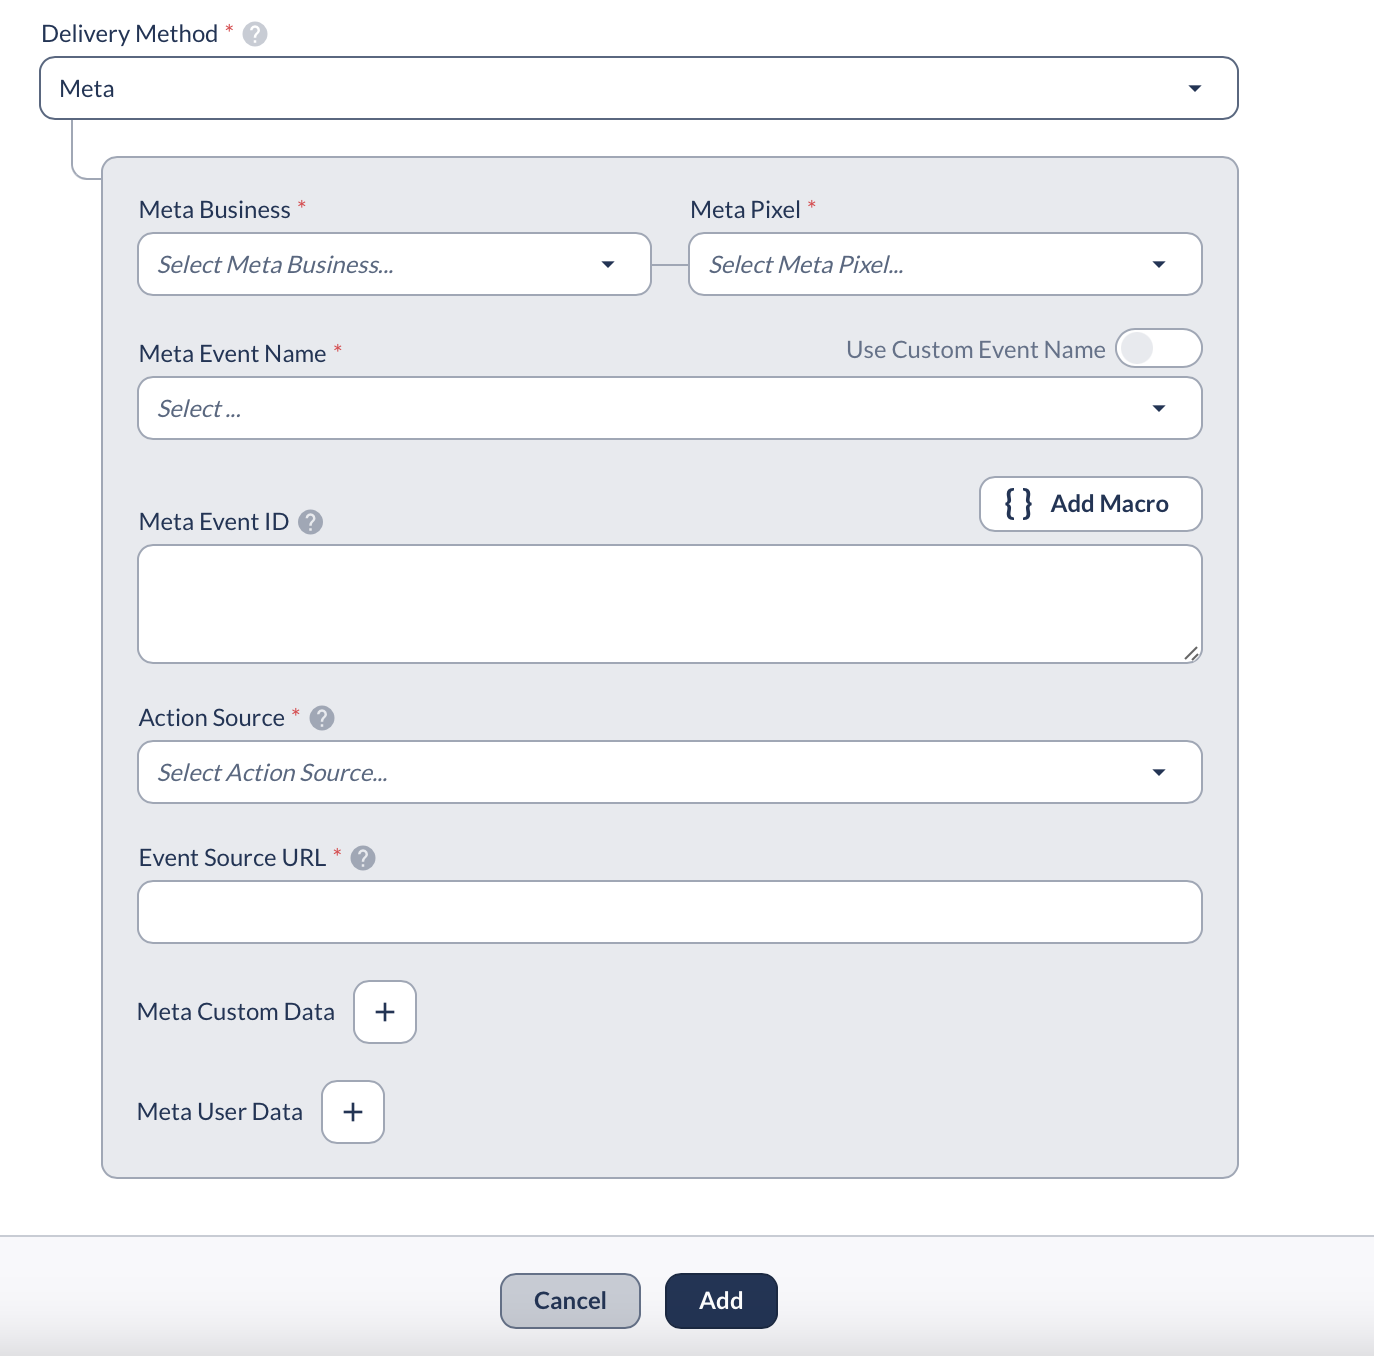
and decide whether you want to edit an existing postback or add a new one.
Under the Delivery Method, select
Meta
.
Under Postback Level, select
Specific
and choose the matching offer.
Under Meta Business, select the
Business App
created in Step #1.
Under Meta Pixel, select the ID. To find the ID or create a new one - [Click Here]
Under Meta Event Name, select the
Event
that matches the action of the Pixel.
Select
Action Source
. Please reference the documentation linked below to determine the value to enter here.
The action_source, as described by Meta: “This field allows you to specify where your conversions occurred. Knowing where your events took place helps ensure your ads go to the right people.”
[Action Source Documentation]
(**Optional if the Meta Event is a Purchase) Enter
Meta Custom Data
.
Click the
Add
button and input Currency {offer_currency}.
Click the
Add
button again and input Value {payout_amount}.
Scroll down to Meta User Data, and click the
Add
button.
Under Data Field, select
Fbc
. We recommend that you enter the following as the Value: fb.1.{timestamp}.{fbclid}
Once you have completed this setup in your Partner Portal, request the Network to complete the following in their Network Portal:
Navigate to
Partners - Postback
. Click
Edit
on the row of the pixel. Add the Event Source URL.
The event_source_url, as described by Meta: “The browser URL where the event happened.”
[Event Source URL Documentation]
Heads up: Meta CAPI is auto-hashed

You don't need to add hashing macros like {adv1>LC_SHA256} for Meta CAPI postbacks. Everflow auto-hashes all macros in the CAPI payload before it's sent. For non-Meta integrations where you need to hash data yourself, the macro syntax lives in Your Guide to Parameters & Macros → Hashing Macros.

Troubleshooting

Viewing API response from Meta (Facebook)

If you navigate to
Reporting > Partner Postback Report
you can see the attempts that were made to the Facebook Postback that was set up.
If you select the options on the failed attempt > View Debug Info

You will then be able to see the response from Meta (Facebook) as to why there was an error:
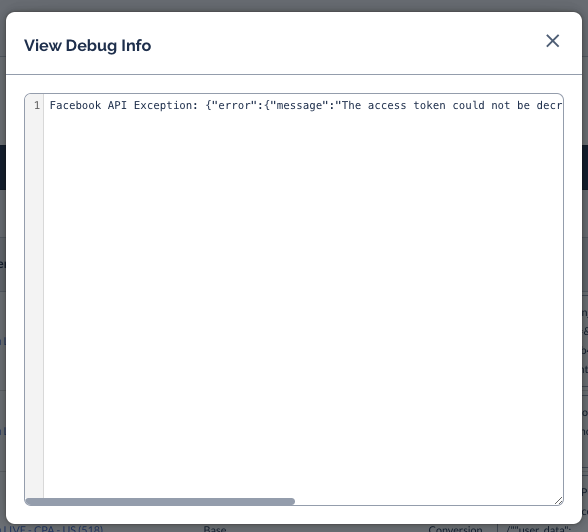
Required fbclid is missing from click parameters:

Meta will only receive a successful response if a fbclid is included in the click details. This can be viewed under the click details > Parameters of the click that was made:
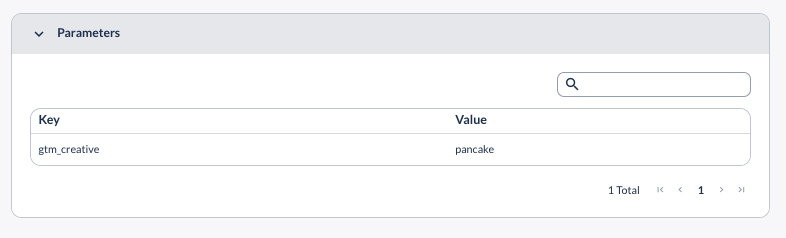
If an affiliate is using direct linking, the fbclid will automatically be passed when a user clicks on the Meta Ad. If they are using direct linking, and there is no fbclid, then the click did not originate from Meta traffic.

If the partner is using a redirect tracking link, they will need to ensure &fbclid={fbclid} is appended to their Partner Tracking Link used in the Ad Placement.

Heads Up!
Direct Linking is required by Meta and using Redirect Links will put the Meta Business Account at risk of being flagged by Meta. 

FAQ

Will Everflow be able to pull the correct amount of conversions even if Meta's reporting is off?
Yes. Everflow receives conversions either from the first-party cookie or from a server call directly to our platform, with extremely high accuracy. Additionally, there are tools in place that record conversions even if the user deletes their cookies. Transparent reporting will tell you exactly how the conversion was attributed.
Why was my Meta postback deactivated?

Everflow automatically deactivates a postback once it reaches 10 failed delivery attempts and the span from the first failure to the latest exceeds 72 hours. Everflow makes up to 5 attempts per logged failure, so that can be as few as 2 logged failures more than 72 hours apart. For Meta postbacks, this commonly happens when traffic comes from non-Meta sources (organic, Google, etc.) that don't include a Facebook Click ID (fbclid). Since the postback expects an fbclid but doesn't receive one, it fails. To prevent this, use a Specific postback scoped only to the offer receiving Meta traffic, rather than a Global postback that fires for all conversions.

Can I clone my Meta postback setup to another offer?

Currently, postback configurations need to be set up individually per offer. However, once you've configured your Meta Business App and Pixel in Step 2 and Step 3, they can be reused across multiple postbacks — you only need to create the token and business app once.

Do I need to hash the fbc (Facebook Click) cookie value?

No. The fbc and fbp cookie values must be sent to Meta in plain text — do NOT hash them. Only personal information like email addresses and phone numbers should be hashed using the LC_SHA256 format described in the Data Hashing section above.

Troubleshooting Checklist

If conversions aren't reaching Meta, work through this checklist before reaching out for help. Have your Transaction ID, Partner ID, and the Partner Postback (pixel) ready.

Confirm there is a conversion recorded in Everflow to fire to Meta in the first place.
Make sure the Meta integration is set up in your Partner portal.
Confirm the Access Token (and any app secret) were entered correctly from Meta.
Ensure the
fbclid
is populating in the Partner Postback. You can verify this by looking at the click redirect URL.
Ensure the
event_source_url
is entered correctly. This is the browser URL where the event happened — typically the Thank You page.
Ensure the postback is configured to include all required details. A Purchase event, for example, may require data points such as city, state, or country code.

For more detail on Meta's error responses, see Meta's error-handling documentation.

Using a Macro in the Event Source URL

The Event Source URL field supports macros, so you can build the URL dynamically. This is useful when a single offer routes traffic across multiple converting domains — for example, listicle offers. For this macro to resolve, the advertiser must pass the converting domain value in their postback to Everflow.

Here is how this process works step-by-step:

Step 1: Advertiser Postback Setup — The advertiser must dynamically pass the converting domain to Everflow via their postback URL using an advertiser parameter (e.g., &adv3=conversionwebsite.com).
Step 2: Event Source URL Resolution — When Everflow receives the conversion, it stores conversionwebsite.com under {adv3}. When triggering the partner's Meta CAPI postback, Everflow resolves https://www.{adv3} dynamically to https://www.conversionwebsite.com at send time.

Creating or Updating a Meta Pixel via the API

In addition to configuring pixels in the interface, networks can create or update a Meta pixel programmatically using the Everflow API. Send a POST request to the /v1/networks/pixels endpoint with your X-Eflow-API-Key header.

Network API — create or update Meta pixel
# POST to create or update a Meta (Facebook) pixel
curl --request POST \
  --url https://api.eflow.team/v1/networks/pixels \
  --header 'content-type: application/json' \
  --header 'X-Eflow-API-Key: <INSERT API KEY>' \
  --data '{
    "network_affiliate_id": 12345,
    "pixel_type": "conversion",
    "pixel_level": "global",
    "pixel_status": "active",
    "facebook_pixel": {
      "custom_data": [
        { "field": "currency", "value": "usd" },
        { "field": "value", "value": "100" }
      ],
      "user_data": [
        { "field": "fbc", "value": "<insert FBC variable>" }
      ],
      "network_affiliate_integration_facebook_business_id": <Meta Integration ID>,
      "pixel_id": "<Pixel ID>",
      "event_name": "<Event>",
      "event_id": "<Event ID>",
      "event_source_url": "<Event Source URL>",
      "action_source": <Action Source>
    },
    "delivery_method": "facebook"
  }'
Next in This Series